Martin DMX 5.3 Splitter User manual

Category
Stroboscopes & disco lights
Type
User manual

This manual is also suitable for

Stagebar 2
RGBAW
user manual
TM
Dimensions
230
190
105
420
230
190
105
630
Stagebar 54 S
Stagebar 54 S
Stagebar 54 L
Stagebar 54 L
All dimensions are in millimeters
Stagebar 2 L
Stagebar 2 S
©2011 Martin Professional A/S. All rights reserved. No part of this manual may be reproduced, in any form or by any means, without
permission in writing from Martin Professional A/S. Information subject to change without notice. Martin Professional A/S and all
affiliated companies disclaim liability for any injury, damage, direct or indirect loss, consequential or economic loss or any other loss
occasioned by the use of, inability to use or reliance on the information contained in this manual. The use of certain patents in
Martin
Stagebar
products is licensed by Color Kinetics, Inc. (see details printed on product).
P/N 35000250, Rev. B
Safety Information
The following symbols are used to identify important safety information on the product and in this manual:
WARNING! Risk Group 3 LED product according to EN 62471. Do not look into the beam at a
distance of less than 8.7 meters (28 ft. 7 ins.) from the front surface of the product. Do not view the
light output with optical instruments or any device that may concentrate the beam.
This product is for professional use only. It is not for household use.
This product presents risks of severe injury or death due to fire hazards, electric shock and falls.
Read this manual before installing, powering or servicing the fixture, follow the safety precautions listed
below and observe all warnings in this manual and printed on the fixture. If you have questions about how to
operate the fixture safely, please contact your Martin™ dealer or call the Martin 24-hour service hotline at
+45 70 200 201.
PROTECTION FROM ELECTRIC SHOCK
Shut down power to the entire installation at the building’s main power distribution board and lock out
power (by removing the fuse for example) before carrying out any installation or maintenance work.
Disconnect the fixture from AC power before removing or installing any cover or part and when not in use.
Always ground (earth) the fixture electrically.
Use only a source of AC power that complies with local building and electrical codes and has both
overload and ground-fault (earth-fault) protection.
Connect this fixture to AC power via 3-conductor cable that is heat resistant to minimum 90° C (194° F)
and rated minimum 13 amp. In North America the cable must be minimum 16 AWG, extra hard usage
type (STW or equivalent). In the EU the cable must be minimum 1.5 mm
2
conductor size and HAR
approved or equivalent.
Cables used for power throughput must meet the same specifications as those given above for power
input cables.
The voltage and frequency at the power throughput outlet are the same as the voltage and frequency
applied to the power inlet. Only connect devices to the power outlet that accept this voltage and
frequency.
The total current draw of all the devices connected to the power throughput outlet of the first fixture in a
chain must not exceed 11 amps.
WARNING!
Read the safety precautions in this section before
installing, powering, operating or servicing this
product.
Warning!
Safety hazard.
Risk of severe
injury or death.
Warning!
LED light
emission. Risk
of eye injury.
Warning!
Refer to
manual before
installing,
powering or
servicing.
Warning!
Hazardous
voltage. Risk of
lethal or severe
electric shock.
Warning!
Fire hazard.
Before using the fixture, check that all power distribution equipment and cables are in perfect condition
and rated for the current requirements of all connected devices.
Do not use the fixture if the power cable or power plug are in any way damaged, defective or wet, or if they
show signs of overheating.
Do not expose the fixture to rain or moisture.
Refer any service operation not described in this manual to a qualified technician.
PROTECTION FROM FIRE
Do not attempt to bypass thermostatic switches or fuses. Replace defective fuses with ones of the
specified type and rating only.
Provide a minimum clearance of 0.1 m (4 in.) around fans and air vents.
Ensure that there are no combustible materials within 0.5 m (20 in.) of the fixture when installed, and that
there are no flammable materials nearby.
Do not modify the fixture or install other than genuine Martin™ parts.
Do not stick filters, masks or other materials directly onto LEDs.
Do not operate the fixture if the ambient temperature (Ta) exceeds 40° C (104° F).
PROTECTION FROM INJURY
Do not look at LEDs from a distance of less than 8.7 meters (28 ft. 7 ins.) from the front surface of the
fixture without protective eyewear such as shade 4-5 welding goggles. At less than this distance, the LED
emission can cause eye injury or irritation. At distances of 8.7 meters (28 ft. 7 ins.) and above, light output
is harmless to the naked eye provided that the eye’s natural aversion response is not overcome.
Do not look at LEDs with magnifiers, telescopes, binoculars or similar optical instruments that may
concentrate the light output.
Ensure that persons are not looking at the LEDs from within 8.7 meters (28 ft. 7 ins.) when the product
lights up suddenly. This can happen when power is applied, when the product receives a DMX signal,
when stand-alone operation starts or when certain items are selected in the onboard control menu.
To minimize the risk of eye irritation or injury, disconnect the fixture from power at all times when the
fixture is not in use, and provide well-lit conditions to reduce the pupil diameter of anyone working on or
near the fixture.
The surface temperature of the fixture can become hot, as much as 90° C (194° F). Avoid accidental
contact.
Install as described in this manual a secondary attachment such as a safety cable that is approved by an
official body such as TÜV as a safety attachment for the weight of the fixture. The safety cable must
comply with EN 60598-2-17 Section 17.6.6 and be capable of safely catching the fixture if the main
attachment fails.
Do not hang fixtures from each other. Use one clamp per fixture when suspending.
When suspending the fixture, ensure that the structure and all hardware used can hold at least 10 times
the weight of all devices suspended from them.
Check that all external covers and rigging hardware are securely fastened.
Block access below the work area and work from a stable platform whenever installing, servicing or
moving the fixture.
Disposing of this product
Martin™ products are supplied in compliance with Directive 2002/96/EC of the European
Parliament and of the Council of the European Union on WEEE (Waste Electrical and Electronic
Equipment), as amended by Directive 2003/108/EC, where applicable.
Help preserve the environment! Ensure that this product is recycled at the end of its life. Your
supplier can give details of local arrangements for the disposal of Martin products.
Contents
Dimensions . . . . . . . . . . . . . . . . . . . . . . . . . . . . . . . . . . . . . . . . . . . . . . . . . . . . . . . . . . . . . . . . . . . . . . . . 2
Safety Information. . . . . . . . . . . . . . . . . . . . . . . . . . . . . . . . . . . . . . . . . . . . . . . . . . . . . . . . . . . . . . . . . . 3
Product overview. . . . . . . . . . . . . . . . . . . . . . . . . . . . . . . . . . . . . . . . . . . . . . . . . . . . . . . . . . . . . . . . . . . 6
Introduction . . . . . . . . . . . . . . . . . . . . . . . . . . . . . . . . . . . . . . . . . . . . . . . . . . . . . . . . . . . . . . . . . . . . . . . . 7
Unpacking . . . . . . . . . . . . . . . . . . . . . . . . . . . . . . . . . . . . . . . . . . . . . . . . . . . . . . . . . . . . . . . . . . . . . . . . 7
Using for the first time . . . . . . . . . . . . . . . . . . . . . . . . . . . . . . . . . . . . . . . . . . . . . . . . . . . . . . . . . . . . . . . 7
Physical installation . . . . . . . . . . . . . . . . . . . . . . . . . . . . . . . . . . . . . . . . . . . . . . . . . . . . . . . . . . . . . . . . 8
Standing installation. . . . . . . . . . . . . . . . . . . . . . . . . . . . . . . . . . . . . . . . . . . . . . . . . . . . . . . . . . . . . . . . . 8
Flying from a truss, bar or other structure . . . . . . . . . . . . . . . . . . . . . . . . . . . . . . . . . . . . . . . . . . . . . . . . 8
AC power. . . . . . . . . . . . . . . . . . . . . . . . . . . . . . . . . . . . . . . . . . . . . . . . . . . . . . . . . . . . . . . . . . . . . . . . . . 9
Connecting to power . . . . . . . . . . . . . . . . . . . . . . . . . . . . . . . . . . . . . . . . . . . . . . . . . . . . . . . . . . . . . . . . 9
Relaying power to other devices . . . . . . . . . . . . . . . . . . . . . . . . . . . . . . . . . . . . . . . . . . . . . . . . . . . . . . 10
Control data link. . . . . . . . . . . . . . . . . . . . . . . . . . . . . . . . . . . . . . . . . . . . . . . . . . . . . . . . . . . . . . . . . . . 11
Connecting the data link . . . . . . . . . . . . . . . . . . . . . . . . . . . . . . . . . . . . . . . . . . . . . . . . . . . . . . . . . . . . 11
Fixture setup. . . . . . . . . . . . . . . . . . . . . . . . . . . . . . . . . . . . . . . . . . . . . . . . . . . . . . . . . . . . . . . . . . . . . . 12
DMX mode. . . . . . . . . . . . . . . . . . . . . . . . . . . . . . . . . . . . . . . . . . . . . . . . . . . . . . . . . . . . . . . . . . . . . . . 12
Fixture settings and DMX channel requirements. . . . . . . . . . . . . . . . . . . . . . . . . . . . . . . . . . . . . . . . . . 13
DMX addresses. . . . . . . . . . . . . . . . . . . . . . . . . . . . . . . . . . . . . . . . . . . . . . . . . . . . . . . . . . . . . . . . . . . 13
Fixture readouts. . . . . . . . . . . . . . . . . . . . . . . . . . . . . . . . . . . . . . . . . . . . . . . . . . . . . . . . . . . . . . . . . . . 13
Other control menu features . . . . . . . . . . . . . . . . . . . . . . . . . . . . . . . . . . . . . . . . . . . . . . . . . . . . . . . . . 14
Operation. . . . . . . . . . . . . . . . . . . . . . . . . . . . . . . . . . . . . . . . . . . . . . . . . . . . . . . . . . . . . . . . . . . . . . . . . 15
Color control . . . . . . . . . . . . . . . . . . . . . . . . . . . . . . . . . . . . . . . . . . . . . . . . . . . . . . . . . . . . . . . . . . . . . 15
Stand-alone operation . . . . . . . . . . . . . . . . . . . . . . . . . . . . . . . . . . . . . . . . . . . . . . . . . . . . . . . . . . . . . . 15
Service and maintenance. . . . . . . . . . . . . . . . . . . . . . . . . . . . . . . . . . . . . . . . . . . . . . . . . . . . . . . . . . 16
Adjustable floorstand/mounting bracket accessory . . . . . . . . . . . . . . . . . . . . . . . . . . . . . . . . . . . . . . . . 16
Cleaning. . . . . . . . . . . . . . . . . . . . . . . . . . . . . . . . . . . . . . . . . . . . . . . . . . . . . . . . . . . . . . . . . . . . . . . . . 16
Removing and installing LED lens sheets . . . . . . . . . . . . . . . . . . . . . . . . . . . . . . . . . . . . . . . . . . . . . . . 17
Installing and removing the diffuser front. . . . . . . . . . . . . . . . . . . . . . . . . . . . . . . . . . . . . . . . . . . . . . . . 18
Fuse replacement . . . . . . . . . . . . . . . . . . . . . . . . . . . . . . . . . . . . . . . . . . . . . . . . . . . . . . . . . . . . . . . . . 18
Battery service. . . . . . . . . . . . . . . . . . . . . . . . . . . . . . . . . . . . . . . . . . . . . . . . . . . . . . . . . . . . . . . . . . . . 19
Software installation. . . . . . . . . . . . . . . . . . . . . . . . . . . . . . . . . . . . . . . . . . . . . . . . . . . . . . . . . . . . . . . . 19
DMX protocols . . . . . . . . . . . . . . . . . . . . . . . . . . . . . . . . . . . . . . . . . . . . . . . . . . . . . . . . . . . . . . . . . . . . 20
All pixels controlled together . . . . . . . . . . . . . . . . . . . . . . . . . . . . . . . . . . . . . . . . . . . . . . . . . . . . . . . . . 20
Pixels controlled in groups. . . . . . . . . . . . . . . . . . . . . . . . . . . . . . . . . . . . . . . . . . . . . . . . . . . . . . . . . . . 21
Onboard control panel menus. . . . . . . . . . . . . . . . . . . . . . . . . . . . . . . . . . . . . . . . . . . . . . . . . . . . . . 22
Display messages. . . . . . . . . . . . . . . . . . . . . . . . . . . . . . . . . . . . . . . . . . . . . . . . . . . . . . . . . . . . . . . . . 24
Troubleshooting . . . . . . . . . . . . . . . . . . . . . . . . . . . . . . . . . . . . . . . . . . . . . . . . . . . . . . . . . . . . . . . . . . 25
Stagebar 2™ specifications. . . . . . . . . . . . . . . . . . . . . . . . . . . . . . . . . . . . . . . . . . . . . . . . . . . . . . . . 26
6 Stagebar 2 user manual
Product overview
A
B
E
H
F
G
D
A
C
Stagebar 54 L
Stagebar 54 L
Stagebar 54 S
Stagebar 54 S
F
J
I
A - End cap release screws
B - Cooling fan
C - Data output connector (5-pin female XLR)
Use to relay DMX control data to the next
fixture.
D - Safety attachment eye
Use only this attachment point for secondary
attachment (e.g. safety cable).
E - Power throughput outlet (PowerCon light
grey)
Connect a power cable via a light-grey
Neutrik PowerCon connector to lead power to
the next fixture. The total current draw of all
the devices connected to the power
throughput outlet of the first fixture in the
chain must not exceed 15 amps peak, 11
amps constant.
F - Quarter-turn mounting points
Use to attach an omega bracket or
floorstand/mounting bracket accessory.
G - Control panel/display
H - Data input connector (5-pin male XLR)
Connect to DMX control data from the
controller or previous fixture.
I - Power inlet (PowerCon blue)
Connect a power cable with a blue Neutrik
PowerCon connector from a 100-240 VAC
nominal 50/60 Hz power source.
J - Primary fuseholder
Replace fuse with one of same type and
rating only.
Figure 1: Connections panel
Stagebar 2 L
Stagebar 2 S
Introduction 7
Introduction
Thank you for selecting the Stagebar 2™, a modular LED-based color changer and pixel display fixture from
Martin™. This product features:
Cree XP-E high-power LEDs
150 watts total LED output per fixture at 25° C (77° F)
RGBAW (red, green, blue, amber, white), and RGB color mixing, HSIC (hue, saturation, intensity, color
temperature) and HSI color management
54 LEDs arranged into 6 pixels per fixture
Individual (6 x 1) or grouped (1 x 6, 2 x 3 or 3 x 2) pixel control
DMX 512A control
Control data in/out via 5-pin XLR connectors
Control panel and full text backlit LCD display with battery power for offline setting and addressing
Auto-sensing power supply unit with 100 - 240 V, 50/60 Hz operating range
Daisy-chainable power link
Power in/out via Neutrik PowerCon locking connectors
Quarter-turn fastener mounting points
Narrow diffuser front supplied
Short (Stagebar 2 S) and long (Stagebar 2 L) models. To simplify the combination of different models in
installations, three short models have the same length as two long models.
The Martin Stagebar 2 is based on the successful Stagebar 54 that was launched in 2007, but the Stagebar
2 has been extensively revised. Besides new, more powerful LEDs and newly designed lenses with a tighter
beam angle, the Stagebar 2 features 5-pin XLR instead of RJ-45 DMX data connectors.
For the latest firmware updates, documentation, and other information about this and all Martin
Professional™ products, please visit the Martin website at http://www.martin.com
Comments or suggestions regarding this user manual may be e-mailed to service@martin.dk or posted to
Technical Documentation, Martin Professional A/S, Olof Palmes Allé 18, DK-8200 Aarhus N, Denmark.
This device complies with Part 15, Class A of the FCC Rules. Operation is subject to the following two
conditions: (1) This device may not cause harmful interference, and (2) this device must accept any
interference received, including interference that may cause undesired operation.
This Class A digital apparatus meets all requirements of the Canadian Interference-Causing Equipment
Regulations. Cet appareil numérique de la classe A respecte toutes les exigences du Règlement sur le
Matériel Brouilleur du Canada.
Unpacking
The following items are included with the Stagebar 2:
Neutrik PowerCon power input connector
Opal front cover
Narrow-angle diffuser filter
Omega rigging clamp attachment bracket with quarter-turn fasteners
This user manual
Using for the first time
Before applying power to the fixture:
Read the “Safety Information” section that starts on page 3.
Check that the local AC power voltage is within the ranges listed on the serial number label and in “AC
power” on page 9.
Install the supplied Neutrik PowerCon power input cable connector on a suitable power cable as
described in “Connecting to power” on page 9.
8 Stagebar 2 user manual
Physical installation
The Stagebar 2 can be placed on a level, stable surface, installed on the floorstand/mounting bracket
available as an accessory (P/N 71606007) or suspended in any orientation from a truss or supporting
structure using the supplied omega bracket and a rigging clamp. Suitable rigging clamps are available from
Martin.
Warning! Read the “Safety Information” section that starts on page 3 before installing the Stagebar
2.
If the diffuser front is installed, there is no eye hazard at any distance.
Standing installation
If you install fixtures in a standing position:
1. Install fixtures on a level, stable surface where they do not
present a hazard of tripping or falling.
2. Stack a maximum of four fixtures vertically and secure stacked
fixtures so that they cannot fall over.
Flying from a truss, bar or other structure
To fly a fixture from a rig or other structure:
1. Check that the supporting structure can bear at least ten times
the weight of all installed devices, cables, etc.
2. Install a rigging clamp on the supplied omega bracket, then
fasten the omega bracket to the fixture using the quarter-turn
mounting points on the rear panel (see Figure 1 on page 6).
Ensure that quarter-turn fasteners are turned a full 90° clockwise to lock them (see Figure 2).
3. Block access under the work area. Working from a stable platform, suspend the fixture by fastening the
rigging clamp to the truss or structure.
4. As soon as a fixture is fastened in place, install an approved secondary attachment such as a safety
cable passed through the safety attachment eye (see D in Figure 1 on page 6) to secure it.
Figure 2: Locking a quarter-turn
fastener
AC power 9
AC power
Warning! Read the “Safety Information” section that starts on page 3 before connecting the
Stagebar 2 to AC power.
Warning! For protection from electric shock, the Stagebar 2 must be grounded (earthed). The power
distribution circuit must be equipped with a fuse or circuit breaker and ground-fault (earth-fault)
protection.
Warning! The Stagebar 2 does not have a power on/off switch. Socket outlets or external power
switches used to supply the Stagebar 2 with power must be located near the fixture and easily
accessible so that the fixtures can easily be disconnected from power.
Important! Do not insert or remove live Neutrik PowerCon connectors to apply or cut power, as this
may cause arcing at the terminals that will damage the connectors.
Important! Do not supply the fixture with power via an external dimming system, or you may cause
damage to the fixture that is not covered by the product warranty.
The Stagebar 2 features an auto-sensing switch-mode power supply that automatically adapts to
100 - 240 V nominal AC power at 50 or 60 Hz. Only connect the fixture to AC power within this voltage
range.
The fixture is protected by a 4 amp slow-blow primary fuse located in a fuseholder on the rear panel (see
Figure 1 on page 6).
Connecting to power
Power is supplied to the fixture via a blue Neutrik PowerCon
inlet that accepts a blue PowerCon
NAC3FCA
cable connector. Power can be relayed to another device via the light-grey PowerCon
outlet that accepts a
light-grey PowerCon NAC3FCB cable connector. Note that blue input and light-grey output connectors have
different designs: one type cannot be connected to the other.
The user must install the supplied PowerCon cable connector on a power cable that meets the
specifications listed under “Protection from electric shock” on page 3.
There is no separate power on/off switch: power is applied to the fixture as soon as power is applied to its
power input cable.
If you install a power plug that is suitable for your AC power outlets on the power cable, use a
grounding-type (earthed) plug that is rated 13 A minimum. Follow the plug manufacturer’s instructions. Table
1 shows some possible pin identification schemes; if pins are not clearly identified, or if you have any doubts
about proper installation, consult a qualified electrician.
Wire Color (EU) Wire Color (US) Pin Symbol Screw (US)
brown black live L yellow or brass
blue white neutral N silver
yellow/green green ground (earth) green
Table 1: Wire color-coding and power connections
10 Stagebar 2 user manual
Relaying power to other devices
Warning! The total current draw of all devices connected to the first fixture’s power outlet must not
exceed 11 amps.
Fixtures can be linked in a chain, power outlet to power inlet, so that they all draw power via the first fixture.
Power throughput cables must meets the same specifications as power input cables (see above). Install a
grey PowerCon NAC3FCB power output cable connector on one end of the power throughput cable and a
blue PowerCon NAC3FCA on the other (see “Installing a PowerCon connector on a power cable” on
page 10).
The total current draw of all the fixtures in the chain after the first fixture must not exceed 11 amps constant.
See the following examples for an explanation of what this means in practice:
•At 100 V AC power, a maximum of five Stagebar 2 fixtures may be linked in one chain so that they draw
AC power from the same source. As stated in the Stagebar 2 Specifications (see page 27), each fixture
draws a current of 2.5 A at 100 V. The first fixture will draw a current of 2.5 A. The four fixtures linked to
the first fixture will draw a total of 10 A, which is within the 11 A limit for constant current draw.
•At 230 V AC power, a maximum of 11 Stagebar 2 fixtures may be linked in one chain so that they draw
AC power from the same source. Each fixture draws a current of 1.1 A at 230 V. The first fixture will draw
a current of 1.1 A. The ten fixtures linked to the first fixture will draw a total of 11 A, which is equal to the
11 A limit for constant current draw.
Installing a PowerCon connector on a power cable
To install a Neutrik PowerCon connector on a power cable:
1. Slide the bushing over the cable.
2. Slide the white chuck over cables with a diameter (D
a
) of 5 - 10 mm
(0.2 - 0.4 in.), or the black chuck over cables with a diameter of 10 -
15 mm (0.4 - 0.6 in.).
3. Prepare the end of the cable by stripping 20 mm (0.8 in.) of the
cable’s outer jacket.
4. Strip 8 mm (1/3 in.) from the end of each of the wires.
5. Insert each of the wire ends into the appropriate terminal (see
instructions and Table 1 above) and fasten the clamping device
using a small flathead screw driver.
6. Push and insert the chuck into the housing (note that there is a
raised key on the chuck to ensure that it is oriented correctly).
7. Fasten the bushing using a wrench to a torque of 2.5 Nm (1.8 lb.-ft).
Illustrations above used by kind permission of Neutrik AG
Chuck BushingHousing Insert
Cable end
Terminals
Control data link 11
Control data link
Stagebar 2 fixtures must be connected via a control data link for DMX controller operation.The following
considerations must be taken into account when planning the data link:
DMX cable of a suitable type and 5-pin XLR connectors must be used. Flexible cable with good bend and
torsion recovery is required for touring installations. Martin DMX cables are recommended.
The maximum permitted control data cable length before a control signal amplifier is required is 500
meters (1640 ft.) if AWG 14 cable is used, or 300 meters (984 ft.) if AWG 16 cable is used.
Fixtures must be ‘daisy-chained’, i.e. the data cable must be connected in one single chain of fixtures.
Each chain may connect a maximum of 32 fixtures.
An optically isolated amplifier-splitter such as the Martin DMX 5.3 Splitter (P/N 90758140) must be used
to:
- extend a link beyond the maximum permitted control data cable length,
- extend the link to include a further maximum 32 fixtures, or
- branch the link into further single chains, each containing 32 fixtures. The Martin DMX 5.3 Splitter
allows a link to be branched into five new chains.
Each chain on the link must be terminated by inserting a DMX termination plug into the data output of the
last Stagebar 2 on the chain. The termination plug places a 120 ohm resistance across data hot (+) and
cold (-).
Long parallel runs of AC power and control data cables may cause interference on the data link and must
be avoided.
One DMX universe has 512 DMX control channels available. If individual control of the Stagebar 2 fixtures
in an installation is required, each fixture must be given its own channels until the limit of 512 is reached.
At this point, a new DMX universe must be created before more fixtures can be added.
The number of Stagebar 2 fixtures that can be individually controlled in one DMX universe depends on
the number of DMX channels they use, which in turn depends on which mode they are set to. For
example, if fixtures are set to individual pixel control in HSI mode, they will each require 18 DMX channels
(one channel for hue, one for saturation and one for intensity on each of six pixels). The total number of
fixtures that can be linked in one DMX universe will therefore be 512/18 = 28. See Table 2 on page 13 for
an overview of the number of DMX channels required by Stagebar 2 fixtures in different modes.
Connecting the data link
The Stagebar 2 has a 5-pin male XLR connector for data input and a 5-pin female connector for data output
Both connectors are located on the connections panel and have standard XLR DMX pin-out.
To connect the data link:
1. Cut power to all devices. If the fixture has been in use, allow it to cool for at least 10 minutes.
2. Connect a suitable cable to the DMX output socket on the DMX controller and route it to the first fixture
on the link.
3. Connect the cable to the first fixture’s DMX input socket, and continue adding fixtures, connecting DMX
output to DMX input sockets.
4. On the last fixture in each chain on the link, insert a DMX termination plug in the DMX output socket.
5. When you have made all connections, set up the fixtures as described in the next section of this manual
before applying power.
12 Stagebar 2 user manual
Fixture setup
The control panel and backlit LCD display on the Stagebar 2’s rear panel allows you to set DMX addresses
and alter various fixture settings. The Stagebar 2’s onboard battery makes the most important fixture setup
functions – such as DMX address setting – available when the fixture is not connected to AC power.
Press Menu to access the menu or go up one level.
Press Enter to confirm a selection.
Press Up and Down to navigate in the menus.
The current menu level is displayed in capital letters and sub-menus or menu items are displayed in small
letters in the LCD display.
See “Onboard control panel menus” on page 23 for an overview of the menus available in the control panel.
DMX mode
Color control mode
Martin use the highest quality components based on the most advanced technology available. However,
despite rigorous quality assurance and manufacturing tolerances, there are very small variations in color
rendition between LEDs. Stagebar 2 fixtures are therefore tested and set up at the factory so that pixels give
evenly matched color in RGB, HSI and HSIC modes. Settings are stored in EEPROM on fixtures’ main
PCBs.
The DMX MODE control mode menu allows you to set the fixture to respond in one of four color
control modes:
RGB (red, green, blue)
In RGB mode, all LEDs (including amber and white) are active in red, blue and green color output. The
intensity of each color is controlled on one DMX channel, giving RGB additive color mixing.
RGBAW (red, green, blue, amber, white)
RGBAW is a ‘raw’ control mode in which the intensity of each color LED is controlled on one DMX channel.
LED intensity is thus not managed by the fixture software based on its factory settings, but is controlled
directly by the user. The factory settings are designed to ensure even color rendition across pixels and
fixtures. By bypassing these, RGBAW mode can allow slightly more saturated color.
HSI (hue, saturation, intensity)
In HSI mode, one DMX channel controls hue (selects a color), one channel controls saturation (adjusts
depth of the selected color) and one channel controls intensity (brightness of the selected color).
HSIC (hue, saturation, intensity, color temperature)
HSIC mode is identical to HSI mode, but with the addition of color temperature control on a fourth DMX
channel that allows easy adjustment of the color temperature of white light output.
Pixel grouping
The DMX MODE pixel grouping menu also allows you to set up pixel control (one pixel is one of the
six blocks of LEDs in a Stagebar 2). You can control each pixel individually, so that each pixel displays its
own color and is controlled using its own DMX channels, or you can control pixels in groups. Pixels in a
group use the same DMX channels and behave identically. The options available are:
1 (each pixel is controlled individually)
2 (pixels are controlled in pairs, giving three groups of 2 pixels)
3 (pixels are controlled in two groups of 3 pixels)
All (all pixels are controlled together in one group)
Fixture setup 13
Pixel left/right inversion
The DMX MODE pixel invert command allows you to swap the pixels from left to right so that pixel
1 becomes pixel 6, pixel 2 becomes pixel 5, and so on. This feature can be used to obtain mirror effects, or
to simplify control if certain fixtures are installed upside-down in your installation.
Fixture settings and DMX channel requirements
Depending on the DMX mode and pixel control setting selected in the control menus, each fixture uses the
number of DMX channels shown in Table 2.
For example, a fixture in DMX mode HSI, with pixel grouping set to 3 (in which pixels are controlled in two
groups of 3 pixels), will use six DMX channels. The first three channels will control hue, saturation and
intensity on the first 3 pixels, and the next three channels will control HSI on the remaining 3 pixels.
To give another example, a fixture in DMX mode RGBAW and pixel grouping set to 2 (in which pixels are
controlled in three groups of 2 pixels) will use 15 DMX channels. The first five channels will control RGBAW
on the first group of 2 pixels. The next five channels will control RGBAW on the next group, and the next five
channels will control RGBAW on the last group.
DMX addresses
The DMX address, also known as the start channel, is the first of the DMX channels used to receive
instructions from the controller. If two fixtures are set to the same mode and share the same DMX address,
they will behave identically. For individual control, each fixture must have its own channels. Thus, if a fixture
has DMX address 1 and uses 18 channels, the DMX address of the next fixture must be set to 19, and so
on.
Setting DMX addresses
The fixture’s DMX address can be set manually using ADDRESS man. address in the control panel.
Press Enter, then use the up and down buttons to set the address.
The fixture’s battery power means that the fixture does not have to be connected to mains power for
address setting.
Fixture readouts
Fixture info
Gives information about currently installed software version, total hours of use and temperature of PCBs.
For each PCB, the Stagebar 2 can display:
the current temperature
the highest temperature logged since the fixture was reset (fixtures reset each time they are powered on),
or
the highest temperature logged since the fixture was manufactured.
Temperatures are given in degrees Celsius and Fahrenheit.
Pixel control setting RGB mode RGBAW mode HSI mode HSIC mode
1
(individual control)
18 30 18 24
2
(three groups of 2 pixels)
915912
3
(two groups of 3 pixels)
6106 8
all
(1 group of 6 pixels)
3534
Table 2: DMX channels required in different control modes
14 Stagebar 2 user manual
DMX link info
Gives information about the characteristics and quality of the DMX signal the fixture is receiving.
Other control menu features
Adjustment
The ADJUSTMENT menu gives manual control of the output for individual colors. This feature allows you
to test LEDs or set a static color display without using a DMX controller.
Test sequence
TEST SEQUENCE runs a test of all LEDs, fans, indicator LEDs and the LCD display for service purposes.
Software upload
Select UTILITIES software upload before uploading new software.
Restoring factory settings
UTILITIES factory setting reloads the default factory settings.
Switching between cooling fan modes
The UTILITIES fan mode settings allow you to set the cooling fans to run in one of two modes:
regulated (fans are thermostatically controlled, giving quietest operation)
full speed (fans run at full speed while power is applied).
‘Silent’ mode
Enabling UTILITIES silent mode lets you limit overall light output intensity to approximately 50% of
normal level. This reduces cooling fan operation to a very low level that is hardly audible in most situations.
Operation 15
Operation
Once the Stagebar 2 is connected and set up as described earlier in this manual, adjust color and intensity
using the DMX controller following the applicable DMX protocol (see page 21).
Color control
See “Color control mode” on page 12 for a description of RGB, RGBAW, HSI and HSIC modes.
RGBAW is a ‘raw’ (i.e. uncalibrated) control mode. If the Stagebar 2 is set to RGBAW mode and you require
precisely matched, even color, it may be necessary to compensate for small differences in LED color
rendition by fine-tuning LED intensity on individual pixels at the controller. If this is inconvenient, switching to
one of the other color control modes will give management of color mixing to the fixture software and deploy
factory settings, thus restoring color evenness.
All five LED colors are active in all color control modes.
Stand-alone operation
In stand-alone operation, the Stagebar 2 can be programmed to run two types of display without the need
for a DMX controller:
A static color that you select by adjusting the intensity of the RGBAW pixels.
Dynamic sequences of RGB, RGBAW or pastel colors that you can set to run at fast, medium or slow
speed. Colors cross-fade (this means that one color fades smoothly into the next with an overlap) and
each sequence repeats in a loop.
Programming stand-alone operation
Stand-alone operation is programmed in the STAND ALONE sa setup control menu.
When stand-alone operation has been programmed, the Stagebar 2 runs the selected stand-alone display
whenever it is powered on.
DMX override
If a Stagebar 2 receives a DMX signal during stand-alone operation, it stops its stand-alone display and
obeys DMX commands. If the DMX signal is no longer received, the Stagebar 2 resumes stand-alone
operation after a delay of approximately 5 seconds.
16 Stagebar 2 user manual
Service and maintenance
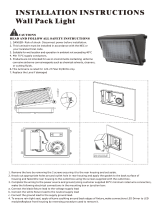
Warning! Read the “Safety Information” section that starts on page 3 before carrying out service or
maintenance work on the Stagebar 2. Lock out power to the entire distribution system before
servicing, cleaning or opening any cover. Refer any service operation not described here
to a qualified service technician.
Important! Excessive dust, smoke fluid, and particle buildup degrades performance,
causes overheating and will damage the fixture. Damage caused by inadequate cleaning or
maintenance is not covered by the product warranty.
Important! As with electronic components in general, the Stagebar 2’s PCBs are sensitive
to ESD (electrostatic discharge). Take precautions to avoid ESD damage during service.
Installation, on-site service and maintenance can be provided worldwide by the Martin Professional Global
Service organization and its approved agents, giving owners access to Martin’s expertise and product
knowledge in a partnership that will ensure the highest level of performance throughout the product’s
lifetime. Please contact your Martin supplier for details.
To maximize the life of the Stagebar 2 and protect the investment it represents, clean the fixture regularly –
especially the cooling fans and grilles – following the guidelines in this section.
It is Martin policy to use the best quality materials available to ensure optimum performance and the longest
possible component lifetimes. However, optical components in all lighting fixtures are subject to wear and
tear over the life of the fixture, resulting in gradual changes in color rendition, for example. The extent of
wear and tear depends heavily on operating conditions, maintenance and environment, so it is impossible to
specify precise lifetimes for optical components. However, you will eventually need to replace LEDs if their
characteristics are affected by wear and tear after an extended period of use and if you require fixtures to
perform within very precise optical and color parameters.
The manufacturer’s LED lifetime data is based on performance under the manufacturer’s test conditions. As
with all LEDs, the gradual reduction in luminous output will be accelerated when LEDs are used in a fixture,
where conditions are much tougher than in manufacturers testing. To maximize LED lifetimes, keep the
ambient temperature as low as possible and drive the LEDs no harder and for no longer than necessary.
Adjustable floorstand/mounting bracket accessory
The adjustable mounting bracket available from Martin (P/N 71606007) as an accessory for the Stagebar 2
is designed for fastening to the quarter-turn mounting points on the back of the fixture (see Figure 1 on page
6). Turn quarter-turn fasteners a full 90° when installing the bracket.
The bracket can either be folded around the fixture and used as a floorstand, fastened directly to a surface
or fastened to a rigging clamp for flying installation. Use at least two bolts, grade 8.8 minimum, if fastening to
a surface.
Cleaning
Regular cleaning is essential for fixture life and performance. Buildup of dust, dirt, smoke particles, fog fluid
residues, etc. degrades the fixture’s light output and cooling ability.
Cleaning schedules for lighting fixtures vary greatly depending on the operating environment. It is therefore
impossible to specify precise cleaning intervals for the Stagebar 2. Cooling fans suck in airborne dust and
smoke particles, and in extreme cases fixtures may require cleaning after surprisingly few hours of
operation. Environmental factors that may result in a need for frequent cleaning include:
Use of smoke or fog machines.
High airflow rates (near air conditioning vents, for example).
Presence of cigarette smoke.
Airborne dust (from stage effects, building structures and fittings or the natural environment at outdoor
events, for example).
If one or more of these factors is present, inspect fixtures within their first 25 hours of operation to see
whether cleaning is necessary. Check again at frequent intervals. This procedure will allow you to assess
cleaning requirements in your particular situation. If in doubt, consult your Martin dealer about a suitable
maintenance schedule.
Service and maintenance 17
Do not use abrasive, caustic or solvent-based products for cleaning, as they can damage plastic or painted
surfaces.
To clean the fixture:
1. Disconnect the fixture from power and allow it to cool for at least 10 minutes.
2. Vacuum or gently blow away dust and loose particles from the fan blades and grilles in the fixture’s end
caps with compressed air.
3. Clean the front cover with a soft cloth dampened in a warm water/detergent solution.
4. If the lens arrays require cleaning, remove them as described on page 17 and wash them in a hot
water/detergent solution with a soft brush. Dry completely before reinstalling.
5. See Figure 3. If a cooling fan or grille requires more thorough cleaning, loosen the fan assembly
retaining screw (arrowed) slightly and slide the assembly out of the end cap for access. Do not strain the
wires to the fan. Brush dirt from the fan blades with a soft brush, preferably in conjunction with a vacuum
cleaner.
6. Avoid trapping wires while reinstalling the fan assembly.
Removing and installing LED lens arrays
The LED lenses installed at the factory are constructed in arrays of 9 lenses. The lenses concentrate the
LED output into a narrower beam angle. Lens arrays can be removed to give a broad beam and must be
removed to obtain smooth color using the diffuser front.
To remove or install a lens array:
1. Isolate the fixture from power. If the fixture has been in use, allow it to cool for at least 10 minutes.
2. See Figure 4. Loosen the two captive screws (arrowed) on the end cap and swing the end cap open.
3. Slide the front cover out of the fixture.
Torx 20
Torx 20
Figure 3: Cooling fan removal
Figure 4: Access to front cover, reflector and lens arrays
18 Stagebar 2 user manual
4. Lift the reflector out of the fixture.
5. See Figure 5. Lens arrays are retained by magnetic
mountings. To remove a lens array, press on one
side until you can grip the other side. Lift the lens
array off the magnets and store for possible future
use. To install a lens array, place it into position on its
magnetic mounting posts and check that it is held
securely.
6. Reinstall components in reverse order of
disassembly before reconnecting the fixture to
power.
Installing and removing the opal front cover
The opal diffuser front cover supplied with the fixture makes the individual LEDs invisible, giving a surface
with smooth color and a very wide beam angle. Before installing it, remove any lens arrays that are installed,
or hot-spots will be visible on the opal front cover surface.
To install an opal front cover:
1. Isolate the fixture from power. If the fixture has been in use, allow it to cool for at least 10 minutes.
2. See Figure 4. Loosen the two captive screws (arrowed) on the end cap and swing the end cap open.
3. A clear front cover is installed at the factory. Slide it out of its slots in the front of the fixture and store it for
possible re-use in future.
4. If lens arrays are installed, lift the reflector out of the fixture, remove the lens arrays as described under
“Removing and installing LED lens arrays” on page 17 and reinstall the reflector.
5. Slide the opal front cover into the slots in the front of the fixture.
6. Close and fasten the end cap before reapplying power.
To remove an opal front cover:
1. Isolate the fixture from power. If the fixture has been in use, allow it to cool for at least 10 minutes.
2. See Figure 4. Loosen the two captive screws (arrowed) on the end cap and swing the end cap open.
3. Slide the opal front cover out of its slots in the front of the fixture and store it for possible re-use in future.
4. If you want to obtain a narrower beam angle when the opal front cover is not installed, install lens arrays
as described under “Removing and installing LED lens arrays” on page 17.
5. Slide the clear front cover into the slots in the front of the fixture.
6. Close and fasten the end cap before reapplying power.
Installing diffuser filters
Diffuser filters ensure uniform color mixing and widen the beam angle. They are designed to be used with
lens arrays and the clear front cover installed. A narrow-angle diffuser filter is supplied with the fixture. Sets
containing 4 narrow-angle or 4 medium-angle diffuser filters are available from Martin as accessories for the
Stagebar 2. Narrow diffusers are marked with one notch (or in early models, no notch) at one end, and
medium diffusers are marked with two notches at one end.
To install a diffuser filter:
1. Isolate the fixture from power. If the fixture has been in use, allow it to cool for at least 10 minutes.
2. See Figure 4. Loosen the two captive screws (arrowed) on the end cap and swing the end cap open.
3. A clear front cover is installed at the factory. Slide it out of its slots in the front of the fixture.
4. Hold the diffuser filter against the inner side of the front cover so that the diffuser’s shiny side will face
out of the fixture and its matt side will face in towards the LEDs, then slide the front cover and diffuser
together into the slots in the front of the fixture, taking care not to damage the diffuser.
5. Close and fasten the end cap before reapplying power.
Figure 5: Removing a lens array
Service and maintenance 19
Fuse replacement
Warning! Disconnect from power before opening covers. Replace fuses with ones of the same type
and rating only.
Primary fuse
Stagebar 2 fixtures are protected by a 4 amp slow-blow primary fuse located in a fuseholder on the rear
panel (see Figure 1 on page 6). If a fixture is completely dead (apart from the battery-powered functions
available in the control panel and display), the primary fuse may have blown.
To replace the primary fuse:
1. Disconnect the fixture from power and allow to cool for 10 minutes.
2. Using a flat-head screwdriver, turn the fuseholder cap counter-clockwise to release it, then remove the
fuse.
3. Replace a defective fuse with one of the same type and rating only. Replacement primary fuses are
available from Martin suppliers (P/N 05020016).
4. Reinstall the fuseholder before reapplying power.
Battery service
The onboard battery that provides power to the control panel and LCD display is recharged while the fixture
is connected to AC power. If the battery has lost its charge over a long period with the fixture disconnected
from AC power, the first remedy is to reconnect the fixture to power.
Due to natural aging, the battery will over time lose its ability to hold a charge. Eventually it will reach the
end of its service life and require replacement. The battery is located immediately behind the bottom cover,
attached to the chassis. Contact a Martin service technician for replacement.
Software installation
It may be necessary to upload new software to the Stagebar 2 if you believe that the product has a
software-related fault or if you want to update to a newer version. Software updates are available from the
Martin website (http://www.martin.com) and can be installed via the DMX data link with the following items:
The Stagebar 2 main CPU software update file, downloadable free of charge from the Product Support
area of the Martin website.
The Martin Software Uploader program, version 5.0 or later, downloadable free of charge from the
Product Support area of the Martin website.
A Martin USB Duo DMX Interface or similar PC/fixture hardware interface and Windows PC (if you have
access to a Martin MP-2 Uploader device, this can also be loaded with the Stagebar 2 main CPU software
update file and used).
Installing software: normal method
1. Connect the uploader hardware to a Stagebar 2 fixture’s data input connector. The software will be
uploaded to that fixture and all Stagebar 2 fixtures that are powered on and connected via the DMX link.
2. Upload the fixture software as described in the uploader’s help file or user documentation.
3. Disconnect the uploader hardware and reconnect the fixture to the DMX link.
4. Cycle power off and on. Check that the fixture resets correctly. If an error message appears in the
display, cycle power off and on again and check that the fixture now resets correctly.
Installing software: boot mode upload
A boot mode upload must be carried out by a qualified professional only.
If you believe that a boot mode upload may be required (if the display is completely dead when power is
applied, for example), or if the software notes call for a boot mode upload:
1. Isolate the fixture from power and open for access to the main PCB.
2. Locate the DIP switch on the main PCB and move pin 6 to ON.
3. Close all covers, reapply power and perform the upload as described above.
4. Isolate from power, open covers, set DIP switch pin 6 to OFF, close all covers and reapply power.
20 Stagebar 2 user manual
5. Check that the fixture resets correctly. If a checksum error occurs, cycle power off and on again and
check that the fixture now resets correctly.
  • Page 1 1
  • Page 2 2
  • Page 3 3
  • Page 4 4
  • Page 5 5
  • Page 6 6
  • Page 7 7
  • Page 8 8
  • Page 9 9
  • Page 10 10
  • Page 11 11
  • Page 12 12
  • Page 13 13
  • Page 14 14
  • Page 15 15
  • Page 16 16
  • Page 17 17
  • Page 18 18
  • Page 19 19
  • Page 20 20
  • Page 21 21
  • Page 22 22
  • Page 23 23
  • Page 24 24
  • Page 25 25
  • Page 26 26
  • Page 27 27
  • Page 28 28
  • Page 29 29
  • Page 30 30
  • Page 31 31
  • Page 32 32

Martin DMX 5.3 Splitter User manual

Category
Stroboscopes & disco lights
Type
User manual
This manual is also suitable for

Ask a question and I''ll find the answer in the document

Finding information in a document is now easier with AI