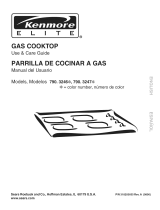
Kenmore 79032233401 Owner's manual

Category
Cookers
Type
Owner's manual
®
COO
Use & Care Guide
CO
Manual del Usuario
GAS
Models, Modelos 790. 3223;',.', 3224;',."
.,. = color number, numero de color
Sears Roebuck and Co., Hoffman Estates, mL(}0179 U.S.A.
www, sears°corn
P/N 318200669 Rev. A (0407)
Table of Contents
Cooktop Warranty .............................................................. 2
Product Record ................................................................. 2
Serial Plate Location ......................................................... 2
iMPORTANT SAFETY iNSTRUCTiONS ......................... 3-4
Protection Agreements ...................................................... 5
Grounding instructions ...................................................... 6
Liquefied Petroleum (Propane) Gas Conversion ................. 6
Surface Cooking ............................................................... 7
Setting Surface Controls ............................................... 8-10
General Care & Cleaning ............................................. 11-13
Cleaning Various Parts ofYour Cooktop ....................... 11
Porcelain Enamel Cooktop Cleaning instructions
(some models) ............................................................ 12
Care & Cleaning of Stainless Steel (some models) ..... 12
Sealed Burner Models ................................................. 13
BeforeYou Call ................................................................. 14
Notes ............................................................................... 15
Sears Service .................................................................. 16
Product Record
in this space below, record the date of purchase, model
and serial number of your product, You will find the model
and serial number printed on the serial plate, This serial
plate is located under the cooktop, See bottom of this
page for the serial plate location,
790.
Model No,
Serial No,
Date of purchase
Save these instructions and your sales receipt for future
reference,
Cooktop Warranty
FULL ONEYEARWARRANTY ON ALL PARTS
If, within one year from the date of installation, any part fails to function properly due to a defect in material or
workmanship, Sears will repair or replace it, at our option, free of charge,,
If the product is subjected to other than private residential use, the above warranty is effective for only 90 days,
WARRANTY SERVICE IS AVAILABLE BY CONTACTING SEARS AT 1-800-4-MY-HOME®.
This warranty gives you specific legal rights, and you may also have other rights which vary from state to state,
Sears Roebuck and Co,, Dept, 817WA Hoffman Estates, IL 60179
Please carefully read and save these
instructions
This Use & Care Manual contains general operating
instructions for your appliance and feature information for
several models, Your product may not have all the
described features, The graphics shown are representative,
The graphics on your appliance may not look exactly like
those shown, Common sense and caution must be
practiced when installing, operating and maintaining any
appliance,
Serial Plate Location
You will find the model and serial number printed on the
serial plate, The serial plate is located under the cooktop,
Please see the illustration for exact location, Remember to
record the serial number for future reference (See Product
Record above),
Serial pJate is
tocated unde_ the
burner box.
important Safety instructions
Read a[I instructions before using this appliance.
Save these instructions for future reference.
This manual contains important safety symbols and instructions. Please pay attention to these symbols and fellow a[[
instructions given.
If the information in this manual is not followed exactly, a fire or explosion may
result causing property damage, persona[ injury or death.
FOR YOUR SAFETY:
-- Do not store or use gasoline or other flammable vapors and Hquids in the
vicinity of this or any other appliance.
-- WHATTO DO mFYOU SMELL GAS:
o Do not try to Hght any appliance.
Do not touch any electrical switch; do not use any phone in your building.
Immediately ca[[ your gas supplier from a neighbor's phone. Follow the
gas supp[ier's instructions.
* If you cannot reach your gas supplier, ca[[ the fire department.
-- Installation and service must be performed
supplier.
by a qualified installer, servicer or the gas
o Remove aHtape and packaging wrap before using the
cooktop. Destroy the carton and plastic bags after
unpacking the cooktop. Never allow children to play with
packaging material Do not remove the model/serial plate
attached to the cooktop,
, Proper Installation--Be sure your appliance is properly
installed and grounded by a qualified technician in
accordance with the National Fuel Gas Code ANSI
Z223.1 latest edition and CAN/OGA B149.2, and the
National Electrical Code ANSl/NFPA No. 70--latest
edition, and local code requirements. Install and/or
adjust only per installation instructions provided in the
literature package for this cooktop,
Sears Parts & Repair is the recommended repair service
for this appliance, Know how to disconnect the electrical
power to the appliance at the circuit breaker or fuse box in
case of an emergency,
o User Servicing--Do not repair or replace any part of the
appliance unless specifically recommended in the
manuals. A[[ other servicing should be done only by a
qualified technician to reduce the risk of persona[ injury and
damage to the coektop,
o Never modify or alter the construction of a cooktop by
removing panels, wire covers, or any other part of the
product.
o Storage on Appliance--Flammable materials should
not be stored on the cooktop, near surface burners.
This includes paper, plastic and cloth items, such as
cookbooks, p[ast[cware and towels, as we[[ as flammable
liquids, Do not store explosives, such as aerosol cans, on
the cooktop, Flammable materials may explode and result
in fire or property damage,
Do not store items of interest to children
in the cabinets above the cooktop.
o Do not leave children alone--Children should not be
[eft alone or unattended in the area where an appliance
is in use. They should never be allowed to sit or stand on
any part of the appliance,
o DO NOTTOUCH SURFACE BURNERS, GRATES, OR
AREAS NEAR THESE BURNERS. Surface burners may
be hot even though the flames are not visible, Areas near
surface burners may become hot enough to cause burns,
During and after use, do not touch or let clothing or other
flammable mate rials touch these areas until they have had
surf[c[ent time to coo[, Among these areas are the cooktop
and the surfaces facing the coektop,
o Wear Proper Apparel--Loose-fitting or hanging
garments should never be worn while using the
appliance. Donot letclothing or other flammable materials
contact hot surfaces,
Stepping or leaning on this cooktop can
result in serious injuries and may also cause damage to
the cooktop. De not allow child ren to climb or piny around the
cooktop,
Never use your appliance for warming or
heating the room.
important Safety instructions
o Do Not Use Water or Flour on Grease Fires--Smother
the fire with apan lid, or use baking soda, a dry chemica!
or foam-type extinguisher.
o Never Leave Surface Burners Unattended at High Heat
Settings--Boilovers cause smoking and greasy spillovers
that may ignite, or a pan that has boiled dry may melt,
When heating fat or grease, watch it ctosely. Fat or
grease may catch fire if allowed to become too hot,
o Use Only Dry Pothotders--Moist or damp pot hotders
on hot surfaces may resuJt in burns from steam. Do not
let the potholders touch the flame or burners, Do not use a
towel or other bulky cloth instead of a pot holder,
o Do Not Heat Unopened Food Containers--Buildup of
pressure may cause container to burst and resuJt in
injury.
o Know which knob controls each surface burner, Always
turn the knob to the MTE position when igniting the burners,
Visually check that the burner has lit, Then adjust the flame
so it does not extend beyond the edge of the utensil,
Use Proper Flame Size--Adjust flame size
so it does not extend beyond the edge of the utensil. The
use of undersized utensils will expose a portion of the burner
flame to direct contact and may result in ignition of clothing,
Proper relationship of utensil to flame will also improve
efficiency,
Do not use stove top grills on your seaJed
gas burners. If you use a stove top grill on a sealed gas
burner, it will cause incomplete combustion and can result in
exposure to carbon monoxide levels above allowable current
standards, This can be hazardous to your health,
Use proper pan size--This appliance is
equipped with one or more surface burners of different sizes,
Select utensils having fiat bottom large enough to cover the
surface burner, The use of undersized utensils will expose a
portion of the surface burner to direct contact and may result
in ignition of clothing, Proper relationship of utensil to the
surface burner will also improve efficiency,
o Clean the appliance regularly to keep aH parts free of
grease that could catch fire. Exhaust fan ventilation
hoods and grease filters should be kept clean, Do not
allow grease to accumulate on hood or filter, Greasy
deposits in the fan could catch fire, When flaming food
under the hood, turn fan on, Refer to hood
manufacturer's instructions for cbaning,
o Utensil Handtes Should BeTumed inward from Edges
of Cooktop and Not Extend Over Adjacent Surface
Burners--To reduce the risk of burns, ignition offlammable
materials, and spillage due to unintentional contact with the
utensil, the handle of the utensil should be positioned sothat
it is turned inward, and does not extend over adjacent
surface burners,
Protective Liners--Do not use aluminum foil to line
sutraceburner pans. Protective liners or aluminum foil may
interfere with heat and air distribution, and combustion.
Damage to the coektop or personal injury may result.
Glazed Cooking Utensils--Only certain types of glass,
glass/ceramic, ceramic, earthenware, or other glazed
utensils are suitable for cooktop service without breaking
due to the sudden change in temperature, Check the
manufacturer's recommendations for coektop use,
Do Not Use Decorative Surface Burner Covers. If a
burner is accidentally turned on, the decorative cover will
become hot and possibly melt, You will not be able to see
that the burner is on, Burns will occur if the hot covers are
touched, Damage may also be done to the ceoktop or
burners because the covers may cause overheating, Air
will be blocked from the burner and cause combustion
problems,
GLASS COOKTOPS (some modeJs):
o Do Not Clean or Operate a Broken Cooktop. Ifcooktop
should break, cleaning solutions and spillovers may
penetrate the broken cooktop and create a risk of electric
shock, Contact a qualified technician immediately,
Clean Cooktop with Caution. if a wet sponge or cloth is
used to wipe spills on a hot cooking area, be careful to
avoid a steam burn, Some cleaners can produce harmful
fumes if applied to a hot surface,
o Do Not Ptace Hot Cookware on Cold Cooktop Glass.
This could cause glass to break,
o Do not slide pans across the cooktop surface. They
may scratch the cooktop surface,
Do not let pans boit dry. Pans that boil dr}, may
permanently damage the cooktop by breaking, fusing to,
or marking it, (This type of damage is net covered by your
warranty),
mMPORTANT SAFETY NOTmCE
The California Safe Drinking Water and Toxic
Enforcement Act requires the Governor of California to
publish a list of substances known to the state to cause
cancer, birth defects or other reproductive harm, and
requires businesses to warn customers of potential
exposure to such substances,
PROTECTmON AGREEMENTS
mnthe U.S.A.
Master Protection Agreements
CongratuUations on making a smart purchase, Your new
Kenmore ®product isdesigned and manufactured for
years of dependabb operation, But HkeaHproducts, it
may require preventive maintenance or repair from time to
time, That's when having a Master Protection Agreement
can save you money and aggravation,
Purchase a Master Protection Agreement now and protect
yourseff from unexpected hassle and expense.
The Master Protection Agreement aUsoheUpsextend the
Hfeof your new product, Here's what's included in the
Agreement:
5_ Expert service by our 12,000 professionaU repair
spedaHsts
5_ Unlimited service and no charge for parts and Uabor
on aHcovered repairs
5_ "No-lemon"guarantee= replacement
of your covered product if four or more product
failures occur within twelve months
5_ Product replacement if your covered product can't
be fixed
5_ AnnuaJ Preventive Maintenance Check at your
5_ request- no extra charge
Fast help by phone - phone support from a Sears
technician on products requiring in-home repair, plus
convenient repair scheduling
5_ Power surge protection against electrical damage
due to power fluctuations
5_ RentaJ reimbursement if repair of your covered
product takes longer than promised
mr_Canada
Maintenance Agreements
Your purchase has added value because you can depend
on Sears HomeCentraPfor service, With over 2400
Sewice Technicians and more than a million parts and
accessories, we have the tools, parts, knowledge and
skills to ensure our pledge: We Service What We Sell,
Your Kenmord_product isdesigned, manufactured
and tested to provide years of dependable operation, But
like all products, it may require service from time to time,
The Sears Maintenance Agreement offers you an
outstanding service program, affordaNy priced,
The Sears Maintenance Agreement:
Is your way to buy tomorrow's service at today's price
Eliminates repair bills resulting from normal wear and
tear
Provides phone support from a Sears technician on
products requiring inohome repair
Even if you don't need repairs, provides an annual
Preventive Maintenance Check, at your request, to
ensure that your product is in proper running condition,
Some Jimitations apply. For more information about
Sears Canada Maintenance Agreements,
call 1-800-361-6665
Once you purchase the Agreement, a simple phone call is
all that it takes for you to schedule service, You can call
anytime day or night, or schedule a service appointment
online,
ii................
Sears has over 12,000 professional repair specialists,
who have access to over 4,5 million quality parts and
accessories, That's the kind of professionalism you can
count on to help prolong the life of your new purchase for
years to come, Purchase your Master Protection
Agreement today!
Some limitations and exclusions apply.
For prices and additionaJ information call
1-800-827-6655o
Sears hstaHation Service
For Sears professional installation of home
appliances, garage door openers, water heaters,
and other major home items, in the U,S,A, call
1-800-4-MY-HOME ®
REV. 030509
Grounding instructions
For personal safety, the cooktop must be properly grounded, For maximum
safety, the power cord must be plugged into an ebctrbal outbt that is
correctly polarized and properly grounded,
DO NOT Operate the cooktop using a 2°prong adapter or an extension cord,
If a 2°prong wall receptacle is the only available outlet, it is the personal
responsibility of the consumer to have it replaced with a properly g rounded
3-prong wall receptacle installed by a qualified electrician,
See the INSTALLATION INSTRUCTIONS packaged with this cooktop for
complete installation and grounding instructions,
This appliance is equipped with a 3-prong grounding
plug for your protection against shock hazard and should be plugged
directly intoa properly grounded receptacle, DO NOTcut or remove the
grounding prong from this plug,
Grounding type
wall receptacle
Do not, underany _
circumstances, /
cut, remove, or /
bypass the |
grounding prong. /
Power supply cord with
3-prong grounding plug
Avoid fire hazard or electrical shock,
DO NOT use an adapter plug, an extension cord, or
remove grounding prong from electrical power cord,
Failure to follow this warning can cause serious injury,
fire or death,
Liquefied Petroleum (Propane) Gas Conversion
This appliance can be used with Natural Gas or Propane Gas, it is
shipped from the factory for use with natural gas,
Only a qualified service agent should perform the L,P, conversion, if
L,P,conversion is needed, contact 1-800-4-MY-H OME® for assistance,
An L,P, kit is provided with this appliance, it iscontained in an envelope
marked "FOR LP/PROPANE GAS CONVERSION", The conversion
must be performed in accordance with the kit instructions and all local
codes and government requirements, Failure to follow instructions
could result in serious injury or property damage, The qualified agency
performing this work assumes responsibility for the conversion,
the cooktop, may occur ifthe cooktop isnot converted
by a qualified installer or electrician,
required in order for this appliance to satisfactorily
meet the application needs must be made by an
authorized Sears Service Center or other qualified
L,P, service agency,
Surface Cooking
Use Proper Cookware
Cookware shouUd
have fiat bottoms
that make good
contact with the
entire surface
Check for flatness Figure 1
by rotating a ruUer
across the bottom of
the cookware (See Figure 1), Be sure to
follow the recommendations for using
cookware as shown in Figure 2,
Note: The size and type of cookware used
wHUinfluence the setting needed for best
cooking resuUts,
Note: Always use a utensil for its intended
purpose, Follow manufacturer's instructions,
Some utensils were not made to be used in
the oven or on the cooktop,
CORRECT mNCORRECT
o Curved and warped pan bottoms,
o Flat bottom and straight
sides,
Tight fitting lids,
Weight of handle does not tilt
pan, Pan is well balanced,
o Pan sizes match the amount
of food to be prepared,
Made of material that
o Pan overhangs unit by more than
2,5 cm (1"),
o Heavy handle tilts pan,
o FUame extends beyond unit,
conducts heat well,
Easy to clean,
Figure 2
* Specialty pans such as lobster pots, griddles and pressure cookers may be ::::i:
used but must conform to the above recommended cookware requirements,
Using a wok
Woks with flat bottoms suitaMe for
use on your cooktop are avaHabUe
in most cookshop or hardware
stores, Round-bottomed woks
(with a support ring that does not
extend beyond the burner unit) may
aUsobe used, The metaUring was
designed to support the wok safeUy
when it is filled with large amounts
of liquids (soup making) or fat
(frying),
Wire trivets: Do not use wire triv-
ets, Cookware bottoms must be in
direct contact with the grates,
DO NOT use a wok if it is equipped
with a metaJ ring that extends beyond
the burner unit. Because this ring
traps heat, the surface unit and
cooktop surface could be damaged.
Setting Surface Controls
Sizes of the Surface Gas
Burners
Your appliance is supplied with the
following 3 different surface gas
burners:
Simmer Burner (5,000 BTU)
2 (or 3 on 36" modeUs)Standard
Burners (9,500 BTU)
oPower Burner (14,200 BTU)
When setting up the range for
the first time, make sure that
the correct Burner Heads,
Left
Gas
Burner Cap Opening
(Standard) ""Ai ....
tandard - _ Burner Head Burner Head
"oor 9, 00BTO 9, 00BTO -*
(
' --_/ Center Rear
Left Front Gas Opening
Gas Opening
Grates are Uocatedas shown
in Figure 1,
Extra Large
Burner Cap "_
"POWER"
Burner Head
(14,200 BTU
36" Models
_¢/only
Burner Cap
(Standard)
36" Models only
Small
Burner Cap
Right Rear
Gas Opening
Figure 2
located properly in slot
of each Burner Head
Right Front
Gas Opening Figure 1
Assembly of the Surface Burner Heads, Burner Caps,
Burner Grates and F_ue Covers
utis very important to make sure that aHof the Surface Burner Heads,
Surface Burner Caps and Surface Burner Grates are installed correctUy
and at the correct Uocations,
1, PUaceaH4 (four) or 5 (five) Burner Heads in the correct locations
(See Figure 1), Make sure that the correct Burner Head is placed
with the corresponding Gas opening and that the Electrode is
located properly in the slot of each Burner Head (See Figure 2),
Proper Burner Head placement insures that each Burner will have
the correct spark required for surface gas ignition,
2, Place the correct Burner Caps at each of the burner locations
(Burner Cap Pilot Hole must face up), Each of the 4 (four) Burner
Heads MUST have a Burner Cap installed to insure proper ignition
and gas flame size and must be in place with the Pilot Hole facing
up BEFORE placing the Burner Grates (See Figure 2),
3, Place the 2 (two) or 3 (three) cast iron Burner Grates supplied with
the range, Carefully lift the burners grates on to the cooktop over
the burners, Properly installed Burner Grates will rest with all Grate
legs on the cooktop,
REMEMBER -- DO NOT ALLOW SPILLS, FOOD, CLEANING
AGENTS OR ANY OTHER MATERIAL TO ENTER THE GAS
OPENING. Always keep the Burner Caps and Burner Heads in place
whenever the surface burners are in use,
Setting Surface Controls
iiii_
2,,,,,,,,,,,,,_--
i i:i !
III _i
Figure 1 (30" modems)
ii ii i:ti'¸¸¸I_.,,. _
i:iiii:iiii i
!
Contro_ Locations of the Gas Surface Burners
Your cooktop is equipped with gas surface burners with 3
different BTU ratings, The ability to heat food quicker and in
HargervoHumes increases as the burner size increases,
The smaHHSIMMER burner is best used for simmering
delicate sauces, etc. This burner is Hocatedat the right rear
burner position on the cooktop.
The STANDARD burners can be used for most surface
cooking needs. The 2 (or3 on 36" modeHs)burners are
Hocatedat the Heftfront and rear burner positions on the
cooktop. For 36" modemsthe third standard burner is Hocated
in the center rear position.
The POWER burner is best used for bringing Hargequantities
of Hquid rapidHyup to temperature or when preparing Harger
quantities of food. The POWER burner is Hocatedat the right
front burner position on the cooktop.
RegardHess of size, aHwaysseHectcookware that is suitabHe
for the amount and type of food being prepared. SeHecta
burner and flame size appropriate to the pan. Never aHHow
flames to extend beyond the outer edge of the pan.
ii................
Figure 2 (36" modems)
Operating the Gas Surface Controls:
1. PHacecooking utensiHon surface burner.
_ 2. Push the surface control knob down and turn counterclockwise out of the OFF
<._" position.
3. Release the knob and rotate to the LiTE position (see figure 2). Note: Ail four
electronic surface ignitors wiil spark at the same time. However, only the burner
you are turning on wiil ignite.
4. Visually check that the burner has a flame.
5. Turn the control knob counterclockwise to the desired flame size. The control
knobs do not have to be set at a particular setting. Use the knob indicator settings
to adjust the flame as needed. DO NOT cook with the surface control knob in the
LiTE position. (The electronic ignitor wiil continue to spark if the knob is left in the
Figure2
NOTE
Hnthe event of an eHectricaHpower outage, the surface burners can be HitmanuaHHy.To Highta surface burner, hoHda Hit
match to the burner head, then showilyturn the surface controHknob to LITE. After burner Hightsturn the knob to desired
setting. Use caution when Hightingsurface burners manuaHHy.Surface burner in use when an eHectricaHpower faiHureoccurs
wiHHcontinue to operate normaHHy.
Do not p_ace p_astic items such as salt and pepper shakers, spoon holders or p_astic wrappings
on top of the range when it is in use. These items couHdmeritor ignite. PothoHders, toweHsor wood spoons couHd
catch fire if pHacedtoo chose to a flame.
Do not operate the burner for an extended period of time without cookware on the grate. The finish on
the grate may chip without cookware to absorb the heat.
9
Setting Surface Controls
Setting Proper Surface Burner F_ame Size
For most cooking - start on the highest control setting and then turn to a
lower one to compbte the process, Use the recommendations below as a
guide for determining proper flame size for various types of cooking, The size
and type of utensil used and the amount of food being cooked will influence the
setting needed,
incorrect
*Ftame Size
High Flame
Medium Flame
Low Flame
Type of Cooking
Start most foods; bring water to a boil; pan broiling,
Maintain a slow boil; thicken sauces, gravies; steaming,
Keep foods cooking; poach; stewing,
Never extend the flame beyond the
outer edge of the utensik A higher
flame simply wastes heat and energy,
and increases the risk of being burned
by the gas flame,
For deep fat frying -use a thermometer and adjust the surface control knob
accordingly, if the fat is too cool, the food will absorb the fat and be greasy, if
the fat is too hot, the food will brown so quickly that the center will be
undercooked, Do not attempt to deep fat fry too much food at once as the food
will neither brown nor cook properly,
*Note: Settings are based on using medium-weight metaJ or aJuminum pans, Settings may vary when using other
types of pans, The color of the flame is the key to proper burner adjustment, A good flame is clear, blue and hardly
visible in a well-lighted room, Each cone of flame should be steady and sharp, Adjust or clean burner if flame is yellow-
orange,
10
Genera Care & CReaning
Cleaning Various Parts of Your Cooktop
Before cbaning any part ofthe cooktop, be sure all controls are turned OFF and the cooktop is COOL. REMOVE SPILLOVERS
AND HEAVY SOiLiNG AS SOON AS POSSIBLE. REGULAR CLEANINGS NOW WiLL REDUCE THE DiFFiCULTY AND
EXTENT OF A MAJOR CLEANING LATER.
Surfaces How to Clean
AJuminum (Trim Pieces) & Use hot, soapy water and a cloth or paper towek Dry with a dean cloth.
Vinyl
Painted and Plastic Control Forgeneral cleaning, use hot soapy water and a cloth. Formore difficult soils andbui/t-
Knobs, Body Pieces, and up grease, apply a liquid detergent directly onto the soil. Leave on soil for 30 to 60
DecorativeTrim minutes. Rinse with a damp cloth and dry. DO NOT use abrasive cleaners on any of
these materials; they can scratch or dull the finish.
ControJ Panel
Stainless Steel, Chrome
Decorative Trim
PorceJain Enamel
Burner Grates, Burner Pans
(some models), Burner Rings
(some models), Cooktop
Surface
Surface Burners
Wipe the control panel clean after each use. Before cleaning the centre/panel turn all
controls to OFF and remove the control knobs. To remove, pull each knob straight off
the shaft. Clean using hot, soapy water and a cloth. Be sure to squeeze excess water
from the cloth before wiping the panel; especially when wiping around the controls.
Excess water in or around the controls may cause damage to the appliance. To replace
knobs after cleaning, line up the fiat sides of both the knob and the shaft; then push the
knob into place.
Clean with hot, soapy water and a dishcloth. Rinse with clean water and cloth. Do not
use charters with high concentrations of cHoridee or cHorinee, Do not use harsh
scrubbing cleaners. Only use kitchen cleaners that are especially made for cleaning
stainless steel. Always be sure to rinse the cleaners off from the surface as bluish
stains may occur during heating that cannot be removed.
Gentle scouring with a soapy scouring pad wiii remove most spots, Rinse with a 1:1
solution of clear water and ammonia, /f necessary, cover difficult spots with an
ammonia-soaked paper towel for 30 to 40 minutes, Rinse with clean water and a damp
cloth, and then scrub with a soap-filled scouring pad, Rinse and wipe dry with a clean
cloth or paper towel, Remove all cleaners or the porcelain may become damaged during
future heating, DO NOT use spray oven cleaners on the cooktop,
The hobs in the burners of your cooktop must be kept clean at all times for proper
ignition and a complete, even flame, Clean the burner hobs routinely with a small gauge
wire or needle and especially after bad spillovers which could clog these hobs,
To remove and replace burner units per your model, see instructions under Sealed
Burner, To clean, soak the burners in a 1:1 solution of ammonia and water for 30 to 40
minutes, For stubborn stains, scrub with soap and water or a mild abrasive cleanser and
damp cloth, Dry the burners thoroughly in a warm oven for 30 minutes, Then replace
them, making sure they are seated and level, DO NOT wash burner units in the
dishwasher,
ii................
11
Genera Care & CReaning
Porcelain enamel cooktop cleaning instructions (some
Correct and consistent cleaning is essential to maintaining your porcelain enamel
cooktop, if food spills and grease spatters are not removed, they may burn onto the
surface of the cooktop and cause permanent discoloration,
Daily Charting
For norrna! soil:
1, Allow cooktop surface to cool,
2, Wipe off spills and spatters using a clean paper towel era clean cloth with warm, soapy
water,
3, if needed, use mild household cleaners or a soap-filled steel wool pad,
4, Be sure to rinse off all cleaning solutions or the porcelain may become damaged du ring
future heating,
For heavy, burned-on soit:
1, Allow cooktop surface to cool,
2, Use a soap filled scouring pad with warm water or cover heavily soiled spots with a
solution of clear water and ammonia, Scour gently, Rinse and wipe dr}, with a clean
cloth,
models)
Do not use a
cooktop cleaner on a hot cooktop,
The fumes can be hazardous to
your health, and can chemically
damage the cooking surface,
Before cleaning
the surface cooktop, be sure the
controls are turned to OFF and
the cooktop is cook
DO NOT use
oommereia_ oven e_eanere on
the exterior surfaces including
rangetop and door frame,
SURFACES CLEANING AGENTS INSTRUCTIONS
Mild cleaners or soap- Use a damp sponge or damp-
filled steel wool pads, ened soap pad, rinse and dry,
Porcelain enamel
(cooktop, surface
under cooktop)
Broil mnsert
Control Panel
Hot, soapy water or
cleaner cream,
Use a clean soapy, dampened
cloth or paper towel, remove soii
and dry, Do not use abrasive
products,
Care and Cleaning of Stainless Steel (somemodels)
Some models are equipped with stainless steel exterior parts, Special care and
cleaning are required for maintaining the appearance of stainless parts, Please
refer to the table provided at the beginning of the Genera! Care & Cteaning
section,
12
Genera[ Care & Cleaning
Sealed Burner
To Clean the Burner Grates, Contoured Burner Skirts, Burner Cap and Burner Head
The burner grates, contoured burner skirts, burner caps and burner head shouUdbe routineUycUeaned,Keeping the burner ports
clean wiil prevent improper ignition and an uneven flame, See instructions below,
To Cban the Burner Grates
Be sure burners and grates are coo[ before you place your hand, a pothoider, cleaning
cloths or other material on them, The cast iron burner grates can be washed in hot soapy
water, Rinse thoroughly and dry the grates with a cloth; don't put them onthe cooktop while
still wet, Be sure the grates are positioned securely over the burners,
To remove burned on food, place the grates in a covered container or plastic bag, Add 1/
4 cup ammonia and soak forSOminutes, Wash, rinse well and dry, An abrasive cleaner can
be used for stubborn stains, Burner grate can appear in
To Clean the Contoured Burner Skirts
The burner skirts are attached to the cooktop and are not removable, The burner skirts forms a recessed weil area located
around each burner unit, if spill occurs in one of the well areas, turn off burner and blot up spill with an absorbent cloth, Rinse
with a clean, damp cloth and wipe dry,
Burner Cap
Sealed Burner
To Clean the Burner Cap
Remove burner cap, Use soap=filled pad or mild abrasive cleanser to clean
burner caps, ifnecessary, cover stubborn spots with an ammonia=soaked paper
towel for 30 minutes, Rub gentlywith a mixture of clean water and vinegar, Wipe
dry, Remove all cleaners orthe porcelain may become damaged during future
heating,
To Clean the Removable Burner Head and Gas Opening (some models)
The ports (or slots) around the burner head must be routinely cleaned, Use a
small-gauge wire or needle to clean small slots or hobs,
Note: if the electrode is damaged or broken, the surface burner wili not light
because it will not spark, Manual lighting with a match is still possible,
For proper flow of gas and ignition of the burner - DO NOT ALLOW SPILLS,
FOOD, CLEANING AGENTS OR ANY OTHER MATERIAL TO ENTER THE
GAS OPENING TUBE, Gas must flow freely through the small hob in the brass
orifice forthe burners to light properly, ifthe gas opening orifice becomes soiled
or clogged, use a small=gauge or needle to clean, ALWAYS keep the burner cap
in place whenever a surface burner is in use,
To Replace the Burner Head and the Burner Cap
Make sure the pieces are thoroughly dry before placing back,
1, Replace burner head and burner cap in their places, Make sure each burner
cap and burner head are properly aligned and leveled,
2, Replacethe burnergrate,
3, Turn the burner on to determine if it lights, if the burner does not light after
cleaning, contact an authorized servicer, Do not service the sealed burner
ii................
13
Before You Call
Solutions to Common Probteme
Befere you call for service, review this Hst, it may save you time and expense, The HstincUudescommon occurrences
that are not the resuUtof defective workmanship or materiaUs in this appliance,
OCCURRENCE POSSIBLE CAUSEiSOLUTmON
Surface burners do not light. Surface ControUknob has not been compbteUy turned to LUTE,Push in and turn
the Surface ControU knob to LUTEuntil burner ignites and then turn controUto
desired flame size,
Be sure gas suppUyvaUveis open,
Gas-air mixture needs a straight Hneto travel, Be sure burner is properly seated
in its support (models with open burners only),
Burner ports or slots are clogged, With the burner off, use a smalPgauge wire or
needle to clean ports or slots,
Power cord is disconnected from outlet (electric ignition models), Be sure cord is
plugged securely into outlet,
Electrical power outage (electric ignition models), Burners can be lit manually,
See Setting Surface Controls in this Use & Care Guide,
Surface burner flame burns haJfway
around.
Burner ports or slots are clogged, With the burner off, clean ports with a smalF
gauge wire or needle to clean ports or slots,
Moisture is present after cleaning, Lightly fan the flame and allow burner to operate
until flame is full, To avoid this occurence dry the burners thoroughly following
instructions under Genera! Care & Cleaning,
Surface burner ftame is orange. Dust particles in main line, Allow the burner to operate a few minutes until flame
turns blue,
in coastal areas, a slightly orange flame is unavoidable due to salt air,
14
Notes
15
Your Home
IIIIIIIIZ '"'"'"'"'"'"
............... [[[[[[[[[[[[[[[[[[
iiiiiiiiiiiiiii:i For repair-in your home-of all major brand appliances, iiiiiiiiiiiiiiiiii
iiiiiiiiiiiiiil [[[[[[[[[[[[[[[[[[
iiiiiiiiiiiiiii:i Hawnand garden equipment, or heating and cooling systems, iiiiiiiiiiiiiiiiii
iiiiiiiiiiiiiil [[[[[[[[[[[[[[[[[[
iiiiiiiiiiiiiii:i no matter who made it, no matter who sold it! iiiiiiiiiiiiiiiiii
iiiiiiiiiiiiii_ iiiiiiiiiiiiiiiiii
iiiiiiiiiiiiiii:i Forthe replacement parts, accessories and iiiiiiiiiiiiiiiiii
iiiiiiiiiiiiiii:i owner'smanualsthatyou needtodo-lt-yourselL iiiiiiiiiiiiiiiiii
iiiiiiiiiiiiiil [[[[[[[[[[[[[[[[[[
iiiiiiiiiiiiiii:i For Sears professional instaHation of home appliances iiiiiiiiiiiiiiiiii
iiiiiiiiiiiiiil [[[[[[[[[[[[[[[[[[
iiiiiiiiiiiiiii:i and items like garage door openers and water heaters, iiiiiiiiiiiiiiiiii
iiiiiiiiiiiiii_ iiiiiiiiiiiiiiiiii
iiiiiiiiiiiiiii:i lo800o4-MYoHOME ® (1-800o469-4663) iiiiiiiiiiiiiiiiii
iiiiiiiiiiiiiil [[[[[[[[[[[[[[[[[[
iiiiiiiiiiiiiii:i Call anytime, day or night(U.S.A, and Canada) iiiiiiiiiiiiiiiiii
iiiiiiiiiiiiiil [[[[[[[[[[[[[[[[[[
iiiiiiiiiiiiiii:i www.sears.com www.sears.ca iiiiiiiiiiiiiiiiii
iiiiiiiiiiiiiil ..................... [[[[[[[[[[[[[[[[[[
............... HHHHHHHHH
:iiii Our Home iiiiiiiiiiiiiiiiii
For repair of carry-in items like vacuums, lawn equipment, iiiiiiiiiiiiiiiiii
................. and electronics, calHor go on-line for the Hocatlon of your nearest iiiiiiiiiiiiiiiiii
...... IIIIIIIIZ
iiiiiiiiiiiiiii:: Sears Parts & Repair Center. iiiiiiiiiiiiiiii
................ HHHHHHH_
iiiiiiiiiiiiiill 1-800-488-1222 iiiiiiiiiiiiiiii
............... [[[[[[[[[[[[[[[i
iiiiiiiiiiiiiii:i Callanytime, dayornight(U.S.A, only) iiiiiiiiiiiiiiii
................ HHHHHHH_
iiiiiiiiiiiiii!_ www.sears.com iiiiiiiiiiiiiiii
iiiiiiiiiiiiiiiiiiiiiiiiiiiiill................................................... iiiiiiiiiiiiiiii
Para pedir servicio de reparacidn Au Canada pour service en frangais:
a domicilio, y para ordenar p[ezas: 1-800-LE-FOYE_ Me
1-888oSUoHOGAR sM (i-800-533-e937)
..... <1-888-784-6,27t www.soa,s.ca
SM
® Registered Trademark / "TMTrademark / Service Mark of Sears, Roebuck and Co.
® Mama Registrada / TM Mama de Fabrica / sM Mama de Servicio de Sears, Roebuck and Co.
_D
MCMarque de commerce / Marque ddposde de Sears, Roebuck and Co.
© Sears, Roebuck and Co.
®
Use & Care Guide
P
Manual del Usuario
Models, Modelos 790. 3223-,., 3224:b"
.,. = color number, nL)mero de color
Sears Roebuck and Co., Hoffman Estates, {L 60179 U.S.A.
www.sears.eom
P/N 318200669 Rev. A (0407)
TabJa de Materias
Garantia de UapUanchade cocinar .................................... 18
Registro deUproducto ....................................................... 18
Ubbaci6n de UapUacade serb .......................................... 18
UMPORTANTES UNSTRUCCUONESDE SEGURUDAD, 19o21
Acuerdo de protecci6n ..................................................... 22
Unstrucciones para Uapuesta a tierra ................................ 23
Conversi6n aUgas propano/Hcuado ................................... 23
Cocinando con UapUanchade cocina ................................ 24
Ajuste de bs controbs Superiores .............................. 25-27
Cuidado y Limpbza GeneraU ....................................... 28°30
Limpbza de Uasdiferentes partes de UapUanchade
cocinar ........................................................................ 28
Unstrucciones para Hmpiar Uacocina en porceUana
(aUgunosmodebs) ....................................................... 29
Cuidado y Limpieza de Acero Inoxidable (algunos
modelos) ..................................................................... 29
Modelos con quemadores sellados ............................. 30
Antes de Ilamar ................................................................ 31
Servicio Sears ................................................................. 32
Registro Producto
En el espacio a continuaci6n, ingrese la fecha de compra, el
modelo y el nOmero de serie de su producto, Encontrara el
modelo y el nOmero de serie impresos en la placa de serie,
Esta placa de serie est,. ubicada sobre la cocina, Vea el
pie de esta p6.gina donde se describe la ubicaci6n de la
placa de serie,
No, de Modelo 790.
No, de Serie
Fecha de Compra
Conserve estas instrucciones y su recibo de compra para
referencia futura,
Garantia de Plancha de Cocinar
GARANTIA COMPLETA DE UN ANO PARATODAS LAS PIEZAS
Si dentro de un aFiodesde la fecha de instalaci6n, alguna de las piezas no funciona en forma adecuada debido a un defecto de
material o fabricaci6n, Sears la reemplazar_, o reparar_., a nuestra opci6n, gratuitamente.
Si este producto se usa para otros prop6sitos que no sean los normales del hogar, la garantia anterior es s61ov_.lidadurante 90
dias,
EL SERVICIO BAJO LA GARANTIA ESTA DISPONIBLE PONIENDOSE EN CONTACTO SEARS AL 1-888-SU-HOGAR sM,
Esta garantia le otorga ciertos derechos legales especificos y usted tambien puede tenet otros derechos que varian de un
estado a otro,
Sears Roebuck and Co,, Dept, 817WA Hoffman Estates, IL 60179
Leer con detenimiento y guardar estas
instrucciones
Este blanual de Use y blantenimiento contiene instrucciones
generales de operaci6n para su electrodom6stico e
informaci6n sobre las funciones para los diversos modelos.
Su producto puede no tenet todas las funciones descritas.
Los graficos que se incluyen son s61orepresentativos. Los
gr_.ficos de su electrodom6stico pueden no set identicos a
los que se muestran. Se debe usar el sentido comOn y set
cauteloso cuado se instala, usa y mantiene cualquier
dispositivo.
Ubicaci6n de la placa de eerie.
Encontrar_. el modelo y el nOmero de serie imprimado en la
placa de serie, La placa de serie esta ubicada bajo la
Yea la ilustraci6n para la ubicaci6n exacta. Aseg0rese de
tomar nota del n0mero de serie para futura referencia (vea
aqui arriba, Registro del Product@.
La placa de eerie
eet& ubicada bajo
ta homilta.
18
lmportantes lnstrucciones de Seguridad
Lea todas _as instrucciones antes de utiHzar e_aparato
Guarde estas instrucciones Isara futura consu_taciSn
Este manual contiene importantes mensajes de seguridad, Simpre lea y obedezca todo mensaje de seguridad,
!ndica una situaci6n de pe!igro inrninente, !a cual de no ser evitada puede ocasionar heddas !eyes o
da_ios al nroducto solamente,
Si no se sigue e×actamente _a informaci6n que aparece en este manual
puede provocarse un incendio o una e×p_osi6n, con _o que resu_tar_an daSos a _a
propiedad, _esiones persona_es o muerte,
PARA SU SEGURIDAD:
-- No almacene o use gasolina ni otros vapores o _quidos inflamab_es junto a
este aparato emectrodom_stico ni de cua_quier otto.
-- QUE HACER Si HUELE GAS:
* No encienda ningQn aparato e_ectrodom_stico.
* No toque ningQn interruptor em_ctrico; no use ningQn te_fono en su edificio.
* Uamedeinmediatoasuproveedordegasdesde_acasadea_g(_nvecino°Siga_asinstrucciones
que _ed_ e_proveedor de gas.
* Si usted no puede ponerse en contacto con su proveedor de gas, Hame a_departamento de
bomberos°
-- Tanto _ainsta_aci6n como e_servicio tienen que quedar a cargo de un insta_ador profesionaL
un t_cnico o e_proveedor de gas.
o Quite todas las cintas y todo el embalaje antes de usar
ta estufa. Despues de haber desempacado la cubierta,
destruya todo cart6n de embalaje y 1asbolsas pl_sticas
despu_s dedesempacar la estufa. Nunca permita quelos
ni_hosjueguen con el material de embalaje, No retire la placa
del nQmero de serie fijada sobre la estufa,
Servicio pot parte deJ usuario--No repare ni
reemplace ninguna parte deJaparato a menos que Jos
manuales as_ to recomienden. Solamente un tecnico
calificado puede ocuparse de todos los demas servicios;
asise reducirA el riesgo de bsiones personabs y dedaSar
la estufa,
instalaci6n correcta--AsegQrese que un t_cnico
caJificado conecte e instaJe su aparato correctamente y
de acuerdo con la Qttima edici6n del c6digo nacionaJ
de gas ANSi Z223.1, o en Canad_ CAN/CGA B149.1 y
CAN/CGA B149.2, as_ como _a Q_tima edici6n de_
C6digo Nacionai de E_ectricidad ANSi/NFPA No. 70, o
en Canada, et CSA Norma C22.1, Canadian Electrical
CODE Part1, as_como de acuerdo con tos requisitos de
tos c6digos toca_es. Instale y/o ajuste su aparato de
acuerdo alas instrucciones impartidas en la literatura
adjunta correspondiente a esta estufa.
o Nunca modifique ni a_tere _a construcci6n de una
estufa quitando _os pane_es, e_revestimiento de tos
a_ambres ni cua_quier parte del producto.
_F__ Esca_ar, apoyarse o sentarse sobre _as
puertas o gavetas de esta estufa puede provocar
tesiones de consideraci6n. Pot otra parte, tambi_n
puede da_arse _a estufa. No permita que los ni_os se
trepen sobre la estufa o jueguen a su alrededor,
Pregunte en su concesionario per un t6cnico calificado y un
sewicio autorizado Sears, Aprenda como desconectar la
estufa del cortacircuito o de la caja de fusibles en caso de
emergencia,
19
lmportantes lnstrucciones de Seguridad
, AImacenamiento dentro del Aparato--No deben
almacenarse materialee inflamables eobre ta eetufa,
cerca de los quemadoree. Esto induye articubs de
papeL pU_.stbo y teUa, tabs come Hbros de cocina,
utensHios de pU6.stico y toaHas, asi come Uiquidos
inflamabbs. No almacene explosives, tales como latas de
aerosol, encima de la estufa. Los materiabs infiamabbs
pueden explotar ycausar incendios o da_os a la propiedad.
_.__ No almacene art_cuJos de inter_e para
toe niSoe dentro de Joearmarios eituadoe pot encirna de
ta eetufa o en eu parte posterior.
. Do not Jeave children aJone--ChHdren should not be
teft alone or unattended in the area where an appliance
is in use. They should never be allowed to sit or stand on
any part of the appliance.
o NO TOQUE LOS QUEMADORES, LAS PARRILLAS, NI
LAS AREAS CERCANAS A ESTAS. Las parrillas y sus
quemadores podrian estar calientes, aunque no est6n
fulgurantes. Las _.reas cercanas alas parrillas pueden
cabntarse Io suficiente come para causar quemaduras.
Durante y despues de su use, no toque, ni permita que
ning0n tipo de paso o tela infiamabb toquen estas _.reas
hasta que hayan tenido el tiempo necesario de enfriarse.
Entre elias se cuentan en homo de la estufa, las superficies
que se encuentran cara a la estufa.
. Pongase Ropa Adecuada--Nunca Heve pueeta ropa
euetta o prendas que cuelguen mientrae eete ueando la
estufa. No deje que suropa ni otras telas infiamabbs
entrenen contacto con superficies calientes.
V!_ Nunca use se eetufa para rnantener un
cuarto caliente ni para calentarlo.
o No vierta agua ni harina sobre fuego provocado pot
graea--Baja lae llamas con la tapa de una oHa, o con
poJvo de homear, un producto quimico eeco o un
e×tinguidor a base de eepuma.
* Cuando caliente manteca o grasa, obeerveta de cerca.
La manoteca o la grasa pueden incendiarse sise calientan
demasiado.
No caliente envaeee de comida sin antes abrirtos--La
presi6n resuttante podr_a causar et eetaHido det
envasey provocar quemaduras.
FarnHiar_cese con Jas perittae que controlan cada
homiHa. Siempre encienda las hornillas dandobs vuelta
alas perillas hasta Ibgar a la posici6n MTE. Verifique
visualmente si se ha encendido la hornilla. Enseguida,
ajuste la llama para que no rebase los bordes de los
utensilios.
Ajuete tae Hamae aJ tamaSo
adecuado--aj(leteJae de manera que no rebasen toe
bordee de toe uteneHioe. Sise usan utensilios de tamafio
demasiado pequeSo, una parte de la llama del quemador
quedar6, expuesta a contacto directo, con Iocual se podria
correr el riesgo de que se quemara la ropa. La relaci6n
adecuada entre el tama_o del utensilio y el de la llama
mejorar_, asimismo la eficacia al cocinar.
W!_ No use parriHae asadoras eobre sue
quemadoree eettadoe. Si usa parrillas asadoras sobre sus
quemadores sellados, la combusti6n ser_. incompleta y
habr6, riesgo de que se produzcan niveles de mon6xido de
carbono pot encima de las normas aceptables. Esto
representaria un peligro para su salud.
Utilice una carton de tarnaSo
apropiado-- Este aparato est,. equipado con quemadores
de diferents tamaSos. Elija utensilios con las bases
aplanadas y Io suficientemente grandes para cubrir todo el
area del quemador. Utilizar utensilios m_.spequeSos puede
exponer parte del quemador y ocasionar quemaduras de
las prendas que lleva puesta.
Limpie Ja plancha de cocina reguJarmente para
mantener todae las partee sin grasa que puede
encenderse y causar un incendio. La cubierta del
escape de ventilaci6n y los filtros de grasa deben estar
limpios. No permita que la grasa se acumub en la cubierta
o en el filtro. Los dep6sitos grasosos pueden encenderse
y causar un incendio. Cuando caliente comida bajo la
cubierta, encienda el ventilador. Consulte las
instrucciones del fabricante para la limpieza.
* Use solamente rnanoptas o agarraderas secae aJasir
utensilioe calientee--Cuando se tas pone eobre
superficies eaJientes, las manopJae, o lae agarraderas
humedae o mojadas pueden cauear quemaduras
reeultantee del vapor. No deje que dichos protectores
toquen las llamas de los quemadores. AI asir utensilios
calientes, no use toallas ni articulos de tela gruesos en
lugar de una manopla o una agarradera.
Los Mangos de los Utensilios no Deben Quedar
E×tendidos Encirna de Joe Quemadores Oue se
Encuentran en ta Supedfcie del Aparato--Para reducir
el riesgo de quemaduras, ignici6n de materiales
infiamabbs y derrames debido al contacto eventual con el
utensilio, hay que colocar su mango de tal manera que
quede volteado hacia adentro yno sobrelos quemadores.
2O
  • Page 1 1
  • Page 2 2
  • Page 3 3
  • Page 4 4
  • Page 5 5
  • Page 6 6
  • Page 7 7
  • Page 8 8
  • Page 9 9
  • Page 10 10
  • Page 11 11
  • Page 12 12
  • Page 13 13
  • Page 14 14
  • Page 15 15
  • Page 16 16
  • Page 17 17
  • Page 18 18
  • Page 19 19
  • Page 20 20
  • Page 21 21
  • Page 22 22
  • Page 23 23
  • Page 24 24
  • Page 25 25
  • Page 26 26
  • Page 27 27
  • Page 28 28
  • Page 29 29
  • Page 30 30
  • Page 31 31
  • Page 32 32

Kenmore 79032233401 Owner's manual

Category
Cookers
Type
Owner's manual

Ask a question and I''ll find the answer in the document

Finding information in a document is now easier with AI

in other languages