Page is loading ...

42" HIGH SPEED
LAWNSWEEPER
Model No's. 486.24266
Owner's Manual
CAUTION:
Before using this product, read
this manual and follow all Safety
Rules and Operating Instructions.
• Safety
• Assembly
• Operation
• Maintenance
• Parts
PRINTEDINU.S.A.
FORMNO.41750(10/02/14)
SearsBrandManagementCorporation,HoffmanEstates,IL60179U.S.A.
www.craftsman.com
®
STOP
DO NOT RETURN TO STORE
For Missing Parts or Assembly
Questions Call 1-866-576-8388
Want more information
or assembly tips?
Scan for Video
Instruction Guide.

2
Anypowerequipmentcancauseinjuryifoperatedimproperlyoriftheuserdoesnotunderstandhowtooperatetheequipment.
Exercisecautionatalltimes,whenusingpowerequipment.
1. Read the vehicle and sweeper owners manuals and
knowhowtooperateyourvehicleandsweeperbefore
usingthissweeperattachment.Alwaysinstructother
usersbeforetheyoperatethesweeper.
2. Donotpermitchildrentooperatesweeper.
3. Donotpermitanyonetorideonsweeper.
4. Neverattachthehopperropetoanypartofyourbody
orclothing!Neverholdontotheropewhiletowingthe
sweeper!Attachtheropetothetowingvehicletokeep
it away from wheels and rotating parts.
5. Operate the sweeper at reduced speed on rough
terrain, near ditches and on hillsides to prevent loss
of control.
6. Vehiclebrakingandstabilitymaybeaffectedwith
theattachmentofthissweeper.Donotllsweeper
tomaximumcapacitywithoutcheckingthecapability
of the towing vehicle to safely pull and stop with the
sweeper attached. Stay off of steep slopes.
7. Stop and inspect vehicle and sweeper for damage
afterstrikinganobject.Repairanydamagebefore
continuing operation.
8. Keepsweeperawayfromre.Excessiveheatcan
damagethebrushesandhopperbagandcould
causethebaganditscontentstoburn.
9. Before storing the sweeper, always empty the hopper
bagtoavoidspontaneouscombustion.
10. Followmaintenanceandlubricationinstructionsas
outlined in the maintenance section of this manual.
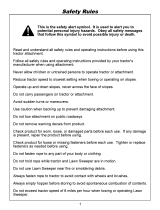
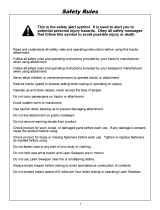
Lookforthissymboltopointoutimportantsafetyprecautions.Itmeans—Attention!!
Become alert!! Your safety is involved.
MaintenanceSchedule .................................................. 13
Storage .......................................................................... 13
ServiceandAdjustments ............................................... 14
Troubleshooting ............................................................. 14
RepairPartsIllustration ................................................. 15
RepairPartsList ............................................................ 16
PartsOrdering ...............................................BACKPAGE
Safety Rules ....................................................................1
Warranty ..........................................................................2
AccessoriesandAttachments..........................................3
CartonContents ..............................................................3
FullSizeHardwareChart .................................................4
SweeperAssemblyInstructions ....................................... 5
HopperAssemblyInstructions .........................................7
Operation ....................................................................... 12
MODELNUMBER: 486.24266
SERIALNUMBER: ____________________
DATEOFPURCHASE: ____________________
WARRANTY
TABLE OF CONTENTS
Themodelandserialnumberswillbefoundonadecal
attached to the lawnsweeper.
Youshouldrecordboththeserialnumberandthedateof
purchase and keep in a safe place for future reference.
SAFETY
CRAFTSMAN LIMITED WARRANTY
FORONEYEARfromthedateofsalethisproductiswarrantedagainstdefectsinmaterialorworkmanship.
WITHPROOFOFSALEadefectiveproductwillbereplacedfreeofcharge.
Forwarrantycoveragedetailstoobtainfreereplacement,visitthewebpage:www.craftsman.com/warranty
Toobtainwarrantycoverage,returnadefectiveproductwithproofofsaletotheretailerfromwhichitwaspurchasedforfree
replacement.
Thiswarrantyisvoidifthisproductiseverusedwhileprovidingcommercialservicesorifrentedtoanotherperson.
Thiswarrantygivesyouspeciclegalrights,andyoumayalsohaveotherrightswhichvaryfromstatetostate.
Sears Brands Management Corporation, Hoffman Estates, IL 60179
DONOTRETURNTOSTOREforMissingPartsorAssemblyQuestions
Call1-866-576-8388AttachmentHotline

3
ACCESSORIES AND ATTACHMENTS
TheFrontMountDethatcher,Model486.24219attaches
to the lawn sweeper to help loosen and remove dead
grass and thatch from the lawn while sweeping.
These accessories were available when the unit was purchased. They are also available at most Sears retail
outlets and service centers. Most Sears stores can order repair parts for you when you provide the model
numbers of your tractor and sweeper
1
2
3
5
6
7
2
16
9
4
10
11
13
14
10
12
11
12
15
8
REF PART NO. QTY DESCRIPTION
1 – – – 1 SweeperHousingAssembly
2 49766 2 BagArmTube
3 46777 HitchTube,L.H.(LeftHand)
4 24192 1 HitchBracket
5 23687 1 HitchBracket,Bent
6 46776 1 HitchTube,R.H.(RightHand)
7 – – – 1 BrushAssembly(RightHand)
8 – – – 1 BrushAssembly(LeftHand)
REF PART NO. QTY DESCRIPTION
9 49768 1 HopperBag
10 47477 2 RearHopperTube
11 49765 2 UpperHopperTube
12 48726 2 LowerHopperTube
13 46823 1 PivotRod
14 43938 2 HopperSupportRod
15 24189 1 Bag Frame Strap
16 43737 1 Rope
CARTON CONTENTS

4
REF PART NO. QTY DESCRIPTION
A 46782 2 HexBolt,5/16-18x3"Lg.
B 43224 2 HexBolt,5/16-18x2-1/4"Lg.
C 43084 4 HexBolt,5/16-18x1-3/4"Lg.
D 43661 4 HexBolt,1/4-20x1"
E 43978 4 CurvedHeadBolt,1/4-20x1"
F 47189 8 NylockNut,1/4"
G 47810 8 NylockNut,5/16"
H 44917 2 Palnut,3/8"
HARDWARE PACKAGE CONTENTS
REF PART NO. QTY DESCRIPTION
I 23368 2 HitchSpacer,3/4"
J 46867 2 ClevisPin,1/4"x1-3/4"
K 48365 2 ClevisPin,1/4"x1-1/8"
L 48366 2 ClevisPin,3/8"x1/2"
M 43055 7 HairpinCotter,3/32"
N 23353 1 HitchPin
O 44481 2 VinylCap
A B C ED
M
N
O
J
I
SHOWN FULL SIZE
NOT SHOWN FULL SIZE
K
L
G
F
H

5
TOOLS REQUIRED FOR ASSEMBLY
(1) Hammer
(2) 7/16"Wrenches
(2) 1/2"Wrenches
ASSEMBLY
STEP 2: (SEE FIGURE 1)
• Eachbrushassemblyhasonebrushretainer
markedwitheitherredorblackink.Layoutthebrush
assembliesasshownsothatthebrushretainers
markedwithinkareinthemiddlewiththeblackone
on your right and the red one on your left.
OVERLAP BRISTLES
BRUSH RETAINER
MARKED RED
BRUSH RETAINER
MARKED BLACK
• Attachthebrushassemblywiththeblackbrush
retainertotherightendofthebrushshaftusingtwo
hexbolts(D)andnylocknuts(F).Thebrushretainer
markedwithblackinkmustbeplacedtothemiddle
of the sweeper.
STEP 1 - REMOVE PARTS FROM CARTON
• Toprotectpaintedparts,laythemoncardboardora
mat.
• Remove the sweeper housing, the loose parts and
thehardwarepackagefromthecarton.Layoutthe
partsandhardwareasshownonpages3and4.
• Placethesheetofcardboardfrominsidethecarton
onto your work surface to prevent scratching the
sweeper.
FIGURE 1
FIGURE 3
NYLOCK NUT (F)
BRUSH
RETAINER
MARKED
BLACK
OVERLAP
BRISTLES
HEX BOLT (D)
WELDED BRACE
STEP 3: (SEE FIGURE 2)
• Tipthesweeperforwardtoaccessthebrushshaft.
FIGURE 2
STEP 4: (SEE FIGURE 3)
IMPORTANT:Besuretheoverlapbristlesfaceoutwhen
abrushisrotatedtothebottomposition.

6
STEP 5: (SEE FIGURE 4)
• Attachthebrushassemblywiththeredbrushretainer
totheleftendofthebrushshaftusingtwohexbolts
(D)andnylocknuts(F).Thebrushretainermarked
withredinkmustbeplacedtothemiddle of the
sweeper.
• Turnawheeltorotatethebrushes.(Thewheels
drivethebrushesinonedirectiononly.)Theoverlap
bristlesshouldbeonthebacksideofthebrushasit
rotates.
FIGURE 4
STEP 6: (SEE FIGURES 5 AND 6)
• Thehitchtubesarestampedwitha"77L"forthe
lefttubeanda"76R"fortherighttube.Thesweeper
housingismarkedwithan"L"ontheleftwithside
andan"R"ontherightside.
• Holdthelefthitchtubeagainsttheleftsideofthe
sweepersothatthe"77L"onthetubefacesaway
fromthesweeper.Attachthehitchtubeusingtwohex
bolts(C)andnylocknuts(G).Do not tighten yet.
HEX BOLT (C)
HITCH TUBE (L.H.)
NYLOCK NUT (G)
TUBE
MARKED
“77L”
HOUSING
MARKED “L”
FIGURE 5
FIGURE 6
HEX BOLT (C)
HITCH TUBE (R.H.)
NYLOCK NUT (G)
TUBE
MARKED
“76R”
HOUSING
MARKED “R”
STEP 7: (SEE FIGURE 6)
• Holdtherighthitchtubeagainsttherightsideofthe
sweepersothatthe"76R"onthetubefacestoward
thesweeper.Attachthehitchtubeusingtwohexbolts
(C)andnylocknuts(G).Do not tighten yet.
HEX BOLT (D)
NYLOCK NUT (F)
BRUSH RETAINER
MARKED RED
STEP 8: (SEE FIGURE 7)
• Fastenthehitchtubestogetherusingtwohexbolts
(A)andnylocknuts(G).Do not tighten yet.
HEX BOLT (A)
NYLOCK NUT (G)
FIGURE 7

7
FIGURE 9
STEP 10b: (SEE FIGURE 9)
• Ifthetractorhitchis10"ormoreabovetheground,
assemblethehitchbracketsasshowningure10.
Inserttwohexbolts(B)throughthebrackets,with
therearhexboltbetweenthecrossboltsinthehitch
tubes.Securethehexbolts(B)withtwonylocknuts
(G).Do not tighten yet.
• Assemblethetwospacers(I)ontothehitchpin(N)
andsecurethepinwiththehairpincotter(M).
FIGURE 8
STEP 10a: (SEE FIGURE 8)
• Ifthetractorhitchislessthan10"abovetheground,
assemblethehitchbracketsasshowningure9.
Inserttwohexbolts(B)throughthebrackets,with
therearhexboltbetweenthecrossboltsinthehitch
tubes.Securethehexbolts(B)withtwonylocknuts
(G).Do not tighten yet.
• Assemblethetwospacers(I)ontothehitchpin(N)
andsecurethepinwiththehairpincotter(M).
STEP 9
• Usethemarkalongthesideofthispagetomeasure
theheightofthetractorhitch.Themarkis10"from
thebottomofthepage.Ifthetractorhitchislessthan
10"abovetheground,gotoSTEP 10a. If the tractor
hitchis10"ormoreabovetheground,gotoSTEP 10b.
STEP 11
• Tightenthefourboltsassembledinsteps6and7.
• Tightenthetwoboltsassembledinstep9.
• Tightenthetwoboltsassembledinstep10aor10b.
10"
NYLOCK NUTS (G)
HITCH BRACKET
ASSEMBLY
BENT HITCH
BRACKET
HEX BOLTS (B)
HITCH PIN (N)
HAIRPIN COTTER (M)
SPACERS (I)
NYLOCK NUTS (G)
BENT HITCH
BRACKET
HITCH
BRACKET
ASSEMBLY
HEX BOLTS (B)
SPACERS (I)
HAIRPIN
COTTER (M)
HITCH PIN (N)

8
ASSEMBLY OF HOPPER BAG
STEP 12: (SEE FIGURE 10)
• Fittheendsofthetwoupperhoppertubesintothe
endsofarearhoppertube.Aligntheholesinthe
endsofthetubesandsecuretheminplaceusingtwo
curvedheadbolts(E)andnylocknuts(F).
• Fittheendsofthetwolowerhoppertubesintothe
endsofarearhoppertube.Aligntheholesinthe
endsofthetubesandsecuretheminplaceusingtwo
curvedheadbolts(E)andnylocknuts(F).
NOTE:Eithersideoftherearhoppertubecanfaceup.
FIGURE 10
FIGURE 11
UPPER
HOPPER
TUBE
HOPPER
BAG
BOTTOM
STITCHED SLEEVE
FIGURE 12
LOWER HOPPER TUBE
HOPPER BAG
BOTTOM
UPPER HOPPER
TUBE
CLEVIS PIN (L)
HAIR COTTER
PIN (M)
UPPER
HOPPER
TUBE
NYLOCK
NUT (F)
CURVED HEAD
BOLT (E)
REAR
HOPPER
TUBE
LOWER
HOPPER TUBE
REAR
HOPPER
TUBE
NYLOCK
NUT (F)
CURVED HEAD
BOLT (E)
STEP 13: (SEE FIGURE 11)
• Unfoldthehopperbag,reversethefoldofthemesh
windscreenandthenlaythebagoutatwiththe
wind screen on top.
• Inserttheendsoftheassembledupperhoppertubes
down through the stitched sleeves in the sides of the
hopperbagandthenslidethetubesbackunderneath
the wind screen.
STEP 14: (SEE FIGURE 12)
• Placetheassembledlowerhoppertubesintothe
bottomofthehopperbagandthenslidethetubesto
thebackofthebag.
• Attachtheendsofthelowerhoppertubestothe
insideoftheupperhoppertubesusingtwoclevis
pins(L)insertedfromtheinside,andtwohaircotter
pins(M).

9
STEP 17: (SEE FIGURE 15)
• Foldthebagapsaroundthelowerhoppertubesand
attachtothebagbottomusingthesnaps.
FIGURE 15
STEP 15: (SEE FIGURE 13)
• Insertthebagframestrapintothestitchedsleeveat
thefrontedgeofthebagbottom.
FIGURE 14
SNAP
FLAP
BAG FRAME STRAP
STITCHED
SLEEVE
STEP 16: (SEE FIGURE 14)
• Assemblethebagframestraptotheholesinthe
lowerhoppertubesusingtwoclevispins(K)andhair
cotterpins(M).
FIGURE 13
STEP 18: (FIGURE 16)
IMPORTANT: Do notoverbendthesupportrods
duringthefollowingstep.Overbendingwillcausethe
steel rods to loose supporting tension.
• Tipthehopperontoit'sbacktoassemblethetwo
hoppersupportrods.Placetheendsofeachrodinto
theupperandlowerrearhoppertubes,bendingthe
rodjustenoughtotintotheholesinthetubes.
SUPPORT
RODS
FIGURE 16
CLEVIS PIN (K)
HAIR COTTER
PIN (M)
BAG FRAME STRAP

10
FIGURE 18
STEP 19: (SEE FIGURE 17)
• Slide the end of the pivot rod through the upper
hoppertube.Placeabagarmtubeontotherod.Slide
the rod through the stitched sleeve at the front edge
ofthewindscreen,andthenplaceanotherbagarm
tubeontotherod.Slidetherodthroughtheother
upperhoppertube.
STEP 22: (SEE FIGURE 20)
• Toattachthehopperbagtothesweeper,slidethe
endsofthebagarmtubesintotheendsofthehitch
tubesandsecurewithtwoclevispins(J)andhairpin
cotters(M).
STEP 21: (SEE FIGURE 19)
• Secure the rope to the center of the upper rear
hoppertube.
FIGURE 20
STEP 20: (SEE FIGURE 18)
• Assembleavinylcap(O)ontoeachbagarmtube.
• Assembletwopalnuts(H)ontotheendsofthepivot
rod using a hammer.
HINT: Toeaseassemblyofthepalnuts,placethebag
onitssideonasolidsurface.Withthebottomendofthe
pivot rod against the surface, tap a palnut onto the top
end of the rod. Repeat for other end of rod.
FIGURE 17
FIGURE 19
BAG ARM TUBE
HOPPER BAG
PIVOT ROD
MOUNTING CLAMP MOUNTING CLAMP
WIND SCREEN WIND SCREEN
MOUNTING CLAMP MOUNTING CLAMP
PALNUT (H)
CAP (O)
CLEVIS PIN (J)
BAG ARM TUBE
HAIRPIN
COTTER (M)

11
ATTACHING SWEEPER HITCH TO TRACTOR
BLACK LINE IS TRACTOR HITCH
HITCH BRACKET MOUNTED
BELOW HITCH TUBES
BLACK LINE IS TRACTOR HITCH
HITCH BRACKET MOUNTED
ABOVE HITCH TUBES
FIGURE 21
• Placethetractorandsweeperonaatlevelsurface.
• Setthesweeperheightadjustmenthandletoabout
themiddleofitsadjustmentrange.
• Attachthesweeperhitchtothetractorhitch,
arrangingthe3/4"spacersinoneofsixpossible
combinationsasshowninGROUPAandGROUPB
diagramsbelow.
IMPORTANT:Toobtainthebestperformancefromyour
sweeper,arrangethespacerssothatthesweeperbagis
approximatelylevelwiththegroundandapproximately5"to
7"offthegroundasshowningure21.
GROUP "B" - For vehicles with hitches
having 10" to 13" ground clearance.
GROUP "A" - For vehicles with hitches
having 8" to 10" ground clearance.
APPROXIMATELY LEVEL
(5" to 7" FROM SURFACE)
BRUSH HEIGHT ADJUSTED
APPROXIMATELY MID-WAY

12
KNOW YOUR SWEEPER
CAUTION:Keepsweeperawayfromre.
Excessiveheatcandamagethebrushesand
hopperbagandcouldcausethebagandits
contentstoburn.
CAUTION: Never attach the hopper rope
toanypartofyourbodyorclothing!Never
hold onto the rope while towing the sweeper!
Attach the rope to the towing vehicle to keep
it away from wheels and rotating parts.
DUMPING OF SWEEPER
• Yoursweepercanbedumpedeasilywithoutgetting
off of the rider or tractor. Simply pull the rope forward
todumpthehopper.Alwaysemptyhopperaftereach
use.
BRUSH HEIGHT ADJUSTMENT
• Toadjustyoursweeperbrushestothebestoperating
height,loosenthewingknobandpushdownonthe
heightadjustmenthandletoraisethebrush,orpush
uponthehandletolowerthebrush.Bestadjustment
iswhenthebrushsettingis1/2"downintothegrass.
Alwaysmowthegrasstoanevenheightbefore
sweeping.
SWEEPING SPEED
• Do not exceed 6 m.p.h.Tryastartingspeedof
approximately3m.p.h.(thirdgearonmosttractors).
Dependingontheconditions,itmaybenecessaryto
adjustthesweepingspeedinordertoachievebest
results.
OPERATION
HopperBag Collectsgrassclippings,leavesanddebris.
HopperRope Permitsdumpingofhopperbagfromdriver'sseat.
Windscreen Helpspreventcollectedmaterialfrombeingblownoutofhopperbag.
BagArmTubes Connectsthehopperbagtothesweeperhousing.
PivotRod Allowshopperbagtotiltforwardtodumpmaterial.
HeightAdjustmentHandle Adjuststheoperatingheightofthesweeper.
HitchBracket Connectsthesweepertothetowingvehicle.Adjustsforvariousheighttractorhitches.
WingKnob Tightensthewheelinpositionafteradjustingheight.
HOW TO USE YOUR SWEEPER
HOPPER BAG
WINDSCREEN
BAG ARM TUBE
PIVOT ROD
HEIGHT
ADJUSTMENT
HANDLE
HITCH
BRACKETS
HOPPER
ROPE
WING KNOB
CAUTION: Maximum towing speed is 6 m.p.h.
Drivingtoofastmaydamagewheelsandbearings.

13
MAINTENANCE
MAINTENANCESCHEDULE
Fill in dates as you
complete regular service.
Checkforloosefasteners X
Checkforwornordamagedparts X X
Clean,inspect&lubricatewheelbearings X
CleanSweeper X X
Clean,inspect&lubricategears X
FIGURE 23
CLEANING
• Cleansweeperhousingwithasoftbrushorcloth.
• Cleandebrisfromhopperbagwithabrushorbroom.
• Remove any material which has wrapped around
brushesorendsofbrushshaft.
CUSTOMER RESPONSIBILITIES
• Read and follow the maintenance schedule and the
procedures listed in the maintenance section.
Before each use
Aftereachuse
Twiceayear
Everyyear
Before storage
ServiceDates
SCHEDULED MAINTENANCE
• Cleanthesweeperaftereachuse.
• Inspectforwornordamagedparts,suchasbrushes
and wheels.
• Everyyear,removethewheelsandcleanthegear
teethandtheteethonthebacksideofthewheel.
Aftercleaning,lubricatetheaxle,andtheteethon
the gears and the wheel with a light coat of grease.
Toremovetherightwheel,unscrewthewingknob
andremovethewheelandwashers.Toremovethe
leftwheel,popoffthehubcapusingascrewdriver
andremovewheelalongwiththebolt,washers,step
spacerandnut.Seegures22and23.
FIGURE 22
• Cleanthesweeperandhopperbagthoroughlytohelp
prevent rust and mildew.
• Tocollapsethehopperbagforstorage,removethe
two hopper support rods from the rear of the hopper.
• Store in a dry area.
CAUTION: Before storing the
sweeper,alwaysemptythehopperbagto
avoidspontaneouscombustion.
STORAGE
WASHER
WING KNOB
REMOVING RIGHT SIDE WHEEL
BOLT
WASHER
HUB
CAP
WASHER
STEP
SPACER
NYLOCK
NUT
REMOVING LEFT SIDE WHEEL

14
GEAR AND PAWL SERVICE
IMPORTANT: Do notremovebothwheelsatthesame
timetoavoidmixingofparts.(TheR.H.andL.H.pinion
gearsarenotinterchangeable.)Make notes on the
positionofwashersandsnapringsduringdisassembly.
• Remove one wheel at a time, following the instructions
intheMAINTENANCEsection.
• Remove the retaining rings which hold the gears on the
brushshaftandthejackshaft.
• Remove the pinion gear, washer and drive pin from the
endofthebrushshaft.(Thedrivepinmayfalloutofthe
brushshaftwhenthepiniongearisremoved.)
• Removetheidlergearandwashersfromthejackshaft.
• Cleanallparts.
• Replace worn parts.
• Toreassemble,lightlygreasethejackshaftandthe
brushshaft.Insertthepinintotheholeinthebrush
shaft.Makesurethepinstaysintheshaft.
• Lightlygreasetheteethonbothgearsandllthe
recessofthepiniongearwithgrease.Assembleboth
gearsbackontotheshafts.
• Lightlygreasetheaxleandthenreassemblethewheel
ontoit.Thebrushesshouldrotateonly during forward
rotationofthewheel.Ifthebrushesaredriven(rotated)
bybothforwardandreverserotationofthewheel,the
drivepinisjamminginthepiniongear.Disassemble
andcleanandlubricatethedrivepinandpiniongear.
BRUSH REPLACEMENT
NOTE: Brushreplacementshouldbedoneonebrushat
a time.
• Removethehopperbagfromthesweeper.
• Loosenthehexboltsandlocknutsontwosingle
brushretainerswhichclamponebrushtothedouble
brushretainers.Do Not loosenorremovethebolts
whichfastenthedoublebrushretainerstothebrush
shaft.Seegure24.
• Slidethebrushoutoftheretainers,notingonwhich
sideofthebrushthebristlesoverlap.Seegure24.
• Installnewbrush,makingsurethebristlesoverlapon
thesamesideofthebrushasbefore.Seegure24.
FIGURE 25
BRUSH ROTATION
BRUSH ROTATION
OVERLAP
BRISTLES
OVERLAP
BRISTLES
SINGLE
BRUSH
RETAINERS
DOUBLE BRUSH RETAINER
BRUSH
SHAFT
FIGURE 24
• Brushessettoolow.
• Brushesarejammed
• Wheelsarejammed.
Wheels skid when sweeping. • Adjustheighttillbrushesare1/2"
down into grass.
• Stopsweeper.Removeobstruction.
• Remove one wheel at a time to check
forobstructionordamage.Referto
ServiceandAdjustmentssection.
SERVICE AND ADJUSTMENTS
TROUBLESHOOTING
IDLER
GEAR
WASHER WASHER
RETAINING
RING
WASHER
PINION
GEAR
DRIVE
PIN

15
NOTES

16
REPAIR PARTS
486.24266 42" HIGH SPEED LAWNSWEEPER
1
2
3
4
5
6
7
8
10
11
12
14
13
13
15
16
17
21
20
20
19
18
22
23
26
25
26
22
27
29
28
27
30
32
31
33
41
33
33
42
43
33
41
33
33
41
33
41
44
46
46
46
46
46
46
46
47
47
45
48
48
49
49
51
53
54
54
51
55
55
56
56
59
58
52
52
60
61
50
17
50
17
57
57
7
37
38
19
39
40
35
34
36
Toorderreplacementparts,callSearsPartsDirect1-800-252-1698orgotowww.searspartsdirect.com

17
ITEM PART NO. QTY DESCRIPTION
1 67105 1 HousingAssembly
2 68202 1 HeightAdjustmentTubeAss'y.
3 46776 1 HitchTube,R.H.
4 46777 1 HitchTube,L.H.
5 24192 1 Bracket,Hitch(Straight)
6 23687 1 Bracket,Hitch
7 41436 2 Wheel&TireAss'y.(withbearings)
8 41570 2 DustCover
9 67103 1 WheelDriveAssembly,L.H.(Not
Shown)
10 67102 1 WheelDriveAssembly,R.H.
11 27235 1 Brush Shaft
12 46780 4 Brush,42"
13 23581 8 Retainer,Brush(Single)
14 23580 4 Retainer,Brush(Double)
15 43661 4 Bolt,Hex1/4-20x1"Lg.
16 43012 8 Bolt,Hex1/4-20x3/4"Lg.
17 47189 16 Nut,Nylock1/4-20Thread
18 43720 1 WingKnob
19 141 2 Washer,.378x1.25x.061
20 45088 4 Wheel Bearing
21 44008 2 Washer,1-1/8"x.78"x.025"
22 1650-1 4 Ring,Retaining(E-type)
23 48652 1 Gear,PinionR.H.
24 48651 1 Gear,PinionL.H.(notshown)
25 47046 2 DowelPin(Drive)
26 R19212016 4 Washer,.656x1.25x.025
27 44137 4 Washer,1/2"x1"x.02"
28 41434 2 IdlerGear,27T.
29 23520 2 Spacer,.660IDx.250ODx.25
30 44232 2 Ball Bearing
31 41437 2 Bearing Retainer
ITEM PART NO. QTY DESCRIPTION
32 43182 4 Bolt,Hex5/16-18x3/4"Lg.
33 47810 12 Nut,Nylock5/16-18Thread
34 27234 1 Retainer,CarriageBolt
35 42425 1 Bolt,Carriage5/16-18x3-1/2"
36 43943 1 Grip,HeightAdjust
37 41017 1 HubCap
38 43932 1 Bolt,Hex3/8-24x3-1/2"Lg.
39 26538 1 Spacer, Step
40 1038 1 Nut,Nylock3/8-24Thread
41 43084 4 Bolt,Hex5/16-18x1-3/4"Lg.
42 46782 2 Bolt,Hex5/16-18x3"Lg.
43 43224 2 Bolt,Hex5/16-18x2-1/4"Lg.
44 23353 1 Pin,Hitch
45 23368 2 Tube,HitchSpacer
46 43055 7 HairpinCotter,3/32"#3
47 46867 2 Pin,Clevis1/4"x1-1/2"Lg.
48 48365 2 Pin,Clevis1/4"x1-1/8"
49 48366 2 Pin,Clevis3/8"x1/2"
50 43978 4 CurvedHeadBolt,1/4-20x1"
51 44917 2 Palnut,3/8"
52 44481 2 Cap,Vinyl
53 46823 1 PivotRod,HopperBag
54 49766 2 Tube,BagArm
55 47477 2 Tube,RearHopperFrame
56 48726 2 Tube,LowerHopperFrame
57 49765 2 Tube,UpperHopperFrame
58 43938 2 HopperSupportRod
59 24189 1 Strap, Bag Frame
60 41751 1 HopperBag
61 43737 1 HopperRope
41750 1 OwnersManual
REPAIR PARTS
486.24266 42" HIGH SPEED LAWNSWEEPER
Toorderreplacementparts,callSearsPartsDirect1-800-252-1698orgotowww.searspartsdirect.com

18

19

® Registered Trademark /
TM
Trademark of KCD IP, LLC in the United States, or Sears Brands, LLC in other countries
® Marca Registrada /
TM
Marca de Fábrica de KCD IP, LLC en Estados Unidos, o Sears Brands, LLC in otros países
Product questions or problems?
1-888-331-4569
Customer Care Hot Line
Get answers to questions, troubleshoot problems,
order parts, or schedule repair service.
Para respuestas a preguntas o problemas, y ordenar
piezas o pedir servicio para la reparación de su equipo.
To help us help you, register your product at www.craftsman.com/registration
Para poderte ayudar mejor, registra tu producto en www.craftsman.com/registration
Join the Craftsman Club today!
Receive exclusive member benefits including special pricing and offers,
project sharing, expert advice, and SHOP YOUR WAY REWARDS!
Como miembro exclusivo, recibe diversos beneficios como ofertas, precios especiales, proyectos
nuevos, consejos de expertos y nuestro programa de puntos SHOP YOUR WAY REWARDS!
/