Page is loading ...

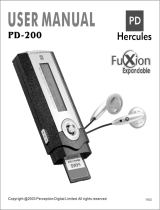
iFP-1000 Series
http://www.iRiver.com
Hardware Instruction Manual
Thank you for your purchase.
Please read this manual carefully
before using your new player.
http://www.iRiver.com
Digital Audio Player/recorder/Camera/FM Tuner
Model iFP-1000 Series

Getting started
Locating the controls
PC software installation
Basic operation
Convenient Functions
Additional information
1
2
3
4
5
6
ContentsFFC Certification
This manual covers the installation and use of the player hardware. For details regarding
the software operation including transferring music to the player, please see the Software
Instruction Manual.
THIS DEVICE COMPLIES WITH PART 15 OF THE FCC RULES. OPERATION IS
SUBJECT TO THE FOLLOWING TWO CONDITIONS:
(1) THIS DEVICE MAY NOT CAUSE HARMFUL INTERFERENCE, AND
(2) THIS DEVICE MUST ACCEPT ANY INTERFERENCE, RECEIVED, INCLUDING
INTERFERENCE THAT MAY CAUSE UNDESIRED OPERATION.
Note :
This equipment has been tested and found to comply with the limits for a Class B digital
device, pursuant to part 15 of the FCC Rules. These limits are designed to provide
reasonable protection against harmful interference in a residential installation.
This equipment generates, uses and can radiate radio frequency energy and, if not installed
and used in accordance with the instructions, may cause harmful interference to radio
communications. However, there is no guarantee that interference will not occur in a
particular installation. If this equipment does cause harmful interference to radio or television
reception, which can be determined by turning the equipment off and on, the user is
encouraged to try to correct the interference by one or more of the following measures :
- Reorient or relocate the receiving antenna.
- Increase the separation between the equipment and receiver.
- Connect the equipment into an outlet on a circuit different from that to which the receiver
is connected.
- Consult the dealer or an experienced radio/TV technician for help.
NOTE:
THE MANUFACTURER IS NOT RESPONSIBLE FOR ANY RADIO OR TV
INTERFERENCE CAUSED BY UNAUTHORIZED MODIFICATIONS TO THIS EQUIPMENT.
SUCH MODIFICATIONS COULD VOID THE USER'S AUTHORITY TO OPERATE THE
EQUIPMENT.

Getting started
Getting started
Contents
1
Getting started
Internet
Features
About power supply
1-1
1-2
1-3
This manual covers the installation and use of the player hardware. For details regarding
the software operation including transferring music to the player, please see the Software
Instruction Manual.

Getting started
Features
1-2
Internet
Getting started
1-1
"
URL : www.iRiver.com
"
Find information on our company, products, and customer and technical
support.
"
Update your player with firmware downloads. Firmware upgrades offer
support for new CODECS and deliver new product features.
"
Consult the product FAQ.
"
Register your iRiver product online so that our Customer Service is able to
provide support as efficiently as possible.
"
All contents contained in this manual subject to change without notice to
improve ability of this player or according to changing of specification.
iRiver Limited does not assume any responsibility for errors or omissions in this
document or make any commitment to update the information contained herein.
iRiver is a registered trademark of iRiver Limited in the Republic of Korea and /or
other countries and is used under license. Microsoft Windows Media and the
Windows Logo are trademarks or registered trademarks of Microsoft Corporation in
the United States and /or other countries.
All other brand and product names are trademarks of their respective companies or
organization. All other product names may be trademarks of the companies with
which they are associated.
1999-2004 iRiver Limited. All rights reserved.
"
Multi-Codec Player
Supports MP3, WMA, OGG and ASF formats.
"
Firmware Upgrade
Provides the latest updated features via firmware upgrade.
"
260,000 color graphic LTPS LCD supporting Multiple Languages(40 languages)
iFP-1000 Series comes with 260,000 color graphic LTPS(Low Temperature Poly Silicon)
LCD which can support multiple languages.
"
Digital Camera
Built in camera and Color LCD screen.
"
FM Function
You can easily listen to FM stations and set your favorite stations by using Auto Preset and
Frequency Memory functions.
"
6 Preset EQ : Normal, Rock, Jazz, Classic, U Bass, Metal
"
Xtreme EQ and Xtreme 3D
Customize your own EQ with Xtreme EQ and enhance bass and surround sound with
Xtreme 3D.
"
GUI (Graphic User Interface) Menu System
"
Easy Navigation
The simple navigation makes it easy to find any song.
"
Supports 8 levels of subfolders, 500 folders total and up to 1500 files at one time.
"
Create your own playlists.
"
Record FM Radio, or Voice
Voice record level is automatically controlled by AGC function.
"
Convenient neck strap.
"
Built-in Rechargeable battery that charges directly from the USB port.

Getting started
About power supply
Battery detach/attach
1-4
About power supply
Getting started
Charging by using USB cable
1-3
Connect the USB cable to the player and the PC. The iFP battery will begin charging.
Connect the AC Power Adapter supplied with the player to the USB connector of the player.
The AC operating voltage of this player is 100~240V, 50/60Hz.
Charging by using AC adapter
"
To detach : Press the tab to release the battery and slide it out of the player.
"
To attach : Slide the battery onto the player until it locks into place.
"
The charging time : Approx. 2.5~3 hours
(At full discharge)
Note
"
The player will charge even if it is turned off.
"
A charging indicator light will illuminate while
the player is charging. The light will turn off
when charging is complete.
Note
"
Charge and store the battery at room temperature.
It may not charge properly in hot or cold temperature environments.
"
Do to attempt to disassemble the battery. Do not expose the battery to open flame.
These activities could cause the battery to explode resulting in serious injury.
"
Do not contact the connectors of the battery to metal objects, or an electrical short
may occur.
Note
If the battery is worn out, “Low Battery” is displayed on the LCD.

Locating the controls
Locating the controls
Contents
2
Front View
Rear View
LCD screen
2-1
2-2
2-3
Getting started
1-5
This manual covers the installation and use of the player hardware. For details regarding
the software operation including transferring music to the player, please see the Software
Instruction Manual.

Locating the controls
Locating the controls
Rear view
2-2
Locating the controls
Locating the controls
Front view
2-1
Earphone
USB connection port
I
(Previous / Fast Reverse)
I (Next / Fast forward)
Volume +, Enlarge, Up
LCD Screen
NAVI/MENU
Microphone
Camera
Charging indicator
Volume -, Reduce, Down
Rechargeble Battery
Hold
Neck strap
Mode/REC/Shot
Power on/off,
/ (Play/Stop),
Stereo
MEMORY/EQ
A-B (Interval repeat)
Picture flip
Camera lense
Battery Lock

PC software installaion
PC software installation
Contents
3
Note
Locating the controls
Locating the controls
LCD Screen
2-3
File number
Bit rate
Playing time
Playback node
Battery indicator
Volume
Folder name
Sampling rate
Program/file icon
File format
Artist/title name
Hold
Equalizer
Visualization
Clock
Status
Current bar
Folder icon
ASF : ASF
IRM : IRM
MP3 : MP3
OGG : OGG
WMA : WMA
"
According to file type displayed as follows :
"
IRM (iRiver Rights Management) : iRiver Rights Management is a digital music format.
Please visit our web site for details about this music format.
PC software installation
Attach the player
3-1
3-4
This section covers the installation for Windows operating systems only.
For installation instructions for Mac OS, please see the Software Instruction Manual.

PC software installaion
PC software installation
Software installation
3-2
PC software installation
PC software installaion
Software installation
3-1
Click “Next” to Install iRiver Music Manager.
Insert the Installation CD into the CD-ROM
drive. Installation start automatically.
Select the folder to Install. Click “Next”.
2
2
1
1
3
3
4
4
Click “Next” after selecting the language to
install.
System Requirements (Windows)
"
Pentium 133MHz or faster
"
USB port
"
Window 98SE / ME / 2000 / XP
"
CD-ROM drive
"
10MB free hard disk space
Note
"
The player can store MP3 files or files of any type.
You can upload files, other than music (MP3, WMA, OGG, ASF), to the PC using the iRiver
Music Manager Program.
"
Download latest versions of drivers and iRiver Music Manager at www.iRiver.com
"
Insert the Installation CD into the CD-ROM drive.
The following screen appears after inserting the CD.
"
If the installation doesn't automatically begin,
execute the "setup.exe" file in the installation
CD.
The installation program will begin.
"
The installation CD contains the following
contents :
- Device Driver
- iRiver Music Manager
- Manager Program for Mac
"
Please be sure your login has Administrator privileges if using Windows 2000 or Windows XP.
MPORTANT, please complete the steps in this section
BEFORE ATTACHING YOUR PLAYER TO YOUR PC.
Please note that the installation screens may differ slightly from those appearing
here, as software may be of a more recent version. If your screens differ, please
visit www.iRiverAmerica.com/software for an updated user guide

PC software installaion
Attach the player
Connecting to the PC
3-4
PC software installation
PC software installaion
Software installation
3-3
Click “Install” to begin the installation.
5
5
6
6
7
7
Connect the USB cable (provided) to the USB port of your computer.
Type “A”
Type “B”
USB port on the PC
USB port on the
iFP-1000 Series
USB cable
Type “A”
Type “B”
Turn on the player by pressing the button
marked STEREO. Lift the protective cover
over the USB port and connect the USB
cable to the player.
“USB CONNECTED” will appear on the
LCD screen of the player.
1
1
2
2
3
3
"
Connect the USB cable to the PC after playback stops to avoid errors.
Note
Click “Next” after confirming the
installation folder.
Installation is in progressing.
Click “Finish” after the installation is completed.

PC software installaion
Attach the player
Installation of New Hardware
3-6
Attach the player
PC software installaion
Installation of New Hardware
3-5
Select “Install the software automatically
(Recommended)” and click “Next”.
If a "Hardware Installation" warning message
appears, click "Continue Anyway".
(Windows XP)
The iRiver software driver will not cause any
damage to your computer.
1
1
3
3
4
4
After installing iRiver Music Manager from
the CD and connecting the player to your
PC, "Found New Hardware" screen is
displayed.
2
2
The computer will automatically search to
find your new hardware.
Information screen is displayed on the PC. New hardware is installed successfully and
ready to use.
5
5
7
7
The installation will continue.
Click “Finish”
Completed the installation of “New hardware”.
6
6
"
Windows 98SE, Windows ME, Windows 2000 O.S do not need any other device
driver installation.
"
Install New Hardware after installing iRiver Music Manager program.
Note

Basic operation
Basic operation
Contents
4
Attach the player
PC software installaion
Safely Removing the player from the PC
3-7
Basic Operation
Listening to Music
Listening to the FM radio
Recording from FM station
Digital Camera
Viewing to picture(My Album)
4-1
4-9
4-10
4-15
4-19
4-23
Click the “OK” after confirming the
hardware to remove.
1
1
3
3
4
4
Select the “Safely Remove hardware”
after clicking the “Safe To Remove
Hardware” by using the right button of
mouse.
2
2
Click the “Stop” after selecting the device
to remove.
Click the “Close” after confirming the
Safely Remove Hardware message.
(In case of Windows XP)

Basic operation
Basic operation
4-2
Basic operation
Basic operation
Turning on the player
4-1
"
Put the HOLD switch to “OFF”.
"
Connect the earphones as shown below.
"
Press the PLAY/STOP button to turn on the player. The “My Image” appears on the LCD.
"
Press it again to play.
Click
Press the PLAY/STOP button to turn the player off.
Click
Long Click
OFF
Push
Turning off the player
To increase volume
To decrease volume
Push NAVI/MENU button to the VOL + direction to increase volume.
Push NAVI/MENU button to the VOL – direction to decrease volume.
Adjusting the volume
Changing functions
Press and hold MODE button to appears current function on the LCD screen.
Push the NAVI/MENU button toward
or
to select the desired function, then click the
NAVI/MENU button to enter that mode.
Click
Push
Push
Long Click
"
When "Hold" is ON, the buttons on the player will not function.
"
When stopped or in recording standby mode, the player automatically turns off according
to the setting of “STOP POWER OFF” on the MENU.(Refer to page 5-19)

Basic operation
Basic operation
4-4
Basic operation
Basic operation
Listening to music
4-3
1
2
3
4
5
6
7
8
9
1. Displays the operating status of the player or pictures.
2. To skip to previous file, folder, picture, FM station or value.
3. To increase volume or zoom in a picture.
4. To skip forward to the next file, folder, picture, FM station or value.
5. To select NAVI/MENU function.
6. To decrease volume or zoom out a picture.
7. To turn on/off, to play or stop playback or to select FM mode
8. To select EQ mode, A-B repeat, or automatically store FM stations.
EQ : NORMAL
ROCK JAZZ CLASSIC U BASS METAL Xtrm EQ Xtrm 3D
9. To select function, playback mode,record/stop recording or shot.
Long Click
Click
Navigation Menu
Press NAVI/MENU button and find the desired music file by pushing NAVI/MENU button to VOL
+ or VOL – direction. To play the files, press the NAVI/MENU button, push NAVI/MENU/VOL to
the
I
direction or the PLAY/STOP button.
To move to the upper folder, NAVI/MENU/VOL to the
I
direction. If there is no upper folder,
NAVIGATION stops.
Navigation
Click
Push
Play
Up/Down
Upper folder
While an audio file is playing or the player is in stop mode, press MODE/REC to activate
selected modes, such as Repeat or Shuffle.
Click
Repeat :
Shuffle :
Intro :
Changing the playback mode
Click
Select the folder to delete in stop mode. Then Click the “MODE” button.
“FILE(or FOLDER) DELETE ARE YOU SURE?” is displayed on the screen. Select “YES” by
using
and (VOL + or VOL -) to delete. Then press NAVI/MENU button.
Delete
Delete
Click
Click

Basic operation
Basic operation
4-6
Basic operation
Basic operation
Tuning FM stations
4-5
Shooting
Click
Click
Click
Push
Long Click
Setup start
Select
Settings
Click
Setting the camera
To flip a picture
Camera zoom in/zoom out
Push
Zoom in
Zoom out
Selecting the FM stereo/mono
Press the STEREO/PLAY/STOP button to select Stereo/Mono.
Click
Push NAVI/MENU/VOL to the
or
direction to select desired station.
Push
Exit

Basic operation
Basic operation
4-8
Basic operation
Basic operation
Viewing a picture (My Album)
4-7
Full screen
Push
shifting the
zoom point
Zooming/cancel
Click
Push
Previous
Next
Push
Click
Click
Zooming a picture
Customizing the function settings(Menu)
1
2
3
Click
Push
Push
You can customize this setting menu according to your preference.
Press and hold NAVI/MENU button will enter the menu system.
1. Scroll between menus : Push NAVI/MENU button to the
or
diretion.
2. Select sub menus : Push NAVI/MENU button to the VOL+ or VOL- diretion.
3. Select Function : Press the NAVI/MENU button.
4. Exit : Push NAVI/MENU button to the VOL - direction.
Long Click
Click
4
Long Click
Press the button repeatedly to chose zoom size.
( x1 x1.5 x2.0 x2.5 x 3.0)
"
When "Hold" is ON, the buttons on the player will not function.
"
When stopped or in recording standby mode, the player automatically turns off
according to the setting of “STOP POWER OFF” on the MENU.(Refer to page 5-19)
Note

Basic operation
Listening to the FM radio
FM radio listening
4-10
Listening to music
Basic operation
Playing music file
4-9
Press and hold MODE button. The current function appears on the LCD screen.
Push NAVI/MENU/VOL to the
or
direction to select FM radio.
Press NAVI/MENU/VOL button to confirm.
Push the NAVI/MENU button to the or direction to select FM frequency.
1
1
2
2
3
3
1
2
Click
Push
Push
Push
To increase
To decrease
Push
Previous
Next
To select music file
Adjusting the volume
Click
Power on/play/stop
A-B repeat
Click
Function
Long Click
To play the folder
Previous
folder
Next folder
Long Push
Push
To fast forward/reverse
Fast
reverse
Fast
forward
Long Push
Power off
playback mode
Click
Long Click
Long Click

Basic operation
Listening to the FM radio
Programming station preset manually
4-12
Listening to the FM radio
Basic operation
4-11
3
3
Press and hold MEMORY(A-B) button.
Automatically appears memory icon and a reserved number of the preset stations.
4
4
Push the NAVI/MENU button to the or direction to select number of the preset.
5
5
Press MEMORY(A-B) button to store. Press PLAY/STOP button to cancel.
"
Up to 20 station can be stored.
to store
1
1
Automatically select stations and save them in sequential order.(It only activates while the player
is not in PRESET mode)
Auto store
Long Click
2
2
Press NAVI/MENU/VOL button to cancel
preset mode.
Press and hold MEMORY(A-B) button.
Automatically select stations and save
them in sequential order.
Click
Programming station preset automatically
Programming station preset manually
1
1
2
2
Press NAVI/MENU/VOL button to cancel
preset mode.
Push or long push NAVI/MENU/VOL to
the
or
direction to select FM
radio.
Click
Long Push
to cancel
PRESET
Click
to cancel
MEMORY
CH 04
MEMORY
CH 03
To slect number of
the preset stations.
Reserved number of
the preset stations.
Click
Push
"
Auto memory may not work within weak transmission areas.
Note

Basic operation
Listening to the FM radio
Tuning stations automatically
4-14
Listening to the FM radio
Basic operation
Deleting preset station
4-13
Press NAVI/MENU/VOL button to cancel preset mode.
Push and hold the NAVI/MENU/VOL to
or
direction.
The frequencies are scanned automatically. When a broadcast is receied, canning stops.
Click
Long Push
Select the station to be deleted at preset
mode.
1
1
2
2
"
The next station will appear when station delete is completed.
"
Push the memory button if you also want to delete the next station.
Press and hold the MEMORY/EQ(A-B)
button.
PRESET
CH 03
PRESET
CH 04
To select stereo/mono
Press the STEREO/PLAY/STOP button to select Stereo/Mono.
Stereo/Mono
Click
"
FM Tuner reception may vary in different areas.
"
While in Preset mode, auto scan and auto memory functions are not available.
"
When the player doesn’t have any preset stations, EMPTY will be displayed at preset
mode then faded out.
Note
Auto scanning
To cancel PRESET

Basic operation
Recording the FM stations
To stop FM recording
4-16
Recording the FM stations
Basic operation
Recording the FM stations
4-15
Press the MODE/REC button during FM reception.
The station will be recorded, the remaining recording time will be displayed on the LCD screen.
Press the MODE/REC button to stop recording.
"
The recorded file is saved as TUNER000.REC.
"
It is saved in the RECORD folder.
"
Recorded REC files can be converted to MP3 files using iRiver Manager.
(Refer to iRiver Music Manager Instruction Manual)
To play a recorded files
After changing to MP3 mode, select a Tuner file in the RECORD folder, press the PLAY/STOP
button.
To pause FM recording
Click
Click
"
Press the PLAY/STOP button to pause the recording process.
"
Press the PLAY/STOP button again to restart recording.
Click
"
Volume can not be controlled while recording.
Note
Click
/