Page is loading ...

IOM 53 3/4-4 10/2013 REV B. Page 1 of 6
Eaton Hydraulics LLC, Filtration Division, 44 Apple Street, Tinton Falls, NJ 07724, www.filtration.eaton.com, Phone732-212-4700
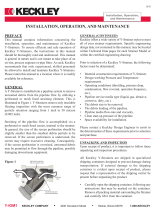
Model 53BTX Duplex Strainer, Sizes ¾” – 4”
TABLE OF CONTENTS
Introduction ...................................................................... 1
Receiving, Handling, and Inspection ................................. 2
Installation ......................................................................... 2
Start Up ............................................................................. 3
Operation .......................................................................... 3
Switching Flow ................................................................... 3
Basket Removal and Cleaning ........................................... 4
Basket Replacement ......................................................... 4
Shut Down ........................................................................ 4
Recommended Spare Parts ............................................... 5
INTRODUCTION
The Eaton Model 53BTX duplex strainer easily installs in
pipelines to remove sediment and debris from fluids. Fluid
flows uninterrupted while the basket is removed for cleaning.
These strainers are designed for pressure or suction
applications.
Straining on the Model 53BTX is accomplished by directing the
fluid through sized openings in the basket. Once sediment and
debris is collected in the basket, the fluid flow is directed by
manually turning the handle over to the other basket for
continuous operation. At this time the debris filled basket can
be removed for cleaning.
For additional information regarding Model 53BTX Duplex
Strainers visit our website at www.eaton.com/filtration
Read all the following information and instructions prior to installing and operating the equipment.
Failure to comply with these instructions could result in bodily injury or property damage.

IOM 53 3/4-4 10/2013 REV B. Page 2 of 6
Eaton Hydraulics LLC, Filtration Division, 44 Apple Street, Tinton Falls, NJ 07724, www.filtration.eaton.com, Phone732-212-4700
Model 53BTX Duplex Strainer, Sizes ¾” – 4”
RECEIVING, HANDLING, AND INSPECTION
1. Unpack the strainer and inspect for damage occurring
during transit. Report damage to the carrier. If the strainer
is not installed immediately, see “Storage” instructions.
2. Remove any preservatives with solvent-dampened cloths.
Exercise care when using solvent and follow solvent
manufacturer’s instructions.
3. Verify that the rating of the strainer is greater than or
equal to the maximum pressure and temperature of the
installation.
4. Open each basket well cover by turning the eye nut
counterclockwise to end of studs. Lift cover up by the tabs
until cover is free of basket well and rotate cover
counterclockwise, clearing the basket well.
5. Remove all flange or nozzle protectors. Check the inside of
the body for any foreign or loose material that could be
carried downstream when fluid is introduced into the
strainer. Install the strainer baskets. Reset the covers by
reversing procedure above. To tighten, turn eye nuts
clockwise until the cover is seated and secured at the top
of the basket well.
6. The cover to basket handle contact holds the baskets in
place. If the basket handle is not in contact with the cover,
bend the handle to a higher position to insure greater
compressions when cover is seated.
STORAGE
Replace protective wrap, flange protectors etc. that may have
been removed during receiving, handling and inspection. Store
the strainer in a clean, dry environment.
INSTALLATION
CAUTION: Before installation, review the
application and chemical compatibility of the
process fluid to all the materials of construction
and components of the strainer.
INSTALLATION (CONTINUED)
1. Remove protective wraps, caps, plugs etc. before installing
the strainer. Be sure to inspect cover gasket or O-ring for
possible damage and replace as required. Position the
strainer in the pipeline so that the fluid enters the
connection marked “IN” or “INLET.”
CAUTION: To lift flanged duplex strainers, put
slings under the inlet and outlet connections and
secure above strainer. To lift duplex strainers
with threaded connections, put slings under the
center body section and secure above strainer.
2. Be sure sufficient clearance is provided for easy opening of
the cover and removal of the basket. Refer to the Sales
Drawing for removal clearances. Support the strainer to a
firm foundation by using the footpads. Refer to sales
drawing for footpad layout.
3. Connect the strainer to the pipeline. On flanged strainers,
be sure to use the same type of flange faces. Do not bolt a
raised face flange to a flat face flange. Be sure flange
gaskets are in place and fasteners are tight.
4. On threaded strainers with other line connections, use
standard piping practice when installing the strainer.
CAUTION: Duplex strainers are not designed to
be anchor supports in the piping line. Be sure to
properly support process piping on both sides of
the strainer. Use care to prevent piping forces
and movements from acting on the strainer connections.
Damage may occur to the strainer if improperly connected.

IOM 53 3/4-4 10/2013 REV B. Page 3 of 6
Eaton Hydraulics LLC, Filtration Division, 44 Apple Street, Tinton Falls, NJ 07724, www.filtration.eaton.com, Phone732-212-4700
Model 53BTX Duplex Strainer, Sizes ¾” – 4”
INSTALLATION (CONTINUED)
Eaton recommends that basket well drain plugs be removed
and pressure equalizer valves with a drain valve be installed
(standard on 4” size) see Figure 1.
Figure 1
Eaton also recommends replacing each cover plug with a vent
valve and piping to a safe area. See Figure 2.
Figure 2
Pressure gauges near the strainer inlet and outlet are required
to determine differential pressure across the strainer and
cleaning frequency. Pressure gauges are essential for the safe
operation of the strainer.
CAUTION: To protect the operator during
draining and venting, the fluid must be piped
to a safe area. This requirement is for all fluids
and water with temperatures above 120° F.
The operator should wear appropriate protective equipment
(goggles, gloves, vests, clothing etc.) consistent with the
process fluid for strainer operation and servicing.
START UP
1. Open cover vent valves and cartridge vent. Close pressure
equalizer valves and drain valve. Rotate the handle 90º
clockwise, so that the handle is over the strainer inlet.
2. Slowly allow fluid to enter the strainer. First, slowly open
the downstream valve nearest to strainer outlet. Then
slowly open the upstream valve nearest to the strainer
inlet.
3. Close cover vent valves and cartridge vent when air is
expelled. Rotate the handle 90º counterclockwise over the
right side basket well. See Figure 3.
Figure 3
OPERATION
The strainer handle’s position indicates which basket well is in
operation. The handle in the 3 o’clock position over the cover
indicates the right basket operation. This prevents access to
the basket underneath the handle. See Figure 3. The handle in
the 9 o’clock position indicates the left basket operation Note:
Above references are with the strainer inlet in the 6 o’clock
position.
SWITCHING FLOW
Open both pressure equalizer valve to insure that both basket
wells are pressurized and rotate the strainer handle 180°
(traveling over the strainer inlet) until the handle is over the
opposite basket cover from where the handle started. Close
both pressure equalizer valves.

IOM 53 3/4-4 10/2013 REV B. Page 4 of 6
Eaton Hydraulics LLC, Filtration Division, 44 Apple Street, Tinton Falls, NJ 07724, www.filtration.eaton.com, Phone732-212-4700
Model 53BTX Duplex Strainer, Sizes ¾” – 4”
BASKET REMOVAL AND CLEANING
A differential pressure increase of 5 psi across the strainer
indicates that the basket in operation is full of debris and
needs to be removed and cleaned.
CAUTION: To prevent damage to the baskets,
DO NOT permit the differential pressure across
the strainer to exceed 20 psi.
1. Transfer flow from the basket well in operation to the
opposite basket well. Refer to Switching Flow. Open the
drain valve.
2. To service the basket well, slowly open the cover vent and
drain or pressure equalizer valve (if installed). This relieves
the pressure and drains the fluid in that basket well.
3. When pressure is relieved and fluid drained, open the
basket well cover by turning the eye nuts counterclockwise
to end of studs. Lift cover up by the tabs until cover is free
of basket well and rotate cover counterclockwise, clearing
the basket well.
4. Remove the debris-laden basket. Invert the basket and
wash out the debris. Direct a stream of air or water from
the exterior of the basket to the interior. Note: Do not
permit the basket debris to dry, as it would be difficult to
remove and clean the basket. Inspect basket at each
cleaning for holes or tears. Replace as needed with
genuine Eaton strainer baskets.
BASKET REPLACEMENT
1. Place the cleaned or new basket into the basket well. Be
sure basket handle is sufficiently high to be compressed by
the cover. Refer to Receiving, Handling, and Inspection.
Inspect cover O-ring and sealing surface. Clean sealing
surface and replace O-ring as necessary. Reseat the cover.
Refer to Receiving, Handling and Inspection.
2. Close drain valve and open pressure equalizer and cover
vent valves of basket well just serviced. Open the pressure-
equalizing valve of the basket well in operation filling the
serviced basket well with fluid. Then close cover vent valve
when air is expelled. Next, close both pressure equalizing
valves.
SHUT DOWN
1. Slowly close the pipeline valves upstream and downstream
from the duplex strainer. Make sure these valves are
tightly closed.
2. To relieve fluid pressure in the strainer, first open the drain
valve. Then slowly open the pressure equalizer and cover
vent valves.
3. Proceed to clean and inspect each basket. Inspect the
strainer to insure there is no standing fluid.
RECOMMENDED SPARE PARTS
2 Strainer Baskets
2 Cover O-rings
4 Stem O-rings **
2 Cartridge O-rings**
4 Seals**
4 Seats **
** Only supplied in a “#53 sealing kit”
When ordering spare parts, be sure to specify all nameplate
data as well as description and quantity of parts.
Always use genuine Eaton replacement parts for guaranteed
fit and performance.
Visit our web site, filtration.eaton.com for information about
the different types of Eaton Duplex Basket Strainers.

IOM 53 3/4-4 10/2013 REV B. Page 5 of 6
Eaton Hydraulics LLC, Filtration Division, 44 Apple Street, Tinton Falls, NJ 07724, www.filtration.eaton.com, Phone732-212-4700
Model 53BTX Duplex Strainer, Sizes ¾” – 4”
PARTS LIST FOR EATON MODEL 53BTX
Item Description
1. Duplex Strainer Body
2. Strainer Basket (2) *
3. Basket Cover (2)
4. Cartridge
5. Stud (4)
6. Eye Nut (4)
7. Pipe Plug (2)
9. Pipe Plug (2)
10. Washer
11. Stem Retainer
12. Cap Screw
13. Cap Screw (4)
14. Cap Screw
15. Vent Valve
16. Pin
17. Handle
18. Cap Screw
19. O-Ring, Cover
20. O-Ring, Stem (4) *
21. O-Ring, Cartridge (2) *
22. Seal (4) *
23. Seat (4) *
24. Ball (2)
25. Stem, Top
26. Stem, Middle
* Recommended Spare Parts List
Item Description
2 Strainer Basket (2)
19 O-Ring, Cover (2)
20** O-Ring, Stem (4)
21** O-Ring, Cartridge (2)
22** Seal (4)
23** Seat (4)
** Only supplied in a “#53 sealing kit”
Diverter Cartridge Maintenance
The Diverter Cartridge assembly is maintenance free. No
initial or operational servicing is required. In the event that
the cartridge O-rings, stem O-rings, seats, or seals need
replacement, Sealing Kits are available for strainer
sizes: ¾” – 1”, 1¼” – 1½”, 2” – 2½”, 3” and 4.”

IOM 53 3/4-4 10/2013 REV B. Page 6 of 6
Eaton Hydraulics LLC, Filtration Division, 44 Apple Street, Tinton Falls, NJ 07724, www.filtration.eaton.com, Phone732-212-4700
Model 53BTX Duplex Strainer, Sizes ¾” – 4”
Eaton
North America — HQ
44 Apple Street
Tinton Falls, NJ 07724
Toll Free: (800) 656-3344
(North America only)
Voice: (732) 212-4700
Fax: ( 952) 906-3706
Eaton
Brazil
Av. Julia Gaioli, 474 –
Bonsucesso
07251-500 – Guarulhos
Brazil
Voice: +55 (11) 2465-8822
Fax: +55 (11) 2465-8884
Eaton
Singapore
4 Loyang Lane #04-01/02
Singapore 508914
Voice: +65-6825-1668
Fax: +65-6825-1639
Eaton
Europe/Africa/Middle East
Auf der Heide 2
53947 Nettersheim
Germany
Voice: +49-2486-809-0
Fax: +49-2486-809-800
Eaton
China
No.3, Lane 280, Linhong Road
Changning District, 200335
Shanghai, P.R. China
Voice: +86-21-5200-0099
Fax: +86-21-5200-0400
WARRANTY
All products manufactured by Seller are warranted against defects in material and
workmanship under normal use and service for which such products were designed for a period
of eighteen (18) months after shipment from our factory or twelve (12) months after start-up,
whichever comes first. OUR SOLE OBLIGATION UNDER THIS WARRANTY IS TO REPAIR OR
REPLACE, AT OUR OPTION, ANY PRODUCT OR ANY PART OR PARTS THEREOF FOUND TO BE
DEFECTIVE. SELLER MAKES NO OTHER REPRESENTATION OR WARRANTY, EXPRESS OR IMPLIED,
INCLUDING, BUT NOT LIMITED TO, ANY IMPLIED WARRANTY OF MERCHANTABILITY OR FITNESS
FOR A PARTICULAR PURPOSE. WE SHALL NOT BE LIABLE FOR CARTAGE, LABOR,
CONSEQUENTIAL DAMAGES OR CONTINGENT LIABILITIES. OUR MAXIMUM LIABILITY SHALL NOT
IN ANY EVENT EXCEED THE CONTRACT PRICE FOR THE PRODUCT.
/