Page is loading ...

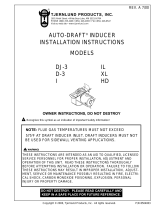
MODELS VH1-3” AND VH1-4” SERIES VENT HOODS
1. Terminate the vent system so that proper minimum clearances are maintained as cited in the latest edition of the
National Fuel Gas Code (NFPA # 54) and the latest edition of NFPA #211, or as follows:
• Not be less than 7 feet above grade when located adjacent to public walk ways
• At least 3 feet above any forced air inlet located within 10 feet
• At least 4 feet below, 4 feet horizontally from or 1 foot above any door, window or gravity air inlet into any building
• At least 12 inches above grade.
THE MANUFACTURER ALSO RECOMMENDS:
• The vent terminal shall also not be installed closer than 3 feet from the inside corner of an L-shaped structure
• Not less than 2 feet from an adjacent building
• Flue gases are not directed so as to jeopardize people, overheat combustible structures or enter buildings
2. Check vent pipe system for leakage. All vent pipe joints on “positive” side of power venter must be sealed.
3. A vent system incorporating a Tjernlund VH1 Series vent hood should not exceed 550
o
F. gross.
4. Termination of a sidewall vent system with a device other than the Tjernlund VH1 vent hood could affect system
performance and result in a possible safety hazard.
5. Plan the vent system layout to avoid the possibility of accidental contact with concealed wiring or plumbing inside walls.
6. Installation must be done by one experienced and familiar with venting of combustion gases.
OWNERS INSTRUCTIONS
THESE INSTRUCTIONS
MUST REMAIN
WITH EQUIPMENT
DO NOT DESTROY
TJERNLUND PRODUCTS, INC.
1601 Ninth Street • White Bear Lake, MN 55110-6794
PHONE (800) 255-4208 • (651) 426-2993 • FAX (651) 426-9547
Visit our web site • www.tjernlund.com
P/N 8504027 ©1998, Tjernlund Products, Inc. REV. 3 10/98

SPECIFICATIONS
INSTALLATION
1. Attach the Vent Hood Mounting Template to the interior of the wall the vent hood will be penetrating.
2. Ensure that proposed vent termination clearances are met before attempting to cut opening through exterior wall.
3. Verify that wall penetration will not come in contact with concealed wiring or plumbing. Using a 1/2” drill bit, drill two pilot holes
where noted on the template. The drill bit must be long enough to penetrate to the building exterior.
4. Attach the template to the building exterior aligning the pilot holes on the template with the pilot holes drilled in step 3.
5. Using a reciprocating saw, cut an opening through the building siding, wall board, etc., following the appropriate lines of the template.
6. Slide the Vent Hood through the opening and fasten to exterior wall using provided screws.
7. Once Power Venter is completely installed and secured, apply a bead of exterior rated caulk between Vent Hood flange and
exterior of building.
MAINTENANCE
The vent system must be inspected regularly. Points of inspection are as follows.
1. Screened opening of the vent hood should be free from foreign material and cleaned as necessary.
2. Structural integrity of the vent hood should be maintained so as not to reduce vent discharge opening.
3. Check all vent system connections for leakage and re-seal where needed. If any vent pipe shows signs of deterioration,
replace immediately and check new connections for possible leaks. Re-seal with high-temperature silicone sealant or
metal tape to prevent flue gas leakage.
TJERNLUND LIMITED ONE YEAR WARRANTY
Tjernlund Products, Inc. warrants to the original purchaser of this product that the product will be free from defects due to faulty material or workmanship for a
period of (1) year from the date of original purchase or delivery to the original purchaser, whichever is earlier. Remedies under this warranty are limited to
repairing or replacing, at our option, any product which shall, within the above stated warranty period, be returned to Tjernlund Products, Inc. at the address list-
ed below, postage prepaid. THERE ARE NO WARRANTIES WHICH EXTEND BEYOND THE DESCRIPTION ON THE FACE HEREOF, AND TJERNLUND
PRODUCTS, INC. EXPRESSLY DISCLAIMS LIABILITY FOR INCIDENTAL OR CONSEQUENTIAL DAMAGES ARISING FROM THE USE OF THIS PROD-
UCT. THIS WARRANTY IS IN LIEU OF ALL OTHER EXPRESS WARRANTIES AND NO AGENT IS AUTHORIZED TO ASSUME FOR US ANY LIABILITY
ADDITIONAL TO THOSE SET FORTH IN THIS LIMITED WARRANTY. IMPLIED WARRANTIES ARE LIMITED TO THE STATED DURATION OF THIS LIM-
ITED WARRANTY. Some states do not allow limitation on how long an implied warranty lasts, so that limitation may may not apply to you. In addition, some
states do not allow the exclusion or limitation of incidental or consequential damages, so that above limitation or exclusion may not apply to you. This warranty
gives you specific legal rights and you may also have other rights which may vary from state to state. Send all inquiries regarding warranty work to Tjernlund
Products, Inc. 1601 9th Street, White Bear Lake, MN 55110-6794. Phone (651) 426-2993 • (800) 255-4208 • Fax (651) 426-9547.
SIDE VIEW
FRONT VIEW

ENSURE THAT PROPOSED VENT TERMINATION CLEARANCES ARE MET BEFORE
ATTEMPTING TO CUT HOLE THROUGH EXTERIOR WALL.

VH1-3 & VH1-4 VENT HOOD INSTALLATION TEMPLATE
1. Attach the Vent Hood Mounting Template to the interior of the wall the vent hood will be penetrating.
2. Ensure that proposed vent termination clearances are met before attempting to cut opening through exterior wall.
3. Verify that wall penetration will not come in contact with concealed wiring or plumbing. Using a 1/2” drill bit, drill two pilot holes
where noted on the template. The drill bit must be long enough to penetrate to the building exterior.
4. Attach the template to the building exterior aligning the pilot holes on the template with the pilot holes drilled in step 3.
5. Using a reciprocating saw, cut an opening through the building siding, wall board, etc., following the appropriate lines of the template.
6. Slide the Vent Hood through the opening and fasten to exterior wall using provided screws.
7. Once Power Venter is completely installed and secured, apply a bead of exterior rated caulk between Vent Hood flange and
exterior of building.
/