Page is loading ...

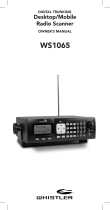
WS1025
200 Channel VHF/Air/UHF
Desktop Scanner
OWNER’S MANUAL

2
Package Contents ..................................................... 3
Scanning Legally ........................................................ 3
Features ..................................................................... 4
Scanner Basics ........................................................... 5
Setup ......................................................................... 6
Connecting the Antenna ..................................................6
Connecting a Speaker or Headphones ............................7
Powering Your Scanner .....................................................7
Turning on the Scanner ....................................................7
Turning Off the Key Tone ..................................................8
Understanding the Display ...............................................8
Understanding the Keypad ............................................10
Configuring Your Scanner ........................................ 12
Preprogrammed Frequencies .........................................12
Programming Channels ..................................................12
Programming with a Computer ......................................13
Cloning Programmed Data .............................................13
Searching for Frequencies ....................................... 14
Service Bank Search........................................................14
Storing Found Frequencies ............................................14
Birdie Frequencies .......................................................... 15
Scanning Stored Channels ..............................................15
Monitoring a Channel .....................................................17
Locking Out Channels ....................................................18
Clearing a Stored Channel .............................................18
Weather Features .................................................... 19
Receiving All Weather Alerts ......................................... 19
Receiving Alerts for Specific Areas ................................ 19
SAME Standby Mode .................................................... 20
Skywarn™ ...................................................................... 21
Additional Information ............................................ 22
Care ............................................................................... 22
Initializing the Scanner ................................................... 22
Preprogrammed Frequency List .................................... 23
Service Banks ................................................................ 26
Specifications ................................................................. 29
FCC Notice .................................................................... 30
Limited Warranty ........................................................... 31
TABLE OF CONTENTS

3
WELCOME
Thank you for choosing a Whistler product. We are
dedicated to providing products that represent
both quality and value. Please read the user manual
carefully before using this product. If you have
additional questions, please visit the FAQ page
on our website at www.whistlergroup.com or call
toll free 800-531-0004, 8am to 5pm CT, Monday
through Friday to speak to a Customer Service
Representative.
Package Contents
• Scanner
• Antenna
• ACAdapter
• User’sGuide
• QuickStartGuide
Scanning Legally
Your scanner covers frequencies used by many
different groups including police and fire departments,
ambulance services, government agencies, private
companies, amateur radio services, military
operations, pager services, and wireline (telephone
and telegraph) service providers. It is legal to listen to
almost every transmission your scanner can receive.
However, there are some transmissions you should
never intentionally listen to.
These include:
• Telephoneconversations(cellular,cordless,
or other private means of telephone signal
transmission)
• Pagertransmissions
• Anyscrambledorencryptedtransmissions
According to the Electronic Communications Privacy
Act (ECPA), as amended, you are subject to fines and
possible imprisonment for intentionally listening to,
using, or divulging the contents of such a transmission
unless you have the consent of a party to the
communication (unless such activity is otherwise illegal).
INTRODUCTION

4
This scanner is designed to prevent reception of
illegal transmissions, in compliance with the law
which requires that scanners be manufactured in such
a way as to not be easily modifiable to pick up those
transmissions.Donotopenyourscanner’scaseto
make any modifications that could allow it to pick up
transmissions that are not legal to listen to. Doing so
could subject you to legal penalties.
In some areas, mobile use of this scanner is unlawful
or requires a permit. Check the laws in your area. We
encourage responsible, legal scanner use.
Features
Your new WS1025 Desktop Scanner lets you scan
conventional transmissions, and is preprogrammed
with search banks for convenience. By pressing a
one touch search key, you can quickly search those
frequencies most commonly used by public service
and other agencies without tedious and complicated
programming.
This scanner gives you direct access to over 26,000
exciting frequencies, including those used by
ambulance services, aircraft, and amateur radio
services, marine, civil air patrol, VHF and UHF
business bands, government frequencies and some
police and fire departments.
Your scanner also has these special features:
One-Touch Service Search Banks – Lets you search
preset frequencies in separate marine, fire/police,
aircraft, ham, FM Radio and weather bands.
Display Backlight – Easy to read in low-light
situations.
Lockout Function – Lets you skip specified channels
or frequencies when scanning or searching.
Ten Channel-Storage Banks – You can store 20
channels in each bank (200 total channels), letting you
group channels so you can more easily identify calls.
SAME/FIPS Weather Alert – Displays weather
events for the county or counties that you choose.
Memory Backup – Keeps the frequencies stored in
memory for an extended time.
FEATURES

5
Scan Delay – Delays scanning for about 2 seconds,
so that you can hear replies on the same channel.
Priority Channel – Lets you set the scanner to check
one channel every 2 seconds so that you do not miss
transmissions on that channel.
Data Cloning – Lets you transfer the programmed
data to another WS1025 scanner.
External Antenna Connector – Lets you connect an
external antenna (not supplied) with a BNC connector
for improved reception of distant/weaker signals.
Scanner Basics
Afteryoufamiliarizeyourselfwithyourscanner’s
features you can then set up your scanner.
Frequencies
A frequency is the waveband of the transmitting signal
(expressed in kHz or MHz). Your WS1025 receives a
range of analog frequencies; the best resource for
your local frequencies is www.radioreference.com.
Also,youcanuseyourscanner’ssearchfunctionsto
find active frequencies in your area.
Your WS1025 scanner can receive these bands:
Frequency Range Types of Transmissions
29–54 MHz 10-Meter Ham, VHF Lo, 6-Meter
Ham
87.3 –107.9 MHz FM Broadcast
108–136.99166
MHz
Aircraft
137–174 MHz Military Land Mobile, 2-Meter Ham,
VHF Hi
380 –512 MHz UHFAircraft,FederalGovernment,
70-cm Ham, UHF Standard, UHF
“T”
n Note: See “Specifications” on page 29 for more
information about frequency steps.
SCANNER BASICS

6
Channels
Channels are storage areas for frequencies saved
inyourscanner’smemory.Eachsavedfrequencyis
assigned a channel.
Banks
A bank is a storage area for a group of channels. Your
scanner provides 10 banks (1 to 10) that can each
store up to 20 channels, for a total of 200 channels.
You can use the banks to group and organize
frequencies.
For example, you could program the frequencies
used by your local police department starting with
Channel 1 (the first channel in bank 1) and program
the fire department frequencies starting with Channel
21 (the first channel in bank 2).
Setup
Connecting the Antenna
To attach the supplied telescopic antenna, insert the
antenna in the hole on the top of the scanner and
turn the antenna clockwise to tighten.
Connecting an Outdoor Antenna
To connect an external antenna, follow the installation
instructions supplied with the antenna. Use 50 Ohm
coaxialcable,suchasRG-58orRG-8.Forlengthsover
50feet,useRG-8low-lossdielectriccoaxialcable.If
theantennacable’sconnectordoesnothaveaBNC
connector, you will also need a BNC adapter.
w Warning: Use extreme caution when installing or
removing an outdoor antenna. If the antenna starts to
fall, let it go! It could contact overhead power lines. If
the antenna touches a power line, touching the antenna,
mast, cable, or guy wires can cause electrocution and
death. Call the power company to remove the antenna.
DO NOT attempt to do so yourself.
CONNECTING ANTENNA

7
Connecting a Speaker or Headphones
You can plug an amplified speaker or headphones
(not supplied) with Çinch (3.5 mm) mini-plug into the
HEADPHONE jack on the back of the scanner. This
automatically disconnects the internal speaker.
Note: Use an amplified speaker with this scanner.
Non-amplified speakers do not provide sufficient
volume for comfortable listening.
Listening Safely
To protect your hearing, follow these guidelines:
• Donotlistenathighvolumelevels.Extended
high-volume listening can lead to permanent
hearing loss.
• Setthevolumetothelowestsetting.Thenturn
on your audio device and adjust the volume to a
comfortable level.
• Avoidincreasingthevolume.Yourearswilladapt
to the volume level, so a level that does not cause
discomfort could still damage your hearing.
Powering Your Scanner
1.Connectthesuppliedadaptertothescanner’s
DC 9V jack and a standard power outlet.
2. To disconnect, unplug the adapter from the
power source first.
Caution: You must use a Class 2 power source that
supplies 9V DC and delivers at least 400mA. Its
center tip must be set to positive and its plug must
tthescanner’sDC 9V jack. Using an adapter that
does not meet these specifications could damage the
scanner or the adapter.
Turning on the Scanner
1. Turn the SQUELCH all the way down before you
turn on the scanner.
2. Slide POWER to ON. A welcome message
appears. After about 3 seconds, adjust VOLUME
to a comfortable level.
3. Turn SQUELCH clockwise, just until the hissing
sound stops. If you always hear a hissing sound,
the scanner will not scan or search properly.
• Tolistentoaweakordistantstation,turn
SQUELCH counterclockwise.
• Ifreceptionispoor,turnSQUELCH clockwise to
cut out weak transmissions.
CONNECTING ACCESSORIES

8
Turning Off the Key Tone
The scanner is preset to sound a tone each time you
press one of its keys.
To turn the key tone on and off:
1. Turn on the scanner. WELCOME SCAnnInG rECEIVEr
appears.
2. While the welcome message is on the screen,
press 1 to turn on the key tone or press 2 to turn
it off.
Understanding the Display
Row 1
– Skywarn channel active.
FD/PD – Searching the fire/police bank.
BANK – Indicates the scan bank(s). A bar appears
under the numbers for banks that are turned on.
AIR – Searching the aircraft bank.
HAM – Searching the amateur radio bank.
Row 2
WX – Searching weather channels.
FM radio – Searching for FM radio stations.
000 – Channel number the scanner is tuned to.
CH – Appears with channel number (1–200) or P
(priority channel).
000.0000 – Frequency the scanner is tuned to.
MAR – Searching the marine bank.
L/0
– A locked out channel/frequency is manually
selected or reviewed.
Row 3
ed (Up/Down) – Search or scan direction.
PRI – Priority feature is active.
S
– Signal meter; bars indicate strength of signal.
MAN – Manual mode.
SCAN – Scan mode.
SRCH – Searching a service bank.
PGM – Program mode.
DLY – Two-second delay is active.
Row 1
Row 2
Row 3
DISPLAY

9
Display Messages
ALL CH L-out – All channels locked out during scan
or marine band search.
b X Ch-FULL – All displayed bank channels are full.
b X StorE – Frequency programmed into displayed
bank’schannel.
CLOnE – Clone mode.
-dUPL- – Frequency is already stored in another
channel.
Error – Entry error.
FLo ALL- CL – All the locked-out frequencies
removed during a FD/PD, AIRCRAFT, or HAM bank
search.
L-r – Review the locked-out frequencies.
L-O Fr-FULL – Maximum of 50 frequencies already
locked out.
oFF tonE – Key tone deactivated.
On tonE – Key tone activated.
P – Scanner is tuned to the priority channel.
-t- – Tune mode.
Sub Bank Messages
Lo VHF – Sub-bank 1 of the fire/police bank.
Hi VHF – Sub-bank 2 of the fire/police bank.
UHF – Sub-bank 3 of the fire/police bank.
10 M – Sub-bank 1 of the HAM bank.
6 M – Sub-bank 2 of the HAM bank.
2 M – Sub-bank 3 of the HAM bank.
70CM – Sub-bank 4 of the HAM bank.
DISPLAY

10
MAR – Search the preprogrammed marine bank.
FD/PD – Search the preprogrammed fire/police bank.
– Search the preprogrammed weather bank, or
press and hold to jump to the Skywarn channel. You
must first program your local Skywarn frequency into
channel 200 (see page 22).
HAM – Search the preprogrammed amateur radio bank.
AIR – Search the preprogrammed aircraft bank.
FM – Search FM radio stations.
SCAN / MAN (Manual) – Enter Scan mode to scan
programmed channels. Enter Manual mode to stop
scanning, directly enter a channel number, or monitor
a single channel.
– Select the direction for searching and scanning.
PRI / ALERT – Enable and disable the priority feature.
Enable and disable SAME standby mode when
monitoring a weather channel.
PSE (Pause) – Stop and restart a search or tune.
Understanding the Keypad
KEYPAD

11
0–9 – Input numbers when entering frequencies and
selecting banks (0 selects bank 10). The number
range above the keys (1–20, 21–40, 41-60, etc.)
indicates the channels stored in that bank.
• / DELAY – Input a decimal point when entering
frequencies. Set a two-second delay for a selected
channel.
ENT (Enter) – Complete the entry of a frequency.
L/O
/
L/O RV W – Lock-out selected channels or
frequencies. Review locked-out frequencies.
TUNE / CLEAR – Enter Tune search. Clear an
incorrect entry.
PGM – Program frequencies into channels.
KEYPAD

12
Configuring Your Scanner
Preprogrammed Frequencies
Your scanner includes 153 preprogrammed
frequencies, which you can load into Channels
1 to 153. For a list of these frequencies, see
“Preprogrammed Frequency List” on page 23.
To load the pregprogrammed frequencies:
1. Turn off the scanner and then turn it on again.
2. While WELCOME message appears, press PGM.
3. Load –Fr– appears, then YES––Ent and No––
CLEAr appear alternately.
4. Press ENT to load frequencies or CLEAR to
cancel.
Programming Channels
If you do not have a list of frequencies in your area,
refer to www.radioreference.com.
1. Press PGM. PGM appears.
2. Enter the channel number (1–200) where you
want to store a frequency, then press PGM again.
3.Usethenumberkeysand•toenterthefrequency
(including the decimal point), then press ENT.
4. To program the next channel in sequence, press
PGM and repeat Step 3. To program a specific
channel repeat Steps 2 and 3..
• Yourscannerautomaticallyroundsdownto
the closest valid frequency. For example, if
you enter 151.473, your scanner rounds it to
151.470.
• IfError appears and the scanner beeps three
times when you press ENT, start again from
Step 2.
• Ifthefrequencyisalreadystoredinanother
channel, the scanner beeps three times and
displays - d U P L- (duplicate) and the lowest
channel number where the frequency is already
stored. Press TUNE/CLEAR to cancel. Press
ENT if you still want to store the frequency.
CONFIGURING SCANNER

13
Programming with a Computer
You can upload or download programmed data to or
from a PC using a PC/IF cable.
The application software is available online at
www.PSRedit.com or www.Starrsoft.com. Find model
WS1025 and follow instructions in the software package
to upload and download data.
Cloning Programmed Data
You can transfer the programmed data to and from a
WS1025 scanner using an optional connecting cable
with Ç-inch (3.5mm) stereo phone plugs on both ends.
1. Turn on both scanners.
2.Connecttheconnectingcabletoeachscanner’s
PC/IF jack. CLOnE and UP to SEnd appears.
3. Press e on the host scanner.
4. SEndInG appears at the host scanner.
To exit clone mode after the data transfer is
complete, remove the cable.
No ConnEct appears if you try to connect to another
model scanner. The WS1025 does not clone with
other scanner models.
Searching for Frequencies
During a tune search, the scanner tunes up or down
starting from a frequency you specify.
1. Press TUNE. The display alternates between PSE
and –t–.
2. If you want to change the starting frequency,
enter a new frequency and press ENT.
3. Press PSE to start tune search. –t– appears on the
display.
PROGRAMMING

14
Service Bank Search
Your scanner contains groups of preset frequencies
called Service Banks. You can search for marine, fire/
police, aircraft, ham, FM, and weather transmissions
even if you do not know the specific frequencies that
are used in your area.
Then you can store the frequencies you find into the
scanner’schannels(exceptforweatherandmarine
banks, which are already stored as channels). To start
a search, press the button of the Service Bank you
would like to search ( Marine, Fire/Police, Aircraft,
Ham, FM, or Weather).
Storing Found Frequencies
Once you find interesting frequencies during a Tune
or Service Bank search, you can store them in the
scanner’schannel-storagebanks.
1. Press ENT when you find a frequency. The bank
number and StorE appear.
2. To change banks, enter the new bank number.
3. Press ENT to store the frequency. The channel
and frequency flash twice. To cancel the
operation, press TUNE/CLEAR.
• Thefrequencyisautomaticallystoredintherst
empty channel of the selected bank.
Search Commands
• PressPSE to pause searching. Press PSE
again to resume.
• Press•/Delay to turn the two-second delay
feature on and off.
• PressL/O to lock-out a frequency (except
Weather band).
•Toreversethesearchdirectionatanytime,
press or .
•Ifnecessary,youcanselectsearchgroups
using the number keys.
SERVICE SEARCH

15
• Ifthescannerdisplays-d U P L-, the frequency is
already stored in another channel. Press ENT if
you want to continue storing the frequency. Press
TUNE/CLEAR to cancel.
• Iftherearenoemptychannelsinthebank,
Ch-FULL appears. You can select another bank
or clear some channels in the current bank (see
“Clearing a Stored Channel” on page 18).
• Ifthescannerdisplays-d U P L- or CH-FULL, you can
store another channel location by pressing PGM.
The channel number flashes and 000.0000 (or
previous frequency) appears. Press the desired
channel number then press ENT. Repeat if
needed. Press ENT again when an empty channel
is found.
Scanning Stored Channels
Press SCAN/MAN until SCAN appears to
continuously scan through all channels with stored
frequencies.
If the scanner finds an active frequency, it stops and
displays that channel and frequency number, then
it automatically begins scanning again when the
transmission on that frequency ends.
• Press or to reverse the scanning direction.
• Tomonitorachannel,pressSCAN/MAN at any
time during the transmission so MAN appears.
The scanner does not scan channels in banks that are
turned off.
Birdie Frequencies
All scanners have birdie frequencies, which are
signals created inside a scanner that can cause
interference.
To find the birdies in your scanner:
1. Disconnect the antenna, and make sure that no
other nearby radio or TV sets are turned on near
the scanner.
2. Search every frequency range from its lowest
frequency to the highest. Occasionally, the
searching will stop as if it has found a signal,
often without any sound. This is a birdie.
3. Make a list of all the birdies in your scanner for
future reference.
SCANNING STORED CHANNELS

16
To turn a channel-storage bank on or off, press the
bank’snumberkey(1–0, using 0 for bank 10) during
scanning. The channel-storage banks are on when
they have a bar underneath them and off when no
bar appears underneath them.
• Youcannotturnoffallbanks;theremustbeat
least one active bank.
• Youcanmanuallyselectanychannelinabank,
even if the bank is turned off.
Setting Delay
To avoid missing a reply in conversations, a
two-second delay is automatically set for each
channel. The scanner stops for two seconds after
a transmission ends before it resumes scanning or
searching. DLY appears on the display when the delay
function is active.
To turn delay on:
•Ifthescannerisscanningandstopsonanactive
channel, quickly press •/DELAY before it resumes.
•Ifthedesiredchannelisnotselected,manually
select the channel, then press •/DEL AY.
•Ifthescannerissearching,press•/DEL AY. DLY
appears and the scanner adds a two-second delay
to every transmission it stops on in that bank.
To turn delay off:
Press •/DELAY while the scanner is monitoring a
channel or frequency. DLY disappears.
Using the Priority Channel
The priority feature sets the scanner to check one
specific channel every two seconds while scanning.
You can only program one frequency into the priority
channel.
1. Press PGM, then press PRI/ALERT. PCH and
000.0000 (or the previously stored frequency)
appear.
2. Enter the frequency you want stored in the priority
channel, then press ENT.
PRIORITY CHANNEL

17
3. To turn on the priority feature, press PRI/ALERT
during scanning or searching. PRI appears. The
scanner checks the priority channel every two
seconds and stays on the channel if there is activity.
To turn off the priority feature, press PRI/ALERT.
PRI disappears.
Monitoring a Channel
You can continuously monitor a specific channel
without scanning.
1. Press SCAN/MAN until MAN appears.
2. Enter the channel number (1–200).
3. Press SCAN/MAN again.
Locking Out Channels
You can increase the scanning or search speed by
locking out channels or frequencies that have a
continuous transmission, such as control channels,
weather channels, or birdie frequencies.
Press L/O when the scanner stops on a channel or
frequency while scanning or searching. The scanner
locks out the channel/frequency then continues
scanning/searching.
To manually lock-out a channel, select the channel
then press L/O.
L/0
appears in the display.
• Yourscannerautomaticallylocksoutempty
channels.
• Youcanstillmanuallyselectlocked-outchannels.
• Youcanlock-outamaximumof50frequencies
during a search. If you try to lock-out more, L- O
Fr-FULL appears.
Managing Lock-outs
1. Set the scanner to Manual by pressing the SCAN/
MAN button until MAN appears.
2. Hold down L/O
/
L /O RV W for about two seconds.
The scanner pulls up a locked out channel.
3. Press and hold L/O
/
L /O RV W to show the next
locked out channel. If an error beep sounds, there
are no locked out channels.
4. To remove the lock-out, press L/O
/
L/O RV W until
L/0
disappears.
MONITORING CHANNEL

18
Managing Service Bank Lock-outs
1. Hold down L/O
/
L /O RV W for about two seconds
during a Service Bank search.
2. Press or repeatedly to scroll through the list
of locked-out frequencies. L- r and
L/0
appear in
the display.
3. Press L/O
/
L /O RV W to remove the lock-out. The
list scrolls to the next locked-out frequency.
• Whenyoureachthehighestlocked-out
frequency, the scanner beeps twice and rolls to
the lowest locked-out frequency.
• IftheServiceBankhasnolocked-outfrequencies,
EMPty appears.
Unlocking All Service Bank Frequencies
1. Hold down L/O
/
L /O RV W for about two seconds
during a Service Bank search. L- r appears.
2. While holding down TUNE/CLEAR, press
L/O
/
L /O RV W. FLo ALL–CL appears for about
two seconds. Then the display alternates with YES
---Ent and No --CLEAr.
3. Press ENT. L- r E M P t y appears. The scanner clears
lock-outs from all frequencies in the Service Bank.
Clearing a Stored Channel
To remove a frequency stored in a channel.
1. Press SCAN/MAN to stop scanning.
2. Press the number keys to enter the channel
number (1–200).
3. Press PGM. PGM appears.
4. Press 0 then ENT. The frequency number
changes to 000.0000 to indicate the channel is
cleared.
5. To clear another channel, use the number keys
to enter that channel number then press PGM
again. Or, repeatedly press PGM until the desired
channel number appears. Repeat Step 4.
MANAGING SERVICE BANK

19
Weather Features
The NOAA and your local weather reporting agency
broadcast local forecast and regional weather
information on one or more channels allocated for
use by weather reporting agencies.
Your scanner is an extremely sensitive high-quality
receiver on the weather frequencies. However, the
included antenna is optimized for general purpose
scanning. To receive weather alerts, please make
sure you are receiving a clear signal or switch to an
external antenna.
Press to hear your local forecast and regional
weather information. WEAthEr appears for about
two seconds, then the scanner starts searching the
weather bank.
Press PSE to stop searching the channels. SRCH
disappears and MAN appears. To change the channel
manually, press or .
Receiving All Weather Alerts
To program the scanner to search for weather alerts
every two seconds, set a weather channel as the
priority channel. See “Using the Priority Channel“
on page 16.
If the scanner detects a 1050 Hz weather alert tone
on the programmed channel, the scanner sounds the
alert tone and ALErt flashes. Press any key to turn off
the alarm.
Receiving Alerts for Specific Areas
The National Weather Service precedes each weather
alert with a digitally encoded SAME (Specific Area
Message Encoding) signal, then a 1050 Hz tone. The
SAME signal includes a FIPS (Federal Information
Processing Standard) code and an event code.
A current list of FIPS codes is located at
www.NWS.NOAA.gov/NWR.
WEATHER

20
SAME Standby Mode
In SAME Standby mode, your scanner monitors
weather channels for SAME alerts for up to seven
areas you specify by entering the FIPS codes.
To program your scanner for SAME Standby mode:
1. Press .
2. Press PGM to access the FIPS code entry mode.
3. Use or to select the desired FIPS code
storage location.
4. Use the number keys to enter the FIPS code, then
press ENT to store the code.
5. Repeat steps 3-4 for all the FIPS codes that you
wish to store.
6. Press to exit FIPS code entry mode. The
scanner displays F showing that FIPS codes are
enabled.
7. Press PRI/ALERT to initiate SAME Standby mode.
The scanner displays F [1-7] CH StAndby.
The scanner will monitor weather channels for alerts
with matching FIPS codes. To exit SAME Standby
mode, press PRI/ALERT again.
• PressL/O during step 4 to lock-out FIPS entries;
L/0
appears in the display. Press L/O again to
enable FIPS entries;
L/0
disappears.
• IfyoudonotenteranyFIPScodes,orifyourFIPS
codes are locked out, when you enter SAME
Standby mode the scanner receives alerts and
warning messages for all receivable areas.
• Thescannersoundsanalertwhenitreceives
the SAME code. To stop the alert and ready the
scanner to receive a new alert signal, press any
key.
• Ifyoudonotstopthealertwithinveminutes,
the alert stops and the scanner beeps every ten
seconds. If the scanner receives a new weather
alert after five minutes, it sounds the new alert.
WEATHER
/