Siemens LF31IVV60 User manual

Category
Cooker hoods
Type
User manual

This manual is also suitable for

Register
your
product
online
siemens-home.bsh-group.com/welcome
en ,QVWUXFWLRQVIRULQVWDOODWLRQDQGXVH
Extractor hood
en
2
Table of contents
enI ns t r u ct i on s for installation and use
INSTRUCTION MANUAL.......................................................... 2
8 Intended use................................................................... 2
( Important safety information ........................................ 3
7 Environmental protection ............................................. 4
1 Operating the appliance................................................ 5
e Connecting to a hob ...................................................... 7
o Home Connect ............................................................... 8
2 Cleaning and maintenance ......................................... 10
3 Trouble shooting ......................................................... 12
4 Customer service......................................................... 13
INSTALLATION INSTRUCTIONS .......................................... 14
( Important safety information...................................... 14
K General information .................................................... 15
5 Installation ................................................................... 16
INSTRUCTION MANUAL
Produktinfo
Additional information on products, accessories,
replacement parts and services can be found at
www.siemens-home.bsh-group.com and in the online
shop www.siemens-home.bsh-group.com/eshops
8Intended use
Intended use
Read these instructions carefully. Only then
will you be able to operate your appliance
safely and correctly. Retain the instruction
manual and installation instructions for future
use or for subsequent owners.
The appliance can only be used safely if it is
correctly installed according to the safety
instructions. The installer is responsible for
ensuring that the appliance works perfectly at
its installation location.
This appliance is intended for domestic use
and the household environment only. The
appliance is not intended for use outside. Do
not leave the appliance unattended during
operation. The manufacturer is not liable for
damage which is caused by improper use or
incorrect operation.
This appliance is intended for use up to a
maximum height of 2000 metres above sea
level.
This appliance may be used by children over
the age of 8 years old and by persons with
reduced physical, sensory or mental capacity
or by persons with a lack of experience or
knowledge if they are supervised by someone
who is responsible for their safety, or have
been instructed in how to use the appliance
safely and have understood the risks involved
in not using it properly.
Children must not play with the appliance.
Cleaning and user maintenance must not be
performed by children unless they are over
15 years of age and are supervised.
Keep children below the age of 8 years old at
a safe distance from the appliance and power
cable.
Check the appliance for damage after
unpacking it. Do not connect the appliance if it
has been damaged in transport.
This appliance is not intended for operation
with an external clock timer or a remote
control.
Important safety information en
3
(Important safety
information
Impor t ant safety informat i on
:Warning
Danger of suffocation!
Packaging material is dangerous to children.
Never allow children to play with packaging
material.
:Warning
Risk of fire!
Fatty deposits in the grease filter may catch
fire. Regularly clean the grease filter. Never
operate the appliance without a grease
filter.
Risk of fire!
Grease deposits in the grease filter may
catch fire. Never work with naked flames
close to the appliance (e.g. flambéing). Do
not install the appliance near a heat-
producing appliance for solid fuel
(e.g. wood or coal) unless a closed, non-
removable cover is available. There must
be no flying sparks.
Risk of fire!
Hot oil and fat can ignite very quickly. Never
leave hot fat or oil unattended. Never use
water to put out burning oil or fat. Switch off
the hotplate. Extinguish flames carefully
using a lid, fire blanket or something similar.
Risk of fire!
When gas burners are in operation without
any cookware placed on them, they can
build up a lot of heat. A ventilation
appliance installed above the cooker may
become damaged or catch fire. Only
operate the gas burners with cookware on
them.
Risk of fire!
Operating several gas burners at the same
time gives rise to a great deal of heat. A
ventilation appliance installed above the
cooker may become damaged or catch fire.
Never operate two gas burners
simultaneously on the highest flame for
longer than 15 minutes. One large burner of
more than 5 kW (wok) is equivalent to the
power of two gas burners.
:Warning
Risk of burns!
The accessible parts become very hot when in
operation. Never touch hot parts. Keep
children at a safe distance.
:Warning
Risk of injury!
Components inside the appliance may have
sharp edges. Wear protective gloves.
Risk of injury!
Items placed on the appliance may fall
down. Do not place any objects on the
appliance.
Risk of injury!
The light emitted by LED lights is very
dazzling, and can damage the eyes
(risk group 1). Do not look directly into the
switched on LED lights for longer than
100 seconds.
:Warning
Risk of injury!
Items placed on the appliance may overload
the fasteners, potentially causing the
appliance to fall off the wall.Do not place items
on the appliance.
:Warning
Risk of electric shock!
A defective appliance may cause electric
shock. Never switch on a defective
appliance. Unplug the appliance from the
mains or switch off the circuit breaker in the
fuse box. Contact the after-sales service.
Risk of electric shock!
Incorrect repairs are dangerous. Repairs
may only be carried out and damaged
power cables replaced by one of our
trained after-sales technicians. If the
appliance is defective, unplug the appliance
from the mains or switch off the circuit
breaker in the fuse box. Contact the after-
sales service.
Risk of electric shock!
Do not use any high-pressure cleaners or
steam cleaners, which can result in an
electric shock.
en Environmental protection
4
Causes of damage
Caution!
Risk of damage due to corrosion. Always
switch on the appliance while cooking to avoid
condensation. Condensate can produce
corrosion damage.
Always replace faulty bulbs to prevent the
remaining bulbs from overloading.
Risk of damage due to ingress of humidity into
the electronic circuitry. Never clean operator
controls with a wet cloth.
Surface damage due to incorrect cleaning.
Clean stainless steel surfaces in the direction
of the grain only. Do not use any stainless
steel cleaners for operator controls.
Surface damage due to strong or abrasive
cleaning agents. Never use strong and
abrasive cleaning agents.
Risk of damage as a result of incorrect
loading of design elements. Do not pull design
elements.Do not place objects on the design
elements or hang objects from them.
7Environmental protection
En v i r o n ment al pr ot ec t i on
Your new appliance is particularly energy-efficient.
Here you can find tips on how to save even more
energy when using the appliance, and how to dispose
of your appliance properly.
Saving energy
During cooking, ensure that there is a sufficient
supply of air so that the extractor hood can work
efficiently and with a low level of operating noise.
Adjust the fan speed to the intensity of the cooking
fumes. Only use intensive mode where this is
required. A lower fan speed means that less energy
is consumed.
If there are intensive cooking fumes, select a higher
fan speed in good time. If cooking fumes have
already spread in the kitchen, the extractor hood
must be operated for longer.
Switch off the extractor hood if you no longer require
it.
Switch off the lighting if you no longer require it.
Clean and, if required, replace the filter at regular
intervals in order to increase the effectiveness of the
ventilation system and to prevent the risk of fire.
Environmentally-friendly disposal
Dispose of packaging in an environmentally-friendly
manner.
This appliance is labelled in accordance with
European Directive 2012/19/EU concerning
used electrical and electronic appliances
(waste electrical and electronic equipment -
WEEE). The guideline determines the
framework for the return and recycling of used
appliances as applicable throughout the EU.
Operating the appliance en
5
1Operating the appliance
Oper at i ng the appl i anc e
These instructions apply to several appliance variants.
It is possible that individual features are described
which do not apply to your appliance.
Note: . Switch on the extractor hood when you start
cooking and switch it off again several minutes after you
have finished cooking. This is the most effective way of
removing the kitchen fumes.
Control panel
Setting the fan
Switching on
Touch the # symbol.
The fan starts at setting ƒ.
Slide your finger across the III settings range to
change the fan speed.
Switching off
Touch the # symbol.
Intensive setting
You can use the intensive setting if there is a large
build-up of odours and fumes/vapours.
Switching on
Touch the @ symbol or slide your finger to the right
across control panel III until 2 appears in the display.
Note: After approx. 6 minutes, the extractor hood
automatically switches back to fan setting 3.
Switching off
If you would like to stop intensive mode before the
preset time expires, slide your finger to the left across
control panel III to select the fan setting you require.
Lighting
The lighting can be switched on and off independently
of the fan.
Touch the = symbol.
Setting the brightness
Press and hold the = symbol until the desired
brightness is reached.
Boost function
Switching on
Touch the & symbol.
Note: After approximately 20 seconds, the extractor
hood automatically switches back to the fan setting that
was set beforehand.
Switching off
If you want to end the Boost function before the preset
time expires, touch the & symbol.
Symbol Explanation
#
Fan on/off
=
Light on/off/dimming
&
Intensive mode
!
Automatic mode
A
Decrease fan setting/fan run-on
||| Control panel
@
Increase fan setting
Display Explanation
!
Metal grease filter saturation indicator
"
Activated charcoal filter saturation indicator
1-3 Fan settings
2
Intensive mode
x
Fan run-on
!
Automatic mode
D
Home Connect
en Operating the appliance
6
Automatic mode
Switching on
Touch the # symbol.
The fan will start at setting 2.
Touch the ! symbol.
The optimum fan setting is set automatically using
an air quality sensor.
Switching off
Touch the ! or # symbol to switch off automatic
mode.
The fan will switch itself off automatically if the air quality
sensor detects no further change in the air quality in the
room.
Automatic mode can run for a maximum of four hours.
Sensor control
In automatic mode, an air quality sensor in the extractor
hood detects the intensity of the cooking and roasting
odours. Depending on the air quality sensor setting, the
fan will switch itself to another fan setting automatically.
Possible sensor settings:
Default sensitivity setting:
Lowest sensitivity setting:
Highest sensitivity setting:
If the sensor controller responds too strongly or not
enough, it can be changed accordingly:
1. Touch and hold the ! symbol for one second
when the fan is switched off. The setting will be
displayed.
2. Slide your finger across control panel III to change
the sensor control setting.
3. Take your finger off the ! symbol.
Fan run-on time
Switching on
Note: If intensive mode has been activated, the run-on
function will not be available.
Touch the A symbol until x lights up on the display
panel.
The fan will run at fan setting 1.
After approximately 10 minutes, the fan will switch itself
off automatically.
Switching off
Slide your finger to the right across control panel III until
a fan setting lights up in the display.
This immediately stops fan run-on.
Saturation display
If the metal grease filters or activated charcoal filter are/
is saturated, the corresponding symbols will flash once
the appliance has been switched off:
Metal grease filter: !
Activated charcoal filter: "
Metal grease filter and activated charcoal filter: !
and "
If you have not yet done so, the metal grease filters
should now be cleaned or the activated charcoal filter
replaced. ~ "Cleaning and maintenance" on page 10
The saturation indicators can be reset while they are
flashing. Slide your finger to the left across the control
panel to do so.
Switching over the display for air recirculation mode
For air recirculation mode, the electronic controller must
be switched over accordingly:
The extractor hood must be connected and switched
off.
Touch and hold the # and ! symbols at the
same time until "2" lights up for air recirculation
mode (filters that cannot be regenerated).
Repeatedly touching and holding this button
combination makes "3" light up for air recirculation
mode (filters that can be regenerated).
Repeatedly pressing and holding this button
combination switches the electronic controller back
over to air extraction mode ("1" ).
Audible signal
Switching on
Touch and hold the # and & symbols at the same time
for approximately 3 seconds when the fan is switched
off. An audible signal will sound as an
acknowledgement.
When the signal tone is activated, will be lit.
Switching off
Touch and hold the # and & symbols at the same time
for approximately 3 seconds when the fan is switched
off. An audible signal will sound as an
acknowledgement.
When the signal tone is deactivated, will be lit.
Connecting to a hob en
7
eConnecting to a hob
Connect i ng to a hob
You can connect this appliance to a hob (if the hob
supports connection to the appliance) and then control
the functions of the hood via your hob.
Appliances can be connected to each other in different
ways:
Home Connect
Two appliances can be connected using the Home
Connect app provided that both of them are Home
Connect compatible.
Refer to the Home Connect documents supplied for
more information.
Connecting appliances directly
If the appliance is connected directly to a hob, it cannot
be connected to your home network as well. The
appliance will function as an extractor hood that is not
connected to the network and you can continue to
operate it via the control panel.
Connecting appliances via your home network
If the appliances are connected to each other via your
home network, both the hood controls on the hob and
Home Connect can be used to operate the appliance.
Notes
Make sure you follow the safety instructions in the
instruction manual for your extractor hood and that
these are complied with even when operating the
appliance via the hood controls on the hob.
If the extractor hood is being operated by means of
the controls on the hood itself, this mode of
operation always has priority. It is not possible to use
the hood controls on the hob during this time.
Setting up a connection
The hood must be switched off before you can connect
the hob and extractor hood.
Connecting directly
Ensure that the hob is switched on and is in search
mode.
To do this, refer to the section entitled "Connecting to
the extractor hood" in the instruction manual for your
hob.
Notes
If your extractor hood is connected directly to the
hob, it cannot be connected to your home network
as well and you will not be able to use Home
Connect.
The hob must not be connected to your home
network. To break a connection, follow the
instructions in the section entitled "Resetting Home
Connect".
Press and hold the & symbol until the D and Ù
indicators start flashing.
The extractor hood has been connected to the hob
when the D stops flashing and remains continuously
lit.
Connecting via your home network
Follow the instructions in the section entitled "Automatic
login to your home network" or "Manually logging into
your home network" ~ "Home Connect" on page 8
Once the extractor hood is connected to your home
network, you can connect to the hob via the Home
Connect app. To do this. follow the instructions on your
mobile device.
2
1
en Home Connect
8
oHome Connect
Ho me Connect
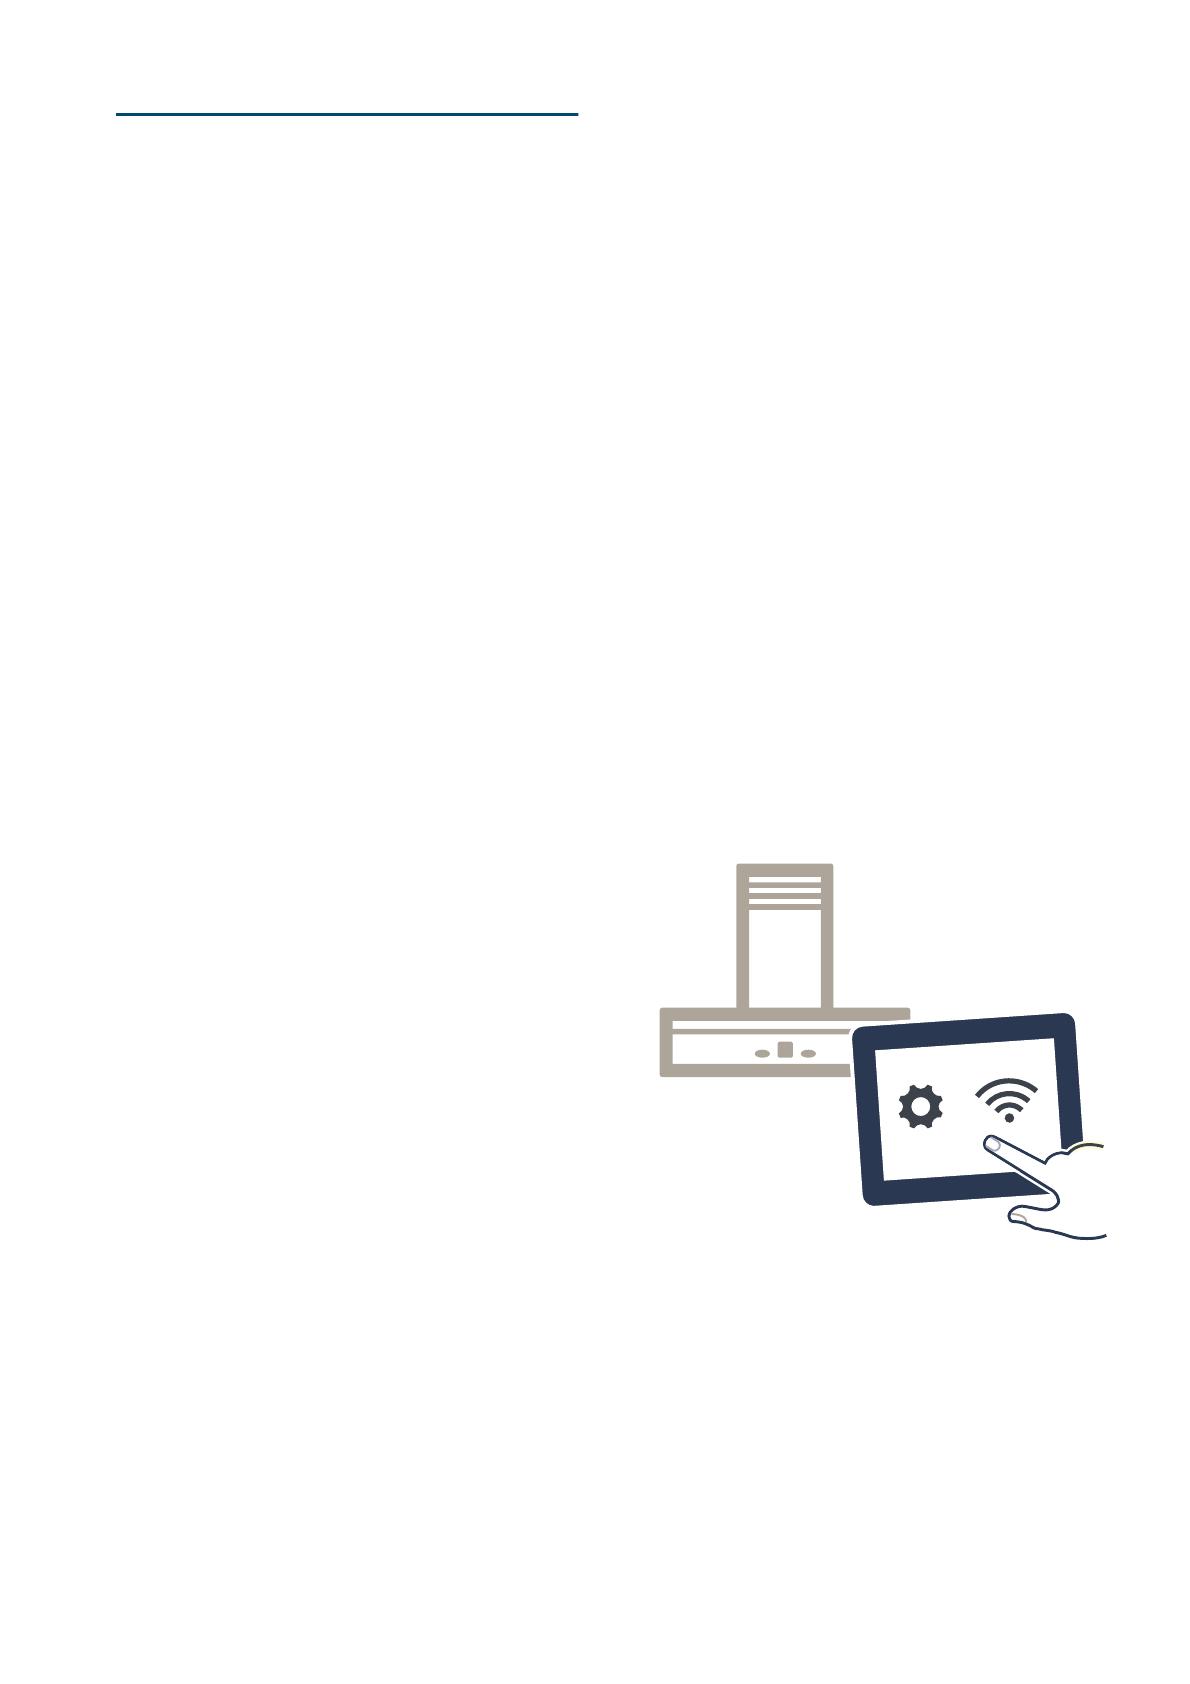
This appliance is Wi-Fi-capable and can be controlled
using a mobile device.
If the appliance is not connected to your home network,
it will function as an extractor hood with no network
connection and can still be operated via the display.
The availability of the Home Connect function depends
on the availability of Home Connect services in your
country. Home Connect services are not available in
every country.You can find more information on this at
www.home-connect.com.
Notes
Ensure that you follow the safety instructions in this
instruction manual and that you comply with these
even when you are away from home and are
operating the appliance via the Home Connect app.
You must also follow the instructions in the
Home Connect app.
If the appliance is being operated by means of the
controls on the appliance itself, this mode of
operation always has priority. During this time, it is
not possible to operate the appliance using the
Home Connect app.
Setting up
To implement settings via Home Connect, you must
have installed and set up the Home Connect app on
your mobile device.
Refer to the Home Connect documents supplied for
more information.
Follow the steps specified by the app to implement the
settings.
The app must be open in order to perform the set-up
process.
Note: In the networked standby mode, your appliance
requires a maximum of 2 W.
Automatic registration in the home network
Notes
You require a router that has WPS functionality.
You require access to your router. If you do not have
this, follow the steps for "Manually logging into your
home network".
The extractor hood cannot be switched on during the
connection process. You can cancel the process at
any time by pressing the # symbol.
To connect the extractor hood to your home
network, the hood and the light must be switched off.
1. Press and hold the & symbol until the D and Ù
indicators start flashing.
2. To start automatic login to your home network, swipe
right over settings area ||| until D and flash.
3. Press the WPS button on the router within the next
2 minutes.
If the extractor hood has successfully connected, it
will automatically connect to the Home Connect app.
D and will flash.
Note: If the extractor hood has been unable to
connect, it will automatically allow you to manually
connect to your home network. D and ƒ will flash.
Log the appliance into your home network manually
or swipe left over the settings area to try logging in
automatically again.
4. On your mobile device, follow the instructions for
automatic network login.
The login process is complete when the D indicator
stops flashing on the control panel and remains
continuously lit.
Manual registration in the home network
Notes
The extractor hood cannot be switched on during the
connection process. You can cancel the process at
any time by pressing the # symbol.
To connect the extractor hood to your home
network, the hood and the light must be switched off.
1. Press and hold the & symbol until the D and Ù
indicators start flashing.
2. To manually log into your home network, swipe right
over settings area ||| until D and ƒ flash.
3. Use the "Home Connect" SSID and the "Home
Connect" key to log the mobile device into the
extractor hood network.
If the extractor hood has successfully connected, it
will automatically connect to the Home Connect app.
D and will flash.
4. On your mobile device, follow the instructions for
manually logging into your network.
The login process is complete when the D indicator
stops flashing on the control panel and remains
continuously lit.
Home Connect en
9
Connecting to the app
If the Home Connect app is installed on your mobile
device, you can connect it to your extractor hood.
Notes
The appliance must be connected to the network.
The app must be open.
1. Press and hold the & symbol until the D and
indicators start flashing.
2. On your mobile device, follow the instructions in the
Home Connect app.
The connection process is complete when the D
indicator stops flashing on the control panel and
remains continuously lit.
Software update
Using the software update function, your extractor
hood's software can be updated (e.g. for the purpose of
optimisation, troubleshooting or security updates). To
do this, you need to be a registered Home Connect
user, have installed the app on your mobile device and
be connected to the Home Connect server.
As soon as a software update is available, you will be
informed through the Home Connect app and will be
able to start the software update via the app.
Once the update has been successfully downloaded,
you can start installing it via the Home Connect app if
you are on your local area network.
The Home Connect app will inform you once installation
is complete.
Notes
You can continue to use your extractor hood as
normal while updates are downloading.
Depending on your personal settings in the app,
software updates can also be set to download
automatically.
We recommend that you install security updates as
soon as possible.
Resetting the connection
You can reset the connections you have saved on your
home network and on Home Connect at any time.
Press and hold the ! and & symbols until the
D symbol goes out. When the audible signal is
switched on, an audible signal sounds.
About data protection
When your appliance is connected for the first time to a
WLAN network, which is connected to the Internet, your
appliance transmits the following categories of data to
the Home Connect server (initial registration):
Unique appliance identification (consisting of
appliance codes as well as the MAC address of the
installed WiFi communication module).
Security certificate of the WiFi communication
module (to ensure a secure IT connection).
The current software and hardware version of your
domestic appliance.
Status of any previous resetting to factory settings.
This initial registration prepares the Home Connect
functions for use and is only required when you want to
use these Home Connect functions for the first time.
Note: Ensure that the Home Connect functions can be
used only in conjunction with the Home Connect app.
Information on data protection can be accessed in the
Home Connect app.
Declaration of Conformity
BSH Hausgeräte GmbH hereby declares that the
appliance which features Home Connect is in
accordance with the basic requirements and the other
relevant provisions of the directive 2014/53/EU.
A detailed RED Declaration of Conformity can be found
online at www.siemens-home.bsh-group.com on the
product page of your appliance with the additional
documents.
en Cleaning and maintenance
10
2Cleaning and maintenance
Cl eani ng and mai nt enanc e
:Warning
Risk of injury!
Items placed on the appliance may overload the
fasteners, potentially causing the appliance to fall off the
wall.Do not place items on the appliance.
:Warning
Risk of electric shock!
Penetrating moisture may result in an electric shock.
Clean the appliance using a damp cloth only. Before
cleaning, pull out the mains plug or switch off the circuit
breaker in the fuse box.
:Warning
Risk of electric shock!
Do not use any high-pressure cleaners or steam
cleaners, which can result in an electric shock.
:Warning
Risk of injury!
Components inside the appliance may have sharp
edges. Wear protective gloves.
:Warning
Risk of injury!
If appliances supported by cables are permitted to
swing to and fro, this may overload the fasteners,
potentially causing the appliance to fall off the wall.Do
not do anything that makes the appliance swing to and
fro.
Cleaning agents
To ensure that the different surfaces are not damaged
by using the wrong cleaning product, follow the
instructions in the table. Do not use any of the following:
Harsh or abrasive cleaning agents, e.g. scouring
powder or liquid scouring cleaner,
Cleaning products with a high alcohol content,
Hard scouring pads or cleaning sponges,
Pressure washers or steam cleaners,
Cleaning products that dissolve limescale,
Aggressive all-purpose cleaning products,
Oven spray.
Note: Wash new sponge cloths thoroughly before use.
Note: Follow all instructions and warnings included with
the cleaning products.
--------
Removing metal grease filter
1. Open the lock and swing down the metal grease
filter. When you do this, take hold of the metal
grease filter from underneath with your other hand.
2. Take the metal grease filter out of the holder.
Notes
Fat may accumulate in the bottom of the metal
grease filter.
Hold the metal grease filter level to prevent fat
from dripping out.
Area Cleaning products
Stainless steel Hot soapy water:
Clean with a dish cloth and then dry with a
soft cloth.
Clean stainless steel surfaces in the direction
of the grain only.
Special stainless steel cleaning products are
available from our after-sales service or from
specialist retailers.Apply a very thin layer of
the cleaning product with a soft cloth.
Painted surfaces Hot soapy water:
Clean using a damp dish cloth and then dry
with a soft cloth.
Do not use stainless steel cleaner.
Aluminium and plastic Hot soapy water:
Clean with a soft cloth.
Glass Glass cleaner:
Clean with a soft cloth. Do not use a glass
scraper.
Controls Hot soapy water:
Clean using a damp dish cloth and then dry
with a soft cloth.
Risk of electric shock caused by penetrating
moisture.
Risk of damage to the electronics caused by
penetrating moisture. Never clean controls
with a wet cloth.
Do not use stainless steel cleaner.
Cleaning and maintenance en
11
3. Clean the metal grease filter.
4. Clean the appliance support cables.
5. Clean the accessible parts of the housing. Clean the
inside of the appliance.
:Warning
Risk of injury!
Components inside the appliance may have sharp
edges. Wear protective gloves.
Cleaning the metal mesh grease filters
These instructions apply to several appliance variants. It
is possible that individual features are described which
do not apply to your appliance.
:Warning
Risk of fire!
Fatty deposits in the grease filter may catch fire.
Regularly clean the grease filter. Never operate the
appliance without a grease filter.
Notes
Do not use aggressive, acidic or alkaline cleaning
products.
We recommend cleaning the grease filters every 2
months.
When cleaning the metal grease filters, also clean
the metal grease filter holder in the appliance using
a damp cloth.
The metal grease filters can be cleaned in the
dishwasher or by hand.
By hand:
Note: You can use a special degreaser to remove
stubborn dirt. This can be ordered from the online shop.
Soak the metal grease filters in hot soapy water.
Clean the filters with a brush and then rinse them
thoroughly.
Leave the metal grease filters to drain on an
absorbent material.
In the dishwasher:
Note: Slight discolouration may occur if the metal
grease filters are cleaned in the dishwasher. This
discolouration has no effect on the performance of the
metal grease filters.
Use normal domestic dishwashing detergents.
Do not clean heavily soiled metal grease filters
together with cookware.
Place the metal grease filters in the dishwasher,
leaving plenty of space around them. Do not trap the
metal grease filters.
Select a temperature of no more than 50 °C.
Installing the metal mesh grease filter
:Warning
Risk of injury!
Components inside the appliance may have sharp
edges. Wear protective gloves.
Notes
Clean all accessible parts of the housing.
Clean the appliance support cables with care.
1. Insert the metal grease filter. When you do this, take
hold of the metal grease filter from underneath with
your other hand.
Note: Make sure that the metal grease filter is
positioned correctly.
2. Swing the metal grease filter up and click it into
place.
3. If the metal grease filter has not been inserted
correctly, open the lock and reinsert the metal
grease filter correctly.
en Trouble shooting
12
Replacing the activated charcoal filter
Note: To bind odours in circulating-air mode, you must
install an activated carbon filter. The different options for
operating the appliance in circulating-air mode can be
found in the brochure. Alternatively, ask your dealer.
The required accessories are available from specialist
retailers, from customer service or from the Online
Shop.
1. Open the cover on the top of the appliance.
2. Remove the old activated charcoal filter and insert
the new one.
3. Close the cover.
4. Reset the saturation indicator.~ "Saturation display"
on page 6
3Trouble shooting
Tr oub l e shoot i ng
Malfunctions often have simple explanations. Please
read the following notes before calling the after-sales
service.
:Warning
Risk of electric shock!
Incorrect repairs are dangerous. Repairs may only be
carried out and damaged power cables replaced by
one of our trained after-sales technicians. If the
appliance is defective, unplug the appliance from the
mains or switch off the circuit breaker in the fuse box.
Contact the after-sales service.
Malfunction table
--------
LED lights
Defective LED lights may be replaced by the
manufacturer, their customer service or a qualified
technician (electrician) only.
:Warning
Risk of injury!
The light emitted by LED lights is very dazzling, and can
damage the eyes (risk group 1). Do not look directly
into the switched on LED lights for longer than
100 seconds.
Problem Possible cause Solution
The appliance
does not work
The plug is not
plugged in.
Connect the appliance to the
electricity supply
Power cut Check whether other kitchen
appliances are working
Faulty fuse Check in the fuse box to make
sure that the fuse for the
appliance is OK
The lighting does
not work.
The LED lights
are defective.
Call the after-sales service.
The button illumi-
nation does not
work.
The control unit is
faulty.
Call the aftersales service.
Customer service en
13
4Customer service
Cu s t o mer ser vi ce
When calling us, please quote the product number
(E no.) and the production number (FD no.) so that we
can provide you with the correct advice. These numbers
can be found on the rating plate on the top of the
appliance (to access it, you will need to remove the
activated charcoal filter).
You can make a note of the numbers of your appliance
and the telephone number of the after-sales service in
the space below to save time should it be required.
Please be aware that a visit by an after-sales engineer
will be charged if a problem turns out to be the result of
operator error, even during the warranty period.
Please find the contact data of all countries in the
enclosed customer service list.
To book an engineer visit and product advice
Rely on the professionalism of the manufacturer. You
can therefore be sure that the repair is carried out by
trained service technicians who carry original spare
parts for your appliances.
Accessories
(not included in the scope of delivery)
Note: These instructions apply to several appliance
models. It may be the case that an optional accessory
that is listed does not apply for your appliance.
Note: Observe the installation instructions in the
accessory.
--------
E no. FD no.
After-sales serviceO
GB 0344 892 8999
Calls charged at local or mobile rate.
IE 01450 2655
0.03 € per minute at peak. Off peak 0.0088 €
per minute.
Easy-change filter for CleanAir air recirculation
module (cannot be regenerated)
LZ56200
Easy-change filter for CleanAir air-recirculation
module (can be regenerated)
LZ00XXP00
Z-Nr:FD:E-Nr:
Type:
en Installation instructions
14
INSTALLATION INSTRUCTIONS
Instal l ati on i nst r uct i ons
Installation instructions
This appliance is fitted to the kitchen ceiling or a
sturdy suspended ceiling.
The surfaces of the appliance are sensitive. Avoid
damaging them during installation.
(Important safety
information
Impor t ant saf et y informat i on
Read these instructions carefully. Only then
will you be able to operate your appliance
safely and correctly. Retain the instruction
manual and installation instructions for future
use or for subsequent owners.
Check the appliance for damage after
unpacking it. Do not connect the appliance if it
has been damaged in transport.
The appliance can only be used safely if it is
correctly installed according to the safety
instructions. The installer is responsible for
ensuring that the appliance works perfectly at
its installation location.
Only a licensed professional may connect
appliances without plugs. Damage caused by
incorrect connection is not covered under
warranty.
The surfaces of the appliance are easily
damaged. Avoid damaging them during
installation.
For the installation, observe the currently valid
building regulations and the regulations of the
local electricity and gas suppliers.
:Warning
Risk of fire!
Fatty deposits in the grease filter may catch
fire. The specified safety clearances must
be complied with in order to prevent a build-
up of heat. Refer to the information
provided for your cooker. If gas and electric
hobs are being operated together, the
largest specified clearance applies.
Risk of fire!
Grease deposits in the grease filter may
catch fire. Never work with naked flames
close to the appliance (e.g. flambéing). Do
not install the appliance near a heat-
producing appliance for solid fuel
(e.g. wood or coal) unless a closed, non-
removable cover is available. There must
be no flying sparks.
:Warning
Risk of injury!
Components inside the appliance may have
sharp edges. Wear protective gloves.
Risk of injury!
[
[
[
[
[
[
PP
PP
!
!
General information en
15
The appliance may fall down if it has not
been properly fastened in place. All
fastening components must be fixed firmly
and securely.
Risk of injury!
The appliance is heavy. To move the
appliance, 2 people are required. Use only
suitable tools and equipment.
Risk of injury!
Changes to the electrical or mechanical
assembly are dangerous and may lead to
malfunctions. Do not make any changes to
the electrical or mechanical assembly.
Risk of injury!
Risk of falling when working on the
appliance. Use a stable stepladder.
:Warning
Risk of electric shock!
Components inside the appliance may have
sharp edges. These may damage the
connecting cable. Do not kink or pinch the
connecting cable during installation.
:Warning
Risk of electric shock!
It must always be possible to disconnect the
appliance from the power supply. If there is a
fixed connection, an all-pole isolating switch
with a contact gap of at least 3 mm must be
provided for the wiring. Only an electrician
may install the fixed connection.We
recommend installing a residual-current circuit
breaker (RCCB) in the appliance's power
supply circuit.
:Warning
Risk of electric shock!
Incorrect repairs are dangerous. Repairs may
only be carried out and damaged power
cables replaced by one of our trained after-
sales technicians. If the appliance is defective,
unplug the appliance from the mains or switch
off the circuit breaker in the fuse box. Contact
the after-sales service.
:Warning
Danger of suffocation!
Packaging material is dangerous to children.
Never allow children to play with packaging
material.
KGeneral information
Gener al informat i on
Preparing the ceiling
The ceiling must be flat, horizontal and have
adequate load-bearing capacity.
The depth of the bore holes must be the same
length as the screws. The wall plugs must have a
secure grip.
The enclosed screws and wall plugs are suitable for
solid brickwork. Suitable fasteners must be used for
other structures (e.g. plasterboard, porous concrete,
poroton bricks).
The maximum weight of the extractor hood is 26 kg.
Electrical connection
:Warning
Risk of electric shock!
It must always be possible to disconnect the appliance
from the power supply. If there is a fixed connection, an
all-pole isolating switch with a contact gap of at least
3 mm must be provided for the wiring. Only an
electrician may install the fixed connection.We
recommend installing a residual-current circuit breaker
(RCCB) in the appliance's power supply circuit.
:Warning
Risk of electric shock!
Components inside the appliance may have sharp
edges. These may damage the connecting cable. Do
not kink or pinch the connecting cable during
installation.
The required connection information can be found on
the rating plate inside the appliance; to access it, you
will need to remove the activated charcoal filter.
Length of the cable: approx. 1.30 m
This appliance complies with the EC interference
suppression regulations.
The appliance must be disconnected from the power
supply whenever installation work is being carried out.
When the appliance is installed, protection must be
provided against accidental contact in the future.
en Installation
16
5Installation
Instal l ati on
Preparing for installation
Caution!
Ensure that there are no electrical wires, gas pipes or
water pipes in the area where holes are to be drilled.
1. Cover the hob to protect it from damage.
2. Mark where the centre of the extractor hood should
be on the ceiling above the centre of the hob.
3. Using the template provided, mark the locations
where the bolts should be inserted on the ceiling.
4. Drill four 8 mm diameter holes to a depth of 80 mm
for fastening the appliance and press in the wall
plugs flush with the wall.
Preparing the appliance
1. Screw in the four bolts on the edge of the frame at
the marked locations, leaving them protruding out of
the frame by approx. 5 mm.
2. Remove the film from the frame cover.
3. Remove the activated charcoal filter from the film.
4. Open the cover on the top of the appliance and
remove it ¨, insert the activated charcoal filter ©
and then close the cover.
min. 5 mm
Installation en
17
Fitting the frame
1. Screw in the two bolts, leaving them protruding out
of the ceiling by 5 - 9 mm ¨.
Note: Make sure that the bolts ¨, frame ©, frame
cover ª and control « are positioned correctly
relative to one another. The position of the control is
marked on the template.
2. Insert the two bolts on the ceiling through the
openings provided in the frame ¨. Move the frame
to allow the bolts to be screwed into the keyhole
openings ©.
3. Use two more bolts to screw the frame in place. ª
Tighten all the bolts fully.
4. Insert the four cables into the openings provided in
the frame and thread them through the labyrinth.
PP
PP
en Installation
18
Establishing a connection to the mains
:Warning
Risk of electric shock!
It must always be possible to disconnect the appliance
from the power supply. If there is a fixed connection, an
all-pole isolating switch with a contact gap of at least
3 mm must be provided for the wiring. Only an
electrician may install the fixed connection.We
recommend installing a residual-current circuit breaker
(RCCB) in the appliance's power supply circuit.
Note: To find out the correct fuse rating, see the total
connected load (in watts) on the appliance's rating
plate.
1. Position the appliance underneath the frame.
2. Carefully thread the cables and the mains power
cable through the opening in the frame cover. Place
the frame cover down onto the appliance.
3. Mount the appliance on the wall and level it; see the
section entitled "Wall-mounting the appliance and
levelling it".
4. Thread the mains power cable through the opening
in the frame and then through the strain relief.
Caution!
Do not position the mains power cable that is inside
the frame underneath the frame.
5. Connect the appliance to the power supply.
Caution!
Pay attention to the marks on the connection
terminals when connecting the wires (permissible
cross sections of the domestic wiring: 1 mm² -
2.5 mm²) in the mains power cable.
6. Use an open-ended spanner (WAF 17) to tighten the
strain relief until the mains power cable is held firmly
and cannot move.
Fitting the frame cover
1. Slide the frame cover up.
Note: Thread the mains power cable through the
opening in the frame cover and, if necessary,
carefully pull it down.
2. Fit the frame cover onto the four bolts at the edge of
the frame.
Note: Slide the frame cover approx. 5 mm to the
right until you hear it click into place.
3. Tighten the bolts at the edge of the frame.
4. Secure the covers to the magnets to hide the bolts
at the edges of the frame.
3( 1 /
3( 1 /
Installation en
19
Attaching and aligning the appliance
1. Manually open the cable tensioners until the cable
can be inserted in it. Do not use any tools.
Note: Do not open the cable tensioners fully. The
cable tensioners may fall into the appliance.
2. Enlist the help of a second person to lift the
appliance and thread the cables into the cable
tensioners on the top of the appliance.
Note: Never shorten the cables.
3. Taking care to comply with the safety clearances,
slide the appliance up and level it.
4. If you need to position the appliance lower down, lift
it up ¨, push the cable tensioners down © and pull
the cables back out of the cable tensioners ª.
5. After aligning, tighten the cable tensioners so that
they are hand-tight. Do not use any tools.
BSH Hausgeräte GmbH
Carl-Wery-Straße 34, 81739 München
GERMANY
*9001195426*
9001195426 971101
siemens-home.bsh-group.com
0DQXIDFWXUHGE\%6++DXVJHUlWH*PE+XQGHU7UDGHPDUN/LFHQVHRI6LHPHQV$*
  • Page 1 1
  • Page 2 2
  • Page 3 3
  • Page 4 4
  • Page 5 5
  • Page 6 6
  • Page 7 7
  • Page 8 8
  • Page 9 9
  • Page 10 10
  • Page 11 11
  • Page 12 12
  • Page 13 13
  • Page 14 14
  • Page 15 15
  • Page 16 16
  • Page 17 17
  • Page 18 18
  • Page 19 19
  • Page 20 20

Siemens LF31IVV60 User manual

Category
Cooker hoods
Type
User manual
This manual is also suitable for

Ask a question and I''ll find the answer in the document

Finding information in a document is now easier with AI