Page is loading ...

Y1-03-0312 Rev A
ARTEX PRODUCTS / ACR ELECTRONICS, INC
5757 Ravenswood Rd, Ft. Lauderdale, FL 33312
Cage Code: 18560
3000 SERIES ELT’s
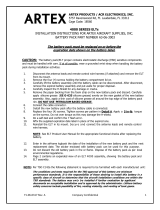
INSTALLATION INSTRUCTIONS FOR ARTEX AIRCRAFT SUPPLIES, INC. BATTERY
PACK PART NUMBER A3-06-2863
The battery pack must be replaced on or before the expiration date shown on the
battery label.
CAUTION: The battery pack contains electrostatic discharge sensitive (ESD) components and it must
be handled with care. If at all possible, wear a grounded wrist strap when
handling the battery pack
during installation activities.
Take particular care to
avoid touching the exposed circuit board and connector pins on the board.
1.
Disconnect the antenna leads and remote control wire harness (if attached) and remove the ELT
from its mount.
2.
Remove the six (6) screws holding the battery compartment lid on.
3.
Carefully lift the battery assembly until the battery flex cable can be disconnected. After
disconnect, remove the expired battery assembly and put aside for disposal.
4.
Remove the existing gasket from the front assembly and discard. Carefully (without stretching
the gasket) apply a silicone d i e l e c t r i c c o m p o u n d (SSP-1212 Silicone grease)
evenly on the new gasket of the new battery assembly. Check the O-ring to ensure it is in the
groove and not exposed to pinching, when the new battery is installed. DO NOT USE A
PETROLEUM BASED GREASE.
5.
Connect the flex cable connector.
6.
Install the new battery pack after the battery flex cable is connected.
7.
Note that there is no pinching of the gasket when properly seated.
8.
Replace the 6 screws. Tighten screws per pattern in Detail A. Apply a 5 in-lb. torque on the
screws.
9.
Do a self-test and confirm the 7 flash error.
10.
Affix the supplied expiration date label in the place of the expired one.
11.
Reinstall the ELT in its mount, secure and connect the antenna leads and remote control
wire harness.
12.
NOTE: See ELT User and Installation Manual for the appropriate functional checks after the
battery was replaced.
13.
Enter in the airframe logbook the date of the installation of the new battery pack and the
next
replacement date. The sticker enclosed with battery pack can be used for this
purpose.
14.
Do not discard the old battery pack in fire or flame. Dispose of the battery pack as per
local
environmental regulations.
15.
Page 2 (back side) contains an expanded view of a 3000 ELT assembly, showing
the battery
pack and ELT assembly.
Note: Per TSO C142a the following statement is required to be furnished with each manufactured
unit:
The conditions and tests required for the TSO approval of this battery are minimum performance
standards. It is the responsibility of those desiring to install this battery in a specific class of
aircraft to determine that the aircraft installation conditions are within the TSO standards. The
battery may be installed only if further evaluation by applicant documents an acceptable
installation and is approved by the administrator. Lithium battery safety concerns include
possibility of fire, venting violently, and venting of toxic gases.
NOTE: It is very important that your 406 MHz ELT be registered with NOAA, or your country’s
Civil Aviation Administration, and that the database information is up to date. In the event that
your ELT is activated, the database is used to facilitate Search and Rescue teams. Without
current information, valuable time may be lost in the search and rescue process. If your

Y1-03-0312 Rev A
address, phone number, etc. has changed, please send the updated information to your
country’s Civil Aviation Administration, or if your aircraft is of
U.S. registry, to the following address:
NOAA/SARSAT Registration forms are available at:
NSOF, E/SP053 www.sarsat.noaa.gov
1315 East West HWY
SILVER SPRING, MD. 20910-9684
1 5 4
3 6 2
DETAIL-A
6 (SIX) SCREWS
GASKET
ELT ASSEMBLY
/


