Page is loading ...

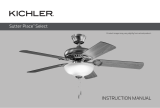
Instruction Manual
ETL Model #Bluetooth Audio LK
LED Ceiling Fan Audio Light Kit
Featuring BLUETOOTH
®
Technology
380950

1
1. SAFETY RULES (READ AND SAVE THESE INSTRUCTIONS)
1. To reduce the risk of electric shock, insure
electricity has been turned off at the circuit
breaker or fuse box before beginning.
2. All wiring must be in accordance with
the National Electrical Code and local
electrical codes. Electrical installation
should be performed by a qualied licensed
electrician.
3. CAUTION: All glass is fragile, use care
when handing the glass bowl.
4. CAUTION: To avoid accidental burning,
allow the bulb and glass bowl to cool
completely before touching or replacing the
glass bowl or bulbs.
5. CAUTION: To reduce the risk of electrical
shock, This light kit is suitable to be used in
damp locations.
6. WARNING: Changes or modications to
this unit not expressly approved by the party
responsible for compliance could void the
user’s authority to operate the equipment.
This equipment has been tested and found to comply with the limits for a Class B digital device, pursuant to Part 15 of
the FCC Rules. These limits are designed to provide reasonable protection against harmful interference in a residential
installation. This equipment generates uses and can radiate radio frequency energy and, if not installed and used
in accordance with the instructions, may cause harmful interference to radio communications. However, there is no
guarantee that interference will not occur in a particular installation. If this equipment does cause harmful interference
to radio or television reception, which can be determined by turning the equipment off and on, the user is encouraged to
try to correct the interference by one or more of the following measures:
• Reorient or relocate the receiving antenna.
• Increase the separation between the equipment and receiver.
• Connect the equipment into an outlet on a circuit different from that to which the receiver is connected.
• Consult the dealer or an experienced radio/TV technician for help.
FCC ID: RGB-BTADLK380950. This device complies with Part 15 of the FCC Rules. Operation is subject to the following
two conditions:
(1) This device may not cause harmful interference, and
(2) this device must accept any interference received, including interference that may cause undesired operation.
This product may cause interference to radio equipment and should not be installed near maritime safety communications
equipment, ships at sea or other critical navigation or communications equipment operating between 0.45-30 Mhz.

2
LED Ceiling Fan Audio Light Kit
Featuring BLUETOOTH
®
Technology
2. TOOLS AND MATERIALS REQUIRED
• Phillips screw driver
• Blade screw driver
• 11mm wrench
• Step ladder
• Wire cutters
• Electrical tape
3. PACKAGE CONTENTS
Unpack your fan and check the contents.
You should have the following items:
Part No. Description Quantity
a Light kit tter assembly 1
b Glass bowl 1
c Hex nut 1
d Rubber washer 1
e 4” Pull chain 1
f 7” Pull chain 1
c
d
e
a
b
f

3
4. PREPARING THE FAN
Step 1. Remove the ceiling fan switch cup cover
from the ceiling fan assembly by removing the three
mounting screws.
Step 2. Remove the center plug from the switch cup
cover.
5. PREPARING THE LIGHT KIT
Step 1. Insert the black wire and white wire from
the light kit through the center hole of the ceiling fan
switch cup cover.
Step 2. Thread the ceiling fan switch cup cover onto
the threaded nipple on the top of the light kit.
Step 3. Take out the lockwasher and hex nut from the
hardware pack. Insert the black wire and white wire
through the lockwasher and hex nut, tighten them
securely.
Switch cup
cover
Center plug
Mounting
screws
Lockwasher
Light kit
Threaded nipple
Hex nut
Switch cup cover

4
LED Ceiling Fan Audio Light Kit
Featuring BLUETOOTH
®
Technology
6. WIRING THE LIGHT KIT TO THE FAN
REMEMBER to turn off the power before you
begin.
Step 1. Locate the blue and white wires inside
the ceiling fan switch cup for light connection.
Step 2. Connect the blue wire form the ceiling
fan switch cup to the black wire from the light kit.
Step 3. Connect the white wire from the ceiling
fan switch cup to the white wire from the light kit
by connecting the molded plugs together.
Step 4. Reattach the switch cup cover to the
ceiling fan switch cup and secure with the
screws that were removed in step of preparing
the fan.
7. INSTALLING THE GLASS BOWL FOR
FANS WITH PULL CHAINS
CAUTION: Do not over-tighten the hex nut.
Over-tightening the hex nut may cause the glass
bowl to crack or break.
Step 1. Pass the fan switch chain through the
hole of the pull chain guide.
Step 2. Remove the pre-installed nial, outer
bowl cap, hex nut and rubber washer from the
light kit and save them for later use.
Step 3. Align the glass bowl over the threaded
nipple and raise the glass bowl up to the light kit.
Step 4. Pass the chain through rubber washer,
hex nut and tighten them with the screw driver.
Step 5. Pass the chain through the outer bowl
cap and align it on the threaded nipple and lock
it with the nial. Finger tighten.
Step 6. Attach the pull chain extensions to the
light switch chain and the fan switch chain.
Switch cup
Switch cup cover
Screws
Light kit
Light kit
Glass bowl
Pull chain
guide
Pull chain
extensions
OO
Rubber washer
Hex rut
Pre-installed finial
Pull chain extensions
Outer bowl cap
Secondary Mode
Primary Mode

5
NOTE: The ceiling fan audio light kit with BLUETOOTH
®
Technology is compatible with iPhone, iPad,
Android, Blackberry, or similar devices whose BLUETOOTH protocol is compatible with 4.1 protocol. To
pair, ensure the light kit is powered up.
Step 1. Pull the chain switch of the light kit to ensure the light kit is powered up. The BLUETOOTH
®
function turns on automatically.
Step 2. On your BLUETOOTH
®
enabled device, search for a new BLUETOOTH
®
device called “BT Audio
LK” under the list of devices available.
Step 3. Pairing is successful when you hear a short conrmation tone from the audio light kit.
Step 4. Start streaming audio from your music source.
Step 5. For some BLUETOOTH
®
devices and mobile phones, “Stereo Speaker” mode should be enabled
to stereo audio wireless.
Step 6. The audio light kit is compatible with the 4.1 protocol. Full BLUETOOTH
®
functionality and volume
control cannot be guaranteed if the audio source has an older BLUETOOTH protocol.
Step 7. To pair to a new BLUETOOTH
®
device, you need to disable the current paired device. Open
searching function of the new BLUETOOTH
®
device and repeat the pairing steps as previously
mentioned.
8. BLUETOOTH
®
PAIRING

6
LED Ceiling Fan Audio Light Kit
Featuring BLUETOOTH
®
Technology
9. BLUETOOTH
®
AUDIO PRIMARY AND SECONDARY FUNCTION
The primary instructions:
Step 1. If you are using the product without other Audio
Light Kits, the switch on the top of the light kit should
be placed into the Primary mode. When the unit is in
Primary mode, it can be connected via BLUETOOTH
allowing audio to be enjoyed via the speakers.
Step 2. If you have two Audio Light Kits, they can work
independently or work simultaneously by pairing. When
pairing, one unit must be placed into the primary mode
and the other unit must be placed into secondary mode.
The unit in secondary mode will then be able to receive
the audio signal from the primary unit.
Primary/Secondary Mode Pairing Instruction:
Keep the distance between the two audio light kits
under 10 meters and turn off power. One unit must
be placed into primary mode and the other must be
placed into secondary mode. Turn on both units at the
same time, the primary audio light kit will search for
the secondary audio light kit automatically within 30
seconds. Pairing is successful when you hear a short
conrmation tone from the audio light kit.
10. BLUETOOTH
®
AUDIO PLAY
Step 1. Once paired, you will be able to control the playback and volume through your device.
Step 2. If available on your device, access the sound settings or equalizer settings. Selecting the correct audio
prole or sometimes turning on the equalizer will improve the quality and maximum volume for the playback.
Step 3. If you wander out of range of the BLUETOOTH
®
device and the device is disconnected, simply move
closer to the audio light kit and re-click ”BT Audio LK”. Bluetooth device will regain connection; if the Bluetooth
device is still connected, then no pairing actions will be needed, the devices will regain the connection
automatically.
Step 4. The ceiling fan audio light kit with BLUETOOTH
®
Technology features a built-in privacy mode which
disconnects speaker playback when a phone call is being received from the device. It will automatically resume
playback when the call is completed.
NOTE:
Audio Light Kits must be turned on within 5 seconds from each other for the pairing to be successful.
Secondary Mode
Primary Mode
NOTE:
Only one secondary Audio Light Kit can be paired per primary Audio Light Kit.

Kichler
®
Lighting
7711 East Pleasant Valley Road
P.O. Box 318010
Cleveland, Ohio 44131-8010
Customer Service
866.558.5706
8:30 AM to 5:00 PM EST,
Monday - Friday
/