Travelstar Series

Western Digital Travelstar Series Installation guide

  • Hello! I am an AI chatbot trained to assist you with the Western Digital Travelstar Series Installation guide. I’ve already reviewed the document and can help you find the information you need or explain it in simple terms. Just ask your questions, and providing more details will help me assist you more effectively!
  • What should be done to reduce static when attempting to install a Western Digital Travelstar Series Hard Drive?
    What is the estimated installation time for a Western Digital Travelstar Series Hard Drive?
    What is the purpose of the 'hold' screw with the PlayStation icons when installing a Western Digital Travelstar Series Hard Drive?
    What is the file size of the PS4UPDATE.PUP file that needs to be downloaded for a Western Digital Travelstar Series Hard Drive installation?
    How can the PS4 be placed in safe mode in order to reinstall the software during a Western Digital Travelstar Series Hard Drive installation?
Tools Needed:
How to Upgrade your PlayStation 4 Hard Drive.
Phillips Head Screwdriver USB Flash Drive (at least 1GB) External Hard Drive 2.5” Hard Drive Computer with Internet Access
Sony and PlayStation are trademarks of Sony Corporation. Sony is not a sponsor of this promotion. Learn more about PlayStation Warranty.
To reduce static, you should work on a clean, dust free surface. To be extra safe, use a grounding strap and do not drop or touch the
electronics area even when grounded.
IMPORTANT: Once you install the new hard drive you will not be able to get the les o your old drive unless you backed up to an
external hard drive or PSN (PlayStation Network). Installation time: Estimated 45 mins
1
Turn on your PS4 and log into PSN. Make sure your PS4 software is up-to-date.
2
Back up all of your saved data from the PS4 hard drive onto the external hard drive or PSN.
3
Turn o the PS4 by pressing the power button. If the LED strip is still lit, hold down the power button for 7 seconds
or until the light turns o.
Note: It is not recommended to unplug the PS4 until the light turns o or it may cause le corruption. Once you are
sure it is o, unplug the power cord. Do not work on the PS4 with the AC cord attached to the wall outlet.
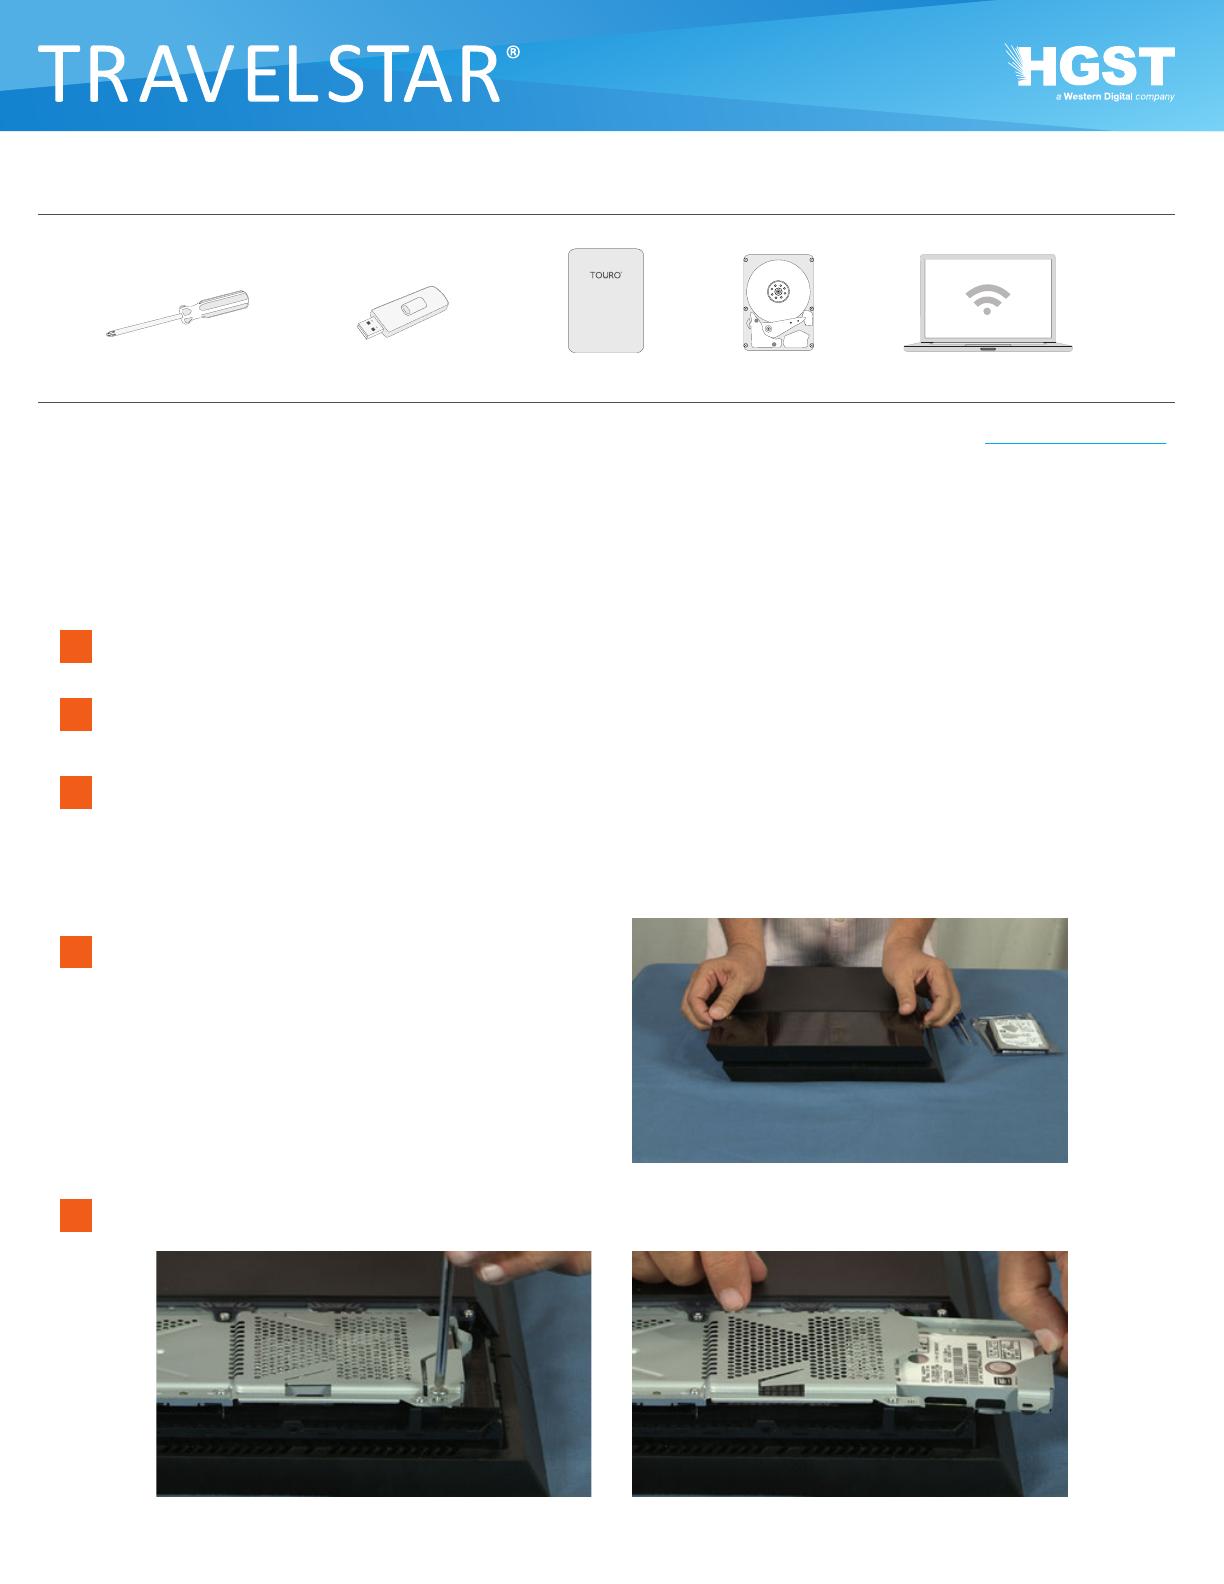
4
Remove cover to access the hard drive. The hard drive is
located under the shiny cover. The cover may take a bit of
force to remove. Gently move it from side to side.
5
Unscrew the “hold” screw that has the PlayStation icons. Remove the drive sled by sliding it outward
How to Upgrade your PlayStation 4 Hard Drive.
6
Remove all four screws from the drive sled. Take out the old drive and place the new drive in the same orientation
as the old one. Replace the 4 screws.
7
Slide the drive sled back into the PS4 and replace
the “hold” screw. Replace the shiny cover.
8
Insert the USB ash drive into your computer and create two folders. One called PS4 and inside the PS4 folder
create another folder called UPDATE.
9
Download the le named PS4UPDATE.PUP on the PlayStation Website and save it in the UPDATE folder located
in the ash drive. (The le is about 800MB so this can take some time depending on your internet connection speed).
10
The PS4 must be in safe mode to re-install the software. To place the PS4 in safe mode, press and hold the power
button. Release it after you hear two beeps: one when you initially press, and another 7 seconds later.
11
Click “initialize. This will take a few minutes to complete. The PS4 will reboot. To move les back to the PS4,
either plug in the external drive or connect to PSN. Disconnect the external drive after le transfer is complete.
12
Now youre ready to enjoy more storage for more gaming. Thank you for choosing HGST!
References:
PlayStation Warranty: http://us.playstation.com/support/warranties/ps4/index.htm
PS4UPDATE.PUP Download page: http://us.playstation.com/support/systemupdates/ps4/new-install/#installationSteps
© 2014 HGST, Inc.
hgst.com/PS4
13 (H) X 80 (W) X 115 (D)
/