Page is loading ...

A
B
C
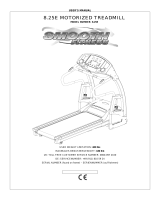
60 - 90 Min.220 / 230 V EN 957 1/6> 5 h < 160 kg A:
B:
C:
103 cm
208 cm
47 cm
159 kgs
EN
Assembly Manual

www.energetics.eu

3
Table of contents
Serial Number: ___________________________
Date of Purchase: ___________________________
www.energetics.eu
c/o Neomark Sàrl, 14a rue de la Gare, 4924 Hautcharage, Luxembourg
Assembled & produced by / assemblé & produit par:
Full address of far east supplier
Produced for / produit pour:
IIC-INTERSPORT International Corporation GmbH, Woelflistrasse 2,
3006 Berne, Switzerland
Product Name: XXX
IIC Product Number: XXX
Manufacturer Number: XXX
Serial Number: XXX
Max User Weight: XXX kg / XXX lbs
EN957/1, EN957/X , Class: X Made in China
Fabriqué en Chine Console, electronics, adaptor
1. English . . . . . . . . . . . . . . . . . . . . . . . . . . . . . . . . . . . . . . .p. 4
Serial Decal
EN The product sticker is placed on the rear stabilizer on bikes and ellipticals
and next to the power inlet on treadmills.
EN © The owner’s manual is only for the customer reference. ENERGETICS can not guarantee for mistakes occurring due to translation or change in technical
specification of the product. Wherever pictograms are used they may differ from your product, it’s for reference only.

www.energetics.eu
4
Corporate Social Responsibility
INTERSPORT is a participating company in the BSCI (Business Social Compliance Initiative) based in Brussels. Through
BSCI, INTERSPORT is committed to implement the BSCI Code of Conduct in its supply chain and to gradually achieve
better working conditions at the involved suppliers’ workplaces. The BSCI system is based on three pillars: monitoring
of non-compliances by external independent audits; empowering of supply chains’ actors through various capacity-
building activities; and engagement with all relevant stakeholders via constructive dialogue in Europe and supplying
countries. Our social audits are conducted by neutral, internationally recognized auditing companies with the aim of
monitoring the social compliance of our supplier factories.
For more information on the BSCI please visit: www.bsci-intl.org
Norms & Regulations
Consumer safety is the number one priority for ENERGETICS products. This means that all of our products comply with
national and international legal requirements (such as the EU Regulation (EC No. 1907/2006) concerning the Registra-
tion, Evaluation, Authorization and Restriction of Chemicals [REACH]).
This product is also CE certified and has been tested by an internationally
recognized institute and certified against the industry standard EN 957.
Disposal of electrical waste products (Directive 2002/96/EC WEEE):
All products that contain electrical and electronic equipment must be
marked with the logo. These products shall not be disposed in municipal
waste. Instead please check local regulations regarding these types of
products.
Disposal of batteries (Directive 2006/66/EG):
Batteries must be marked with the logo including the chemical symbols Hg,
Cd or Pb if the battery contains mercury, cadmium or lead above the thresh-
old limits mentioned in the directive and its amendments. Batteries used in
products shall not be disposed in municipal waste.
Directive 2011/65/EU:
Restriction of the use of certain hazardous substances in electrical and
electronic equipment (RoHS).

5
EN
Dear Customer,
Congratulations on your purchase of an ENERGETICS light institutional fitness equipment. This product has been
designed and manufactured to meet the needs and requirements of light institutional use (CEN 957 class S). Please
carefully read the assembly- and user manual. Be sure to keep the instructions for reference and/or maintenance. If
you have any further questions, please contact us. We wish you lots of success and fun while training,
Your ENERGETICS - Team
Product Safety
ENERGETICS offers high quality light institutional fitness equipment. All products have been tested and certified
according to the latest European Norm EN 957.
Important Safety Instructions for all light institutional fitness equipment
• Do not assemble or operate this light institutional fitness equipment outdoors or in a wet or moist location.
• Before you start training on your home exercise product, please read the instructions carefully.
• Be sure to keep the instructions for information, in case of repair and for spare part delivery.
• This training equipment is not suitable for therapeutic purposes.
• Consult your physician before starting with any exercise programs to receive advice on the optimal training.
• Warning: incorrect/excessive training can cause health injuries. Stop using the light institutional fitness equipment
when feeling uncomfortable.
• Warning: The safety level of the training equipment can only be maintained if it is examined regularly on damage or
wear.
• Please follow the advice for correct training as detailed in the training instructions.
• Ensure that training only starts after correct assembly, adjustment and inspection of the light institutional fitness
equipment.
• Always start with a warm-up session.
• Only use original ENERGETICS parts as delivered (see parts list).
• Follow the steps of the assembly instruction carefully.
• Only use suitable tools for assembly and ask for assistance if necessary.
• Place the light institutional fitness equipment on an even, non-slippery surface for immobilization, reducing noise
and vibration.
• To protect the floor or carpet from damage, place a mat under the product.
• For all adjustable parts be aware of the maximum position to which they can be adjusted.
• Tighten all adjustable parts to prevent sudden movement while training.
• This product is designed for adults. Please ensure that children only use it under the supervision of an adult.
• Ensure that those present are aware of possible hazards, e.g. movable parts during training.
• Do not use the light institutional fitness equipment without shoes or loose shoes.
• Ensure that sufficient space is available to use the light institutional fitness equipment.
• Be aware of non-fixed or moving parts whilst mounting or dismounting the light institutional fitness equipment.
• Search for noisy parts: If you should notice unusual noises, like grinding, clacking etc. try to locate it and have it
repaired by a professional. Make sure the light institutional fitness equipment is not used until after repairs have been
made.

www.energetics.eu
6
• This device is not meant to be used by persons (including children) with limited physical, sensory or mental capabil-
ities or lacking experience and/or the knowledge to use this device, unless under the supervision of another person
in charge of their safety or having been given prior instruction on the operation of this device.
• Children should always be under supervision, to assure they are not playing with this device.
• Advised correct running position: Running straight on the treadmill is made easier by focusing on a fixed object in
front of you in the room. Run as if you wanted to approach the object.
• Noise compliance: This treadmill meets the requirements of the noise pollution standards.
• This product is made for light institutional use and tested up to a maximum body weight of: see front
page or serial decal on product.
WARNING: Heart rate monitoring systems may be inaccurate. Over exercising may result in serious injury or
death. If you feel faint stop exercising immediately.
Important Safety Instructions for Treadmills
• To protect the floor or carpet from damage, place a mat under the treadmill.
• Turn off the power whilst the treadmill is not in use and remove the safety key.
• In case of emergency please place both feet at the same time on the side rails.
• Do not leave the equipment unattended when the treadmill is still plugged-in.
• Remove the main plug from the power outlet when the equipment is not in use, before assembly or disassembly
and before cleaning and maintenance.
• We take no responsibility for personal injury or damage sustained by or through the use of this treadmill.
• The function of the immobilization method: the purpose of immobilizing the treadmill is to prevent unauthorized
use. This can be accomplished by removing the safety key from the console, unclipping it from the cord and putting
it in a non-accessible place.
• Clear safety area of at least 200 cm in length and at least as wide as the treadmill shall be provided behind the equip-
ment when in use.
• Make sure that the walking belt comes to a complete stop before folding up the machine.
• Never start the treadmill if folded up.

7
EN
Emergency Key / Stop
The function of the emergency stop: The safety key functions as the emergency stop. In an emergency situation,
remove the safety key from the console and the treadmill will come to a stop.
Note: Please attach the safety key clip onto your running outfit while running.
Cleaning, Care & Maintenance on fitness equipment
Warning
• To prevent electrical shock, be sure the power to the treadmill is OFF and the power cord is unplugged from the wall
electrical outlet before attempting and cleaning or maintenance.
Important
• Frequent cleaning of your treadmill will extend the product’s life.
• Use of a treadmill mat is recommended for ease of cleaning.
• Use clean and proper sport shoes only.
• Use a damp cloth to clean the treadmill and avoid the use of abrasives or solvents.
• To prevent damage to the computer, keep liquids away and keep it out of direct sunlight.
• The treadmill should not be used or stored in a moist area because of possible corrosion.
• Dirt from your shoes contacting the belt may eventually make its way underneath the running belt.
• In case of repair please ask your dealer for advice.
• Replace defective components immediately and/or keep the equipment out of use until repair.
• Use original spare parts for repair only.
Follow the steps listed below if you experience pain, feel
faint or need to stop your treadmill in an emergency
situation:
1. Grip handrails for support.
2. Step onto the lateral platform.
3. Pull the safety key off the console.
To activate an emergency stop, please detach the
safety key from the console.

www.energetics.eu
8
Deck Lubrication
The walking belt has been pre-lubricated at the factory. However, it is recommended that the waking board be
checked periodically for lubrication to ensure optimal treadmill performance. Your treadmill should not have to be
lubricated usually within the first year or 500 hours of use.
Every 30 days or 20 hours of operation lift the sides of the walking belt and feel the top surface of the walking board
as far as you can reach. If there are signs of silicone, no further lubrication is required. If it feels dry to the touch, follow
the instructions below. Please use a non-petroleum based silicone.
To apply lubricant to the walking belt:
1. Position the walking belt so that the seam is located on top and in center of the walking board.
2. Insert the spray nozzle into the spray head of the lubricant can.
3. While lifting the side of the walking belt, position the spray nozzle between the walking belt and the board approx-
imately 6 cm from the front of the treadmill. Apply the silicone spray to the walking board, moving from the front of
treadmill to the rear. Repeat this on the other side of the belt. Spray approximately 4 seconds on each side.
4. Allow the silicone to “set” for 1 minute before using the treadmill.
Monthly
• Check that all connecting elements are
tightly fitted and in good condition.
Daily
• Immediately wipe of the sweat; perspiration
can ruin the appearance and proper func-
tion of the treadmill.
Weekly
• Vacuum underneath treadmill once a week.

9
EN
Please keep children and pets away from the silicone oil at all times to prevent any swallowing of the substance.
Belt adjustment
Belt adjustment and tension performs two functions: adjustment for tension and centering. The running belt has been
adjusted properly at the factory. However transportation, uneven flooring or other unpredicted reasons could cause
the belt to shift off center resulting in the belt rubbing with the plastic side rail or end caps and possibly causing dam-
age. To adjust the belt back to it’s proper position please follow the directions below:
Walking belt has shifted to the left: First unplug the power cord from the surge protector. Using the hex key pro-
vided, turn the left rear roller adjustment bolt 1/4 turn in the clockwise direction. Plug the power cord back into the
surge protector and run the treadmill at 4 km/h (2.5 mph). You should see the belt start to correct itself, moving back
towards the center. Repeat the above procedure until the walking belt is centered. It may be necessary to set walking
belt tension once you have completed this procedure if the belt feels like it is slipping while walking. Refer below to
the “Walking belt slipping” instructions.
Walking belt has shifted to the right: First unplug the power cord from the surge protector. Using the hex key pro-
vided, turn the right rear roller adjustment bolt 1/4 turn in the clockwise direction. Plug the power cord back into the
surge protector and run the treadmill at 4 km/h (2.5 mph). You should see the belt start to correct itself, moving back
towards the center. Repeat the above procedure until the walking belt is centered. It may be necessary to set walking
belt tension once you have completed this procedure if the belt feels like it is slipping while walking. Refer below to
the “Walking belt slipping” instructions.
Walking belt is slipping: First unplug the power cord from the surge protector. Using the hex key provided, turn
both the left and right rear roller adjustment bolts the same distance, usually a 1/4 turn in the clockwise direction.
Plug the power cord back into the surge protector and run the treadmill at 4 km/h (2.5 mph). You should now walk on
the belt to determine if the belt is still slipping. Repeat the above procedure until the walking belt is not slipping. The
tension should be just tight enough not to slip.

www.energetics.eu
10
Wire
Click
Assembly Information
1. Also refer to the drawings on the last pages of the manual.
2. Open the carton, put the main frame on the ground.
3. Fix the console cockpit on the uprights using designated screws (see assembly drawing for reference).
Important: Make sure you will not pinch, cut or damage the cable in any way (see hangtag). Please pay special
attention to the wire connecting of the upper board with the lower board. Please also make sure that you connect
the two cables correctly. The connection has been connected well once you hear a “click” sound. Any damage or
incorrect connection will cause major problems operating the machine.
WARNING! Do not over tighten rollers! This will cause premature roller bearing failure!
Right and left tension bolts are located at the rear of the treadmill.

11
EN
4. Fold and move up the console together with the upright posts.
Important: When you up fold the computer and the uprights, make sure the metal does not damage the inside
wires! Fix the upright onto the base frame with the designated screws (see assembly drawing for reference). Repeat
the same on the other side.
5. If applicable fix the right & left base cover on each upright with the designated screws (see assembly drawing for
reference).
6. If applicable cover the right & left handlebar cover on the computer frame.
7. Attach the safety key to the computer.
Operations
Proper Training Clothes
Please make sure you always wear proper training shoes while working out. It is recommended that you wear training
appropriate exercise clothing’s that allow you to move freely whilst exercising.
Exercise Level
Please contact a physician before your exercise program. Immediately stop exercising if you feel any pain or tightness
in your chest, become short breathed of faint. Please contact your doctor before you start using your fitness product
again.
Incline Adjustment
Training instructions
Check www.energetics.eu for detailed training instructions.
Computer controlled adjustment
The incline level can be increased or decreased on the console (if applicable). Please consult the computer manu-
al for further information.

www.energetics.eu
12
Transport treadmill
Lift the deck from the rear so that the treadmill rests on the front transportation wheels.
Handling
First locate the two adjustable stabilizers under the base frame. Then simply rotate them in or out to ad-
just the level of the treadmill. When properly adjusted the treadmill should sit firmly on both stabilizers
and all cushions.
An uneven floor or improper stabilizer level can cause the treadmill to wobble during use as well as the incline ad-
justment to function incorrectly. Please follow the procedure described below to make sure the treadmill stabilizer
is adjusted correctly prior to use. You may need the assistance of another person to perform this adjustment.

13
Roll to a desired location.
EN
Correct biomechanical position: Please refer to left
picture. Running straight on the treadmill is made
easier by focusing on a fixed object in front of you
in the room. Run as if you wanted to approach the
object. Always keep a distance which you can reach
the front hand bar.
Major exercise type: This equipment focuses on
your lower body, and it can train your muscle of
thigh and shank.
Important: Incorrect/excessive training can cause
health injuries.

www.energetics.eu
14
B
507 510 511
505
501
506
504
709
307
513
508509 512
503
EA D

15
FIG-1
713
103
507
103
C

www.energetics.eu
16
103
103
713
316
508
508
C
633
632
637
635

17
504
504
103
103
C

www.energetics.eu
18
103
103
709709
307307E
712

19
206
504
103
501
501
504
504
206
103
C

www.energetics.eu
20
509
506
703
103
703
103
509
509
509
506
B
D
/