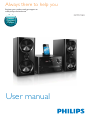
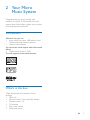
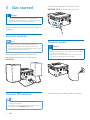
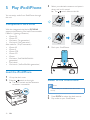
Philips DCM3160 is a versatile audio system that allows you to enjoy your favorite music from multiple sources. Play CDs, MP3s from USB drives, or connect your iPod or iPhone directly to the system's dock for high-quality sound. Tune in to FM radio stations for a wide variety of programming, and customize your listening experience with a range of sound effects, including Digital Sound Control (DSC).
Philips DCM3160 is a versatile audio system that allows you to enjoy your favorite music from multiple sources. Play CDs, MP3s from USB drives, or connect your iPod or iPhone directly to the system's dock for high-quality sound. Tune in to FM radio stations for a wide variety of programming, and customize your listening experience with a range of sound effects, including Digital Sound Control (DSC).


-
 1
1
-
 2
2
-
 3
3
-
 4
4
-
 5
5
-
 6
6
-
 7
7
-
 8
8
-
 9
9
-
 10
10
-
 11
11
-
 12
12
-
 13
13
-
 14
14
-
 15
15
-
 16
16
-
 17
17
-
 18
18
-
 19
19
-
 20
20
-
 21
21
-
 22
22


Philips DCM3160 is a versatile audio system that allows you to enjoy your favorite music from multiple sources. Play CDs, MP3s from USB drives, or connect your iPod or iPhone directly to the system's dock for high-quality sound. Tune in to FM radio stations for a wide variety of programming, and customize your listening experience with a range of sound effects, including Digital Sound Control (DSC).
Ask a question and I''ll find the answer in the document
Finding information in a document is now easier with AI
