DCM2160B

Black & Decker DCM2160B, DCM2160W, DCM2160W, DCM2160B User manual

  • Hello! I am an AI chatbot trained to assist you with the Black & Decker DCM2160B User manual. I’ve already reviewed the document and can help you find the information you need or explain it in simple terms. Just ask your questions, and providing more details will help me assist you more effectively!
Please Read and Save this Use and Care Book
Por favor lea este instructivo antes de usar el producto
Veuillez lire et conserver ce guide d’entretien et d’utilisation
Models
Modelos
Modèles
DCM2160W
DCM2160B
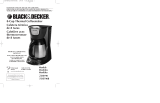
12-Cup Programmable
Coffeemaker
Cafetera programable
de 12 tazas
Cafetière programmable
de 12 tasses
USA/Canada 1-800-231-9786
Mexico 01-800-714-2503
www.applicaconsumerproductsinc.com
IMPORTANT / IMPORTANTE /
IMPORTANT
WASH CARAFE BEFORE FIRST USE!
LAVE LA JARRA ANTES DEL PRIMER USO
LAVER LA CARAFE AVANT
LA PREMIÈRE UTILISATION!
Accessories/Parts (USA/Canada)
Accesorios/Partes (EE.UU/Canadá)
Accessoires/Pièces (É.-U./Canada)
1-800-738-0245
Register your product online at www.prodprotect.com/applica,
for a chance to WIN $100,000!
For US residents only
Registre su producto en la Internet en el sitio Web www.prodprotect.com/applica
y tendrá la oportunidad de GANAR $100,000!
Solamente para los residentes de EE.UU
Inscrivez votre produit en ligne à l'adresse www.prodprotect.com/applica
et courez la chance de GAGNER 100 000 $!
Aux résidents du É.-U seulement
*
* Filters not included.
* No incluye los filtros.
* Filtres non compris.
21
IMPORTANT SAFEGUARDS
When using electrical appliances, basic safety precautions should always be
followed to reduce the risk of fire, electric shock and/or injury to persons,
including the following:
Read all instructions.
Do not touch hot surfaces. Use handles or knobs.
To protect against fire, electric shock and injury to persons do not
immerse cord, plugs or appliance in water or other liquid.
Close supervision is necessary when any appliance is used by or near
children.
Unplug from outlet when not in use and before cleaning. Allow to cool
before putting on or taking off parts, and before cleaning the appliance.
Do not operate any appliance with a damaged cord or plug, or after the
appliance malfunctions or has been damaged in any manner. Return
appliance to the nearest authorized service facility for examination, repair
or adjustment. Or, call the appropriate toll-free number on the cover of
this manual.
The use of accessory attachments not recommended by the appliance
manufacturer may result in fire, electric shock or injury to persons.
Do not use outdoors.
Do not let cord hang over edge of table or counter, or touch hot surfaces.
Do not place on or near a hot gas or electric burner, or in a heated oven.
To disconnect, turn any control to OFF, then remove plug from wall
outlet.
Do not use this appliance for other than intended use.
Keep lid on the carafe when in use.
Scalding may occur if the lid is removed during the brewing cycles.
SAVE THESE INSTRUCTIONS.
POLARIZED PLUG (120V Models Only)
This appliance has a polarized plug (one blade is wider than the other). To reduce
the risk of electric shock, this plug is intended to fit into a polarized outlet only one
way. If the plug does not fit fully into the outlet, reverse the plug. If it still does not fit,
contact a qualified electrician. Do not attempt to modify the plug in any way.
TAMPER-RESISTANT SCREW
Warning: This appliance is equipped with a tamper-resistant screw to prevent
removal of the outer cover. To reduce the risk of fire or electric shock, do not
attempt to remove the outer cover. There are no user-serviceable parts inside.
Repair should be done only by authorized service personnel.
ELECTRICAL CORD
a) A short power-supply cord (or detachable power-supply cord) is to be provided
to reduce the risk resulting from becoming entangled in or tripping over a
longer cord.
b) Longer detachable power-supply cords or extension cords are available and
may be used if care is exercised in their use.
c) If a long detachable power-supply cord or extension cord is used,
1) The marked electrical rating of the detachable power-supply cord
or extension cord should be at least as great as the electrical rating
of the appliance,
2) If the appliance is of the grounded type, the extension cord should
be a grounding-type 3-wire cord, and
3) The longer cord should be arranged so that it will not drape over
the countertop or tabletop where it can be pulled on by children
or tripped over.
Note: If the power supply cord is damaged, it should be replaced by qualified
personnel or in Latin America by an authorized service center.
4
3
Product may vary slightly from what is illustrated.
1. One-piece water reservoir and brew
basket cover
2. Water showerhead
3. Water reservoir
4. Water windows (on both sides)
with cup level markings
5. Cord storage (inside of unit)
6. Control panel
7. “Keep Hot” plate
†8. 12-cup/60 oz. (1774 ml) carafe
(Part # DCM2160W-02(w))
(Part# DCM2160B-02(b))
†9. Carafe lid
(Part #DCM2160W-03(w))
(Part #DCM2160B-03(b))
†10. Removable filter basket
(Part #DCM2160W-01(w))
(Part #DCM2160B-01(b))
Consumer replaceable/removable parts
MA
X
PO
WE
R
A
Control Panel
1. LCD display
Shows:
Current time of day
Preset auto brew cycle
2. AUTO light (in LCD display): Lights up when auto brew function is activated.
3. Power light: Lights up to indicate that the unit is turned on and the “Keep Hot” plate
is heated.
4. MIN button: Sets desired minutes.
5. AUTO button: Activates the auto brew function.
6. ON/OFF button: Turns the unit on and off.
7. PROG button: Press to select Delayed Brew mode.
8. HOUR button: Sets desired hours.
9. PM light (in LCD display): Lights up to indicate PM hours.
B
POWER
6:00
6
5
SETTING THE CLOCK
1. Plug appliance into standard electrical outlet.
2. The digital clock display flashes 12:00 (F).
Note: You must set the clock in order to use the Delayed
Brewing feature.
3. To set the time: Press HOUR button until the correct
hour appears (G).
Note: When the time passes Noon a small light appears
in the top left corner of the digital display under the PM
signage to let you know you are in P.M. time. If the P.M.
indicator is not lit, the time is A.M.
4. Repeat with the MIN button (H). (If minute setting is not
changed within 5 seconds, the clock will revert to default
time and the selection of hour and minute will have to
be repeated.)
Tip: Hold the button down to make the hours and minutes
change rapidly after a short delay. To change the time in
1 minute increments, press and release the MIN button.
Note: If the unit is unplugged or power is interrupted even momentarily, the time
will need to be reset.
BREWING COFFEE
It is not necessary to set the clock to brew coffee unless you want to use Delayed
Brewing.
1. Open water reservoir/brew basket cover.
2. Fill water reservoir with cold tap water up to the desired
water marking on the side of reservoir. Caution: Be
careful not to exceed the 12-cup maximum level, to
avoid water running out the overflow hole in the back
of the coffeemaker (J).
3. Place an 8 to 12 cup basket style paper filter in the removable filter basket,
make sure that it is properly centered in the brew basket.
4. Add your desired amount of ground coffee.
5. Insert brew basket into brew basket holder following directions in GETTING
STARTED.
6. Close brew basket/ water reservoir cover securely.
7. Place brew- thru cover on empty carafe following directions in GETTING
STARTED.
Note: Coffee may overflow if brew-thru lid is not properly aligned.
8. Place empty carafe on the “Keep Hot” plate.
9. Plug cord into standard electrical outlet.
POWE
R
G
POWER
12:00
F
POWE
R
H
MA
X
J
How to Use
This product is for household use only.
GETTING STARTED
1. Remove all packing material, and any stickers from the product.
2. Remove and save literature.
3. Wash all removable parts as instructed in the Care and Cleaning section.
4. Open water reservoir/brew basket cover and pour in
fresh cold water up to the #12-cup level mark. Caution:
Be careful not to exceed the 12-cup maximum level, to
avoid water running out the overflow hole in the back
of the coffeemaker (C).
5. Place empty 8 to 12 cup basket style paper filter into
removable filter basket.
6. Place basket into brew basket with the handle to the
right (D).
7. Close water reservoir/brew basket cover securely.
8. To replace brew-thru lid cover on empty carafe insert
small hole on left side of cover handle into projection on
carafe cover holder. Press U-shaped projection on right
side of cover handle down to click into position on right
side of cover holder (E).
9. Place empty carafe on the “Keep Hot” plate.
10. Pull power cord out from power cord holder in back of coffeemaker and plug
into standard electrical outlet.
11. Brew water through appliance following the “Brewing Coffee” instructions
without adding coffee grounds. This removes any dust or residue that may
have remained in the coffeemaker during the manufacturing process.
12. When brewing is complete, discard the water from the carafe and paper filter
from filter basket.
13. Turn off the coffeemaker; unplug it and allow it to cool down.
ADJUSTING THE POWER CORD LENGTH
You can adjust the length of the power cord to suit your needs.
To increase the length of the power cord, simply grasp the cord (not the plug)
in the rear of the coffeemaker and gently pull down and out of the slot away
from the coffeemaker.
To decrease the length of the power cord, simply feed any excess cord into the
slot in the rear of the coffeemaker.
Lift the cord and lock it into the slot when cord is at desired length.
M
A
X
D
MA
X
C
E
Do not reuse coffee grounds; the best flavors are extracted during the first
brewing.
If carafe filled with coffee is left on the “Keep Hot” plate, be sure to remove the
coffee grounds from the filter basket as soon as they have cooled slightly. This
will keep the coffee from developing a bitter taste.
For a special occasion, whip some heavy cream with 1 or 2 tablespoons of
hazel nut, chocolate or almond liqueur. Use to top off each cup of coffee.
Add a 2-inch piece of vanilla bean to the sugar bowl. You’ll be surprised at
how good it tastes.
Keep your coffeemaker very clean; you’ll be pleased with the flavor.
For iced coffee, brew the coffee with twice the normal amount of grounds. The
ice dilutes the coffee flavor.
Make coffee ice cubes from left over coffee and brew your coffee at its normal
strength.
Remember when pouring hot liquid into a glass, always put a spoon in the
glass before adding the hot liquid. This will prevent glass from breaking.
Care and Cleaning
This product contains no user serviceable parts. Refer service to qualified service
personnel.
Cleaning
1. To clean your coffeemaker, be sure the unit is off and cooled. Open the
cover, remove the brew basket, and discard the paper filter/grounds. Clean as
follows: brew basket, carafe and carafe lid are all top rack dishwasher-safe;
or they maybe hand washed in warm, sudsy water. See below for carafe care.
The coffeemaker’s exterior, control panel area and “Keep Hot” plate may be
cleaned with a soft damp cloth. Do not use abrasive cleansers or scouring
pads. Never immerse the coffeemaker in water.
2. To clean inside the reservoir cover, open the one-piece cover allowing it to rest
in the open position. Pull showerhead, clean showerhead with a damp cloth,
then place water spreader under guide and close the cover.
Caring for Your Carafe
A damaged carafe may result in possible burns from a hot liquid. To avoid
breaking:
Do not allow all liquid to evaporate from the carafe while it is stationed on the
“Keep Hot” plate, or heat the carafe when it is empty.
Discard the carafe if it is chipped, cracked, or damaged in any manner.
Never use abrasive scouring pads or cleansers, they will scratch and weaken
the glass.
Do not place the carafe on or near a gas or electric burner, in a heated oven,
or in a microwave oven.
Avoid rough handling and sharp blows.
7
8
10. Press ON/OFF button; power light is illuminated..
Brewing begins OR to delay brewing set the auto
function. (See below for Delayed Brewing.) (K).
11. When coffee stops flowing into carafe the brew cycle is
complete.
12. Once coffee grounds have cooled, carefully open
reservoir/brew basket cover and lift the filter basket by
its handle, remove and discard used grounds and paper filter. Close open
reservoir/brew basket cover.
13. The coffeemaker will keep brewed coffee hot for 2 hours and then turn off
automatically.
14. To turn off the coffeemaker, press the ON/OFF button.
15. Unplug appliance when not in use.
SNEAK-A-CUP
®
INTERRUPT FEATURE
The Sneak-A-Cup
®
feature allows you to pour a cup of coffee from the carafe
while the coffee is brewing. When the carafe is removed, the brewing process is
paused. Simply replace the carafe on the “Keep Hot” plate within 30 seconds and
brewing will resume automatically.
Note: If the carafe is not replaced within 30 seconds the brew basket may
overflow.
DELAYED BREWING:
1. Follow steps 1 through 9 under Brewing Coffee.
2. Make sure clock has been set to correct time of day.
3. Press the PROG button; the AUTO light blinks.
4. To select the time for delayed brewing: Press HOUR button until the correct
hour appears on the display. Repeat with the MIN button within 5 seconds. (If
minute setting is not changed within 5 seconds the clock will revert to default
time and selection of hour and minute will have to be repeated.)
5. Press the PROGRAM button again. The delayed brewing time is set.
6. Press the AUTO button to activate the delayed brewing. The AUTO button light
is displayed on the digital display screen.
7. To check the preset auto time, press PROG button and it will display the time
selected for delayed brewing to begin. (The AUTO light will blink until the
AUTO button is pressed.)
8. To cancel the AUTO brew, press the ON/OFF button twice. All lights are off.
COFFEE BREWING TIPS
Stir coffee in carafe before serving to evenly distribute the flavor.
Coffee that is poured during brewing cycle may vary in strength from the
finished brew.
Not sure how much coffee to use. Begin by using 1 level scoop of medium
grind coffee for each cup of coffee to be brewed.
Never reuse coffee filters; they absorb flavors from the brewed coffee and will
give the newly brewed coffee a stale flavor. They may also tear and allow
grinds to drip into the freshly brewed coffee.
P
OW
E
R
K
10
9
TROUBLESHOOTING
PROBLEM POSSIBLE CAUSE SOLUTION
Coffeemaker does not
turn on.
Coffeemaker is
leaking.
Brewing takes too
long.
Coffee is not brewing.
The coffee maker
brews clear water.
The one-piece cover
does not close.
Filter basket
overows.
Grounds in the
brewed coffee.
Coffeemaker is
brewing slowly;
brewed coffee tastes
bad.
Coffeemaker is not
plugged in.
Water reservoir may be
overlled.
Carafe may not be correctly
placed on “Keep Hot”
plate.
The coffeemaker might
need cleaning.
Water reservoir might be
empty.
There may be no coffee
grounds in the removable
lter basket.
Removable lter basket
may not be correctly
placed.
Carafe may be improperly
placed on the “Keep Hot”
plate.
The lter and/or the brew
basket are not properly
placed.
Coffeemaker needs
cleaning; wrong grind
being used.
Check to be sure appliance is
plugged into a working outlet
and the ON/OFF button has
been pressed.
Make sure the water reservoir
has not been lled beyond the
MAX ll line.
Make sure carafe is placed
correctly on “Keep Hot” plate
and is centered under the
brew basket.
Follow procedure under
“Maintaining Your
Coffeemaker.”
Make sure water reservoir
has sufcient water to brew
desired number of cups of
coffee.
Add sufcient amount of
coffee grounds to paper lined
removable lter basket.
Remove lter basket and
replace correctly into brew
basket.
Remove carafe and insert so
that carafe rests comfortably
within the grooves on the
“Keep Hot” plate.
Insert paper liner into lter
basket and insert basket
properly into brew basket.
Follow directions in CARE
AND CLEANING. Use only
coffee ground for automatic
drip coffeemakers.
MINERAL DEPOSITS AND CLOGGING
Mineral deposits left by hard water can clog your coffeemaker. Excessive steaming
and/or a prolonged brewing cycle are signs that a cleaning is needed. The
frequency of cleaning out deposits is affected by the regularity of usage and water
hardness. During cleaning, more steaming occurs than when brewing coffee and
may emit spurts of steam. Cleaning is recommended every 60 brewing cycles.
1. Pour white vinegar into water reservoir up to 7-cup line on the water level
window. Add water up to 12-cup line.
Caution: Be careful not to exceed the 12-cup maximum level, to avoid water
running out the overflow hole in the back of the coffeemaker.
2. Put a paper filter in the brew basket and close the one-piece water reservoir and
brew basket cover. Set empty carafe on the "Keep Hot" carafe plate.
3. Turn on coffeemaker and let half the cleaning solution brew into carafe (till
water level goes down to around the 6-cup line on the water level window).
Turn coffeemaker off and let it soak for at least 15 minutes to soften the
deposits.
4. Turn on coffeemaker and brew remaining cleaning solution into carafe.
5. Turn off coffeemaker, empty carafe and discard filter.
6. Fill reservoir with fresh water to 12-cup line, replace empty carafe on the “Keep
Hot” carafe plate and then turn on coffeemaker for a complete brew cycle to
flush out remaining cleaning solution. You may wish to repeat this step again to
eliminate any remaining vinegar smell/taste.
7. Wash the brew basket and carafe as instructed for normal cleaning.
31
32
NEED HELP?
For service, repair or any questions regarding your appliance, call the appropriate
"800" number on the cover of this book. Do not return the product to the place
of purchase. Do not mail the product back to the manufacturer nor bring it to a
service center. You may also want to consult the website listed on the cover of
this manual.
One-Year Limited Warranty
(Applies only in the United States and Canada)
What does it cover?
Any defect in material or workmanship; provided; however, Applica’s liability
will not exceed the purchase price of the product.
For how long?
One year after the date of original purchase.
What will we do to help you?
• Provide you with a reasonably similar replacement product that is either
new or factory refurbished.
How do you get service?
• Save your receipt as proof of the date of sale.
• Check our on-line service site at www.prodprotect.com/applica, or call our
toll-free number, 1-800-231-9786, for general warranty service.
• If you need parts or accessories, please call 1-800-738-0245.
What does your warranty not cover?
• Damage from commercial use
• Damage from misuse, abuse or neglect
• Products that have been modified in any way
• Products used or serviced outside the country of purchase
• Glass parts and other accessory items that are packed with the unit
• Shipping and handling costs associated with the replacement of the unit
• Consequential or incidental damages (Please note, however, that some states do
not allow the exclusion or limitation of consequential or incidental damages, so
this limitation may not apply to you.)
How does state law relate to this warranty?
This warranty gives you specific legal rights, and you may also have other rights
that vary from state to state or province to province.
DÉPANNAGE
PROBLÈME CAUSE POSSIBLE SOLUTION
La cafetière ne
s’allume pas.
La cafetière a une
fuite
L’infusion prend trop
de temps.
L’infusion du café ne
commence pas.
La cafetière ne donne
que de l’eau claire.
Le couvercle
monopièce ne se
ferme pas.
Le panier-ltre
déborde.
Il y a du marc de café
dans le café infusé
La cafetière infuse
lentement; le café
infusé a un mauvais
goût.
La cafetière n’est pas
branchée.
Le réservoir d’eau est peut-
être rempli au-delà de sa
capacité.
La carafe n’est peut-être pas
bien placée sur le réchaud.
La cafetière peut avoir
besoin d’être nettoyée.
Le réservoir d’eau est peut-
être vide
Il n’y a peut-être pas de
café moulu dans le ltre
amovible.
Le panier-ltre amovible
n’est peut-être pas bien
installé.
La carafe est peut-être mal
centrée sur le réchaud.
Le ltre et(ou) le panier-
ltre ne sont pas bien
placés.
La cafetière nécessite un
nettoyage; la mouture du
café est inadéquate.
Vérier si l’appareil est
branché dans une prise de
courant fonctionnelle et si
vous avez bien appuyé sur le
bouton de mise en marche/
arrêt (ON/OFF).
Vérier si le réservoir d’eau a
été rempli au-delà de la ligne
de remplissage MAX.
Vérier si la carafe a été
placée correctement sur le
réchaud et si elle est bien
centrée sous le support du
panier-ltre.
Suivre la procédure indiquée
sous la rubrique « Entretien de
votre cafetière ».
Vérier si le réservoir d’eau
est assez rempli pour obtenir
la quantité de tasses de café
désirée.
Ajouter sufsamment de café
moulu dans le ltre en papier
dans le support à panier-ltre.
Retirer le panier-ltre
amovible et le replacer
correctement dans son
support.
Retirer la carafe et la placer
de façon à ce qu’elle soit
bien centrée sur les sillons du
réchaud.
Insérer le ltre en papier dans
le panier-ltre et placer celui-
ci adéquatement dans son
support.
Suivre les instructions de
nettoyage de la cafetière.
Utiliser seulement du café
moulu pour les cafetières
ltres.
Copyright © 2008 Applica Consumer Products, Inc.
Made in People’s Republic of China
Printed in People’s Republic of China
Fabricado en la República Popular de China
Impreso en la República Popular de China
Fabriqué en République populaire de Chine
Imprimé en République populaire de Chine
is a trademark of The Black & Decker Corporation, Towson, Maryland, USA
Marca registrada de The Black & Decker Corporation, Towson, Maryland, E.U.
Marque de commerce déposée de la société The Black & Decker Corporation, Towson, Maryland, É.-U.
2007/10-11-47E/S/F
975 W 120 V
CAT. NO . EHB5 00
TYPE 1 1 60 W 12 0 V
AC ONLY 60Hz
60Hz
Printed on recycled paper.
Impreso en papel reciclado.
Imprimé sur du papier recyclé.
The lightning symbol
refers to “dangerous
voltage”; the exclamation
symbol refers to
maintenance instructions.
See below.
WARNING: To reduce
the risk of fire or electric
shock, do not remove the
cover of the coffeemaker.
There are no user-
serviceable parts inside.
Repair should be done
by authorized service
personnel only.
El símbolo de un rayo
indica voltaje peligroso.
El signo de exclamación
indica importantes
instrucciones de
mantenimiento. Consulte
a continuación:
PRECAUCIÓN: Para
reducir el riesgo de
incendio o de choque
eléctrico, no retire la
cubierta de la cafetera.
No contiene por dentro
partes reparables por el
consumidor. Cualquier
reparación deberá ser
efectuada únicamente por
personal autorizado.
L'éclair représente une
tension dangereuse.
Le point d'exclamation
indique qu'il s'agit
d'importantes consignes
d'entretien. Voir plus bas.
AVERTISSEMENT :
Afin d'éviter les risques
d'incendie ou de
secousses électriques,
ne pas retirer le
couvercle de la cafetière.
L’utilisateur ne peut
réparer aucune des pièces
internes.
En confier les réparations
uniquement au personnel
d'un centre de service
autorisé.
WARNING / PRECAUCIÓN / AVERTISSEMENT
RISK OF FIRE OR ELECTRIC SHOCK. DO NOT OPEN.
RIESGO DE INCENDIO O DE CHOQUE ELÉCTRICO. NO ABRA.
RISQUES D’INCENDIE OU DE SECOUSSES ÉLECTRIQUES. NE PAS OUVRIR.
/