1 – 10
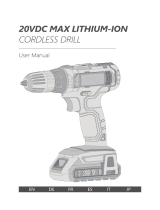
CORDLESS DRILL / DRIVER
Original instructions
22 – 32
PERCEUSE / VISSEUSE SANS FIL
Notice originale
75 – 86
АКKУМУЛЯТОРНАЯ ДРЕЛЬ / ШУРУПОВЕРТ
Оригинальная инструкция по эксплуатации
87 – 97
АКУМУЛЯТОРНА ДРИЛЬ / ШУРУПОВЕРТ
Оригінальна інструкція з експлуатації
98 – 108
АКУМУЛАТОРНА БОРМАШИНА / ВИНТОВЕРТ
Оригинална инструкция за използване
11 – 21
AKKU-BOHRSCHRAUBER
Originalbetriebsanleitung
65 – 74
WKRĘTARKА AKUMULATOROWА
Instrukcją oryginalną
33 – 42
AVVITATORE / TRAPANO A BATTERIA
Istruzioni originali
54 – 64
APARAFUSADORA SEM FIO
Instrução original para o uso
43 – 53
TALADRO ATORNILLADOR A BATERÍA
Instrucciones de uso originales
© 2010 SPARKY
BUR2 18Li HD
BR2 15Li HD • BUR2 15Li HD
18 V Lithium-Ion
14,4 V Lithium-Ion
1204R04
www.sparkygroup.com
01.08.2010
Manufacturer
SPARKY Power Tools GmbH
Leipziger Str. 20
10117 Berlin, GERMANY
Signature of authorized person
A. Ivanov
Technical director of SPARKY ELTOS AG
DECLARATION OF CONFORMITY
We declare under our sole responsibility that this product fulls
all the relevant provisions of the following directives and the
harmonized standards:
2006/42/EC, 2004/108/EC, EN 60745-1, EN 60745-2-1,
EN 60745-2-2, EN 55014-1, EN 55014-2
Charger: 2006/95/EC, 2004/108/EC, EN 60335-1,
EN 60335-2-29, EN 62233, EN 55014-1, EN 55014-2,
EN 61000-3-2, EN 61000-3-3
Technical le is stored at SPARKY ELTOS AG, Koubrat Str. 9,
5500 Lovetch, Bulgaria.
KONFORMITÄTSERKLÄRUNG
Hiermit versichern wir unsere persönliche Haftung, dass
dieses Erzeugnis allen einschlägigen Bestimmungen folgender
Richtlinien und entsprechender harmonisierten Standards
entspricht:
2006/42/EC, 2004/108/EC, EN 60745-1, EN 60745-2-1,
EN 60745-2-2, EN 55014-1, EN 55014-2
Ladegerät: 2006/95/EC, 2004/108/EC, EN 60335-1,
EN 60335-2-29, EN 62233, EN 55014-1, EN 55014-2,
EN 61000-3-2, EN 61000-3-3
Die technischen Unterlagen werden bei SPARKY ELTOS AG,
Kubrat Str.9, 5500 Lovetch, Bulgarien, aufbewahrt.
DECLARATION DE CONFORMITE
Nous déclarons sous notre responsabilité que ce produit
satisfait à l’ensemble des dispositions pertinentes de la présente
directives, respectivement aux normes harmonisées:
2006/42/EC, 2004/108/EC, EN 60745-1, EN 60745-2-1,
EN 60745-2-2, EN 55014-1, EN 55014-2
Chargeur: 2006/95/EC, 2004/108/EC, EN 60335-1,
EN 60335-2-29, EN 62233, EN 55014-1, EN 55014-2,
EN 61000-3-2, EN 61000-3-3
Le dossier technique est conservé par SPARKY ELTOS AD,
9, rue Kubrat, Lovech, Bulgarie.
DICHIARAZIONE DI CONFORMITÀ
Noi dichiariamo sotto la nostra personale responsabilità, che
questo prodotto è in conformità a tutte le disposizioni pertinenti
della presente direttive e norme armonizzate:
2006/42/EC, 2004/108/EC, EN 60745-1, EN 60745-2-1,
EN 60745-2-2, EN 55014-1, EN 55014-2
Caricabatteria: 2006/95/EC, 2004/108/EC, EN 60335-1,
EN 60335-2-29, EN 62233, EN 55014-1, EN 55014-2,
EN 61000-3-2, EN 61000-3-3
Il fascicolo tecnico viene custodito presso la SPARKY ELTOS,
5500 Lovech, via Kubrat n. 9, Bulgaria
DECLARACIÓN DE CONFORMIDAD
Declaramos bajo nuestra exclusiva responsabilidad que este
producto está conforme con todas las disposiciones aplicables
de la presente directrices aplicables y las correspondientes
normas armonizadas:
2006/42/EC, 2004/108/EC, EN 60745-1, EN 60745-2-1,
EN 60745-2-2, EN 55014-1, EN 55014-2
Cargador: 2006/95/EC, 2004/108/EC, EN 60335-1,
EN 60335-2-29, EN 62233, EN 55014-1, EN 55014-2,
EN 61000-3-2, EN 61000-3-3
El expediente técnico está archivado en SPARKY ELTOS SA,
C/ Kubrat, 9, 5500 Lovech, Bulgaria.
DECLARAÇÄO DE CONFORMIDADE
Declaramos assumindo a nossa responsabilidade pessoal que
este produto está conforme com todas as disposições relevantes
da presente directrizes aplicáveis e respectivos estandartes
harmonizados: 2006/42/EC, 2004/108/EC, EN 60745-1,
EN 60745-2-1, EN 60745-2-2, EN 55014-1, EN 55014-2
Carregador: 2006/95/EC, 2004/108/EC, EN 60335-1,
EN 60335-2-29, EN 62233, EN 55014-1, EN 55014-2,
EN 61000-3-2, EN 61000-3-3
O expediente técnico ca guardado na SPARKY ELTOS SA,
rua Kubrat, 9, 5500 Lovech, Bulgária
DEKLARACJA ZGODNOŚCI
Niniejszym deklarujemy naszą osobistą odpowiedzialnością,
że ten produkt spełnia wszystkie odpowiednie postanowienia
następujących dyrektyw i harmonizowanych standardów:
2006/42/EC, 2004/108/EC, EN 60745-1, EN 60745-2-1,
EN 60745-2-2, EN 55014-1, EN 55014-2
Ładowarka: 2006/95/EC, 2004/108/EC, EN 60335-1,
EN 6 03 35 -2-2 9, EN 62 23 3, EN 5 5014 -1, EN 55 014- 2, EN 610 00 - 3- 2,
EN 61000-3-3
Teczka techniczna przechowywana jest w SPARKY ELTOS AG,
Kubrat Str.9, 5500 Lovetch, Bułgaria
ДЕКЛАРАЦИЯ О СООТВЕТСТВИИ
Мы заявляем со всей ответственностью, что данный про-
дукт полностью соответствует всем соответствующим тре-
бованиям действующих директив и гармонизированных
стандартов:
2006/42/EC, 2004/108/EC, EN 60745-1, EN 60745-2-1,
EN 60745-2-2, EN 55014-1, EN 55014-2
Зарядное устройство: 2006/95/EC, 2004/108/EC, EN 60335-1,
EN 6 03 35 -2-2 9, EN 62 23 3, EN 5 5014 -1, EN 55 014- 2, EN 610 00 - 3- 2,
EN 61000-3-3
Техническое досье хранится в СПАРКИ ЕЛТОС АД,
ул. Кубрат №9, 5500 Ловеч, Болгария.
ДЕКЛАРАЦІЯ ПРО ВІДПОВІДНІСТЬ
Ми заявляємо під свою власну відповідальність, що
даний продукт відповідає всім діючим вимогам директив і
гармонізованих стандартів:
2006/42/EC, 2004/108/EC, EN 60745-1, EN 60745-2-1,
EN 60745-2-2, EN 55014-1, EN 55014-2
Зарядний пристрій: 2006/95/EC, 2004/108/EC, EN 60335-1,
EN 6 03 35 -2-2 9, EN 62 23 3, EN 5 5014 -1, EN 55 014- 2, EN 610 00 - 3- 2,
EN 61000-3-3
Технічне досьє зберігається в СПАРКИ ЕЛТОС АД,
ул. Кубрат № 9, 5500 Ловеч, Болгарія.
ДЕКЛАРАЦИЯ ЗА СЪОТВЕТСТВИЕ
Ние декларираме на своя лична отговорност, че това
изделие отговаря на всички приложими изисквания на
следните директиви и хармонизирани стандарти:
2006/42/EC, 2004/108/EC, EN 60745-1, EN 60745-2-1,
EN 60745-2-2, EN 55014-1, EN 55014-2
Зарядно устройство: 2006/95/EC, 2004/108/EC, EN 60335-1,
EN 6 03 35 -2-2 9, EN 62 23 3, EN 5 5014 -1, EN 55 014- 2, EN 610 00 - 3- 2,
EN 61000-3-3
Техническото досие се съхранява в СПАРКИ ЕЛТОС АД,
ул. Кубрат №9, 5500 Ловеч, България.
10
BLACK PANTONE185
BLACK PANTONE185