Page is loading ...

SUP’AIR _EIKO Page 1
glider user's manual EIKO
User’s manual
SUP’AIR - VLD
34 rue Adrastée
Parc Altaïs
74650 Annecy - Chavanod
FRANCE
45°54.024’N / 06°04.725’E
English
Revision index : 13/10/2016
Mountain GLIDER

SUP’AIR _EIKO Page 2
glider user's manual EIKO
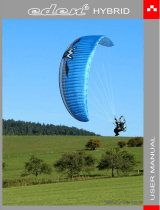
Thank you for choosing to fly our EIKO to pa-
raglide with. We are delighted to have you
on-board to share our passion for paragli-
ding.
SUP'AIR has been designing producing and
selling accessories for free flying activities
since 1984. By choosing a SUP'AIR product
you benefit from almost thirty years of ex-
pertise, innovation and customer care. We
pride ourselves for our work ethics and cus-
tomer care.
We hope you will find this user's manual
comprehensive, explicit and hopefully en-
joyable as well. We advise you to read it
carefully.
You will find the latest information and
updates on this product on our web-
site : www.supair.com. If however you
have any further questions, do not
hesitate to ask one of our dealers.
Naturally the entire SUP’AIR team remains at
your disposal at info@supair.com
We wish you many safe and enjoyable
flying hours and happy landings.
Team SUP’AIR

SUP’AIR _EIKO Page 3
glider user's manual EIKO
Introduction 4
Technical specifications 5
Equipment overview 6
Connecting the glider 7
Pre-flight preparation 11
Take-off 12
Flight characteristics 13
End of the flight 14
Specific practices 14
Fast descents 15
Flight incidents 17
Line layout 18
Materials 19
Measurement table 20
Certificates 22
Maintenance 24
Mandatory checks 25
Warranty 25
Disclaimer 25
Pilot equipment 25
Complementary equipment / Accessories 26
Contents

SUP’AIR _EIKO Page 4
glider user's manual EIKO
Introduction
Advice Caution ! Danger !!
Welcome to the world of free flying : a shared world of passion.
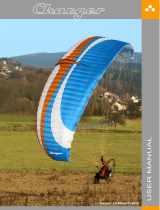
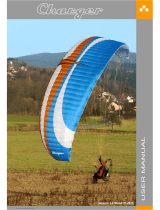
The EIKO glider is the answer to the Hike&Fly pilots targeting local sites, Flight Parks and mountaineering in general. Providing great com-
fort levels in all stages of the activity, the EIKO layout was well thought from beginning to end, and choice of materials were guided by
the same quality and longevity objectives.
The EIKO glider was certified EN 926-1: 2015 & 926-2: 2013, Category B and LTF 91/09.
Meaning that this paragliding wing has an excellent levelof passive safety margin built-in, in addition to being well beheaved and col-
lapse resistant in turbulent aerology.
It is naturally adapted to all flying levels.
It is compatible with most harness models found on today's market, however we highly recommend using the Hike&Fly SUP'AIR models
specifically adapted for the activity.
After reading this manual we advise you to inflate & check your wing on a training hill first.
N.B. : The following three icons will help you to read this manual.

SUP’AIR _EIKO Page 5
glider user's manual EIKO
Technical data
Glider EIKO 20 23
Cell number 41 41
Flat surface area (m²) 20 23
Span (m)9,8 9,8
Chord (m)2,48 2,48
Flat Aspect Ratio 4,8 4,8
Projected surface area (m²) 16,98 19,53
Projected span (m) 7,71 8,27
Projected aspect ratio 3,5 3,5
Glider weight (kg) 2,45 2,75
In-flight weight range (kg) 50 - 80 65 - 100
Min. speed (km/h) 39
Max. speed (km/h)
Certification EN & LTF classe B
Riser number. 3 3
Trimmer non non

SUP’AIR _EIKO Page 6
glider user's manual EIKO
Equipment overview
8
13
Riser hook-up loop
14
15
16
1Leading edge
2Trailing edge
3
Stabilizer
4
5
A riser'
6
7
C riser
10
Brake handle
9
Brake line
11
12
Brake holding guide
Intrados
Extrados
Accelerator/Speedbar Split-hook.
Inner bag.
Pocket with repair kit.
19
B riser
A riser
8
13
14
15
16
1
2
3
4
5
6
7
10
9
11
12
3

SUP’AIR _EIKO Page 7
glider user's manual EIKO
Connecting the glider
Opening the wing
Choosing an adapted harness.
Choose a flat or lightly angled training hill without obstacles or wind.
Open your wing and arrange it in a crescent shape.
Check the fabric and the lines for any sign of wear or damage. Check for the links connecting the lines to the risers to be fully closed.
Identify, separate and arrange the A,B.C, risers as well as the brake lines neatly. Knots or tangles can not be present.
The EIKO glider was certified EN B with a EN1651 & LTF 91/09 certified harness and hence can be flown with most harnesses models
found on the market today. Meaning that it can be flown with most harnesses models found on the market today. We wil advise you
to choose a EN1651 and or LTF 91/09 certified harness with a built-in dorsal protection system.
It is advised to adjust the harness's chest strap width based on your wing size :
38 cm for an EIKO size XS
40 cm for an EIKO size S
Harness chest strap spacing

SUP’AIR _EIKO Page 8
glider user's manual EIKO
Connecting the wing to the harness.
Connecting the glider
1
3
5
2
4
6
7 8
1
3
5
2
4
6
7 8
1
3
5
2
4
6
7 8
With self-locking
carabiners
With Connects
Without twisting the risers, connect
them to the harness connection
loops using the self-locking carabi-
ners.
The connection wing/harness can
be done using either standard
self-locking carabiners or a set
of SUP'AIR "Connects" ( ultralight
flexible Dyneema connectors ).
Check for the risers to be properly
positioned and untwisted. The "A"
risers must be located at the front
and facing the flight direction( see
schematic ).
Lastly, check for the main self-loc-
king carabiners to be fully closed
and locked in place.
A'A
A'A
Flight directionFlight direction

SUP’AIR _EIKO Page 9
glider user's manual EIKO
Install the accelerator according to your harness manufacturer's recommendations.
Connect it to the wing using the split hooks.
Once the accelerator/speedbar is connected, adjust its length according to your measu-
rements. For correct use, there must not be any tension at the split-hook level when the
accelerator/speedbar line is relaxed.
Installing the accelerator
Connecting the glider
Flight direction

SUP’AIR _EIKO Page 10
glider user's manual EIKO
Brake line length fisherman's knot
Connecting the glider
Margin
Be certain to adjust and leave a small amount of
line slack to keep steering toggle play, prevent wing
profile deformation and hinder the accelerator func-
tionality.
During acceleration, the glider's trailing edge must
not be deformed.
If you modify the original default setting, have it
inspected and approved by a professional before
flying..
The default factory maximum brake line length is :
72 cm
Brake line lengths are set at the factory to allow opti-
mal glider control. However, if they do not suit you
they can be adjusted to your liking.
We will advise using a fisherman's knot and to keep
your length changes to a minimum (approx 5cm
maximum).

SUP’AIR _EIKO Page 11
glider user's manual EIKO
PRE-FLIGHT PREPARATION
Unfold the glider and place it on its upper surface in an arc.
Separate the A,B,C risers and the brakes, be certain for the risers and lines not to have any twists or knots or be hooked to a branch,
stone etc...
The EIKO was designed for mountaineering Hike&Fly pilots or those making lighter weight gear a priority. To discover your new glider,
we recommend you to first try it in calm weather conditions on a school slope or at a site you frequently fly, using your regular har-
ness.
Caution !
It vital to conduct a thorough pre-flight check and have the harness properly connected to the glider prior each takeoff.
Run through the following procedure prior each takeoff:
- harness or carabiners do not show signs of wear and tear.
- the reserve parachute container is correctly closed and that the handle is in the correct position
- your personal settings have not been changed
- The wing is properly connected to the risers with all links securely tightened and locked in place.
- The wing is properly connected to the harness without any riser twist.
- You are securely connected to the harness with the leg and chest strap buckles closed, self-locking carabiners locked.
- Your are wearing your helmet and it is properly fastened.

SUP’AIR _EIKO Page 12
glider user's manual EIKO
Take-off
The design team has strived to produce a wing with optimum inflating abilities in all flyable conditions. Whether it be in light or high
winds you will enjoy its docile behavior while launching. However before the first flight, practice ground-handling to become familiar
with your new glider. It is possible to inflate in a front- or reversed-launch method.
Forward launch
To inflate the glider grab the upper ends of the "A" risers with your hands and progressively move foreward guiding the glider
upward. Once the wing is flying overhead, apply brakes as necessary, look up and perform a visual check before accelerating to
take off.
Reverse launch
If the wind speed is sustained and permits it, we will advise you to use a reversed inflation method more adapted to conduct a better
visual check. Face the wing and grab the "A" risers. With a light pull and adapted rearward walking motion, inflate your wing. Once
the glider is stable overhead, turn around, look up once more to check that all is ok. before running down the slope and takeoff. Note:
it is not necessary to use the "A" risers to inflate the wing.
Caution !
Before take-off, ensure for the airspace to be clear in front, around and above you with weather conditions matching your flying skill
level..

SUP’AIR _EIKO Page 13
glider user's manual EIKO
FLIGHT CARACTERISTICS
Here are a few tips to take advantage of your EIKO wing's performance in flight:
Flying « hands up » will provide the best glide ratio in nil wind.
Using the accelerator/speedbar.
« Hands up » speed or trim speed
Piloting without the toggles/brakes.
According to the EN926-2 class B norm, the EIKO glider was designed to be stable throughout its speed range.
Accelerated, the wing becomes more sensitive to turbulence. If you sense a glider internal pressure decrease while pushing on the
accelerator; lessen the speedbar tension to bring it back to its neutral default setting while slightly applying a small amount of brake
by pulling the hand toggles and prevent a possible leading edge frontal collapse.
The accelerator/speedbar length travel is : 13 cm.
If for whatever reason, the toogles/brakes are no longer available, you will need to pilot your wing using the harness and "C" risers
instead. Beware not to overcontrol the glider to limit the risk of experiencing a possible stall.
To land, let your wing glide for as long as possible before applying a full braking motion. Braking using the "C" risers is not as efficient
as using the toggles and could bring a more energetic landing than normal.
Turns
To make your glider turn efficiently, and only after checking that the space below you is clear and safe to land on, weight shift toward
the inside of the turn and progressively pull your brake/toggle on the same side until the desired turning angle is reached. The turning
speed and radius can also be adjusted by using the other brake/toggle controlling the upper half side of the wing. If flying at low
speed, begin your turn by raising your hand on the upper and external side of the turn to prevent a possible flat-turn or twisted turn
on the vertical axis.

SUP’AIR _EIKO Page 14
glider user's manual EIKO
Specific usage
End of the flight
The EIKO wing can be towed up. Fly only with certified gear operated by qualified personal and only after taking a towing clinic. The
towing force must correspond to the weight of the equipment, and the pulling sequence can only start when the wing is fully inflated
and stable over the pilot's head.
Towing
The EIKO wing was not designed to enter aerobatic maneuvers. We highly discourage its use for this type of flying.
Aerobatics
Be certain to always have enough altitude for a safe landing before approaching the chosen Landing Zone ( PTU, PTS, etc...). Never
make aggressive maneuvers close to the ground. Always land into the wind ( upwind ), standing up and ready to run to a stop if
necessary. Make your landing approach with maximum air speed if possible depending on the weather conditions of the moment,
then progressively brake to slow the glider to a final touchdown. Beware not to brake too much, too soon and too rapidly to prevent a
possible stall and hard landing.
In case of a landing in sustained higher wind speeds, you will need to quickly turnaround, face the wing, move forward while braking
down symmetrically. You can equally pull the "C" risers down to deflate the glider and bring it to the ground.
Landing
Fold each side of your wing in an accordion-like shape. Stack-up the leading edge reinforcements on top of one another.
Bring one side of the glider over the other while keeping the leading edge reinforcements flat. Roll the wing on itself, starting from the
leading edge toward the trailing edge. During the entire packing procedure, do not bend the leading edge's reinforcements.
Folding
The EIKO wing was not designed for tandem flying.
Tandem

SUP’AIR _EIKO Page 15
glider user's manual EIKO
FAST DESCENTS
The following techniques should only be used in emergencies and require prior training to be safely conducted. Appropriate analysis
and anticipation of the conditions will often prevent the need to use fast descent techniques. We will advise you to practice in still air
and preferably above water.
Big Ears
Pulling "ears" increases the glider sink rate. We do not recommend the use of big ears close to the ground
In order to pull "ears", grab the specific riser (outer "A" riser) while keeping the toggles in hands and lowering them until the win tips
collapse. It is preferable to collapse one side after the other and not simultaneously in order to prevent an eventual frontal collapse.
Once the "Ears" are folded and stabilized, we will recommend using the accelerator/speedbar to regain your initial air speed.
To reopen the "Ears", bring the accelerator/speedbar back to its neutral default setting, then let go the risers symmetrically. You can
pump the brake/toggles on either side of the wing to facilitate its reopening sequence.

SUP’AIR _EIKO Page 16
glider user's manual EIKO
Fast descents
360° spiral dives
To begin a spiral dive make sure the air space is clear around and below you, then lean toward the chosen side while gradually
applying brake/toggle pressure on that side. The wing will gradually accelerate before entering a full spiral dive. You may use the
outer/upper toggle to manage your sink rate.
In order to exit the rotation, get back to a neutral (centered) position in the harness and gradually release the inside brake. You need
to keep the glider in a turn as it decelerates in order to limit the surge while exiting the spiral. If your exit is too radical the glider will
surge aggressively and experience a substantial dive to be immediately controlled.. Gradually slowing down the rotation with the
outside and upper brake will allow you to exit the spiral in a controlled manner.
DANGER This manœuvre places a lot of stress on the glider. The high speed and "G" force might be disorientating and, in
extreme cases, cause you a temporary loss of consciousness. Practice this maneuver gradually with ample space around
and below you.
This technique is usually physically demanding and will provoke a parachutal wing configuration and hence wing control will be dimi-
nished.
Loosing altitude using the "B" risers is done by grabbing the risers at the metal links level and applying a symmetrical downward verti-
cal pull until the wing's profile is deformed. This maneuver can be maintained to increase the wing's sink rate.
To regain a normal flying configuration, bring your hands up progressively to the "A" risers red markers, then let go the "B" risers alto-
gether. The wing will experience a moderate surge forward which will need to be instantly neutralized and controlled.
B-line stall
Conforming to the EN B, the EIKO glider does not show any tendency to stay in a locked spiral configuration and will return by itself to
a normal flying angle in less than two full rotations when the toggles/brakes are brought back up.
To prevent stressing we do not recommend combining spiral dives with "Ears".

SUP’AIR _EIKO Page 17
glider user's manual EIKO
Flight incidents
Parachutal stall
Spin / asymetric stall
Even though this configuration only rarely occurs, you may find yourself in a situation called "parachutal stall " where the glider des-
cends vertically with no forward motion. If it happens, release the brakes/toggles fully and trims symmetrically. You might also need
to push forward on the "A" risers. Make sure you regained a normal flight configuration before proceeding with brake/toggle usage
again.
Stall
This technique is not recommended as it requires intense physical impute. It is not a safe descent technique.
A spin will only occur because of a piloting error. If so, release the brake fully on the stalled side and be certain to keep the glider in
check during the ensuing dive and reopening sequence.
Asymmetric collapses
Any paraglider may occasionally collapse due to turbulence or a piloting error. In the event of an asymmetric collapse your priority
must be to stay clear of the terrain and regain level flight. It is done by via of weight shifting toward the open side and if necessary,
support the action by applying an appropriate amount of brake on the same side.
If the collapsed side does not automatically reopen then pump the collapse side deeply and repetitively to repressurize the deflated
wing tip. Repeat if necessary until full reinflation is successful. In the event of a “cravat” (where the wing tip is snagged between the
lines) you may use the "ears" technique described above by pulling on the tangled line in order to release the wingtip.
Front collapses
During a front collapse according to the certification standard the glider is designed to reopen on its own. make sure you do not
brake to facilitate the return to a normal flight.

SUP’AIR _EIKO Page 18
glider user's manual EIKO
LINE LAYOUT DIAGRAM
1234567
8
9
10
11
12
13
14
15
16
17
18
19
20
21
1
2
3
4
5
6
7
8
9
10
11
12
13
14
15
16
17
18
19
20
21
SA
SB
SC
SD
A16
B16
C16
K12
K11
A15
A14
K10
A13
K9
A12
A11
K8
A10
K7
A9
K6
A8
K5
A7
A6
K4
A5
K3
A4
K2
A3
K1
A2
A1
A
R
III
AM
5
AM
6
K
R
Ma
i
n
K
M
1
K
M
U
1
K
M
U
2
K
M
2
K
M
U
4
KM
U
3
KM
3
KMU6
K
M
U
5
ST
Main
SM
A
S
M
B
A
R
I
AM
2
AM
1
ARII
AM
3
AM
4
B15
C15
B14
C14
B13
C13
B12
C12
D12
B11
C11
D11
B10
C10
D10
B9
C9
D9
B8
C8
D8
B7
C7
D7
B6
C6
D6
B5
C5
D5
B4
C4
D4
B3
C3
D3
B2
C2
D2
B1
C1
D1
CR
I
C
M
1
CMU2
C
M
U
1
D
M
1
D
M
U
2
D
M
U
1
CRII
CM
2
CMU4
C
M
U
3
D
M
2
D
M
U
4
D
M
U
3
CR
III
D
M
3
C
M
3
C
M
4
BR
III
B
M
5
B
M
6
BR
I
B
M
2
BM
1
BR
II
B
M
3
BM4

SUP’AIR _EIKO Page 19
glider user's manual EIKO
Materials
Fabrics Producer Reference
Extrados bord d'attaque Porcher Sport 70032 E3W
Outer surface Porcher Sport 70000 E71
Inner Surface Porcher Sport 70000 E71
Supported ribs Porcher Sport Skytex 27
Compression straps and D ribs Porcher Sport 70000 E91 (Hard)
Main lines Producer Reference
Top cascade Cousin Trestec 16140 / 12100
Upper middle cascade Cousin Trestec 12240
Lower cascade Edelrid 7343-190
Stabilo lines Producer Reference
Top cascade Cousin Trestec 12100
Middle cascade Cousin Trestec 12240
Lower cascade Liros Gmbh PPSL 120
Brake lines Producer Reference
Top cascade Cousin Trestec 12100
Upper middle cascade Cousin Trestec 16140
Lower middle cascade Cousin Trestec 12240
Lower cascade Liros Gmbh PPSL 200

SUP’AIR _EIKO Page 20
glider user's manual EIKO
Maintenance sheet.
EIKO glider
Size 20
Line Check Maintenance Sheet
A B C D Breaks
Centre 1 5693 5 611 5688 5808 6402
25644 5563 5638 5756 6224
35635 5554 5629 5746 6104
45665 5583 5662 5780 6091
55657 5557 5614 5727 5958
65615 5519 5575 5682 5885
75612 5519 5572 5677 5865
85602 5513 5569 5673 5906
95653 5567 5630 5737 5842
10 5506 5470 5526 5594 5809
11 5431 5401 5468 5531 5770
12 5397 5381 5453 5509 5759
13 5349 5331 5412
14 5303 5293 5383
15 5297 5296 5386
Stabilizers 16 5145 5113 519 6
Wingtip 17 5031 5053 5098 5192
Tolerance: 10 mm. Measurement made under a tension of 50N
Riser length : 460mm Tolérence +/- 5mm
/