Henny Penny HCH-932 Operating instructions
- Category
- Thermostats
- Type
- Operating instructions
This manual is also suitable for

Model HCH-930/932
3-1. INTRODUCTION This section contains an explanation of all controls and components,
and information on operating the HCH-930 and HCH-932. Read
the Introduction, Installation and Operation Sections before operat-
ing the cabinet.
3-2. OPERATING CONTROLS Figures 3-1 through 3-10 identify and describe the function of all
operating controls and the major components of the cabinet.
Figure 3-1 Figure 3-2
Figure 3-3 Figure 3-4
1
2
3
4
5
803 3-1
SECTION 3. OPERATION

Model HCH-930/932
Figure 3-5 Figure 3-6
Figure 3-7 Figure 3-8
Figure 3-9
Figure 3-10
7
6
8
9
10
16
14 13 15 12 11
3-2 803
3-2. OPERATING CONTROLS (Continued)

Model HCH-930/932
Fig. Item
No. No. Description Function
3-1 1 Water Strainer A filter preventing particles from entering the water line
and blocking the water valve
3-2 2 Water Valve A valve, opened by the float switch, that allows water
to flow into the water pan
3-3 3 Water Pan Holds the water for creating humidity inside the cabinet
3-3 4 Baffles Metal plates placed in the water pan to transfer heat to
the water to create humidity
3-4 5 Float Switch An electromechanical level switch controlling the water
level in the water pan
3-5 6 Solid State Time Used to reduce the electrical load on the float switch
Delay Relay and provide an automatic delay of 10 seconds to avoid
overflowing the water pan
3-6 7 Blower Circulates air up from the cabinet, through the heater
coils, and water baffles, and back down into the
cabinet
3-7 8 Heater An 810 watt, open coil type heater
3-7 9 High Limit A safety device mounted on the heater plate which
protects the unit from overheating
3-8 10 Thermostat An electromechanical device controlling the
temperature inside the cabinet
3-9 11 Thermometer Indicates the temperature inside the cabinet
3-9 12 Power Switch Controls electrical current to the cabinet
3-9 13 Power Light When lit, indicates the power switch is on, and that the
components have electrical current supplied to them
3-9 14 Water Light When lit, indicates the float switch is calling for water
3-9 15 Heat Light When lit, indicates the thermostat is calling for heat
3-10 16 Fan Circulates fresh air around the operating components
203 3-3
3-2. OPERATING CONTROLS (Continued)

Model HCH-930/932
3-3. START-UP
Before using the heated holding cabinet, thoroughly clean
the unit as described in the Cleaning Procedures Section
of this manual.
For CDT units: To operate the unit, move the power switch to the ON position.
Select either the A or B mode by depressing the UP button
for A, or the DOWN button for B.
The display shows an increasing temperature indicating the cabinet
is heating. When the operating pre-set temperature is reached, the
display reads 74ºC + 3ºC (165ºF + 5ºF) in the A mode, or 85ºC +
3ºC (185ºF + 5ºF) in the B mode.
Place product inside the drawers, and press the appropriate
timer button.
For electromechanical units: Turn the power switch to the ON position to operate the cabinet.
The power light illuminates, indicating the unit is operating.
The water light illuminates, indicating water is flowing into the
water pan. When the pan is full, the light goes out and the water
stops flowing.
A 10 second delay occurs before the float switch activates
the water solenoid. This prevents overworking the compo-
nents if the cabinet is bumped, or moved.
The heat light illuminates, indicating the unit is heating. Once
operating temperature is reached, the light goes out. The operating
temperature is factory preset and is reached within one hour.
3-4. OPERATION WITH 1. Place hot product in the wire baskets, or pans, inside the
PRODUCT drawers.
2. Serve the product first, that has been in the cabinet the longest.
3. Open the drawers only as necessary to load and serve product.
3-4 1110

Model HCH-930/932
3-5. CLEANING PROCEDURES 1. Move the Power Switch to the OFF position.
2. Disconnect electrical supply to the unit.
To avoid burns, allow the unit to cool before cleaning.
3. Remove the wire baskets from the drawers.
4. Take the baskets to a sink and thoroughly clean.
5. Remove drawers by pulling them out and tilting them up.
6. Clean the drawers with a cloth and soapy water.
7. Remove the drip tray from the bottom of the cabinet and clean
it at a sink.
8. Clean the cabinet interior with a cloth and soapy water.
Do not use steel wool, other abrasive cleaners or
cleaners/sanitizers containing chlorine, bromine, iodine or
ammonia chemicals, as these will deteriorate the stainless
steel material and shorten the life of the unit.
DO NOT use a water jet (pressure sprayer) to clean the
unit, or component failure could result.
9. Wipe the cabinet exterior with a damp cloth. Avoid getting
water in the area of the control panel.
10. Replace the drip tray, drawers, and wire baskets.
11. If the unit is to remain turned off, leave the top drawer open two
or three inches to help dry the interior.
Step 5
Step 7
203 3-5
Step 3

Model HCH-930/932
3-6. PROGRAMMING Temperature Setting
(HCH-930/932 CDT Only) To change the setpoint temperature:
1. Press and hold the SET/TEMP button, and the setpoint
temperature is displayed.
2. While pressing the SET/TEMP button, press the UP
or DOWN button until the desired setpoint is displayed.
3. Release the SET/TEMP button to return to operating mode.
Before a temperature setting can be changed, the controls must
be unlocked. See Special Program Mode Section of this manual.
Timers Setting
To change the timers setting:
1. Make sure the timer is not running. (Display is dim.)
2. Press the timer button to be changed and the preset time shows
in the display.
3. While pressing the timer button, press the UP or DOWN
buttons until the desired time is displayed.
4. Once the desired time shows in the display, release both
buttons. The timer reverts back to the last mode of operation.
Before a timer setting can be changed, the controls must be
unlocked. See Special Program Mode Section of this
manual.
A timer can also be changed while it is in the countdown mode.
This is only in effect for the remainder of that timing cycle. At
the end of the timing cycle the timer reverts back to the previ-
ous time. To permanently change the timer, program it when the
timer display is dim.
3-6 1110

Model HCH-930/932
3-6. PROGRAMMING Timer Operation
(HCH-930/932 CDT Only) When the timer is not running, the timer display is dim. By
(Continued) pressing the timer button and starting a timing cycle, the time
remaining shows in the full brightness, and the decimal point in the
lower right corner blinks.
All timers operate independently of each other and may be started,
stopped, or aborted regardless of the status of the other timers. At
the end of the timing cycle an alarm sounds, “00” flashes in the timer
display, and the decimal point stops blinking. Press the timer to
reset.
Timing Through Power Down
If a power interruption, such as brown out, occurs, the control
checks the timers and cabinet temperature, once power is
restored. If the cabinet temperature drops more than
7ºC (10ºF) the timing cycle ends and the alarm sounds. This
informs the operator that this temperature drop may affect the
product.
If the cabinet temperature drops less than 7ºC (10ºF), the timers
continue timing from the point of the power interruption.
Special Program Mode
This special program mode consists of the following features:
1. Fahrenheit, “F” or Celsius, “C”.
2. Program Mode Lockout: Locked, “L” or unlocked, “U”.
3. One-button programming for times and temperature.
To enter the special program mode:
1. Turn the power switch to OFF.
2. Press and hold the SET/TEMP button while turning the
power switch to ON.
3. Release the SET/TEMP button. “F” or “C” displays in the
timer display, and “L” or “U” displays in timer 2 display.
1110 3-7

Model HCH-930/932
3-6. PROGRAMMING Celsius and Fahrenheit
(HCH-930/932 CDT Only) To change from Celsius (C), to Fahrenheit (F), or vice versa,
(Continued) enter the Special Program Mode, depress and release timer 1
button. This toggles the display from “C” to “F”, or “F” to “C”.
Turn unit off, then back on again to normal operation.
Locked or Unlocked Controls
The controls can be locked to prevent anyone from changing
the times and temperature. The timers and temperatures cannot
be changed until the controls are unlocked.
To unlock the controls, enter the Special Program Mode.
Then press and release timer 2 button. The display toggles
from “L” to “U”.
Turn unit off, then back on to normal operation.
Initialization of Control Board
The control can be reset to factory preset times and
temperatures.
To reset the controls, enter the Special Program Mode.
Press and release timer 3 button. The control reverts to factory
settings.
Turn unit off, then back on again to normal operation.
3-8 1110

Model HCH-930/932
3-7. PREVENTIVE Deliming Water Pan and Baffles
MAINTENANCE
Inspect the water pan and baffles every 10 days for lime buildup,
and clean when necessary.
Failure to keep the water pan and baffles free of lime
buildup reduces the performance of the cabinet.
1. Disconnect the electrical supply to the cabinet.
Failure to disconnect power to the cabinet causes the
interior of the cabinet to be “flooded” with water from
the automatic water fill system.
2. Remove the top drawer from the cabinet.
3. Remove the water pan and baffles by supporting the pan with one
and pulling out on the latches with the other hand. The water pan
drops down from the ceiling.
4. Remove the 4 baffles from the water pan.
Step 3
5. Clean the baffles and water pan with a brush, or other tool, to
loosen and remove any buildup. If the buildup is excessive, a
liquid chemical lime remover may help to remove lime.
Do not use steel wool, other abrasive cleaners or
cleaners/sanitizers containing chlorine, bromine, iodine or
ammonia chemicals, as these will deteriorate the stainless
steel material and shorten the life of the pan and baffles.
6. After removing all lime buildup, rinse pan and baffles, and place
water pan and baffles back into cabinet. Make sure water pan
is secure against the ceiling of the cabinet.
7. Replace the top drawer and reconnect electrical supply to unit.
1110 3-9

Model HCH-930/932
3-7. PREVENTIVE Clean Water Strainer
MAINTENANCE
(Continued) If the flow of water into the cabinet slows or stops, the water strainer
screen may be clogged. Follow the steps below to check and clean
the screen.
1. Shut off water supply.
2. Remove the hex cap at the bottom of the strainer.
3. Remove the screen from the strainer and clean it. If strainer has a
lime buildup, lime remover can be used.
4. Reassemble in reverse order.
5. Turn on water supply and check for leaks.
Step 2
3-10 1110

Model HCH-930/932
3-8. TROUBLESHOOTING GUIDE
PROBLEM CAUSE CORRECTION
Product not holding • Drawers are left open • Keep drawers closed except
temperature to load and serve product
• Product held too long • Hold product only for the
recommended times
• Thermostat set too low • Increase thermostat setting by
removing hole plug on control
panel and turning the shaft
clockwise with a screwdriver
Cabinet steaming • Too much humidity inside • Remove one or more baffles
or product soggy cabinet from water pan
Water pan not filling • Water supply off or • Check water supply line
disconnected
• Plugged water strainer • Clean water strainer
• Corroded water pan • Clean water pan
• Faulty or corroded water valve • Clean water valve; replace if
necessary
Water pan overflows • Water pan not installed or • Check water pan installation
installed improperly
• Corroded water pan • Clean water pan
• Faulty or corroded water valve • Clean water valve; replace if bad
• Faulty float switch • Check float switch
With switch in ON • Unit not connected to • Plug cord into electrical outlet
position the cabinet is electrical supply
completely inoperative
• Open breaker or fuse • Reset breaker or install new
fuse in junction box
• Faulty cord or plug • Check cord and plug
1110 3-11
More detailed troubleshooting information is available in the Technical Manual, available at www.hennypenny.com,
or 800-417-8405 or 937-456-8405.

Model HCH-930/932
3-9. ERROR CODES
DISPLAY CAUSE PANEL BOARD CORRECTION
“E-4” Control board Turn switch to OFF position, then turn switch back to
overheating ON; if display shows “E-4,” the control board is
getting too hot; make sure unit is not overheating
“E-6” Wrong number of Check to see if unit is set to the correct number of
drawers programmed, drawers, ex: MP-942=2 drawers (see programming
or faulty temperature instructions); have temperature probe checked for
probe faulty probe
“E-41” Memory scrambled Press and release the UP and DOWN buttons to
initialize the program; if “E-41” persists replace the
control board
“Hi” Unit over-heating; Have relay or control board replaced
faulty relay or
control board
3-12 1110
-
 1
1
-
 2
2
-
 3
3
-
 4
4
-
 5
5
-
 6
6
-
 7
7
-
 8
8
-
 9
9
-
 10
10
-
 11
11
-
 12
12


Henny Penny HCH-932 Operating instructions
- Category
- Thermostats
- Type
- Operating instructions
- This manual is also suitable for
Ask a question and I''ll find the answer in the document
Finding information in a document is now easier with AI
Related papers
-
Henny Penny HCH-930 Operating instructions
-
-
-
-
-
-
-
Henny Penny HCD-930 CDT Operating instructions
-
-
Other documents
-
TECSUN R9702 Owner's manual
-
Hobart HCH16 Datasheet
-
Heat Controller HCH006 Operating instructions
-
Aiwa XP-V4116CALHS User manual
-
 Tresanti KI10289-48-PI04 User guide
-
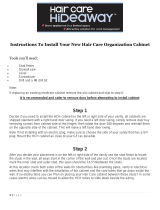 Hair Care Hideaway HCH1500 Installation guide
-
 De Dietrich HG6644D1 Owner's manual
-
Haier HCH-T895 User manual
-
Chromalox HCH User manual
-
EMI VCA/HCA/HCH Installation & Operation Manual


