Page is loading ...

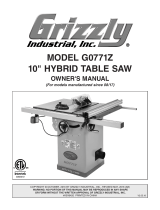
MODEL G0641
DOUBLE MITER SAW
OWNER'S MANUAL
COPYRIGHT © JANUARY, 2008 BY GRIZZLY INDUSTRIAL, INC.
WARNING: NO PORTION OF THIS MANUAL MAY BE REPRODUCED IN ANY SHAPE
OR FORM WITHOUT THE WRITTEN APPROVAL OF GRIZZLY INDUSTRIAL, INC.
#TS9874 PRINTED IN TAIWAN


Table of Contents
INTRODUCTION ............................................... 2
Foreword ........................................................ 2
Contact Info ...................................................
2
Machine Data Sheet ......................................
3
Identification ................................................... 4
SECTION 1: SAFETY .......................................
5
Safety Instructions for Machinery ..................
5
Safety Instructions for Double
Miter Saws .... 7
SECTION 2: CIRCUIT REQUIREMENTS ........
8
220V Single-Phase ........................................
8
SECTION 3: SETUP .........................................
9
Setup Safety ..................................................
9
Items Needed for Setup ................................. 9
Unpacking ...................................................... 9
Inventory ...................................................... 10
Clean Up ......................................................
11
Site Considerations ......................................
11
Moving & Placing
Machine .......................... 12
Mounting to Shop Floor ...............................
13
Assembly ..................................................... 14
Air Supply ....................................................
15
Dust Collection .............................................
16
Test Run ......................................................
17
SECTION 4: OPERATIONS ...........................
18
Operation Safety ..........................................
18
Operational Overview .................................. 18
Hold-downs .................................................. 19
Lowering Speeds .........................................
20
Fence Stop ..................................................
21
Replacing Blades .........................................
22
SECTION 5: ACCESSORIES ......................... 23
SECTION 6: MAINTENANCE .........................
26
Schedule ...................................................... 26
Cleaning ....................................................... 26
Lubrication ................................................... 27
V-Belt Maintenance .....................................
29
SECTION 7: SERVICE ...................................
31
Troubleshooting ........................................... 31
Aligning Pivot Arm Assembly .......................
34
Pneumatic Limit Switch ................................
35
Electrical Wiring Diagram ............................
36
Motor Wiring Diagram .................................. 37
Pneumatic System Diagram ........................
38
SECTION 8:
PARTS ....................................... 39
Cabinet ......................................................... 39
Drive System ...............................................
41
Pivot Linkage ...............................................
43
Extension Wings ..........................................
44
Electrical & Lubrication Systems .................
45
Pneumatic System ....................................... 47
Label Placement .......................................... 49
WARRANTY AND RETURNS ........................
53
WARRANTY AND RETURNS ........................ 53

-2-
G0641 Double Miter Saw
INTRODUCTION
Foreword
We are proud to offer the Model G0641 Double
Miter Saw. This machine is part of a growing
Grizzly family of fine woodworking machinery.
When used according to the guidelines set forth in
this manual, you can expect years of trouble-free,
enjoyable operation and proof of Grizzly’s commit-
ment to customer satisfaction.
The specifications, drawings, and photographs
illustrated in this manual represent the Model
G0641 when the manual was prepared. However,
owing to Grizzly’s policy of continuous improve
-
ment, changes may be made at any time with no
obligation on the part of Grizzly.
For your convenience, we always keep current
Grizzly manuals available on our website at
www.grizzly.com. Any updates to your machine
will be reflected in these manuals as soon as they
are complete. Visit our site often to check for the
latest updates to this manual!
If you have any comments regarding this manual,
please write to us at the address below:
Grizzly Industrial, Inc.
C
/O Technical Documentation Manager
P.O. Box 2069
Bellingham, WA 98227-2069
Email: [email protected]
We stand behind our machines. If you have any
service questions or parts requests, please call or
write us at the location listed below.
Grizzly Industrial, Inc.
1203 Lycoming Mall Circle
Muncy, PA 17756
Phone: (570) 546-9663
Fax: (800) 438-5901
E-Mail: [email protected]
Web Site: http://www.grizzly.com
Contact Info

G0641 Double Miter Saw
-3-
Machine Data Sheet
machine data sheet

-4-
G0641 Double Miter Saw
Figure 1. Model G0641 identification.
A. Left Extension Wing w/Scale
B. Transparent Guard
C. Front Guard
D. Oil Reservoir
E. Safety Hood
F. ON/OFF Magnetic Switch
Identification
A
B
C
D
E
F
G
H
I
J
K
G. Right Extension Wing
H. Pneumatic Connections Access Door
I. Foot Pedal Actuator
J. Waste Chute
K. Dust Port 4"

G0641 Double Miter Saw
-5-
Safety Instructions for Machinery

-6-
G0641 Double Miter Saw

G0641 Double Miter Saw
-7-
Like all machinery there is potential danger when operating this machine. Accidents are fre-
quently caused by lack of familiarity or failure to pay attention. Use this machine with respect and
caution to lessen the possibility of operator injury. If normal safety precautions are overlooked or
ignored, serious personal injury may occur.
Safety Instructions for Double Miter Saws
7. DISCONNECT AIR PRESSURE. To avoid
the risk of unintentional operation, discon
-
nect air pressure when the machine is not
in use. Always disconnect air pressure from
the machine when performing maintenance,
setup, or service.
8. BE AWARE OF AIR HOSE LOCATION.
Hoses can easily become a tripping hazard
when laid across the floor in a disorganized
manner.
9. STALLED BLADE. Disconnect the saw
from power before attempting to "free" a
stalled saw blade or jammed workpiece.
10. WORKPIECE SUPPORT. Provide adequate
support for workpieces that extend beyond
the extension wings.
11. STABLE POSITION. Avoid operations and
hand positions where a slip could cause
your hand to move into the blade.
12. MACHINE CONDITION. If any part of the
machine is damaged or not working prop
-
erly, STOP using the machine immediately.
To avoid the risk of serious personal injury,
make sure that proper repairs are completed
before re-connecting the machine to power.
13. EXPERIENCING DIFFICULTIES. If at
any time you are experiencing difficulties
performing the intended operation, stop
using the machine! Contact our Service
Department at (570) 546-9663.
1. SAFETY GUARDS. The safety guards are
designed to protect you from the spinning
blades and flying debris during operation.
Always keep the safety guards in their cor
-
rect position when the machine is in opera
-
tion.
2. KICKBACK. Be familiar with kickback.
Kickback happens when the workpiece is
thrown towards the operator at a high rate
of speed. Until you have a clear understand
-
ing of kickback and how it occurs, DO NOT
operate this saw!
3. WORKPIECE CONTROL. To avoid kick
-
back, make sure the workpiece is stable
on the table and is supported by the fence,
extension wings, and pneumatic hold-
downs. DO NOT perform any cutting opera
-
tions free-hand.
4. REACHING NEAR SAFETY GUARDS. The
spinning saw blades can cause serious
personal injury very quickly. Never reach
near or under safety guards when the
machine is connected to power
. Disconnect
the machine from power before placing your
hands within 4" of the safety guards.
5. DAMAGED SAW BLADES. Never use
blades that have been dropped or otherwise
damaged.
6. USE CORRECT AIR PRESSURE.
Exceeding the maximum 90 PSI air pres
-
sure rating of this machine may cause
unpredictable operation, personal injury, or
damage to the machine.

-8-
G0641 Double Miter Saw
Full Load Amperage Draw
Total Motor Draw .................................. 20 Amps
Power Supply Circuit Requirements
You MUST connect your machine to a grounded
circuit that is rated for the amperage given below.
Never replace a circuit breaker on an existing cir
-
cuit with one of higher amperage without consult
-
ing a qualified electrician to ensure compliance
with wiring codes
. If you are unsure about the
wiring codes in your area or you plan to con
-
nect your machine to a shared circuit, consult
a qualified electrician.
Minimum Circuit Size .............................
30 Amps
SECTION 2: CIRCUIT REQUIREMENTS
Power Connection Device
The type of plug required to connect your machine
to power depends on the type of service you cur
-
rently have or plan to install. We recommend using
the plug and receptacle shown in Figure
2.
Serious personal injury could occur if you
connect the machine to power before com
-
pleting the setup process. DO NOT connect
the machine to the power until instructed
later in this manual.
Electrocution or fire could
result if machine is not
grounded and installed in
compliance with electrical
codes. Compliance MUST
be verified by a qualified
electrician!
Extension Cords
Using extension cords may reduce the life of the
motor. Instead, place the machine near a power
source. If you must use an extension cord:
• Use at least a 12 gauge cord that does not
exceed 50 feet in length.
• The extension cord must have a ground wire
and plug pin.
• A qualified electrician MUST size cords over
50 feet long to prevent motor damage.
Figure 2. NEMA L6-30 plug and receptacle.
220V Single-Phase

G0641 Double Miter Saw
-9-
Wear safety glasses dur-
ing the entire setup pro
-
cess!
This machine presents
serious injury hazards
to untrained users. Read
through this entire manu
-
al to become familiar with
the controls and opera
-
tions before starting the
machine!
Setup Safety
SECTION 3: SETUP
The following items are needed to complete the
setup process, but are not included with your
machine:
Description Qty
• Straightedge 4' (or longer) ......................... 1
• Precision Level ...........................................
1
• Assistants .....................................At Least 1
• Safety Glasses (for each person) ..............
1
• Dust Collection System ..............................
1
• 4" Dust Hose (length as needed) ...............
1
• 4" Hose Clamp ...........................................
1
• Air Compressor ..........................................
1
• Air Hose (length as needed) ......................
1
• Forklift (rated for 1500 lbs.) ........................
1
Items Needed for
Setup
Your machine was carefully packaged for safe
transportation. Remove the packaging materials
from around your machine and inspect it. If you
discover the machine is damaged, please imme
-
diately call Customer Service at (570) 546-9663
for advice.
Save the containers and all packing materials for
possible inspection by the carrier or its agent.
Otherwise, filing a freight claim can be difficult.
When you are completely satisfied with the condi
-
tion of your shipment, inventory the contents.
Unpacking
This machine and its com-
ponents are very heavy.
Get lifting help or use
power lifting equipment
such as a forklift to move
heavy items.

-10-
G0641 Double Miter Saw
Inventory
The following is a description of the main compo-
nents shipped with your machine. Lay the compo
-
nents out to inventory them.
Note:
If you can't find an item on this list, check
the mounting location on the machine or examine
the packaging materials carefully
. Occasionally
we pre-install certain components for shipping
purposes.
Inventory: (Figures
3) Qty
A. Double Miter Saw (not shown) ................... 1
B. Left Extension Wing w/Scale ...................... 1
C. Right Extension Wing ................................. 1
D. Support Legs w/Adjustable Floor Mounts .. 2
E. Hex Wrench Set 1.5–10mm ....................... 1
F. Combo Wrenches:
— 11/13mm .................................................
1
— 12/14mm .................................................
1
— 17/19mm .................................................
1
— 22/24mm .................................................
1
— 23/26mm .................................................
1
G. Hardware Bag (not shown):
— Special Hex Bolts 5/8-11 x 2
3
⁄8"
(lifting) .....................................................
4
— Hex Nuts
5
⁄8"-11 (lifting) ........................... 4
—Hex Bolts M8-1.25 x 25 (ext. wings) ......
8
— Flat Washers 8mm (ext. wings) ..............
8
If any nonproprietary parts are missing (e.g. a
nut or a washer), we will gladly replace them; or
for the sake of expediency, replacements can be
obtained at your local hardware store.
SUFFOCATION HAZARD!
Immediately discard all plas-
tic bags and packing materi
-
als to eliminate choking/suf
-
focation hazards for children
and animals.
B
C
D
E
F
Figure 3. Extension wings and tools.

G0641 Double Miter Saw
-11-
Floor Load
Refer to the Machine Data Sheet on Page 3 for
the weight and footprint specifications of your
machine. Some floors may require additional
reinforcement to support both the machine and
operator.
Placement Location
Consider existing and anticipated needs, size of
material to be processed through each machine,
and space for auxiliary stands, work tables or
other machinery when establishing a location for
your new machine. See Figure
5 for the minimum
working clearances.
Children and visitors may be
seriously injured if unsuper
-
vised around this machine.
Lock entrances to the shop
or disable start switch or
power connection to prevent
unsupervised use.
The unpainted surfaces are coated with a waxy
oil to prevent corrosion during shipment. Remove
this protective coating with a solvent cleaner or
citrus-based degreaser such as Grizzly’s G7895
Citrus Degreaser. To clean thoroughly, some parts
must be removed. For optimum performance
from your machine, clean all moving parts or
sliding contact surfaces. Avoid chlorine-based
solvents, such as acetone or brake parts cleaner
that may damage painted surfaces. Always follow
the manufacturer’s instructions when using any
type of cleaning product.
Site ConsiderationsClean Up
Figure 5. Minimum working clearances.
Gasoline and petroleum
products have low flash
points and can explode
or cause fire if used to
clean machinery. DO
NOT use these products
to clean the machinery.
Many cleaning solvents
are toxic if inhaled.
Minimize your risk by only
using these products in a
well ventilated area.
Figure 4. Grizzly citrus degreaser.
G7895—Grizzly Citrus Degreaser
This natural, citrus-based degreaser is a great
solution for removing export grease, and it’s much
safer to work around than nasty solvents.

-12-
G0641 Double Miter Saw
Moving & Placing
Machine
The Model G0641 is a
heavy machine. Serious
personal injury may occur
if safe moving methods
are not used. To be safe,
get assistance and use
a forklift rated for 1500
lbs. to move the shipping
crate and remove the
machine from the crate.
Lifting hex bolts are included with your saw so that
you can raise the machine from the shipping pal
-
let far enough to insert forklift forks for moving.
To move the machine:
1. Remove the top wooden crate from the
machine and shipping pallet.
2. Remove the four lag bolts and washers
securing the machine to the pallet.
4. Evenly tighten the four lifting hex bolts to raise
the machine up from the pallet far enough to
insert forklift forks under the machine, then
tighten the jam nuts down to the mounting
flange to lock the lifting bolts in place.
5. Spread the forklift forks as far as possible and
insert them under the machine.
6. With assistance to steady the load, slowly lift
the machine from the pallet and move it to
your prepared location.
Note: Place a precision level on the table
and shim under the machine as necessary
to make it level. Take care to shim any gaps
between the mounting flanges and the floor
before tightening the lag bolts to prevent the
cast iron cabinet from warping or cracking.
Figure 6. Lifting hex bolts and jam nuts.
Lifting Hex Bolt
Jam Nut
Machine
Mounting
Flange
DO NOT lift the machine any higher than
necessary to clear the pallet and the floor.
Serious personal injury and damage to the
machine may occur if safe moving methods
are not followed.
3. Use a 24mm wrench to thread the four spe-
cial 5/8-11 x 2
3
⁄8" hex bolts into the machine
mounting flanges (see
Figure 6).

G0641 Double Miter Saw
-13-
Although not required, we recommend that you
mount your new machine to the floor. Because
this is an optional step and floor materials may
vary, floor mounting hardware is not included.
Generally, you can either bolt your machine to
the floor or mount it on machine mounts. Both
options are described below. Whichever option
you choose, it is necessary to level your machine
with a precision level.
Bolting to Concrete Floors
Anchor studs and lag shield anchors with lag bolts
(Figure 7) are two popular methods for anchor-
ing an object to a concrete floor. We suggest
you research the many options and methods for
mounting your machine and choose the best that
fits your specific application.
Mounting to Shop
Floor
NOTICE
Anchor studs are stronger and more perma-
nent alternatives to lag anchors and bolts;
however, they will stick out of the floor,
which may cause a tripping hazard if you
decide to move your machine
.
Figure 8. Machine mount example.
Using Machine Mounts
Using machine mounts, shown in Figure 8, gives
the advantage of fast leveling and vibration reduc
-
tion. The large size of the foot pads distributes
the weight of the machine to reduce strain on the
floor.
NOTICE
We strongly recommend securing your
machine to the floor if it is hardwired to the
power source. Consult with your electrician
to ensure compliance with local codes.
Figure 7. Typical fasteners for mounting to
concrete floors.
Anchor Stud
Lag Anchor & Bolt

-14-
G0641 Double Miter Saw
Assembly
Once you have secured the machine in its pre-
pared location, install the extension wings.
To assemble the double miter saw:
1. Turn the extension wings upside down on a
protected surface (see
Figure 9).
2. Use a 13mm wrench to secure the support
legs to the extension wings with the M8-1.25
x 20 hex bolts and flat washers, as shown in
Figure 9.
3. Turn the support leg and extension wing
assemblies right side up and mount them to
the flanges on both sides of the saw table
(see Figure 10) with the M8-1.25 x 20 hex
bolts and flat washers.
Note: The extension wing with the scale is
mounted on the left side of the machine.
4. Lay a long straightedge across the extension
wings and the saw table.
5. Adjust the supporting leg floor mounts so that
the extension wings are level with the table,
then tighten the jam nuts on the floor mounts
to secure the settings.
Figure 9. Extension wing with support leg
installed.
Support
Leg
Adjustable
Floor
Mounts
Hex Bolts &
Flat Washers
Extension
Wing
Figure 10. Extension wing mounted onto the
saw table.
Hex Bolts
& Flat Washers

G0641 Double Miter Saw
-15-
Required Air PSI ....................................... 70 PSI
Air Consumption ....................................... 4 CFM
Maximum Air PSI ...................................... 90 PSI
To connect the saw to compressed air:
1. Connect a source of compressed air to the
air regulator-lubricator inlet valve on the back
(see Figure 11).
Figure 11. Air regulator-lubricator.
Air
Pressure
Knob
Air
Pressure
Dial
Air Inlet Valve
2. Lift up on the air pressure knob (see Figure
11), and turn it to adjust the air pressure dial
to 70 PSI, then push the knob down to lock
the setting.
3. Open the pneumatic access door on the right
side of the machine and set the air pressure
knob in a similar manner so that the air pres
-
sure dial reads 70 PSI (see
Figure 12).
Figure 12. Internal air regulator.
Air Pressure
Dial
Air Pressure Knob
Air Supply
NOTICE
Exceeding 90 PSI may result in unpredict-
able operation of the saw and damage to
the pneumatic system.

-16-
G0641 Double Miter Saw
Figure 13. Dust hose attached to dust port.
Dust Collection
To connect a dust collection hose:
1. Fit a 4" dust hose over the dust port, as
shown in
Figure 13, and secure it in place
with a hose clamp
.
2. Tug the hose to make sure it does not come
off.
Note: A tight fit is necessary for proper per-
formance.
DO NOT operate the Model G0641 without an
adequate dust collection system. This saw
creates substantial amounts of wood dust
while operating. Failure to use a dust collec
-
tion system can result in short and long-term
respiratory illness.
Recommended CFM at Dust Port: 400 CFM
Do not confuse this CFM recommendation with
the rating of the dust collector. To determine
the CFM at the dust port, you must consider
these variables: (1) CFM rating of the dust col
-
lector, (2) hose type and length between the
dust collector and the machine, (3) number
of branches or wyes, and (4) amount of other
open lines throughout the system. Explaining
how to calculate these variables is beyond the
scope of this manual. Consult an expert or pur-
chase a good dust collection "how-to" book.

G0641 Double Miter Saw
-17-
Test Run
Once the assembly is complete, test run your
machine to make sure it runs properly. The test
run consists of verifying the following: 1) The saw
motors power up and run correctly, and 2) the
front guard safety feature works correctly.
If, during the test run, you cannot easily locate the
source of an unusual noise, vibration, or action,
stop using the machine immediately, then review
the Troubleshooting on Page 31.
If you still cannot remedy a problem, contact our
Tech Support at (570) 546-9663 for assistance.
To test run the machine:
1. Make sure you have read and understand
the safety instructions at the beginning of the
manual and that the machine is setup prop
-
erly.
2. Check for proper lubrication (refer to
Lubrication on Page 27).
3. Make sure the saw blades are firmly secured
by the arbor bolts and flanges (refer to
Replacing Blades
on Page 22 for detailed
instructions).
4. Make sure all tools and objects used during
set up are cleared away from the machine.
5. Connect the machine to the power and air,
correctly adjust the air pressure on both regu
-
lators, then turn the machine
ON.
6. Listen to and watch for abnormal noises or
actions. The machine should run smoothly
with little or no vibration or rubbing noises.
— Strange or unusual noises should be inves
-
tigated and corrected before operating the
machine further. Always disconnect the
machine from power when investigating or
correcting potential problems.
7. Turn the power OFF.
8. Press the foot pedal actuator—the hold-
downs and blades should lower. Lift your foot
from the pedal—the blades and hold-down
should raise.
9. Remove the two thumb screws securing the
front guard (see
Figure 14) and swing the
guard up, as shown in
Figure 15.
Figure 14. Front guard thumb screws.
Front Guard
Thumb Screws
10. Standing away from the front of the saw, turn
the machine
ON.
—If the machine
DOES NOT start, the front
guard safety feature is working correctly.
Lower the front guard and secure it with the
two thumb screws before proceeding.
—If the machine
DOES start (with the front
guard raised up), immediately disconnect
power to the machine. The front guard
safety switch (
Figure 15) is not working
correctly. This safety feature must work
properly before proceeding with the rest of
the test run. Call Tech Support for help.
Figure 15. Front guard in the upper position.
Safety Switch

-18-
G0641 Double Miter Saw
Damage to your eyes, lungs, and ears could
result from using this machine without
proper protective gear. Always wear safety
glasses, a respirator, and hearing protection
when operating this machine.
Loose hair and cloth-
ing could get caught in
machinery and cause seri
-
ous personal injury. Keep
loose clothing and long
hair away from moving
machinery.
Operation Safety
SECTION 4: OPERATIONS
NOTICE
If you have never used this type of machine
or equipment before, WE STRONGLY REC
-
OMMEND that you read books, trade maga
-
zines, or get formal training before begin
-
ning any projects. Regardless of the con
-
tent in this section, Grizzly Industrial will
not be held liable for accidents caused by
lack of training.
Operational
Overview
The Model G0641 was designed to make two pre-
cise and matching 45° cuts in a high-production
shop. This is accomplished by using two opposing
12" saw blades and motors, with the blades rotat
-
ing down through the workpiece in guillotine-type
movement.
The stock is positioned on the table up against
the fence and the adjustable stop. When the foot
pedal actuator is pressed, the pneumatic hold-
downs lower to hold the workpiece and the blades
swing down in a controlled manner to make the
cuts.
The resulting workpiece will have opposing 45°
cuts on the ends, and the triangular waste piece
exits the machine down through the waste chute.
The vertical movement of the clamping hold-
downs and saw blades is pneumatically controlled
and the rate can be independently adjusted.
To make a cut:
1. Position the hold-downs to firmly hold the
workpiece against the fence (
Page 19).
2. Adjust the lowering rates for the hold-downs
and saw blades (
Page 20).
3. Set the fence stop at the correct distance for
your operation (
Page 21).
4. Turn the saw ON, then press the foot pedal
actuator to make the cut.
/