Dash DIGITAL COMPACT AIR FRYER Owner's manual
- Category
- Deep fryers
- Type
- Owner's manual
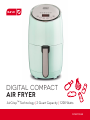
Dash DIGITAL COMPACT AIR FRYER
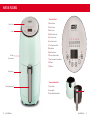
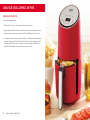
Below you will find brief product information for Dash DIGITAL COMPACT AIR FRYER. It is a kitchen appliance that uses hot air to cook food, making it a healthier alternative to deep frying. The device has a 2-quart capacity and 1200 watts of power, allowing you to cook a variety of dishes. It features AirCrisp™ Technology, which circulates hot air around the food, resulting in evenly cooked and crispy results. The digital control panel makes it easy to set the cooking time and temperature.
Dash DIGITAL COMPACT AIR FRYER
Below you will find brief product information for Dash DIGITAL COMPACT AIR FRYER. It is a kitchen appliance that uses hot air to cook food, making it a healthier alternative to deep frying. The device has a 2-quart capacity and 1200 watts of power, allowing you to cook a variety of dishes. It features AirCrisp™ Technology, which circulates hot air around the food, resulting in evenly cooked and crispy results. The digital control panel makes it easy to set the cooking time and temperature.


-
 1
1
-
 2
2
-
 3
3
-
 4
4
-
 5
5
-
 6
6
-
 7
7
-
 8
8
-
 9
9
-
 10
10
-
 11
11
-
 12
12
-
 13
13
-
 14
14
-
 15
15
-
 16
16
-
 17
17
-
 18
18
-
 19
19
-
 20
20
-
 21
21


Dash DIGITAL COMPACT AIR FRYER Owner's manual
- Category
- Deep fryers
- Type
- Owner's manual
Dash DIGITAL COMPACT AIR FRYER
Below you will find brief product information for Dash DIGITAL COMPACT AIR FRYER. It is a kitchen appliance that uses hot air to cook food, making it a healthier alternative to deep frying. The device has a 2-quart capacity and 1200 watts of power, allowing you to cook a variety of dishes. It features AirCrisp™ Technology, which circulates hot air around the food, resulting in evenly cooked and crispy results. The digital control panel makes it easy to set the cooking time and temperature.
Ask a question and I''ll find the answer in the document
Finding information in a document is now easier with AI
in other languages
Related papers
-
Dash DCAF155GBAQ02 User manual
-
-
-
-
-
-
-
-
-
Other documents
-
Costway EP23501 User guide
-
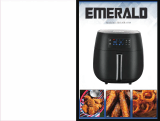 Emerald SM-AIR-1819 User guide
-
deco chef DCDCDAIR05 User manual
-
Lenoxx AF310W User manual
-
Aigostar 718356204828 User manual
-
HAEGER AF-D42.007A User manual
-
Vytronix 45QCF User manual
-
-
DASH D DASH-D DFAF755 Tasti-Crisp Family Size Air Fryer User manual
-
 SUPER DEAL Air fryer oven 0020 User manual

