Page is loading ...

Cable Puller Manual 1010 8/19/2013 update
Page 1 of 9
Copyright 2010 Vestil Manufacturing Corp.
CP-SERIES CABLE PULLERS
INSTRUCTION MANUAL
MODEL CP-15 & -30
VESTIL MANUFACTURING CORP.
2999 NORTH WAYNE STREET, P.O. BOX 507, ANGOLA, IN 46703
TELEPHONE: (260) 665-7586 -OR- TOLL FREE (800) 348-0868
FAX: (260) 665-1339
URL: WWW.VESTILMFG.COM EMAIL: SALES@VESTIL.COM
NOTE: COMPLIANCE WITH REGULATIONS, CODES, AND/OR STATUTORY (NON-VOLUNTARY) STANDARDS
ENFORCED IN THE LOCATION WHERE THE DEVICE IS USED IS EXCLUSIVELY THE RESPONSIBILITY OF THE END-USER. IF
LAW ENFORCED WHERE THE CABLE PULLER IS USED CONTRADICTS AN INSTRUCTION(S) OR PART OF AN
INSTRUCTION(S), VESTIL IS NOT RESPONSIBLE FOR ANY CONSEQUENTIAL DAMAGES SUSTAINED AS A RESULT.
Table of Contents Table of Figures
Product Introduction……………………………….... 2 Fig. 1A “Side view”……........................................................... 4
Safety Principles……………………........................ 2 Fig. 1B “Top view”…................................................................ 4
Safety Guidelines………………….......................... 3 Fig. 1C “View of cable opening”………………………………… 4
Use Instructions……………………………………… 5-6 Fig. 2 “Product label placement”.…………….……………….... 8
Maintenance Recommendations…………............. 6-8

Page 2 of 9
Copyright 2010 Vestil Manufacturing Corp.
Safety Principles
Vestil Manufacturing Corp. recognizes the critical importance of workplace safety. However,
although Vestil diligently strives to identify foreseeable hazardous situations, this manual cannot
address every conceivable danger. The end-user is ultimately responsible for exercising sound
judgment at all times.
Vestil Manufacturing Corp. created this manual to acquaint persons authorized to use and/or
maintain this cable puller with safe use and maintenance procedures. Each person, who might
use or perform maintenance on the cable puller, must read and understand every
instruction BEFORE using the device or performing maintenance. Users should have access
to the manual at all times and should routinely review the directions.
Employers are responsible for instructing employees to use the product properly. If you do not
understand an instruction, ask your supervisor or employer for assistance. Failure to adhere to the
directions in this manual might result in serious personal injury or even death.
Vestil is not liable for any injury or property damage that occurs as a consequence of failing to
apply either: 1) the instructions that appear in this manual; or 2) the information provided on labels
affixed to the product. Furthermore, failure to exercise good judgment and common sense might
result in property damage, serious personal injury or death. Such failure is solely the fault of the
person(s) using the cable puller.
This manual uses SIGNAL WORDS to classify personal injury risks and situations that
might lead to property damage, as well as to draw attention to safety message(s). The
reader must understand that each signal word indicates the seriousness of the described
hazard.
Identifies a hazardous situation which, if not avoided, WILL result in DEATH or SERIOUS
INJURY. Use of this signal word is limited to the most extreme situations.
Identifies a hazardous situation which, if not avoided, COULD result in DEATH or SERIOUS
INJURY.
Indicates a hazardous situation which, if not avoided, COULD result in MINOR or MODERATE
injury.
Identifies practices likely to result in product/property damage, such as operation that might damage
the cable puller.
Model
Useable Cable Length
Range in feet (~m)
Uniform Max. Rated
Load in Pounds (~kg)
Cable Diameter
in inches
Net Weight in Pounds (~kg)
CP-15 60 (~18.3m)
1,500 (~682kg)
5/16 35 (~16kg)
CP-30 60 (~18.3m)
3,000 (~1,364kg)
7/16 60 (~27¼ kg)
Thank you for purchasing a CP-series cable puller (“cable puller,” “CP,” or
“puller”). Our cable pullers are durable, high-quality products that have been
rigorously engineered to provide both dependable operation and simplicity.
Although use and maintenance procedures are relatively intuitive, any person
who might use or maintain this product must be familiar with the instructions
provided in this manual. Dimensions and other product specifications appear
in the following table:
PRODUCT INTRODUCTION

Page 3 of 9
Copyright 2010 Vestil Manufacturing Corp.
Failure to read and understand the instructions included in this manual before using or servicing the cable
puller constitutes misuse of the product. Study the entire manual before installing the product. Read the
manual to refresh your understanding of the safe use and maintenance procedures explained on p. 5-8. DO NOT
attempt to resolve any problem(s) with the device unless you are both authorized to do so and certain that it will be
safe to use afterwards.
Electrocution might result if any part of the cable puller, cable, or the object connected to the cable
hook contacts electrified wires. Reduce the likelihood of electrocution by applying common sense:
DO NOT contact electrified wires with any part of the cable puller, cable, or the object connected to the cable hook;
DO NOT use or store the cable puller in an area where contact with electrified wires is likely or possible;
Before using the puller, inspect the usage area for unusual conditions and implement precautions that account for
those conditions.
If this product is used improperly or carelessly, the operator and/or bystander(s) might sustain serious
personal injuries or could be killed. To reduce the likelihood of injury:
DO NOT use the cable puller to lift material. ONLY use the device to PULL loads. DO NOT use the device to
pull any apparatus that supports people, such as a work platform.
DO NOT use the cable puller if the cable cannot form a straight line between the puller and the load.
DO NOT disconnect the cable hook while pulling an object/material. BEFORE disconnecting the object/material, be
certain that it is fully and stably supported by the ground or other surface, and is fully immobilized (can’t fall over,
roll, slide, or move in an uncontrolled manner). If a second person is needed to immobilize the load, find someone
to help you.
ASME standard B30.21 is NOT law, but it contains worthwhile recommendations about the use of cable pullers.
ALWAYS inspect the cable puller before each use according to the inspection procedures described in the most
recent edition of ASME B30.21. B30.21 also recommends “frequent” and “periodic” inspections.
DO NOT use the cable puller if the cable is twisted, kinked, or damaged.
Properly maintain the cable puller according to the maintenance procedures on p. 6-8 of the manual. The
procedures that appear in this manual should supplement the maintenance practices of ASME B30.21.
ALWAYS attach the cable puller to a device that is capable of supporting the weight of the cable puller, the cable
AND the maximum rated load. DO NOT connect the cable puller to an anchoring structure that might accidentally
or unintentionally move or shift position.
Make sure that no person is in the travel path during use.
DO NOT remove or obscure any label. Verify the placement and readability of all labels as shown in FIG. 2 on p. 8.
DO NOT use the cable puller UNLESS all labels are securely attached and readable.
DO NOT sit on or apply any weight/pressure to a load connected to the cable puller.
DO NOT attempt to pull material that weighs more than the maximum rated load of the cable puller.
DO NOT get in front of or behind a load while pulling it. Always orient yourself so that the load is visible to you.
You are less likely to be injured if the load remains within sight at all times.
DO NOT leave a connected load unattended. An unattended load creates a risk of injury to the operator and to
others. Always properly immobilize the load, if necessary, before disconnecting it from the hook.
SAFETY GUIDELINES

Page 4 of 9
Copyright 2010 Vestil Manufacturing Corp.
Labeled Photographs
**Note: Vestil does NOT provide replacement parts for this product. The following diagram is solely intended to clarify
terms that appear in the Use (p. 5-6) and Maintenance Instructions (p. 6-8).**
FIG. 1A: Side View
FIG. 1B: Top View
Shaft linking collar
E
D
B
C
F
A
G
F
G
A
B C D E
I
TEM
LETTER
D
ESCRIPTION
A Mounting pin
B Forward ratchet lever
C Housing (2 halves)
D Reverse ratchet lever
E Cable release lever
F Cable guide
G 5/16 in. cable
FIG. 1C: View of Cable Opening
A
B
Opening for cable through forward ratcheting lever
Openings for mounting pin
G

Page 5 of 9
Copyright 2010 Vestil Manufacturing Corp.
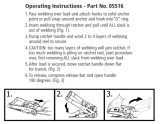
Use Instructions:
The operating instructions in this manual should supplement the operation recommendations of
ASME B30.21.
Only trained, designated persons should use the cable puller. “Designated person” means someone selected by his
or her employer, or by a representative of the employer, as competent to use the cable puller. Maintenance persons
and personnel who perform tests also may use the cable puller when necessary to fulfill their employment
responsibilities.
Step 1: Perform a complete “Frequent Inspection” as described in the most recent edition of ASME B30.21, BEFORE
using the puller. (Also see “Maintenance and Inspections” on p. 6-8). Proceed to the next step ONLY IF the puller
passes each part of the inspection and is deemed to be safe to use by designated inspection personnel.
Step 2: Inspect the cable. (See “Maintenance and Inspections” on p. 6-8).
Step 3: Connect the puller to an anchoring device/structure. The anchoring device must be able to safely handle the
weight of the cable puller, the cable, and the maximum rated load of the puller.
Step 4: Open the cable-ratcheting mechanism, by locking the cable release lever (E) and positioning the ratcheting
levers as shown in the photos below:
Step 5: Feed the cable through the puller as shown below:
Step 6: Unlock the release lever.
Press release lever down
and forward until it seats
behind locking tab (marked
with an asterisk).
Pivot ratcheting levers toward release lever
*
Press lever down and
pull it away from the
reverse ratcheting lever
E E

Page 6 of 9
Copyright 2010 Vestil Manufacturing Corp.
Step 7: Slide the operator handle onto the forward ratcheting lever; then work the forward ratcheting lever back-and-
forth until approximately 5 feet of cable has passed through the puller.
Step 8: Connect the load to the cable hook by suitable means. The cable must form a straight line between the puller
and the load. Test the soundness of the connection. Slowly ratchet cable (forward) through the puller, and observe
the motion of the attached load. If the load appears likely to tip, is improperly balanced, or does not move despite
working cable through the puller, immobilize the load; then attach the handle to the reverse ratcheting lever (“reverse
lever”). Ratchet cable back through the puller until the cable slacks. Adjust the load-to-hook connection as necessary
and remove obstacles from the path the load will follow as it slides across the ground/supporting surface.
Improperly connecting the load to the hook might result in serious personal injuries. The means used
to connect the load to the hook MUST seat in the saddle of the hook. DO NOT attach the means to the tip of the
hook.
Step 9: Pull the load. Connect the operator handle to the forward lever and ratchet the cable until the load reaches the
desired position. Immobilize the load, if necessary; then ratchet the puller in reverse until the cable slacks.
Disconnect the hook and the load.
Maintenance and Inspections:
The end-user is responsible for knowing all requirements imposed by law on cable pulling devices in the location
where the puller will be used. The end-user should also determine which authorities (publications) that appear to
apply requirements to cable pullers actually are law. For instance, just because an “American standard” (ANSI
publication) exists that discusses a particular type of device, it does not constitute anything more than the observation
and suggestion of a group of persons who deemed themselves experts about such devices.
I
NSPECTIONS:
The person(s) designated to conduct inspections must do so before the puller is used for the first time, as well as
before EACH use.
The end-user is responsible for performing inspections as recommended in ASME B30.21. The
standard categorizes examinations as either “Frequent” or “Periodic”; highlights of the recommended inspection
procedures appear below. However, the complete procedures (in the published standard) should be followed.
DO NOT use a puller that is structurally damaged. Structural damage includes, but is not limited to,
bending, warping, cracking or other deformation of the housing, inner ratcheting mechanism, ratchet levers, cable, or
cable hook (see FIG. 1A on p.4). Restore the puller to normal operating condition BEFORE using it again.
Open end of operator handle
Operator handle
Notch for retaining
pin
(Handle) retaining pin

Page 7 of 9
Copyright 2010 Vestil Manufacturing Corp.
Inspections before EACH use: visual examination should be performed by a person qualified and selected to
evaluate the condition of cables and cable pullers prior to each use. In particular, the selected person should
inspect the following items and prepare a written record describing the findings of the inspections:
1. Cable puller: visually inspect the puller for loose bolts/nuts, excessive wear of the mounting pin or cable
guide. Remove the puller from service if inspection personnel determine that the condition of the puller makes
it unsafe to use.
2. Cable: visually examine the cable for a) distortions, including kinks, crushed portions, segments where the
cable strands “birdcage”, displacement of the main strand, and exposed or protruding portions of the core; b)
generally corroded condition; c) broken or severed strands; OR d) broken wires. If one or more of conditions
a-d are discovered, the inspecting person should either permanently remove the cable from service, or
determine whether the nature and degree of damage makes the cable unsafe to use. Section 21-2.5.2 on p.
26 of ASME B30.21-1999 is an example of a checklist usable to determine whether a cable should remain in
service.
Periodic Inspections: visual inspections performed AND recorded by a qualified person.
1. Puller: visually examine the puller every 3 months. If the qualified person performing the inspection
determines that the condition of the puller constitutes a safety hazard, he should permanently remove it from
service. Lay the puller on a flat surface; remove the nuts and bolts that fasten the two sides of the housing
together; then remove the half of the housing facing upwards to expose the inner ratcheting mechanism.
Examine:
a. Ratcheting levers, release lever, cable guide, mounting pin, and each part of the ratcheting mechanism
for damage including warps, breaks, cracks, bends, thinned or excessively worn regions or corrosion;
b. Housing: examine the interior surface of each half of the housing. The inner surfaces, particularly the
depressions, should be liberally greased to prevent movements by the inner ratcheting mechanism from
wearing away the housing.
c. Inner ratcheting mechanism: excessive wear of linkages and other mechanical parts; AND/OR
d. Cable openings in the forward ratcheting lever (see FIG. 1C on p. 4): inspect for elongation or expansion
of the opening in the forward ratcheting lever;
e. Openings (in the housing) for the mounting pin (see FIG. 1A on p. 4): check for warping, stretching, or
cracking apparent to the pin opening in each half of the housing;
Maintenance: the end-user must implement a maintenance program to ensure the proper function and safe
condition of both the puller and cable. A qualified person can establish a program that is used in preference to
the maintenance procedures described below.
Replacement parts are not available for the cable puller. Any condition which requires
replacement parts can ONLY be corrected by purchasing a new puller.
ONLY qualified persons should perform maintenance on the puller. A qualified person is someone
“who, by possession of a recognized degree in an applicable field or certificate of professional standing, or who,
by extensive knowledge, training, and experience, has successfully demonstrated the ability to solve or resolve
problems relating to the subject matter [cable puller] and work [use of the cable puller].” See ASME B30.21-0.2-
1999 on p. 6.
Step 1: Tag the cable puller, “Out of Service.”
Step 2: Perform all necessary adjustments and repairs as indicated by the most recent inspection.
Step 3: If other conditions exist which require new/replacement parts to repair, you must order a new puller or
cable. DO NOT modify the puller from its original condition unless you are authorized to do so and certain that
the puller will be safe to use afterwards.
The reader should understand the significant difference between “Adjustments” and “Repairs,”
and “Modifications”.
An adjustment or repair refers to a simple correction that restores the puller to normal operating condition,
such as tightening loose fasteners, or removing debris from the surface of the cable puller. DO NOT use the
device if adjustments and/or repairs are incomplete! Return the puller to service ONLY after finishing all
necessary repairs and adjustments.

Page 8 of 9
Copyright 2010 Vestil Manufacturing Corp.
A modification is a change that alters the puller from normal operating condition, like bending the structural
members. NEVER modify the puller without the express, written approval of Vestil, because modifications
might render it unsafe to use.
Step 4: Perform complete “Before each use” and “Periodic” inspections.
Step 5: Make a dated record of the repairs and/or adjustments made.
Markings:
Only use the cable puller if all labels are readable and undamaged.
FIG. 2: Product label placement
CE certification label
Device data label

Copyright 2016 Vestil Manufacturing Corp. Page 9 of 9
LIMITED WARRANTY
Vestil Manufacturing Corporation (“Vestil”) warrants this product to be free of defects in material and workmanship
during the warranty period. Our warranty obligation is to provide a replacement for a defective original part if the part is
covered by the warranty, after we receive a proper request from the warrantee (you) for warranty service.
Who may request service?
Only a warrantee may request service. You are a warrantee if you purchased the product from Vestil or from an
authorized distributor AND Vestil has been fully paid.
What is an “original part”?
An original part is a part used to make the product as shipped to the warrantee.
What is a “proper request”?
A request for warranty service is proper if Vestil receives: 1) a photocopy of the Customer Invoice that displays the
shipping date; AND 2) a written request for warranty service including your name and phone number. Send requests
by any of the following methods:
Mail Fax Email
2999 North Wayne Street, PO Box 507 Phone
Angola, IN 46703 (260) 665-7586
In the written request, list the parts believed to be defective and include the address where replacements should be
delivered.
What is covered under the warranty?
After Vestil receives your request for warranty service, an authorized representative will contact you to determine
whether your claim is covered by the warranty. Before providing warranty service, Vestil may require you to send the
entire product, or just the defective part or parts, to its facility in Angola, IN. The warranty covers defects in the
following original dynamic components: motors, hydraulic pumps, electronic controllers, switches and cylinders. It also
covers defects in original parts that wear under normal usage conditions (“wearing parts”): bearings, hoses, wheels,
seals, brushes, batteries, and the battery charger.
How long is the warranty period?
The warranty period for original components is 30 days. The warranty period begins on the date when Vestil ships the
product to the warrantee. If the product was purchased from an authorized distributor, the period begins when the
distributor ships the product. Vestil may extend the warranty period for products shipped from authorized distributors
by up to 30 days to account for shipping time.
If a defective part is covered by the warranty, what will Vestil do to correct the problem?
Vestil will provide an appropriate replacement for any covered part. An authorized representative of Vestil will contact
you to discuss your claim.
What is not covered by the warranty?
1. Labor;
2. Freight;
3. Occurrence of any of the following, which automatically voids the warranty:
Product misuse;
Negligent operation or repair;
Corrosion or use in corrosive environments;
Inadequate or improper maintenance;
Damage sustained during shipping;
Collisions or other incidental contacts causing damage to the product;
Unauthorized modifications: DO NOT modify the product IN ANY WAY without first receiving written
authorization from Vestil. Modification(s) might make the product unsafe to use or might cause excessive
and/or abnormal wear.
Do any other warranties apply to the product?
Vestil Manufacturing Corp. makes no other express warranties. All implied warranties are disclaimed to the extent
allowed by law. Any implied warranty not disclaimed is limited in scope to the terms of this Limited Warranty.
/