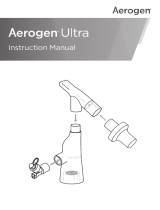
Aerogen Solo System Instruction Manual

Category
Oxygen Equipment
Type
System Instruction Manual

This manual is also suitable for

for use with Aerogen® Solo
and Aerogen® Pro
System Instruction Manual
www.aerogen.com
Aerogen® USB Controller System Instruction Manual 1
Contents
Introduction 2
Intended Use 2
Set Up 5
System Warnings 8
Controls & Indicators 12
Accessories 13
Functional Test 20
Aerogen Solo Aerosol Flow Rate Calculation 21
Cleaning of the Aerogen USB Controller System 22
Troubleshooting 28
Warranty 29
Life Of Products 29
Specifications 30
Aerogen Solo Performance 31
Aerogen Pro Performance 32
Power 33
Symbols 34
Appendix 1: EMC Tables 35
Aerogen®
2
Introduction
The Aerogen USB Controller System is:
A portable medical device that is intended to aerosolise physician-
prescribed medications for inhalation.
Approved for use with USB ports on medical electrical equipment for
the purposes of power only or the Aerogen USB Controller AC/DC
Adapter.
An alternative to the existing Aerogen® Pro and Aerogen® Pro-X
Controllers.
Intended Use
The Aerogen® Pro is a portable medical device for multiple patient uses
that is intended to aerosolise physician-prescribed solutions for inhalation
to patients on and off ventilation or other positive pressure breathing
assistance in the hospital environment and on vent only in the homecare
environment. The Aerogen Pro is suitable for use in adult, paediatric and
neonate patients.
The Aerogen® Solo belongs to the Aerogen Pro family, the Aerogen Solo
nebuliser is a single patient use device intended for both intermittent and
continuous nebulisation. It is intended to nebulise physician-prescribed
medications for inhalation which are approved for use with a general
purpose nebuliser. The Aerogen Solo is suitable for use with neonate,
paediatric and adult patients. It is intended for on and off ventilation or
other positive pressure breathing assistance in the hospital environment
and on vent only in the homecare environment.
Aerogen® USB Controller System Instruction Manual 3
The Aerogen USB Controller can be used with Aerogen nebulisers as
follows:
Table 1. Intended Use Summary
Intended Use Summary Aerogen Solo
Nebuliser
Aerogen Pro
Nebuliser
Hospital - Ventilated patients
Hospital -Spontaneously Breathing Patients
Homecare - Ventilated patients
Homecare - Spontaneously Breathing Patient
30 Minute Mode Operation
6 Hour Mode Operation
Aerogen®
4
Aerogen USB Controller System
Figure 1. Aerogen USB Controller System (Items Provided)
1. Aerogen USB Controller
2. Aerogen Nebuliser (Aerogen Solo or Aerogen Pro)
3. T-Piece & Silicone Plug
4. Cable Management Clips
5. Aerogen USB Controller AC/DC Adapter
Visit www.aerogen.com for full parts list.
Aerogen
Solo
Aerogen
Pro
12
3 4 5
Aerogen® USB Controller System Instruction Manual 5
Set Up
Read and study all instructions before using the Aerogen USB
Controller.
Perform a functional test of the Aerogen nebuliser prior to use as described
in the Functional Test section of this manual (see page 20).
Connect the Aerogen Solo or
Aerogen Pro nebuliser by firmly
pushing into the T-piece.
Connect the Aerogen USB Controller
to the nebuliser as shown.
Insert the nebuliser and the T-piece*
in the breathing circuit.
* Adult T-piece shown here. For full
instruction on T-piece location see
page 13 (T-Piece Accessories).
3
1
2
Aerogen®
6
Alternative Set Up:
The Aerogen Solo can be placed on
the dry side of the humidifier.
Connect the Aerogen USB Controller
into the USB Port.
Note: The Aerogen USB Controller
can only be operated from a USB
port on any medical electrical
equipment approved to IEC/EN
60601-1 or Aerogen USB Controller
AC/DC Adapter.
Open the plug on the nebuliser and
use a pre-filled ampoule or syringe
to add medication to the nebuliser.
Close the plug.
Note: To avoid damage to the
Aerogen Solo, do not use a syringe
with a needle.
4
5
Aerogen® USB Controller System Instruction Manual 7
To operate in 30 Minute Mode press
the On/Off button once.
To operate in 6 Hour Mode press the
On/Off button from the off mode for
>3 seconds.
Note: Verify the correct mode of
operation is selected.
Verify that aerosol is visible.
Note: Clips are provided to assist with cable management.
7
6
30 Min.
6 Hr.
USB
Controller
30 Min.
6 Hr.
USB
Controller
1s > 3s
Aerogen®
8
System Warnings
Read and study all instructions before using the Aerogen USB Controller
System.
Only trained persons should operate the Aerogen USB Controller System,
Aerogen Solo, Aerogen Pro and associated accessories.
If this product is being used to treat a life threatening condition, a backup
device is necessary.
During use observe for correct functioning of the nebuliser by regularly
verifying aerosol is visible and that no amber indicator lights are illuminated.
Do not use a filter or heat-moisture exchanger (HME) between the nebuliser
and patient airway.
The Aerogen nebulisers, T-pieces and accessories are not sterile.
The components and accessories of the Aerogen USB Controller System
are not made with natural rubber latex.
Only use physician-prescribed solutions that are approved for use with
a general purpose nebuliser. Consult drug manufacturer’s instructions
regarding suitability for nebulisation.
Only use the Aerogen nebuliser technology with components specified
in the instruction manuals. Use of the Aerogen nebuliser technology with
components other than those specified in the Instruction Manual may
result in increased emissions or decreased immunity of the nebuliser
system.
Do not place the Aerogen USB Controller in an incubator during use.
To avoid exhaled medication affecting the ventilator, follow ventilator
manufacturer’s recommendations for use of a bacterial filter in the
expiratory limb of a breathing circuit.
Aerogen® USB Controller System Instruction Manual 9
Do not use in the presence of flammable substances or flammable
anaesthetic mixtures combined with air, oxygen or nitrous oxide.
To avoid the risk of fire do not use to aerosolise alcohol-based medications,
which can ignite in oxygen-enriched air under high pressure.
Do not modify this equipment without the authorisation of the manufacturer.
Inspect all parts before use, and do not use if any parts are missing,
cracked or damaged. In case of missing parts, malfunction or damage,
contact your sales representative.
Do not immerse or autoclave the Aerogen USB Controller or Aerogen USB
Controller AC/DC Adapter.
Do not microwave any parts.
Do not use or store outside of specified environmental conditions.
Follow local laws and recycling plans regarding disposal or recycling of
components and packaging.
Do not use in the presence of devices generating high electromagnetic
fields such as magnetic resonance imaging (MRI) equipment.
The Aerogen USB Controller must be installed and put into service
according to the EMC information provided in the Instruction Manual.
Do not use the Aerogen USB Controller adjacent to or stacked with other
equipment. If adjacent or stacked use is necessary, the device should be
observed to verify normal operation in this configuration.
Portable and mobile radio frequency (“RF”) communication devices can
disrupt medical electrical equipment.
The Aerogen Solo is a single patient use device not to be used on more
than one patient to prevent cross infection.
10 Aerogen®
Keep all cables tidy to avoid tripping or strangulation hazards and take
particular care around children.
Ensure that the Aerogen USB Controller cable is removed from the power
supply host using the grip feature provided.
Do not attempt to clean the device while in use.
Do not obstruct the removal of the Aerogen USB Controller AC/DC Adapter
from the mains.
Do not store the Aerogen USB Controller System in a location where it is
exposed to direct sunlight, extreme heat or cold, dust or moisture. Store
out of reach of children.
Do not operate Aerogen USB Controller from USB ports on non-medical
equipment.
Condensate can collect and occlude ventilator circuits. Always position
ventilator circuits so that fluid condensate drains away from the patient.
Adult supervision is required when this product is used by children and
individuals who require special assistance.
To avoid damage to the Aerogen Palladium vibrating mesh technology:
Do not apply undue pressure to the domed aperture plate in the centre
of the nebuliser (Figure 2).
Do not push out the Aerogen Vibronic® aerosol generator.
Do not use a syringe with a needle to add medication.
Do not use abrasive or sharp tools to clean the nebuliser.
Prior to use, autoclave the Aerogen Pro and accessories according to
specified directions and temperature given in the Cleaning, Disinfection
and Sterilisation section of this Instruction Manual only. Any deviation
from directions given in this Instruction Manual may cause damage to
the nebuliser and render it inoperable.
Aerogen® USB Controller System Instruction Manual 11
Figure 2. Aerogen Palladium Vibrating Mesh Technology
Use of the Aerogen Solo and T-piece during the administration of volatile
anaesthetics may result in adverse effects on the constituent plastics. Do
not use with volatile anaesthetics unless known to be compatible. Aerogen
have determined that, using anaesthetic ventilators, the following volatile
anaesthetic agents are compatible under the stated conditions below:
Anaesthetic
Agent Proprietary Name
Maximum
Percentage of
Anaesthetic
Maximum Duration
of Exposure
Isoflurane FORANE®3.5 % 12 hours
Sevoflurane SEVOFLURANE®8 % 12 hours
Desflurane SUPRANE®10 % 12 hours
12 Aerogen®
Controls & Indicators
Figure 3. Aerogen USB Controller Controls & Indicators
Table 2. Aerogen USB Controller Controls & Indicators
Control / Indicator Function
30 Min. Indicator
• Green = 30 Minute nebulisation cycle on.
• Amber = Nebuliser disconnect.
• Aerogen USB Controller automatically powers
off after 30 minutes have elapsed.
6 Hr. Indicator
• Green = 6 Hour nebulisation cycle on.
• Amber = Nebuliser disconnect.
• Aerogen USB Controller automatically powers
off after 6 hours have elapsed.
Error Indicator
• 30 Minute and 6 Hour Indicators flash amber
alternatively twice = Internal error condition.
Aerogen USB Controller automatically powers
off.
On/Off Power Button
• To operate in 30 Minute Mode press the On/Off
button once.
• To operate in 6 Hour mode press and hold the
On/Off button for greater than 3 seconds.
• Pressing during nebulisation turns off power to
the nebuliser.
30 Min.
6 Hr.
USB
Controller
30 Minute Mode Indicator light
6 Hour Mode Indicator light
On/Off Control
Aerogen® USB Controller System Instruction Manual 13
Accessories
T-Pieces - Connection To A Breathing Circuit
Adult & Paediatric Circuit
For adult and paediatric patients, connect
the nebuliser with T-piece into the
inspiratory limb of the breathing circuit
before the patient Y.
Neonate Circuit
Connect the nebuliser with the paediatric
T-piece and the neonate adapters
approximately 30 cm (12 in.) back from
the patient Y. Alternatively connect the
nebuliser with the Neonate T-piece 30cm
(12 in.) back from the patient Y.
Dry Side of the Humidifier
The Aerogen Solo can be placed on
the dry side of the humidifier as shown.
The Aerogen Solo can be used with a
nasal interface in this configuration. The
Aerogen Pro is not recommended for
use on the dry side of the humidifier.
Note: Always perform a leak test of the breathing circuit after inserting or
removing the nebuliser.
Follow ventilator manufacturer instructions for performing a leak test.
For additional T-piece Adapters visit www.aerogen.com for full
parts list.
14 Aerogen®
Connection To A Face Mask - Mouthpiece
(Hospital Use Only)
Face Mask
Mask kits, which include a vented elbow
and mask elbow, are available separately
(visit www.aerogen.com for full parts list).
Note: When using a mask, connect the
vented elbow, mask elbow and mask to
the nebuliser by firmly pushing the parts
together.
Rotate the vented elbow to suit the position
of the patient.
Mouthpiece
When using a standard ISO 22 mm
mouthpiece, connect the nebuliser to the
T-piece as shown, and connect the T-piece
to the mouthpiece by pushing the parts
firmly together.
Note: To ensure correct nebulisation,
maintain the nebuliser in a vertical
orientation.
Use With A Nasal Interface
The Aerogen Solo can be used on/off ventilator with a nasal interface
when configured with a humidifier.
Aerogen® USB Controller System Instruction Manual 15
Aerogen® Ultra (Hospital Use Only)
The Aerogen Ultra is an accessory specific to the Aerogen Solo nebuliser.
It facilitates intermittent and continuous nebulisation and optional supply
of supplemental oxygen to paediatric and adult patients via mouthpiece.
The device can alternatively be used with the I-Guard Aerosol Mask, as
supplied.
It is a single patient use device which is qualified for 20 intermittent use
treatments (at a rate of four 3 mL doses per day over 5 days) or 3 hours of
continuous use.
Optimal aerosol delivery is achieved with valved mouthpiece or valved
aerosol face mask with low/no oxygen flow.
Inspect for device integrity and correct valve placement prior to use.
Figure 4. Assembly of Aerogen Ultra
Oxygen Tubing
Face Mask
Aerogen Solo
Mouthpiece
Aerogen Ultra
16 Aerogen®
1. Insert Aerogen Solo nebuliser firmly into Aerogen Ultra in orientation
shown in Figure 4.
2. If supplemental oxygen is required, firmly attach oxygen tubing to
Aerogen Ultra.
Note: Oxygen flow rate should be set between 1-6 LPM.
3. If a face mask is required, remove mouthpiece and attach face mask
to Aerogen Ultra.
Note: When using an open face mask, a minimum oxygen flow of 1 LPM
is required.
4. Add medication to Aerogen Solo.
5. Connect cable to Aerogen Solo and power on controller.
6. Introduce Aerogen Ultra to patient and observe aerosol flow to ensure
correct operation.
7. Remove excess rainout from the Aerogen Ultra periodically (hourly with
continuous nebulisation).
8. To ensure optimum performance of the Aerogen Ultra, remove any
residue by rinsing through with sterile water, shake off excess and allow
to air dry.
Warnings
• Do not use with a closed face mask.
• When using with an open face mask, always use supplemental oxygen
flow of 1-6 LPM.
• Performance of the Aerogen Ultra may vary depending upon the type
of drug and Aerogen Ultra configuration used.
• Do not exceed recommended oxygen flow for system.
• Ensure oxygen connection port or tubing is not occluded.
• Do not use Aerogen Ultra without a mouthpiece or face mask.
• Visually check Aerogen Ultra post-rinsing to ensure that valves have
not become dislodged.
• Do not cover Aerogen Ultra valves during use.
• Do not use Aerogen Ultra in conjunction with the Aerogen Pro.
• Do not autoclave any component of the kit.
• Ensure tubing is safely orientated to prevent strangulation hazard.
Aerogen® USB Controller System Instruction Manual 17
Continuous Nebulization Tube Set
(Hospital Use Only)
The Aerogen Continuous Nebulization Tube Set is an accessory specific
to the Aerogen Solo nebuliser which enables safe continuous infusion of
liquid medication for aerosolisation.
Note: Place the syringe cap on the syringe after it is filled with medication.
Figure 5. Continuous Nebulization Tube Set
1. Ensure the Aerogen Solo nebuliser is firmly fitted into the Aerogen Solo
T-piece in the breathing circuit.
2. Remove the syringe cap from the medication-filled syringe.
3. Attach the syringe end of the tubing onto the syringe.
4. Prime the tubing until the medication reaches end of tubing (Point A)
Note: The tubing priming volume is maximum 3.65 mL.
5. Unplug the tethered silicone plug from the Aerogen Solo nebuliser, but
do not remove it from the nebuliser.
6. Screw the nebuliser end of the tubing onto the top of the nebuliser.
ASyringe Cap
Syringe
Tubing
(Syringe End)
Tubing
Tethered Silicone Plug
Tubing
(Nebuliser End)
18 Aerogen®
7. Insert the syringe filled with medication into the syringe infusion pump
(pump not shown in Figure 5).
8. Turn on the 6 Hour Mode option on the Aerogen USB Controller and
turn on the infusion pump (refer to pump manual or manufacturer for
guidance).
9. Observe nebuliser for correct operation. During continuous
nebulisation, the nebuliser is on continuously and the medication is
nebulised on a drop by drop basis. Nebulisation should be visible with
regular intermittent pauses. Medication level in the nebuliser reservoir
should not rise during use.
10. To stop the nebuliser at any time, press the On/Off power button. The
indicator turns off to indicate that nebulisation has stopped.
Note: Aerogen’s recommended input rate of medication into the Aerogen
Solo nebuliser during continuous nebulisation is up to a maximum of 12
mL per hour. The upper limit of 12 mL per hour is based on Aerogen’s
specification for the minimum nebuliser flow rate. For directions on
determining flow rates, refer to the Optional Flow Rate Calculation method
in the Functional Test section, page 21.
Warnings Specific to the Continuous Nebulization Tube Set
• It is important to ensure that the maximum flow rate through the tube
set into the nebuliser must not exceed the output rate of the nebuliser.
• Check for leaks from the system prior to and during use.
• The graduations on the syringe are for indication use only.
• Store at room temperature and use product within labelled shelf life.
• To ensure correct and safe connection between the nebuliser and the
medication reservoir, trace the medication tube from the nebuliser
back to the medication reservoir to make sure the medication tube is
connected to the correct source.
• The recommended syringe pump software setting with the Aerogen
syringe is typically the “BD Plastipak” setting. This must be validated
locally before use. Refer to pump manual or manufacturer for guidance.
These pumps may also be used in accordance with local hospital or
ward policies.
  • Page 1 1
  • Page 2 2
  • Page 3 3
  • Page 4 4
  • Page 5 5
  • Page 6 6
  • Page 7 7
  • Page 8 8
  • Page 9 9
  • Page 10 10
  • Page 11 11
  • Page 12 12
  • Page 13 13
  • Page 14 14
  • Page 15 15
  • Page 16 16
  • Page 17 17
  • Page 18 18
  • Page 19 19
  • Page 20 20
  • Page 21 21
  • Page 22 22
  • Page 23 23
  • Page 24 24
  • Page 25 25
  • Page 26 26
  • Page 27 27
  • Page 28 28
  • Page 29 29
  • Page 30 30
  • Page 31 31
  • Page 32 32
  • Page 33 33
  • Page 34 34
  • Page 35 35
  • Page 36 36
  • Page 37 37
  • Page 38 38
  • Page 39 39
  • Page 40 40
  • Page 41 41
  • Page 42 42

Aerogen Solo System Instruction Manual

Category
Oxygen Equipment
Type
System Instruction Manual
This manual is also suitable for

Ask a question and I''ll find the answer in the document

Finding information in a document is now easier with AI