Page is loading ...

1
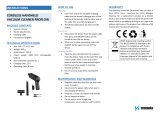
SMART ROBOT VACCUM CLEANER
Instruction manual
Dear consumer, Please read these instructions carefully before use in
order to avoid damage due to incorrect use and to better understand the
functions of this product. Please pay particular attention to the safety
guide.
If you pass the device on to a third party, these Operating Instructions
must also be handed over.
Please keep them for future references.
TAR-3066G

2
IMPORTANT SAFEGUARDS
Please read these instructions carefully before use.
Keep present instructions for future references.
Check that your mains voltage corresponds to that stated on
the appliance.
Only use the appliance for domestic purposes and household
or similar applications such as:
- Staff kitchen areas, in shops, offices and other working
environments;
- By clients in hotels, motels and other residential type
environments;
- Environment type like :
• Farm Houses • Bed and Breakfast.
Only use the appliance in the way indicated in these
instructions.
Never use this unit near bathtub, shower, wash-hand basins
or other containers with water.
Never use this apparatus near water projections.
Never use this apparatus with the wet hands.
If, unfortunately the apparatus is wet, immediately withdraw
the cord of the socket-outlet.
Inform potential users of these instructions.
Never leave the appliance unsupervised when in use.
The appliance must be used only for its intended purpose. No
responsibility can be taken for any possible damage caused
by incorrect use or improper handling.
Children and persons with disabilities are not always aware of
the danger posed by the use of appliances.
This device can be used by children aged 8 years and older
and adults, with reduced physical, sensory or mental
capabilities or lack of experience and knowledge, if they have
been given supervision or instruction concerning use of the
appliance in a safe way and understand the hazards
involved.

3
Children shall not play with the appliance.
Cleaning and user maintenance shall not be made by
children unless they are supervised.
A hazard may occur if the robot runs over the supply cord.
Keep the appliance and its cord out of reach of children aged
less than 8 years of age when it is energized or cooling down.
This device is not a toy, do not leave children or people with
disabilities to play with.
In order to ensure your children‘s safety, please keep all
packaging (plastic bags, boxes, polystyrene etc.) out of their
reach.
Caution ! Do not allow small children to play with the foil :
THERE IS A DANGER OF SUFFOCATION !
From time to time check the cord for damages. Never use the
appliance if cord or appliance shows any signs of damage.
Never immerse the appliance in water or any other liquid for
any reason whatsoever.
Never place it into the dishwasher.
Never use the appliance near hot surfaces.
Do not operate the appliance with a damaged cord or plug, or
after the appliance has been damaged in any manner.
Disconnect the power source cable before any operation of
cleaning of maintenance and accessories assembly.
Never use the appliance outside and always place it in a dry
environment.
Never use accessories, which are not recommended by the
producer. They could constitute a danger to the user and
risk to damage the appliance.
The appliance is only to be used with the power supply unit
provided with the appliance.
The robot must only be supplied at safety extra low voltage
corresponding to the marking on the appliance.
Never move the appliance by pulling the cord. Make sure the
cord cannot get caught in any way.

4
Never wind the cord around the appliance and do not bend it
Ensure that the power cord does not come into contact with
hot parts of this unit.
Make sure the appliance has cooled down before cleaning
and storing it.
The temperature of accessible surfaces may be very high
when the appliance is operating. Never touch these parts, of
apparatus, to avoid burning itself.
Make sure the appliance never comes into contact with
flammable materials, such as curtains, cloth, etc...& the
power cord and plug do not come in contact with water.
Before cleaning, always unplug the appliance from the power
supply and let it cool down.
This appliance is not intended to be operated by means of an
external timer or separate remote-control system.
Always remove the plug from the wall socket when the
appliance is not in use.
When using an extension lead always make sure that the
entire cable is unwound from the reel. Use solely CE
approved extension leads. Input power must be at least 16A,
250V, 3000W.
Incorrect operation and improper use can damage the
appliance and cause injury to the user.
This device, designed for home use, complies with standards
relating to this type of product.
The item must not be left unattended when it is connected to
main supply.
The item is not to be used, if it has been dropped or if there
are visible signs of damage or if it is leaking.
This appliance is only intended for household use.

5
GENERAL INFORMATION
The symbol "OPEN BOOK" means a recommendation
to read important things contained in the record.
The symbol "BIN" crossed out, abbreviation WEEE
(Waste of Electrical and Electronic Equipment) means
that at the end of life, it should not be discarded with
household waste, but filed to the sorting of the locality.
Waste recovery can help preserve our environment.
The symbol "CE" is the guarantee of compliance with
harmonized European standards, voluntary, reflecting
the essential requirements into technical
specifications. These standards are not mandatory
but are guarantees of compliance with essential
requirements.
The symbol ROHS (Restriction of use of some
Hazardous Substances) on the Environmental
Protection, certifies that for each of the five hazardous
substances • Lead • Mercury • (hexavalent) chromium •
products for protection against flames PBB and PBDE,
the peak concentration is equal to or less than 0.1% of
the weight of homogeneous material, and 0.01% for the
6th • cadmium.
The symbol "DOUBLE SQUARE" means a double
insulated. A basic insulation and supplementary
insulation. This device requires no connection to the
mass of a protective conductor grounded. The
materials are said : double insulation class II.

6
The symbol "TRIMAN" indicates that the consumer is
invited to dispose the product as part of a separate
collection (eg recycling bin, waste, voluntary intake
point).
For more information : http://www.quefairedemesdechets.fr
CLEANING AND MAINTENANCE
Before cleaning, always switch off the appliance, disconnect the
apparatus and let it cool.
Clean the outside of the apparatus with a sponge or slightly wet
linen.
Open the lid of the dust container, empty it and clean it with a
sponge or a slightly damp cloth.
Once dry, reattach the dust cover.
Never plunge the apparatus in water or all other liquid!
Do not use abrasive cleaners, gritting, or metal brush or another
cutting object.
Notes : Do not wash the filter in a washing machine and do not
dry it with an electric dryer.
Do not clean the outside of the vacuum cleaner with
gasoline oil or any other liquid.
Caution: The rotating brush could break if too much dirt adheres
around. It is advisable to clean it after each use once a week.

7
DESCRIPTION
1. Infrared sensor
2. Anti-shock protection
3. Rotating side brush
4. Top of the device
5. Dust container cover
1. Infrared sensor
2. Front caster
3. Side brushes
4. Battery compartment
5. Propulsion wheels
6. Air intake hole
7. Dust collection blade
8. On / Off switch
9. Auto charge contact.
1. Lifetable cover
2. Remote control infrared receiver
3. Dust container
4. AC adapter socket

8
A. Dust container
B. Primary filter grid
C. Filter
D. Filter holder
IMPORTANT
• Read this manual carefully.
• Before using the appliance, check that the mains voltage corresponds to the
voltage indicated on the rating plate.
• Always remove the plug from the power socket when the appliance is not in use
and before carrying out any cleaning or maintenance operations.
• Always unplug the power cord before opening the unit.
• Never use methylated spirits or other solvents to clean the appliance.
• Do not use the device to aspirate liquids.
• Never leave the appliance unattended while it is on.
• This unit is for household use only.
• Do not use the device if it appears to be defective in any way.
• For repairs or accessories. Contact your dealer or an authorized service centre.
• Use only the battery supplied with the device. Do not replace it with non-
rechargeable batteries.
• Do not pick up hard, sharp objects: lit matches, hot ashes, cigarette butts, or
other similar items.
• Do not recover flammable liquids, cleaning products or aerosols.
• Do not use the appliance in a bathroom or laundry room.
• Do not use the appliance with objects: clothing, newspapers and / or electrical
cords, dragging on the floor.
• Do not mount on the device.
• Fall down arrest sensor begins to operate 5 seconds after the power is on.
• Unplug the unit and remove the battery if it should not be used for a long time.
Notes : It is normal for the charger to heat to the touch while charging.
Fall down arrest sensor begins to operate 5 seconds after the power is on.

9
1. Infrared signal output windows
2. Light Indicator
3. Charging base
4. Connection pins for loading
(with the vacuum cleaner)
5. AC adapter socket
REMOTE CONTROL
1. "Start / Pause / Sleep" button
A In standby mode, by pressing this button, the vacuum cleaner automatically
scans.
B. In "standby" mode, by pressing this button, the vacuum cleaner enters
"Pause" mode and stops.
C. In "On" mode, by pressing this button, the machine will stop cleaning.
Sleep mode : the power switch is activated, but the screen is not on and the
machine is on standby.
Standby mode : the power switch is activated and the scan button is also
activated, but the machine is on standby.
Operating mode : the vacuum cleaner is working and the indicator light for the
program is on.
How this button works:
1. Sleep mode. 2. standby mode 3. operating mode.
2. "Arrows" keys
Top : In “On” or “standby” mode, press this button so that the unit goes forward.
Low : In “On” or “standby” mode, press this button so that the device goes in
reverse.
Left : In “On” or “standby” mode, press this button so that the device turns to the
left.
Right : In "On" or "standby" mode, press this button so that the device turns
right.
3. "AUTO" button
In "On" mode, press this button so that the device enters the planned mode.
In “standby” mode, pressing this button will have no effect on the device.

10
4. "POWER" button
In "standby or on" mode, the machine will sweep quickly by pressing this button.
5. "EDGES" button
In "standby or On" mode, the machine will sweep the edges of the room by
pressing this button.
6. "RETURN" button
In "standby or on" mode, the vacuum cleaner will automatically return to the
charging station for recharging by pressing this button.
CHARGE
The vacuum cleaner can be charged in two ways:
A. Directly on the vacuum cleaner
Insert the AC adapter directly into the outlet on the vacuum cleaner and
connect the other end to the power supply.
Figure below.
B. With the charging base
1. Place the charging station against the wall and remove any obstruction 1
meter on each side of the charging station and 2 meters from its front face.
2. Connect the adapter to the base and to the power supply, so that the
indicator light always stays on.

11
3. Set the "On / Off" switch (under the vacuum cleaner) to "On" so that the
indicator light (on the device) comes on and the machine goes into standby
mode.
Warning : before charging the machine, make sure that the "On / Off" switch
is activated for charging to take place.
4. Press the "Return" button on the remote control whether the device is in
standby mode, or in "On" mode, so that the machine automatically returns to
the base for charging.
Figure below.
Notes : After using the charging station to charge, To do start the appliance, press
the "Start / Pause" button on the remote control or on the "scan" button on
the machine. The device will stop charging and scan.
This operation cannot be performed using the adapter sector directly
connected to the machine for charging.

12
DETAIL ON THE BATTERY
The battery is a 850m Ah Ni-Mh rechargeable battery.
Make sure that the voltage indicated on the rating plate is identical to that of
the local current.
The battery should be charged indoors and away from moisture.
Gently insert the charger plug into the power port on the device.
Do not use any charger other than the one supplied by the manufacturer.
Do not use the device if the battery connection is damaged.
Do not touch the charger plug or the wires with wet hands.
AUTOMATIC CHARGING
When the battery power becomes low, the robot vacuum cleaner
automatically tries to return to its charging station.
Make sure the charging station is connected to power and powered up.
Remove the obstacles leading to it, otherwise the vacuum cleaner will not be
able to find it and therefore will not be able to recharge.
Charge the battery for 6 hours the first time.
Note : In normal use, leave the machine on the charging station after
charge, until the next use.
If the robotic vacuum cleaner is not used for a long period, switch off the
appliance by setting the power switch to 0.
USE
• Unwind the power cord completely.
• Check that the voltage in force in the country where you are corresponds to that
indicated on the device.
• Connect the device into an outlet in good condition (earthed if the device is class
I), to avoid any danger.
• Disconnect the power cable from the electrical network before any maintenance
cleaning and fitting of accessories.
• Never modify the device.
START-UP
A. Switch on the appliance by pressing the
switch. (8).
B. Press the "Start / Pause" button on the
remote control or "Auto" on the device.

13
STOP
When the appliance is operating, by pressing the "On / Pause "or by setting the
power switch to" Off (0) ", It will stop working.
Note : When the machine is running, the orange light on the "On / Pause ”is lit
continuously.
TYPE OF SWEEPING
1. Automatic sweeping
In "standby" mode, by pressing the "start / pause" button on the remote control or
the "Auto" button on the vacuum cleaner, the robot will automatically sweep and
adjust the sweeping mode by itself according to the environment of the different
floors in the room.
2. Powerful sweep
Place the robot vacuum cleaner next to or on the most dusty area and press the
"power" button on the remote control. The robot vacuum will strongly and quickly
sweep the area.
3. Edges
In "standby" mode, or in "On" mode, press the "Edges" button on the remote
control with the robot vacuum to sweep along the edges of the room.
Important notes :
When the powerful sweep or edge sweep is complete, the robotic vacuum cleaner
automatically enters the automatic sweep mode.
In any scan mode, the machine will stop scanning by pressing the "start / pause"
button on the remote control or the "Auto" button on the machine.
CLEANING THE SIDE BRUSHES
If the side brushes are dirty, wash them with water and wait for them to dry
naturally before using the appliance again.
Notes : if they are blocked or damaged, they may not operate normally. In this
case, consider changing them.
When changing the side brushes, match the signs "L" and "R" on the side
brushes with the signs "L" and "R" located on the unit.
CLEANING THE DUST TANK AND FILTER

14
Press the centre of the cover (1) so that it opens automatically (2).
Remove the tank (3) and check that the suction channel of the device is not
blocked by foreign objects. If so, clean it.
Remove the filter (4).
Open the tank cover (5) and remove the filter grid (6).
Empty the tank into a bin (7). Wash it (if necessary), rinse and dry it. (8) (Do not
let it dry in the sun).
Clean, with a brush using a blower or vacuum cleaner, the filter and the grid (9).
Notes : We suggest cleaning the filter and the screen every 10 uses.
The service life of the filter is 2 years under normal use.
Never clean it with a brush or water.
After cleaning, reassemble the grid, the filter with the tank (10) and reintroduce the
assembly into the robot.
CLEANING THE SENSOR LENS
THE CHARGE ELECTRODES AND THE CONNECTORS
Use a cleaning or a soft cloth to lightly wipe the sensors (1); the electrodes (2);
and, the charge connectors (3).
STORAGE
-Ensure the unit is completely cool and dry.

15
-Do not wrap the cord around the appliance, as this will cause damage.
-Keep the appliance in a cool, dry place and out of reach from children.
GUARANTEE
Before being delivered, all our products are subjected to a rigorous control.
This apparatus is guaranteed 24 months starting from the date of purchase by the
consumer.
The documents in proof of guarantee are:
• The invoice and
• The filled and stamped warrantee plate (located on side or bottom of the gift
box). Without these documents in proof, no free replacement, nor no free repair,
can be carried out.
During the warranty period, we deal for free, the defects of the apparatus or the
accessories, rising from a defect of materials or manufacture by repair or,
replacement. The services within the framework of the guarantee do not involve
any extension of the warranty period and does not give right to a new guarantee!
In the event of recourse to the guarantee, bring back the complete apparatus to
your retailer, in its original packing, accompanied by the proofs of purchase.
The breakage of parts out of glass or plastic is, in all the cases, not warranted.
Defects on the accessories or the wearing parts (for example: coals of engines,
hooks, drive belts, remote control of replacement, teeth brushes of replacement,
webs etc) as well as cleaning, maintenance or it replacement of wearing parts are
not guaranteed and are thus to pay!
In the event of foreign intervention, the guarantee becomes null and void.
After flow of the warranty period, repairs can be carried out, against payment, by a
specialized trade or a repair service.
SPECIFICATIONS
Unit
Power supply 14.4V 1.5A
Adapter
Input 100-240V~ 50/60Hz
Output 19.0V 0,6A 11,4W
Norm Class II
Made in PRC

16
INFORMATION PUBLIEE
INFORMATION PUBLISHED
VALEUR ET PRECISION
VALUE AND PRECISION
UNITE
UNIT
MARQUE
BRAND
TECHWOOD
Sotech International
Commercial Registration Number/N°SIRET: 4250992000016
33 Avenue du Maréchal de Lattre de Tassigny
94120 Fontenay sous Bois - France
REFERENCE
MODEL IDENTIFIER
TAR-3066G
Tension d’Entrée
Input Voltage
100-240
V
Fréquence du CA d’entrée
Input AC frequency
50/60
Hz
Tension de sortie
Output voltage
19,0
V
Courant de sortie
Output current
0,6
A
Puissance de sortie
Output power
11,4
W
Rendement moyen en mode actif
Average active efficiency
83,7
%
Rendement à faible charge (10%)
Efficiency at low load (10%)
75,0
%
Consommation électrique hors charge
No-load power consumption
0,09
W
The characteristics can change without prior notice.
ENVIRONMENTAL PROTECTION
(Destruction of Ni-MH or Ni-Cd batteries)
The appliance must be disconnected from the main power, when the battery is
removed.
To remove the battery:
• Disassemble the unit and remove the battery.
- THE BATTERY MUST BE REMOVED BEFORE THE UNIT IS GIVEN TO
REBUS.
- THE BATTERY MUST BE ELIMINATED IN A SAFE WAY. DO NOT THROW IN
A TRASH CAN, BUT GIVE IN CENTRE OF WASTE.
CAUTION: In order to minimize the risks of electric shock, In the event of
breakdown, not to open the case but to call upon a qualified technician
for repairs.
This device complies with EC directives, it was controlled according to all current
European directives, applicable such as: electromagnetic compatibility (EMC) and
low voltage (LVD).

17
This device has been designed and manufactured in compliance with the latest
regulations and technical requirements for safety.
Imported by Sotech International
" LE PERIPOLE " N°A-107
33, Avenue du Marechal de Lattre de Tassigny
94120 Fontenay sous-bois - France
/