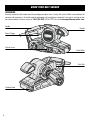
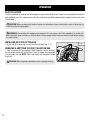
Wen 6321 is a reliable and efficient power tool designed for sanding various surfaces. Thanks to its powerful motor, it operates at a speed of 820 FPM, providing fast and consistent sanding results. The 3 in. x 21 in. belt size allows you to cover a wide surface area, making it suitable for both large and small sanding tasks.
Whether you're a professional contractor or a DIY enthusiast, this belt sander is versatile enough to meet your sanding needs. It can be used for a variety of applications, including removing paint, smoothing rough surfaces, and shaping wood. Additionally, the lightweight design (only 6.1 pounds) and compact dimensions (13.7 in. x 5.9 in. x 6.3 in.) ensure easy handling, reduced fatigue, and convenient storage.
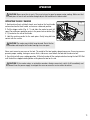


-
 1
1
-
 2
2
-
 3
3
-
 4
4
-
 5
5
-
 6
6
-
 7
7
-
 8
8
-
 9
9
-
 10
10
-
 11
11
-
 12
12
-
 13
13
-
 14
14
-
 15
15
-
 16
16


Wen 6321 is a reliable and efficient power tool designed for sanding various surfaces. Thanks to its powerful motor, it operates at a speed of 820 FPM, providing fast and consistent sanding results. The 3 in. x 21 in. belt size allows you to cover a wide surface area, making it suitable for both large and small sanding tasks.
Whether you're a professional contractor or a DIY enthusiast, this belt sander is versatile enough to meet your sanding needs. It can be used for a variety of applications, including removing paint, smoothing rough surfaces, and shaping wood. Additionally, the lightweight design (only 6.1 pounds) and compact dimensions (13.7 in. x 5.9 in. x 6.3 in.) ensure easy handling, reduced fatigue, and convenient storage.
Ask a question and I''ll find the answer in the document
Finding information in a document is now easier with AI