Page is loading ...

IMPORTANT INSTRUCTIONS & OPERATING MANUAL
Model: MFE5048WL / BG-50B
Read these instructions carefully before attempting to assemble, install, operate or maintain
the product described. Protect yourself and others by observing all safety information. Failure
to comply with instructions could result in personal injury and / or property damage. Retain
instructions for future reference.
Website: www.ModaFlame.com
Cynergy Log Linear Wall Mounted Electric Fireplace
Model: MFE5060WL / BG-60B

1
IMPORTANT:
IMPORTANT:
IMPORTANT:
IMPORTANT:It
It
It
Itis
is
is
isimportant
important
important
importantto
to
to
toread
read
read
readthese
these
these
theseinstructions
instructions
instructions
instructionscarefully
carefully
carefully
carefullybefore
before
before
beforeusing
using
using
usingthe
the
the
theappliance
appliance
appliance
appliancefor
for
for
for
the
the
the
thefirst
first
first
firsttime.
time.
time.
time.Keep
Keep
Keep
Keepthe
the
the
theinstructions
instructions
instructions
instructionssafe
safe
safe
safeso
so
so
sothat
that
that
thatyou
you
you
youcan
can
can
canrefer
refer
refer
refert
t
t
to
o
o
othem
them
them
themlater
later
later
laterif
if
if
ifnecessary.
necessary.
necessary.
necessary.
【IMPORTANT
IMPORTANT
IMPORTANT
IMPORTANTINSTRUCTIONS
INSTRUCTIONS
INSTRUCTIONS
INSTRUCTIONS】
Whenusingelectricalappliancesbasicprecautionsshouldalwaysbefollowedtoreducetheriskoffire,
electricshockandinjurytopersons,includingthefollowing:
1)Readallinstructionsbeforeusingthisheater.
2)Thisheaterishotwheninuse.
To
avoidburning,donottouchhotsurface.Ifprovided,usehandles
whenmovingthisheater.Keepcombustiblematerials,suchasfurniture,pillows,bedding,papers,
clothes,andcurtainsatleast1mfromthefrontoftheheaterandkeepthemawayfromthesidesand
rear.Inordertoavoidoverheating,donotcovertheheater.
3)Extremecautionisnecessarywhenanyheaterisusednearchildrenortheinfirmandwheneverthe
heaterisleftoperatingandunattended.
4)Alwaysunplugheaterwhennotinuse.
5)Donotoperateanyheaterwithadamagedcordorplugoraftertheheatermalfunctions,hasbeen
droppedordamagedinanymanner,returnheatertoauthorisedservicefacilityforexamination,
electricalormechanicaladjustment,orrepair.
6)Donotuseoutdoors.
7)Thisheaterisnotintendedforuseinbathrooms,laundryareasandsimilarindoorlocations.Never
locateheaterwhereitmayfallintoabathtuborotherwatercontainer.
8)Donotruncordundercarpeting.Donotcovercordwiththrowrugs,runners,orsimilarcoverings.
Arrangecordawayfromtrafficareaandwhereitwillnotbetippedover.
9)
To
disconnectheater,turncontrolstooff,thenremoveplugfromoutlet.
10)Donotinsetorallowforeignobjectstoenteranyventilationorexhaustopeningasthismaycause
anelectricshockorfire,ordamagetheheater.
11)
To
preventapossiblefire,donotblockairintakesorexhaustinanymanner.Donotuseonsoft
surfaces,likeabed,whereopeningsmanybecomeblocked.
12)
A
heaterhashotandarcingorsparkingpartsinside.Donotuseitinareaswheregasoline,or
flammableliquidsareusedorstored.
13)Usethisheateronlyasdescribesinthismanual.Anyotherusenotrecommendedbythe
manufacturermaycausefire,electricshock,orinjurytopersons.
14)DANGER-HIGHTemperaturesmaybegeneratedundercertainabnormalconditions.Donot
partiallyorfullycoverorobstructthefrontofthisheater.
15)Replacementofthelampsshouldbedoneonlywhiletheheaterisdisconnectedfromthesupply
circuit.
16) Thisapplianceisnotintendedforusebypersons(includingchildren)withreducedphysical,sensory
orcapabilities,orlackofexperienceandknowledge,unlesstheyhavebeengivensupervisionor
instructionconcerninguseoftheappliancebyapersonresponsiblefortheirsafety.Childrenshouldbe
supervisedtoensurethattheydonotplaywiththeappliance.
17)CAUTION:Inordertoavoidahazardduetoinadvertentresettingofthethermalcut-out,this
appliancemustnotbesuppliedthroughanexternalswitchingdevice,suchasatimer,orconnectedtoa
circuitthatisregularlyswitchedonandoffbytheutility.

2
UNPACKINGANDTESTINGAPPLIANCE
Carefullyremovetheappliancefromthebox.Priortoinstallingtheappliance,testtomakesurethe
applianceoperatesproperlybypluggingthepowersupplycordintoaconvenientlylocated110-120Volt
groundedoutlet.
【
Grounding
Grounding
Grounding
GroundingAppliance
Appliance
Appliance
Appliance
】
Thisapplianceisforuseon120Volts.Thecordhasaplug
asshownin(A).Anadapterasshownin(C)isavailable
forconnectingthree-bladegroundingtypeplugstotwo-slot
receptacles.Thegreengroundinglugextendingfromthe
adaptermustbeconnectedtoapermanentgroundsuchas
aproperlygroundedoutletbox.Theadaptershouldnotbe
usedifathree-slotgroundedreceptacleisavailable.
Todisconnectappliance,turncontrolstooff,thenremove
plugfromoutlet.
WARNING:
WARNING:
WARNING:
WARNING:
Keepthefrontoftheappliancethroughwhichtheheatis
radiatedatleast1meterawayfromfurniture,curtainsand
otherflammableobjectsatalltime.
Neveruseanextensionlead.Themainscablemustremain
atthebackoftheapplianceandmustnotbeincontactwith
anyhotelements.
【
【
【
【INSTALLATION
INSTALLATION
INSTALLATION
INSTALLATION】
】
】
】
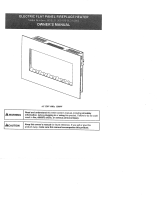
UsingthePhilipsScrewDriver"+"
Driver"+"
Driver"+"
Driver"+"totakeoffthetwoscewsinthefronttwosidesFigure(A)
(A)
(A)
(A),then
havetwopeopletotakeofftheGlassPanelFigure(B)
(B)
(B)
(B)
ALWAYS
ALWAYS
ALWAYS
ALWAYSunplug
unplug
unplug
unplugthisfireplaceheaterbefore
before
before
beforeassembly
assembly
assembly
assemblyorcleaning,
cleaning,
cleaning,
cleaning,or
or
or
orbefore
before
before
beforerelocating.
relocating.
relocating.
relocating.
Failuretodosocouldresultinelectric
electric
electric
electricshock
shock
shock
shock,fire
fire
fire
fire,orpersonal
personal
personal
personalinjury
injury
injury
injury.
Warning
Warning
Warning
Warning

PuttheFireplaceboxintothewall,there'retwohangerbracketsinbothsidesofthefireplacebox,using
6pcsofST4X
ST4X
ST4X
ST4X16
16
16
16screws(eachsidewith3screws)tolockthefireplaceinthewoodenwallFigure(C)
(C)
(C)
(C)
AfterfirmlyinstalledtheFireplacebox,thenmovetheGlassPanelbacktotheFireplacebox,using
thetwoscrewstolockinbothsidesLikeFigure(A),
(A),
(A),
(A),theFireplacewilllooklikethisafterthe
installationseeFigure(D)
(D)
(D)
(D)
3
【
【
【
【Special
Special
Special
Specialcharacteristics
characteristics
characteristics
characteristicsof
of
of
ofthis
this
this
thisElectric
Electric
Electric
ElectricFireplace
Fireplace
Fireplace
Fireplace】
】
】
】
1、Thesmoulderingglowoftheflamescanhardlybedistinguishedfromthatofarealfireplace.
2、Producestheeffectofahotcurrentofair.
3、Automaticandconstanttemperaturecontrol.
4、FireplacecanbebothusedasWallHangingandBuild-inthewall
5、FireplaceexchangedfreelyfromLOG,RocksandGlassMedia
6、Perfectforsmalltomid-sizedrooms
7、Timer(0.5hrsto7.5hrs)
8、OperatedwithremotecontrolandManualPanelSwitch
9、Dimmer(FivestepsFlameadjustfromDimmertoLighter)

Onlyusetheapplianceinaccordancewiththeinstructionsinthismanual!Itcannotbeusedforany
otherpurpose.
Neveroperatetheappliancewhentheapplianceitselforthemaincableshowanysignsofdamage.
Inordertoavoidoverheating,donotcovertheheater.
Beresponsiblewhenhandlingthepackingmaterial.Warning:plasticwrappingmaybelethaltochildren.
Donotplacetheappliancenexttoasocket.
Neveroperatetheheateronaprogramswitch,timerswitchoranyotherapplianceforautomatic
operation.
Theheaterisonlysuitableforindooruse.
Neverusetheheaterinthebathroom,showerornearaswimmingpool.
Theheatermustnotbelocatedimmediatelybelowasocket-outlet
Ifthesupplycordisdamaged,itmustbereplacedbythemanufactureroritsserviceagentorasimilarly
qualifiedpersoninordertoavoidahazard.
Neverleavesmallchildrenunattendedneartheappliance.
Incaseofmalfunction,disconnecttheplugimmediately.
Whennotinuseforaconsiderableamountoftime,unplugtheappliance.
Componentsshouldonlybeservicedbyanapprovedelectrotechnician.
【
【
【
【
To
switchon】
】
】
】
Plugintheapplianceintothesocket.TurnonthePower
Power
Power
PowerSwitch
Switch
Switch
Switch
ThecontrolSwitch
Switch
Switch
SwitchPanel
Panel
Panel
PanelisundertheVentinfrontofthefireplace(See
(See
(See
(Seepic)
pic)
pic)
pic)
Power
Power
Power
PowerSwitch
Switch
Switch
Switch
ControlSwitchPanel
4
【
【
【
【Safety
Safety
Safety
Safetyinstructions
instructions
instructions
instructions】
】
】
】

【
【
【
【Instruction
Instruction
Instruction
Instructionfor
for
for
forRemote
Remote
Remote
RemoteController
Controller
Controller
Controllerand
and
and
andSwitch
Switch
Switch
SwitchPanel
Panel
Panel
Panel】
】
】
】
5
Control Panel / Remote Control Operation
(Control panel POWER switch must be ON to use remote control.)
BUTTON FUNCTION ACTION & INDICATION
ON
OFF
ON (l). Enables all functions.
OFF (O). Turns off all functions on control
panel and remote control.
1. Press ON (l). Power turns on. All
functions are enabled.
2. Press OFF (O). Power, flame effect, and
all functions turn off.
POWER
ON: Enables touch panel functions and
remote control. Turns on flame effect.
OFF: Disables touch panel functions and
remote control. Turns off flame effect.
1. Press once. Indicator light turns on.
Power turns on. All functions enabled.
2. Press again. Flame effect turns off.
Power and all functions turn off.
TIMER
TIMER button: Controls timer settings to
turn off fireplace at selected time.
Settings range from 0.5 hours to 7.5 hours.
1. Press once. Indicator light turns on.
Timer is set to 0.5 hours.
2. Press again until desired setting is
reached. Indicator lights show setting.
FLAME -
FLAME “-”: Makes flame effect dimmer.
NOTE: Flame effect stays on until power
button is turned off. Flame effect must be
on for heater to turn on.
1. Press once. Flame effect gets dimmer.
2. Press again until desired setting is
reached. Flame effect continues to get
dimmer each time button is pressed.
FLAME +
FLAME “+”: Makes flame effect brighter.
NOTE: Flame effect stays on until power
button is turned off. Flame effect must be
on for heater to turn on.
1. Press once. Flame effect gets brighter.
2. Press again until desired setting is
reached. Flame effect continues to get
brighter each time button is pressed.
HEATER
HEATER button: Turns heater on and off.
NOTE: The heater only works when the
flame effect is on. If the flame effect is off,
the heater will not turn on.
NOTE: To prevent overheating, the heater
blows cool air for 10 seconds before the
heater turns on, and after it turns off.
1. Press once. Indicator lights up.
Fan blows cool air for 10 seconds. Low
heater turns on and blows warm air.
2. Press again. Indicator lights up.
High heater turns on and blows hot air.
3. Press again. Heaters turn off.
The fan blows cool air, then turns off.

NOTICE
When the heater is first turned on, a slight odor may be present. This is normal and
should not occur again unless the heater is not used for a long period of time.
NOTICE
To improve operation, aim the remote control at the front of the fireplace. DO NOT
press the buttons too quickly. Give the unit time to respond to each command.
Remote Control Battery Information
This remote control uses two AAA batteries (Not included).
Instructions for battery installation are on the Remote Control battery compartment.
NEVER dispose of batteries in fire. Failure to observe this precaution may result in an
explosion. Dispose of batteries at your local hazardous material processing center.
Temperature Limiting Control
This heater is equipped with a Temperature Limiting Control. Should the heater reach an unsafe
temperature, the heater will automatically turn OFF. To reset:
1. Unplug the power cord from the outlet.
2. Turn the ON/OFF switch on the CONTROL PANEL to OFF. Wait 5 minutes.
3. Inspect the fireplace to make sure no vents are blocked, or clogged with dust or lint. If they are,
use a vacuum to clean the vent areas.
4. With the POWER switch in the OFF position, plug the power cord back into the outlet.
5. If the problem continues, have your outlet and wiring inspected by a professional.
Care and Maintenance
Cleaning
ALWAYS turn the heater OFF and unplug the power cord from the outlet before
cleaning, performing maintenance, or moving this fireplace. Failure to do so could result in
electric shock, fire, or personal injury.
NEVER immerse in water or spray with water. Doing so could result in electric shock,
fire, or personal injury.
Metal:
Buff using a soft cloth, slightly dampened with a citrus oil-based product.
DO NOT use brass polish or household cleaners as these products will damage the metal trim.
Glass:
Use a good quality glass cleaner sprayed onto the cloth or towel. Dry thoroughly with a paper
towel or lint-free cloth.
NEVER use abrasive cleansers, liquid sprays, or any cleaner that could scratch the surface.
Vents:
Use a vacuum or duster to remove dust and dirt from the heater and vent areas.
Plastic:
Wipe gently with a slightly damp cloth and a mild solution of dish soap and warm water.
NEVER use abrasive cleansers, liquid sprays, or any cleaner that could scratch the surface.
6

CAUTION:
CAUTION:
CAUTION:
CAUTION:sharp
sharp
sharp
sharpedges!
edges!
edges!
edges!
1.Afterinstallation,thepowerplugshouldbeaccessible.
2.Ifthepowercordisdamaged.Itmustbereplacedbythemanufactureroritsserviceagentora
similarlyqualifiedpersoninordertoavoidahazard.
3.Theheatermustnotbelocatedimmediatelybelowasocket.
4.Theapplianceisnotintendedforusebyyoungchildrenorinfirmpersons.Youngchildrenshouldbe
supervisedtoensurethattheydonotplaywiththeappliance.
5.Donotusethisheaterintheimmediatesurroundingsofabath,ashoweroraswimmingpool.
6.Inordertoavoidoverheating,donotcovertheheater.
Technical
Technical
Technical
Technicaldata:
data:
data:
data:
RatedVoltage:120V~
RatedFrequency:60Hz
RatedPower:1500W
WEEE
WEEE
WEEE
WEEE:
Meaning
Meaning
Meaning
Meaningof
of
of
ofcrossed
crossed
crossed
crossed–
–
–
–out
out
out
outwheeled
wheeled
wheeled
wheeleddustbin:
dustbin:
dustbin:
dustbin:
Donotdisposeofelectricalappliancesasunsortedmunicipalwaste,useseparatecollectionfacilities.
Contactyoulocalgovernmentforinformationregardingthecollectionsystemsavailable.Ifelectrical
appliancesaredisposedofinlandfillsordumps,hazardoussubstancescanleakintothegroundwaterand
getintothefoodchain,damagingyourhealthandwell-being.
Whenreplacingoldapplianceswithnewones,theretailerislegallyobligatedtotakebackyouroldappliance
fordisposalsatleastfreeofcharge.
7
/