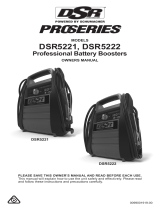
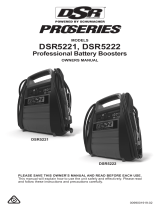
Schumacher Electric PBI3612 Owner's manual

Category
Car battery chargers
Type
Owner's manual

This manual is also suitable for

Schumacher Electric PBI3612

The Schumacher Electric PBI3612 is a powerful and versatile 1,200 Amp peak portable power source that can jump-start most vehicles, power 12V DC devices, and quickly recharge mobile devices. It features a durable polypropylene case with high-impact rubber base, a two-function digital display, and heavy-duty replaceable battery clamps.

The PBI3612 is equipped with a high-output AGM battery, which provides long-lasting power and durability. It also has a 12V DC power outlet, which can be used to power a variety of devices, such as laptops, cell phones, and power tools.

0099001151-02
PBI2212, PBI3612, PBI3624, PBI4424
SCI200B
English ............. Page 02
2
IMPORTANT: READ AND SAVE THIS SAFETY AND INSTRUCTION MANUAL.
SAVE THESE INSTRUCTIONS – Charge the booster’s internal battery immediately
after purchase, after every use and every 30 days. This manual will show you how
to use your booster safely and effectively. Please read, understand and follow these
instructions and precautions carefully, as this manual contains important safety and
operating instructions.
The signal word indicates the level of the hazard in a situation.
Indicates an imminently hazardous situation which, if not avoided, will result in
death or serious injury to the operator or bystanders.
Indicates a potentially hazardous situation which, if not avoided, could result in
death or serious injury to the operator or bystanders.
Indicates a potentially hazardous situation which, if not avoided, could result in
moderate or minor injury to the operator or bystanders.
Indicates a potentially hazardous situation which, if not avoided, could result in
damage to the equipment, vehicle or property.
PBI BOOSTERS CONTAIN SEALED, NON-SPILLABLE LEAD-ACID
BATTERY. MUST BE DISPOSED OF PROPERLY.
WARNING: Possible explosion hazard. Contact with battery acid may
cause severe burns and blindness. Keep out of reach of children.
PBI Booster markings/symbols
Contact the equipment
supplier for details on
how to properly dispose
of this product within
DVSHFL¿FFRXQWU\SHU
WEEE requirements.
Read manual
before using. Fuse –
see Section
8 for fuse
replacement
instructions.
Caution,
risk of
electric
shock.
Do not
expose
to rain.
Use in a
well-ventilated
area.
Keep away from
VSDUNVDQGÀDPH±
battery could emit
explosive gases.
If auto engine does not start,
stop and wait for at least
1 minute, then go back to
step 4 – see Section 7.1.4.
12V 2A
Charging
Port – see
section
14.13.1
DANGER
WARNING
CAUTION
IMPORTANT
ENGLISH
Models: PBI2212, PBI3612, PBI3624, PBI4424 Boosters
with Model SCI200B Charger
OWNERS MANUAL
3
1. IMPORTANT BOOSTER SAFETY INSTRUCTIONS – SAVE THESE INSTRUCTIONS.
This manual contains important safety and operating instructions.
RISK OF ELECTRIC SHOCK OR FIRE.
1.1 Read the entire manual before using this product. Failure
to do so could result in serious injury or death.
1.2 This booster is not intended for use by persons (including
children) with reduced physical, sensory or mental capabilities,
or lack of experience and knowledge, unless they have been given supervision or
instruction concerning the use of the booster by a person responsible for their safety.
1.3 Children should be supervised to ensure they do not play with the booster.
1.4 'RQRWSXW¿QJHUVRUKDQGVLQWRWKHSURGXFW
1.5 Do not expose the booster to rain or snow.
1.6 Use only recommended attachments. Use of an attachment not recommended or sold
by Schumacher®(OHFWULF&RUSRUDWLRQPD\UHVXOWLQDULVNRI¿UHHOHFWULFVKRFNRULQMXU\
to persons or damage to property.
1.7 Do not operate the booster with a damaged output cable, have the damaged part
UHSODFHGLPPHGLDWHO\E\DTXDOL¿HGVHUYLFHSHUVRQ
1.8 Do not operate the booster if it has received a sharp blow, been dropped or otherwise
GDPDJHGLQDQ\ZD\WDNHLWWRDTXDOL¿HGVHUYLFHSHUVRQ
1.9 'RQRWGLVDVVHPEOHWKHERRVWHUWDNHLWWRDTXDOL¿HGVHUYLFHSHUVRQZKHQVHUYLFHRU
UHSDLULVUHTXLUHG,QFRUUHFWUHDVVHPEO\PD\UHVXOWLQDULVNRI¿UHRUHOHFWULFVKRFN
RISK OF EXPLOSIVE GASES.
1.10 WORKING IN THE VICINITY OF A LEAD-ACID BATTERY IS
DANGEROUS. BATTERIES GENERATE EXPLOSIVE GASES DURING
NORMAL OPERATION. FOR THIS REASON, IT IS IMPORTANT THAT YOU
FOLLOW THESE INSTRUCTIONS EACH TIME YOU USE THE BOOSTER.
1.11 The booster and lead-acid battery must be placed in a well-ventilated area.
1.12 To reduce the risk of a battery explosion, follow these instructions and those published by
the battery manufacturer and the manufacturer of any equipment you intend to use in the
vicinity of the battery. Review the cautionary markings on these products and on the engine.
WARNING
Do not use with non-rechargeable batteries. Use only with lead-acid
type rechargeable batteries.
2. PERSONAL PRECAUTIONS FOR USING THE BOOSTER
RISK OF EXPLOSIVE GASES. A SPARK NEAR
THE BATTERY MAY CAUSE A BATTERY
EXPLOSION. TO REDUCE THE RISK OF A
SPARK NEAR THE BATTERY:
2.1 1(9(5VPRNHRUDOORZDVSDUNRUÀDPHLQ
the vicinity of a battery or engine.
2.2 Remove personal metal items such as rings, bracelets, necklaces and watches when
working with a lead-acid battery. A lead-acid battery can produce a short-circuit current
high enough to weld a ring or the like to metal, causing a severe burn.
2.3 Be extra cautious, to reduce the risk of dropping a metal tool onto the battery. It might
spark or short-circuit the battery or other electrical part that may cause an explosion.
2.4 To prevent sparking, NEVER allow clamps to touch together or contact the same piece
of metal.
2.5 Consider having someone close enough by to come to your aid when you work near a
lead-acid battery.
2.6 Wear complete eye and body protection, including safety goggles and protective
clothing. Avoid touching your eyes while working near the battery.
2.7 If battery acid contacts your skin or clothing, immediately wash the area with soap and
ZDWHU,IDFLGHQWHUV\RXUH\HLPPHGLDWHO\ÀRRGWKHH\HZLWKFROGUXQQLQJZDWHUIRUDW
least 10 minutes and get medical attention right away.
2.8 If battery acid is accidentally swallowed, drink milk, the whites of eggs or water. DO NOT
induce vomiting. Seek medical attention immediately.
WARNING
WARNING WARNING WARNING
WARNING WARNING
4
3. PREPARING TO USE THE BOOSTER
RISK OF CONTACT WITH BATTERY ACID.
BATTERY ACID IS A HIGHLY CORROSIVE
SULFURIC ACID.
3.1 Clean the battery terminals before using the
booster. During cleaning, keep airborne corrosion
from coming into contact with your eyes, nose and
mouth. Use baking soda and water to neutralize the battery acid and help eliminate
airborne corrosion. Do not touch your eyes, nose or mouth.
3.2 Determine the voltage of the battery by referring to the vehicle owners manual and
make sure that the output voltage of the booster is correct.
3.3 Make sure that the booster cable clamps make tight connections.
4. FOLLOW THESE STEPS WHEN CONNECTING THE BOOSTER TO A BATTERY
A SPARK NEAR THE BATTERY MAY CAUSE A BATTERY EXPLOSION. TO
REDUCE THE RISK OF A SPARK NEAR THE BATTERY:
4.1 Attach the output cables to the battery and chassis, as indicated below.
Never allow the output clamps to touch each other.
4.2 Position the DC cables to reduce the risk of damage by the hood, door
and moving or hot engine parts. NOTE: If it is necessary to close the hood
during the jump starting process, ensure that the hood does not touch the metal part of
the battery clamps or cut the insulation of the cables.
4.3 Stay clear of fan blades, belts, pulleys and other parts that can cause injury.
4.4 Determine which post of the battery is grounded (connected) to the chassis. If the
negative post is grounded to the chassis (as in most vehicles), see step 4.5. If the
positive post is grounded to the chassis, see step 4.6.
4.5 For a negative-grounded vehicle, connect the POSITIVE (RED) clamp from the booster
to the POSITIVE (POS, P, +) ungrounded post of the battery. Connect the NEGATIVE
(BLACK) clamp to the vehicle chassis or engine block away from the battery. Do not
connect the clamp to the carburetor, fuel lines or sheet-metal body parts. Connect to a
heavy gauge metal part of the frame or engine block.
4.6 For a positive-grounded vehicle, connect the NEGATIVE (BLACK) clamp from the
booster to the NEGATIVE (NEG, N, -) ungrounded post of the battery. Connect the
POSITIVE (RED) clamp to the vehicle chassis or engine block away from the battery. Do
not connect the clamp to the carburetor, fuel lines or sheet-metal body parts. Connect to
a heavy gauge metal part of the frame or engine block.
4.7 When disconnecting the booster, remove the clamp from the vehicle chassis, then
remove the clamp from the battery terminal, in that order.
5. FEATURES
6
2
4
5
3
7
1
8
1. Durable polypropylene case
with high-impact rubber base
2. ON/OFF switch
3. 12 Volt DC power outlet
4. Reverse hook-up alarm
5. Two function digital display
6. Professional-grade,
high-output AGM battery
7. Heavy-duty replaceable
battery clamps
8. SCI200B charger
WARNING
WARNING WARNING WARNING
5
6. CHARGING THE INTERNAL BATTERY OF THE BOOSTER
See Section 14 – Operating Instructions for the SCI200B Charger.
7. BOOSTER OPERATING INSTRUCTIONS
7.1 Jump Starting a Vehicle Engine
IMPORTANT
Do not use the booster while charging the internal battery.
1. Turn the vehicle’s ignition OFF before making cable connections.
2. Connect the booster to the vehicle’s battery, as described in Section 4. If you have
connected the clamps backward, an audio alarm will sound. DO NOT turn the
booster ON/OFF switch to the ON position. This could cause serious damage to the
booster or the vehicle. Reverse the connections and the audio alarm will stop.
3. Turn the booster ON/OFF switch to the ON position.
4. Crank the engine. If the engine does not start within 3-8 seconds, stop cranking and
wait at least 1 minute before attempting to start the vehicle again. (This permits the
booster battery to cool down.)
5. After the engine starts, turn the booster ON/OFF switch to the OFF position.
6. Disconnect the booster from the vehicle, as described in Section 4.7.
7. Return the battery clamps to their storage holders and recharge the booster.
7.2 When using the other features of the booster, always observe the following steps:
1. Ensure the battery clamps are securely clipped in the storage holders.
2. Charge the booster as soon as possible after using the feature.
7.3 Powering a 12V DC Device:
The booster is a power source for all 12V DC accessories that are equipped with a 12V
DFFHVVRU\SOXJ8VHLWIRUSRZHURXWDJHVDQG¿VKLQJRUFDPSLQJWULSV
Make sure the device to be powered is OFF before inserting the 12V DC accessory plug
into the 12V DC accessory outlet.
1. Open the protective cover of the DC power outlet on the front of the booster.
2. Plug the device into the outlet and turn the device on (if required).
3. If the device draws more than 15A or has a short circuit, the internal circuit breaker
of the booster will trip and disconnect the power to the device. Disconnect the device
and the breaker will automatically reset.
The DC power outlet is wired directly to the internal battery. Extended operation of
a 12V device may result in excessive battery drain. Recharge immediately after
unplugging the device.
8. FUSE REPLACEMENT FOR THE BOOSTER
The Portable Power is equipped with an inline fuse, to protect the battery from overload.
)XVH6SHFL¿FDWLRQ
Models PBI4424, PBI3612 and PBI3624 – Fast blow, DC automotive type, rated 32 V,
500 A (Buss AMG-500).
Model PBI2212 – Fast blow, DC automotive type, rated 32 V, 300 A (Buss AMG-300).
WARNING
.HHSDZD\IURPVSDUNVDQGÀDPH±EDWWHU\FRXOGHPLWH[SORVLYHJDVHV
1. Allow the fuse to cool down completely (approximately 5 minutes).
2. Make sure the switch is in the OFF position and the unit is unplugged from
the external charger.
3. Remove the positive (RED) clamp from the storage compartment on the side
of the unit and locate the fuse holder.
4. Open the fuse holder by removing its cover.
5. 8VLQJDZUHQFKUHPRYHWKH¿UVWQXWDQGEROWVHFXULQJWKHIXVHRQWKHSRVLWLYHFDEOH
Repeat the same steps for the second nut and bolt. Remove the open fuse and replace
it with a new one of the same type and rating.
6
6. Tighten the nuts and bolts to secure the fuse, and then replace the cover of the
fuse holder.
7. The unit is now ready to use.
9. MAINTENANCE INSTRUCTIONS FOR THE BOOSTER
9.1 Unplug the charger from the booster before attempting any maintenance or cleaning.
9.2 Use a dry cloth to wipe all battery corrosion and other dirt or oil from the battery clamps,
FRUGVDQGWKHERRVWHUFDVH'RQRWXVHFOHDQLQJÀXLGV
9.3 Ensure that all of the booster components are in place and in good working condition.
9.4 $OORWKHUVHUYLFLQJVKRXOGEHSHUIRUPHGE\TXDOL¿HGVHUYLFHSHUVRQQHO
10. MOVING AND STORAGE INSTRUCTIONS FOR THE BOOSTER
10.1 Store the booster in an upright position, inside, in a cool, dry place.
10.2 Always make sure the booster is fully charged before storing. When not using it for long
periods of time, recharge the booster every 30 days.
IMPORTANT
Do not use and/or store the booster in or on any area or surface where
damage could occur if the internal battery should unexpectedly leak acid.
11. TROUBLESHOOTING – FOR THE BOOSTER
PROBLEM POSSIBLE CAUSE REASON/SOLUTION
The booster won’t jump start
my car. Clamps are not making a good
connection to the battery.
The booster battery is not
charged.
The vehicle’s battery is
defective.
The fuse has blown.
Check for poor connection to
battery and frame. Make sure
connection points are clean.
Rock clamps back and forth
for a better connection.
Check the battery charge
status by pressing the button
on the front of the booster.
See LED Indicators section of
this manual.
Have the battery checked.
Replace the fuse.
(See Section 8).
The booster won’t power my
12V device. The 12V device is not turned
on.
The booster battery is not
charged.
The 12V device draws more
than 15A or has a short
circuit.
Turn on the 12V device.
Check the battery charge
status by pressing the button
on the front of the booster.
See LED Indicators section of
this manual.
Disconnect the 12V device.
The internal breaker will
automatically reset after a
minute or two. Try the 12V
device again. If it happens
again, replace the 12V device.
The battery in the booster
won’t hold a charge. The battery is bad (will not
accept a charge). Have the battery checked.
Booster shows 100% charge,
but charger still shows
charging (yellow LED).
Unit needs more charge. Charge Booster until
the chargers green LED
comes on.
7
12. BOOSTER SPECIFICATIONS
TEST
Model
PBI2212
PBI3612
PBI3624
PBI4424
Model
PBI2212
PBI3612
PBI3624
PBI4424
V
12V/6 cells
Hawker
(2)
12V/6 cells
Hawker
(2)
12V/6 cells
Hawker
(2)
12V/6 cells
Hawker
1V/C
545
910
690
12V 910
24V 690
PEAK
BATTERY
1900
4400
24V 3800
12V 4400
24V 3800
PROTECTIONCHARGE
CHARGER
2A
230V
POWER OUT
MEMORY
15A FUSE
50 in./1.27 m
4G
55 in./1.397 m
2G
55 in./1.397 m
2G
55 in./1.397 m
2G
354.8 x 120 x 395
375 x 209.8 x 395
375 x 209.8 x 395
375 x 209.8 x 395
9.5
17.3
17.3
17.3
START CABLE LENGTH
GAUGE
PBI3612
PBI3624
PBI4424
PBI2212
MAX HP MAX HP
13. REPLACEMENT PARTS FOR THE BOOSTER
Battery Clamp Jaw Replacement Kit ............................................................ 2299001580
Charger (EU) ...................................................................................................94065011C
Charger (UK) ...................................................................................................94065011G
Charger (Australia) ............................................................................................94065011I
Fuse (300A) ...................................................................................................3999002113
Fuse (500A) ...................................................................................................3999002114
13.1 Battery Clamp Replacement
1. Make sure the rotary switch on the front panel is in the OFF (O) position and the
booster charger is not connected.
2. Secure the clamp in the open position using a vise or equivalent clamping device.
WARNING: The clamps are spring loaded, so use caution when replacing the jaws to
avoid injury.
3. Remove the rear screw that attaches the booster cable to the jaw.
4. Remove the screw holding the copper jaw to the plastic clamp. Repeat for other jaw.
5. Remove the two jaws and braided cable.
6. Reverse the steps to install the replacement parts.
8
Model SCI200B Charger
14. CHARGER SAFETY AND OPERATING INSTRUCTIONS
Contact the equipment
supplier for details on
how to properly dispose
of this product within
DVSHFL¿FFRXQWU\SHU
WEEE requirements.
Read manual
before using. For indoor
use only.
Do not
expose
to rain.
Caution,
risk of electric
shock.
Warning
Class II Charger
IMPORTANT
Charge Booster immediately after purchase, after each use and every
30 days to keep the boosters internal battery fully charged. Never wait
until the Booster is completely discharged before recharging.
14.1 Read the entire manual before using this product. Failure to do so could result in serious
injury or death.
14.2 This charger is not intended for use by persons (including children) with reduced
physical, sensory or mental capabilities, or lack of experience and knowledge, unless
they have been given supervision or instruction concerning the use of the charger by a
person responsible for their safety.
14.3 Children should be supervised to ensure they do not play with the charger.
RISK OF EXPLOSIVE GASES. PREVENT FLAMES AND SPARKS.
PROVIDE ADEQUATE VENTILATION DURING CHARGING.
14.4 The charger and booster must be placed in a well-ventilated area
during use.
14.5 0DNHVXUHWRSODFHWKHFKDUJHURQDGU\QRQÀDPPDEOHVXUIDFHOLNH
metal or concrete.
14.6 To reduce the risk of a battery explosion, follow these instructions and those published by
the battery manufacturer and the manufacturer of any equipment you intend to use in the
vicinity of the battery. Review the cautionary markings on these products and on the engine.
14.7 Digital Display on the Booster
To check the internal battery’s charge status, either press the Battery Status button to
get the percent of charge or turn the ON/OFF switch to the ON position to get the battery
voltage. Charge the internal battery if the display shows it is under 100%.
When connected to the vehicle, the display shows the vehicle’s battery voltage. When
connected and in the ON position, the display shows the equalized voltage between the
vehicle’s battery and the internal battery.
NOTE: The internal battery’s charge status is most accurate when the booster has been
disconnected from all devices and charging sources for a few hours.
14.8 LED Indicators on the Charger
CHECK BATTERY (red) LED lit: Indicates that the charger is not properly
connected to the battery. If the charger does not detect a properly connected battery,
the CHECK BATTERY LED will light. Charging will not begin if the CHECK BATTERY
LED is on.
WARNING
9
CHECK BATTERY UHG/('ÀDVKLQJIndicates the charger is in abort mode. If
charging cannot be completed normally, charging will abort. When charging aborts, the
FKDUJHUVRXWSXWLVVKXWRIIDQGWKH&+(&.%$77(5</('ZLOOÀDVK7RUHVHWDIWHUDQ
aborted charge, unplug the charger from the AC outlet, wait a few moments and plug it
back in.
CHARGING (yellow) LED lit: Indicates the charger has detected a battery and
is charging it. After the battery is fully charged, the charger will automatically go into
maintain mode and maintain it at full charge without damaging it.
CHARGED (green) LED lit: Indicates the battery is fully charged and the charger
is in maintain mode. When the CHARGED LED is lit, the charger has started Maintain
Mode. In this mode, the charger keeps the battery fully charged by delivering a small
current when necessary. NOTE: The maintain mode technology utilized in Schumacher®
chargers allows you to safely charge and maintain a healthy battery for extended
periods of time. However, problems with the battery, electrical problems in the booster,
improper connections or other unanticipated conditions could cause excessive current
draws. As such, occasionally monitoring your battery and the charging process is
recommended.
14.9 Charging the Booster’s Internal Battery using the Included Charger
IMPORTANT
Only use the charger that was included with the booster to charge the
internal battery of the booster. Using any other charger or using the included charger for
any other purpose could result in personal injury or property damage.
RISK OF ELECTRIC SHOCK OR FIRE.
14.10 This battery charger is for use on a nominal 120-240V,
50/60 Hz circuit. The plug must be plugged into an outlet that
is properly installed in accordance with all local codes and
RUGLQDQFHV7KHSOXJSLQVPXVW¿WWKHUHFHSWDFOHRXWOHW
14.11 DANGER 1HYHUDOWHUWKH$&FRUGRUSOXJSURYLGHG±LILWGRHVQRW¿WWKHRXWOHW
KDYHDSURSHURXWOHWLQVWDOOHGE\DTXDOL¿HGHOHFWULFLDQ$QLPSURSHUFRQQHFWLRQFDQ
result in a risk of an electric shock or electrocution.
14.12 An extension cord should not be used unless absolutely necessary. Use of an improper
H[WHQVLRQFRUGFRXOGUHVXOWLQDULVNRI¿UHDQGHOHFWULFVKRFN,IDQH[WHQVLRQFRUGPXVW
be used, make sure:
That the pins on the plug of the extension cord are the same number, size and shape
as those of the plug on the charger.
That the extension cord is properly wired and in good electrical condition.
That the wire size is large enough for the AC ampere rating of the charger.
Recommended minimum AWG size for extension cord:
30.5 meters long or less – use a 1.0 mm2 extension cord.
Over 30.5 meters long – use a 1.25 mm2 extension cord.
14.13 Charging
1. To charge, plug the included charger into the charger plug on the side of the booster.
2. &RQ¿UPWKH$&RXWOHWYROWDJHPDWFKHVWKHLQSXWYROWDJHRIWKHFKDUJHU
3. Plug the charger into an electrical wall outlet. Make sure to place the charger on a
GU\QRQÀDPPDEOHVXUIDFHOLNHPHWDORUFRQFUHWH
4. While the booster is charging, the CHARGING LED on the booster and on the
charger will be lit. When the booster is fully charged, the CHARGED LED will light
on the booster and on the charger. Complete charging may take up to 24 hours. The
booster is then ready to use.
5. After charging, disconnect the charger from the supply mains. Then remove all
connections to the PBI booster.
WARNING WARNING
10
15. CHARGER MAINTENANCE INSTRUCTIONS
15.1 Unplug the charger from the booster before attempting any maintenance or cleaning.
15.2 8VHDGU\FORWKRFFDVLRQDOO\WRZLSHGLUWRURLOIURPWKHFKDUJHU'RQRWXVHFOHDQLQJÀXLGV
15.3 $OORWKHUVHUYLFLQJVKRXOGEHSHUIRUPHGE\TXDOL¿HGVHUYLFHSHUVRQQHO
15.4 If the supply cord is damaged, it must be replaced by the manufacturer, its service agent
RUVLPLODUO\TXDOL¿HGSHUVRQVLQRUGHUWRDYRLGDKD]DUG
16. CHARGER MOVING AND STORAGE INSTRUCTIONS
Store the charger in an upright position, inside, in a cool, dry place.
17. TROUBLESHOOTING – FOR CHARGER
PROBLEM POSSIBLE CAUSE REASON/SOLUTION
CHECK BATTERY (red) LED
on charger is on. Charger is not making a good
connection to the booster.
Battery is defective (will not
accept a charge).
Check the connection. Make
sure the connection points are
clean.
Have the battery checked.
CHECK BATTERY (red) LED
LVÀDVKLQJ Indicates the charger is in
abort mode. See Section 14.8.
Booster shows 100% charge,
but charger still shows
charging (yellow LED).
Unit needs more charge. Charge Booster until
the chargers green LED
comes on.
18. CHARGER SPECIFICATIONS
SCI200B Charger
Input 120–240V~, 50/60Hz, 0.47–0.28A
Output 12V 2A
Approximate Charging Time 24 hours
Weight 0.54 kg
11
19. LIMITED WARRANTY FOR BOOSTER AND CHARGER
SCHUMACHER ELECTRIC CORPORATION, 801 BUSINESS CENTER DRIVE,
MOUNT PROSPECT, IL 60056-2179, MAKES THIS LIMITED WARRANTY TO THE
ORIGINAL RETAIL PURCHASER OF THIS PRODUCT. THIS LIMITED WARRANTY IS
NOT TRANSFERABLE OR ASSIGNABLE.
Schumacher Electric Corporation (the “Manufacturer”) warrants your unit for two (2)
years and the internal battery for one (1) year (excluding units with swollen batteries
or melted battery terminals) from the date of sale to the original end user or consumer
purchaser against defective material or workmanship that may occur under normal use
and care. If your unit is not free from defective material or workmanship, Manufacturers
obligation under this warranty is solely to repair or replace your product with a new or
reconditioned unit at the option of the Manufacturer. It is the obligation of the purchaser
to forward the unit, along with proof of purchase and mailing charges prepaid to the
Manufacturer or its authorized representatives in order for repair or replacement to occur.
Manufacturer does not provide any warranty for any accessories used with this product
that are not manufactured by Schumacher Electric Corporation and approved for use
with this product. This Limited Warranty is void if the product is misused, subjected to
FDUHOHVVKDQGOLQJUHSDLUHGRUPRGL¿HGE\DQ\RQHRWKHUWKDQ0DQXIDFWXUHURULIWKLVXQLW
is resold through an unauthorized retailer.
Manufacturer makes no other warranties, including, but not limited to, express,
implied or statutory warranties, including without limitation, any implied warranty
RIPHUFKDQWDELOLW\RULPSOLHGZDUUDQW\RI¿WQHVVIRUDSDUWLFXODUSXUSRVH)XUWKHU
Manufacturer shall not be liable for any incidental, special or consequential damage
claims incurred by purchasers, users or others associated with this product, including,
EXWQRWOLPLWHGWRORVWSUR¿WVUHYHQXHVDQWLFLSDWHGVDOHVEXVLQHVVRSSRUWXQLWLHV
goodwill, business interruption and any other injury or damage. Any and all such
warranties, other than the limited warranty included herein, are hereby expressly
disclaimed and excluded. Some states do not allow the exclusion or limitation of
incidental or consequential damages or length of implied warranty, so the above
OLPLWDWLRQVRUH[FOXVLRQVPD\QRWDSSO\WR\RX7KLVZDUUDQW\JLYHV\RXVSHFL¿FOHJDO
rights and it is possible you may have other rights which vary from this warranty.
THIS LIMITED WARRANTY IS THE ONLY EXPRESS LIMITED WARRANTY AND THE
MANUFACTURER NEITHER ASSUMES OR AUTHORIZES ANYONE TO ASSUME
OR MAKE ANY OTHER OBLIGATION TOWARDS THE PRODUCT OTHER THAN
THIS WARRANTY.
Warranty, Repair Service and Distribution Centers:
For customers outside of the U.S.A., contact your local distributor.
North and South America: Hoopeston in U.S.A. 1-800-621-5485
Europe: Freightways in Netherlands +31 71 4090704
Schumacher® and the Schumacher Logo are registered trademarks
of Schumacher Electric Corporation.
132
DECLARATION OF CONFORMITY
We, Schumacher Electric Corporation
801 East Business Center Drive
Mount Prospect, Illinois, 60056, U.S.A.
certify that the Booster Models PBI2212, PBI3612, PBI3624 and PBI4424 and Charger
Model SCI200B comply with the following standards:
Low Voltage Directive (LVD) 2006/95/EC,
EN 60335-1:2002 + A1:2004 + A2:2006 + A11:2004 + A12:2006 + A13:2008
EN 60335-2-29:2004
89/336/EEC and 93/68/EEC
and therefore conform with the protection requirements relating to safety
and electromagnetic compatibility.
7KH\HDULQZKLFKWKH&(PDUNLQJZDVDI¿[HGLV³´
Manufacturer:
John Waldron
President
November 29, 2011
Hereby declares that the equipment Models PBI2212, PBI3612, PBI3624, PBI4424 and
SCI200B are compliant to DIRECTIVE 2002/95/EC OF THE EUROPEAN PARLIAMENT
AND OF THE COUNCIL of 27 January 2003 (RoHS) on the restriction of the use of certain
hazardous substances in electrical and electronic equipment, and DIRECTIVE 2006/66/EC OF
THE EUROPEAN PARLIAMENT AND OF THE COUNCIL of 6 September 2006.
November 29, 2011
President, Schumacher Electric Corporation – U.S.A.
133
KONFORMITÄTSERKLÄRUNG
Wir, die Schumacher Electric Corporation
801 East Business Center Drive
Mount Prospect, Illinois 60056, USA,
erklären, dass die Boostermodelle PBI2212, PBI3612, PBI3624 und PBI4424 sowie das
Ladegerät Modell SCI200B den folgenden Normen entsprechen:
Niederspannungsrichtlinie (LVD) 2006/95/EG,
EN 60335-1:2002 + A1:2004 + A2:2006 + A11:2004 + A12:2006 + A13:2008
EN 60335-2-29:2004
89/336/EWG und 93/68/EWG
und somit die Schutzanforderungen bezüglich Sicherheit
und elektromagnetischer Verträglichkeit erfüllen.
Die CE-Kennzeichnung wurde im Jahr 2011 angebracht.
Hersteller:
John Waldron
President
29. November 2011
erklärt hiermit, dass die Produkte mit den Modellzeichnungen PBI2212, PBI3612, PBI3624,
PBI4424 und SCI200B die Bestimmungen der vom EUROPÄISCHEM PARLAMENT UND
RAT am 27. Januar 2003 erlassenen EU-RICHTLINIE 2002/95/EG (RoHS) bezüglich der
Einschränkung des Gebrauchs bestimmter gefährlicher Substanzen in elektrischer und
elektronischer Ausrüstung erfüllen, und DIREKTIVE 2006/66/EC DES EUROPÄISCHEN
PARLAMENTS UND RATES vom 6. September 2006.
29. November 2011
President, Schumacher Electric Corporation – USA
134
DÉCLARATION DE CONFORMITÉ
Nous, Schumacher Electric Corporation
801 East Business Center Drive
Mount Prospect, Illinois, 60056, U.S.A.
FHUWL¿HTXHOHVPRGqOHVBooster PBI2212, PBI3612, PBI3624 et PBI4424 et chargeur
Modèle SCI200B respecter les normes suivantes :
Directive Basse Tension (DBT) 2006 / 95 / CE,
EN 60335-1 : 2002 + A1 : 2004 + A2 : 2006 + A11 : 2004 + A12 : 2006 + A13 : 2008
EN 60335-2-29 : 2004
89 / 336 / CEE et 93 / 68 / CEE
et donc conformes aux exigences de protection relatives à la sécurité et la compatibilité
électromagnétique.
L’année où le marquage CE a été apposé est « 2011 ».
Fabricant :
John Waldron
Président
29 novembre 2011
Déclare que les modèles d’équipements PBI2212, PBI3612, PBI3624, PBI4424 et
SCI200B sont conformes à la Directive2002 / 95 / CE DU PARLEMENT EUROPÉEN ET DU
CONSEIL du 27 Janvier 2003 (RoHS) sur la limitation de l’utilisation de certaines substances
dangereuses dans les équipements électriques et électroniques, et Directive 2006 / 66 / CE DU
PARLEMENT EUROPÉEN ET DU CONSEIL du 6 Septembre 2006.
29 novembre 2011
Président, Schumacher Electric Corporation - U.S.A.
  • Page 1 1
  • Page 2 2
  • Page 3 3
  • Page 4 4
  • Page 5 5
  • Page 6 6
  • Page 7 7
  • Page 8 8
  • Page 9 9
  • Page 10 10
  • Page 11 11
  • Page 12 12
  • Page 13 13
  • Page 14 14

Schumacher Electric PBI3612 Owner's manual

Category
Car battery chargers
Type
Owner's manual
This manual is also suitable for

Schumacher Electric PBI3612

The Schumacher Electric PBI3612 is a powerful and versatile 1,200 Amp peak portable power source that can jump-start most vehicles, power 12V DC devices, and quickly recharge mobile devices. It features a durable polypropylene case with high-impact rubber base, a two-function digital display, and heavy-duty replaceable battery clamps.

The PBI3612 is equipped with a high-output AGM battery, which provides long-lasting power and durability. It also has a 12V DC power outlet, which can be used to power a variety of devices, such as laptops, cell phones, and power tools.

Ask a question and I''ll find the answer in the document

Finding information in a document is now easier with AI