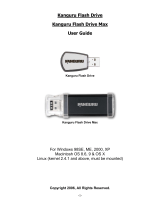
Page is loading ...

Kanguru Defender
Secure USB Flash Drive
Quick Start Guide for
KRMC Cloud
Managed Devices
Copyright 2016, All Rights Reserved
For Defender Models:
• Defender 2000
• Defender 3000
• Defender Elite30
• Defender Elite200
• Defender Elite300

2
Introduction
1. Introduction
The Kanguru Defender flash drive is a hardware encrypted, tamper proof USB flash drive. The Defender
flash drive contains two partitions:
1. A CD-ROM partition containing the login application for authenticating the device user and
allowing access.
2. A secured, encrypted partition where the actual user data is stored.
The Kanguru Defender flash drive secures your sensitive data using:
• 256-bit AES hardware encryption
• Secure password protection
1.1 Package Contents
Please check the contents of the package you received. If any of the parts listed below are missing, please
contact Kanguru Solutions (508-376-4245) and you will be shipped replacement parts immediately.
• Kanguru Defender USB Flash Drive
• Registration Card
1.2 System Requirements
• 1 available USB port (USB 2.0 or higher recommended)
• 256MB of internal DDR RAM or more
• 500MHz internal CPU or faster
Note: This is a Quick Start Guide only. For complete instructions please download the device’s user
manual from the Kanguru Support Site under the Downloads section at:
http://support.kanguru.com/

3
Kanguru Defender Manager
2. Kanguru Defender Manager
Kanguru Defender Manager (KDM) is the client program preloaded on the Defender’s CD-ROM
partition. The user needs to login to KDM in order to access the secure, encrypted partition. KDM comes
pre-installed on your Defender flash drive. No installation to your PC is necessary.
2.1 Running KDM
The Kanguru Defender flash drive is compatible with multiple operating systems. Running the KDM
application can be different depending on the operating system your computer is running.
• Windows ....................................................page 3
• Mac OSX ...................................................page 4
• Ubuntu Linux ...........................................page 5
• Red Hat Enterprise Linux 5 ....................page 6
2.1.1 Running KDM on Windows
To run KDM from a Windows operating system, simply connect your Defender flash drive to your
computer through a USB port. The KDM application should start automatically if Autorun is enabled.
If KDM does not start automatically:
3. Open an explorer window and open the Defender’s CD-ROM partition. The drive letter (e.g. D:, E:,
F:) will depend on your computer.
4. Double-click on the KDM.exe file to launch the KDM application.
○ If it is your first time running KDM you will need to complete the setup wizard (see section 2.2
The Setup Wizard on page 7).
○ If you have already gone through the setup wizard, you will be prompted to login (see section
2.4 The Login Window on page 12).
Caution! The ‘KDM.exe’ file needs to remain on your Defender’s CD-ROM partition at all times.
Always run the application from the Defender’s CD-ROM partition. Do not try to copy KDM or run
KDM from your computer’s hard drive.

4
2.1.2 Running KDM on Mac OS X
To run KDM from Mac OS X, connect your Defender flash drive to your computer through a USB port.
A CD icon named ‘KDM’ will appear on the desktop. Double click on the KDM icon to open it.
In the window that opens, double-click on the KDM.app file to launch the KDM application.
• If it is your first time running KDM you will need to complete the setup wizard in order to set your
security password (see section 2.2 The Setup Wizard on page 7).
• If you have already setup your security password, you will be prompted to login (see section 2.4
The Login Window on page 12).
Caution! The ‘KDM.app’ file needs to remain on your Defender’s CD-ROM partition at all times.
Always run the application from the Defender’s CD-ROM partition. Do not try to copy KDM or run
KDM from your computer’s hard drive.
Note: The KDM icon is not always displayed on the desktop. If you do not see the KDM icon on your
desktop, you can locate the ‘KDM.app’ file on the CD-Rom partition through the Finder window.
Kanguru Defender Manager

5
2.1.3 Running KDM on Ubuntu Linux
The following Defender flash drive models are supported on Linux Ubuntu:
• Defender 2000
• Defender 3000
• Defender Elite200
• Defender Elite300
To run KDM from an Ubuntu Linux operating system, connect your Defender to your computer through
a USB port. A ‘KDM’ icon will appear on the desktop. Double click on the KDM icon to open it.
In the window that opens, double-click on the KDM file to launch the KDM application.
• If it is your first time running KDM you will need to complete the setup wizard in order to set your
security password (see section 2.2 The Setup Wizard on page 7).
• If you have already setup your security password, you will be prompted to login (see section 2.4
The Login Window on page 12).
Caution! The KDM file needs to remain on your Defender’s CD-ROM partition at all times. Always
run the application from the Defender’s CD-ROM partition. Do not try to copy KDM or run KDM from
your computer’s hard drive.
Kanguru Defender Manager

6
2.1.4 Running KDM on Red Hat Enterprise Linux 5
Only the following Defender flash drive models are supported on Red Hat Enterprise Linux 5:
• Defender 2000
• Defender Elite200
Note: You must have Super User or Root privileges in order to run KDM on Red Hat Enterprise Linux 5.
To run KDM from the Red Hat Enterprise Linux 5 operating system, connect your Defender flash drive
to your computer through a USB port. A CD icon named ‘KDM’ will appear on the desktop. If the KDM
window doesn’t open automatically, double click on the KDM icon to open it.
From the window that opens, copy the kdm_exec.sh shell script file to a location on your computer’s
local hard drive.
Once the kdm_exec.sh shell script has been copied to a local hard drive, you can execute KDM
through the Terminal:
1. Open the Terminal window by clicking on Applications →Accessories →Terminal. The Terminal
location may be different depending on which version of Red Hat you are running.
2. From the Terminal, navigate to the directory where you copied the kdm_exec.sh shell script file to.
3. Type, “chmod 007 kdm_exec.sh” to allow full execute permission.
4. Type, “./kdm_exec.sh” to execute the shell script.
○ If it is your first time running KDM you will need to complete the setup wizard in order to set
your security password (see section 2.2 The Setup Wizard on page 7).
○ If you have already setup your security password, you will be prompted to login (see section 2.4
The Login Window on page 12).
Running Kanguru Defender Manager

7
2.2 The Setup Wizard
When you are running KDM for the first time you will be greeted by the Setup Wizard. Follow the Setup
Wizard instructions to create a security password for your Defender’s secure, encrypted partition.
Caution! Once the Setup Wizard has started, you should not disconnect your Defender flash drive
without either first completing the Setup Wizard or closing the Setup Wizard.
Running Kanguru Defender Manager

8
2.2.1 Activating On-board Antivirus Protection (optional)
This section does not apply if you are running the Setup Wizard in Linux or Mac OS X. This section
may not appear if your KRMC Cloud Administrator chose to disable AV when provisioning the drive.
Note: Your Defender flash drive will need to be connected to a computer with internet access in order to
register for on-board antivirus protection.
KDM will automatically check during the Setup Wizard for a valid antivirus license key.
If your Defender flash drive does not already have a valid antivirus license key, then you must fill out
the registration form with the required information and then click on the Apply button to activate your
free antivirus trial.
Click on the Skip button if you do not wish to activate antivirus protection. If you decide not to activate
your antivirus at this point, you will not be able to activate it in the future without first resetting your
drive back to the factory default setting.
Click on the Next button to continue with setting up your Defender’s security password.
Running Kanguru Defender Manager

9
2.2.2 Contact Info
The information you enter in the Contact Info section will automatically be imported to the KRMC
Cloud account.
Fill in your information in the appropriate fields and then click on the Apply button. Any field that
appear with a
*
next to it is a mandatory field and must be filled out.
A window will appear confirming that your data has been saved. Click on the OK button to close the
window and then click on the Next button to finish setting up your drive.
Running Kanguru Defender Manager

10
2.3 Setting a Password
From the Set Password screen:
1. Enter your password in the ‘Password’ field. You can enter your password using KDM’s Virtual
Keyboard by clicking the VK button.
Note: For security reasons, it is recommended that you incorporate letters, numbers and symbols
to achieve maximum security.
2. Enter the same password in the ‘Confirm Password’ field for verification. If your passwords do not
match or there is any other issue with the password which you have entered in the Set Password
section, an explanation will be visible in the ‘Password Info’ window.
Note: The ‘Password Info’ window will inform you if there are any password requirements. It
updates in real time. Disregard the messages in the Password Info box until you have finished
entering your password into both the Password and Confirm Password fields.
3. Click on the Apply button to set your password.
Running Kanguru Defender Manager

11
2.3.1 Enabling Self Service Password Management (optional)
Depending on how your KRMC Administrator configured the Global Provisioning Profile, you may
have the option of enabling Self Service Password Management (referred to as SSPM). Enabling SSPM
functionality will allow you to reset your Defender’s password and regain access to your data. Enabling
SSPM requires an internet connection.
To enable the SSPM service:
1. Select the Enable Service option and then click on the Apply button.
Note: If you want SSPM but you do not have internet access, you can select ‘I will set this up later’
and then click on the Next button and move on to the next section.
2. Next you’ll need to register an email address where a password reset link can be sent in case you
forget your login password. Enter your email in the corresponding fields ahnd the click the Submit
button.
3. An email containing your activation code will be sent to the email address you entered above
validation. Enter the activation code into the ‘Enter Activation Code’ field and then click on the
Activate button. The activation code field is case sensitive. Please enter your activation code
exactly as it appears in the email that you received from Kanguru.
4. Click on the OK button to close the window, and then click on the Next button.
Congratulations! Your Defender flash drive is now setup and ready to use.
Running Kanguru Defender Manager

12
2.4 The Login Window
After you have completed the Setup Wizard, anytime you run KDM you will be prompted to login
with your security password. You need to provide the correct security password in order to access the
Defender’s secure partition.
When the login window appears:
1. Enter your password in the ‘Password’ field.
2. Click on the Login button.
Caution! By default, if you enter your password incorrectly six times in a row any data stored on the
secure partition will automatically be erased for security purposes. You will be issued an on-screen
warning when you have one attempt remaining, to prevent accidental erasure. To cancel the login process,
click on the Cancel button. Unplugging and then reinserting your Defender flash drive or manually
restarting KDM.exe will bring the login window back.
Once you have successfully logged in to KDM, the Defender’s secure partition will be accessible through
My Computer or Windows Explorer. For more information on accessing the secure partition.
Caution! Once KDM has started, you should never disconnect your device without first closing KDM
properly by clicking the KDM task bar icon and selecting Unmount Kanguru Defender.
Running Kanguru Defender Manager

13
2.4.1 Encrypting Files and Folders
A key feature of the Defender flash drive is drag & drop encryption; allowing you to simply drag files
that you want encrypt directly onto the drive. The Defender flash drive automatically encrypts these files
as they are transferred to the secure partition, ensuring that your data stays safe and private.
To open the secure partition:
1. Start KDM.
2. Login to KDM to gain access to the secure partition.
3. Click on the KDM icon located in the task bar and then select ‘Explore Security Drive’ from
the popup menu.
The secure partition appears in a new window. We recommend using either the drag & drop action, right-
click copy/paste action, or the shortcut keys (Ctrl+C and Ctrl+V) to copy and paste files and folders
directly to and from the secure partition.
Note: Data saved on the Defender’s secure partition are only accessible after you have successfully
logged into KDM.
Running Kanguru Defender Manager

14
2.5 Unmounting Your Defender
When you unmount your Defender flash drive, the KDM application will close and the secure partition
containing your encrypted data will be inaccessible until you log into KDM again.
To unmount your Defender flash drive, right-click on the KDM icon located in the task bar and
then select ‘Unmount Kanguru Defender’.
Note: Linux users must right-click on the KDM icon in the task bar.
The KDM icon in the task bar will disappear and the Defender’s secure partition will no longer be
accessible.
Caution! Do not disconnect the Kanguru Defender flash drive without first properly unmounting your
device as detailed in this section. Doing so may result in file damage or data corruption.
Running Kanguru Defender Manager

15
3. Warranty Information
All Defender flash drive products carry a 3-year warranty from the date of purchase. Kanguru Solutions
is not responsible for any damages incurred in the shipping process. Any claims for loss or damage
must be made to the carrier directly. Claims for shipping errors should be reported to Kanguru Solutions
within three (3) working days or receipt of merchandise.
4. Tech Support
If you experience any problems using your Kanguru Defender flash drive or have any technical questions
regarding any of our products, please call our technical support department. Our tech support is free and
available Monday thru Friday, 9am to 5pm EST.
Call 1-508-376-4245 or
Visit our website at www.Kanguru.com
Warranty and Tech Support

Legal terms and conditions available at www.kanguru.com. Please review and agree before use. Thank you.
Kanguru Solutions
1360 Main Street
Millis, MA 02054
www.kanguru.com
10.12.18 v1.2 © 2018
/