Page is loading ...

LS-100 January 2006
ROM Replacement Instructions, V2.00
Follow these instructions whenever you need to change the scale’s ROM.
1. Backup Data:
a. Using the LS-100 Software Package to backup all of the PLUs.
2. Upper Case Disassembly:
a. Remove the AC cord from the scale and the electrical outlet.
b. Remove the platter and the Cassette Drawer from the scale.
c. Remove the platform by removing the four 4mm hex bolts that hold it in place.
d. Remove the 4 Upper Case screws (1 brass sealing bolt and 3 Phillip’s screws.)
e. Remove the 3 screws underneath the bottom front edge of the scale.
f. Lift the Upper Case upwards and towards you making sure not to damage the
keyboard ribbon cable or the CAL Switch PCB cable.
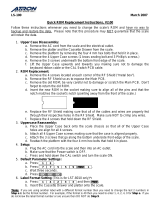
3. ROM Replacement:
a. Remove the 4 screws located at each corner of the RF Shield (“metal box”).
b. Remove the RF Shield so as to expose the Main PCB.
c. Remove the old ROM; be very careful not to damage or scratch the Main PCB. Don’t
forget to return the old ROM.
d. Insert the new ROM in the socket making sure to align all of the pins and that the
notch matches the socket’s notch (pointing away from the front of the scale.)
e. Replace the RF Shield making sure that all of the cables and wires are properly fed
through their respective holes in the RF Shield. Make sure NOT to crimp any wires.
f. Replace the 4 screws that hold down the RF Shield.
4. Uppercase Reassembly:
a. Place the Upper Case back onto the scale chassis so that all of the Upper Case
holes are align for all 4 screws.
b. Attach all 4 Upper Case screws making sure that the case is aligned properly.
c. Attach the 3 screws that go along the bottom underside front-edge of the scale.
d. Insert the Cassette Drawer and platter onto the scale.
5. Setup:
a. Plug the AC cord into the scale and then into an AC outlet.
b. Make sure that the Power switch is OFF.
c. Press and hold down the CAL switch and turn the scale ON.
6. RAM Clear:
a. Once in the CAL Main Menu, press
2
and then
7
.
b. Now type
7
7
5 5
9
and then press
PRINT
.
c. Press 1 and wait for about a minute.
d. Press
ESC
ESC
ESC
.
7. Default Parameter Settings:
a. Press
1
3
1
.
b. Wait three seconds.
c. Press
ESC
ESC
ESC
.
8. Label Format Setting (This is for LST-8010 only)*:
a. Press
1
4
2
3 3
and then
PRINT
.
*Note: If you are using another label with a different format number then you need to change the last 2
numbers in Step a to be the format number. For example, if the format is 40 then you need to enter 1, 4, 2, 4,
0 for Step a. If you do not know the label format number or are unsure then DO NOT do Step 9.

LS-100 January 2006
9. Label Settings:
a. Press
ESC
ESC
ESC
.
b. Press
1
4
1
2
5
and then
PRINT
.
c. Press
4
1
and then
PRINT
.
d. Press
5
2
and then
PRINT
.
10. Sensor calibration: you will need to catch the labels as they are feed out. Remember to
always pull the labels towards you (the front of the scale.) This will make the labels come
loose with ease but if you pull the labels sideways, this may cause the scale to misalign the
labels and cause feed errors.
a. Press
ESC
ESC
ESC
.
b. Now press
3
and get ready to catch the labels that are feed out. If the labels are
not fed out immediately you may need to press
3
again.
c. Press
SAVE
.
d. If there are any errors, please repeat steps b thru c.
11. Span Calibration (using 10% of capacity):
a. Make sure that the platter is properly placed and that there is nothing on it.
b. Press
ESC
1
1
and then
PRINT
.
c. Wait for the scale to display “Load 100% of Capacity.”
d. Press the
TARE
key until it reads “Load 10% of Capacity.”
e. Place 6.00 pounds on the platter and then press the
PRINT
key.
f. Once the scale reads
Calibrated!
press the
PRINT
key.
g. Remove the weight from the platter.
12. Exit CAL Mode & Process Changes:
a. Press
ESC
ESC
ESC
4
, and wait for the scale to go to zero.
b. Press
1
2
3
and
PRINT
.
c. The scale will issue a label; check that all is OK.
13. Restore Data:
a. Using the LS-100 Software Package to restore all of the PLUs.
b. You are done!
/