Page is loading ...

ENG
3D PRINTING
HANDBOOK
USER MANUAL FOR 3D PRINTERS:
– ORIGINAL PRUSA SL1 KIT
– ORIGINAL PRUSA SL1
ORIGINAL INSTRUCTIONS

Original Instructions: Basic info
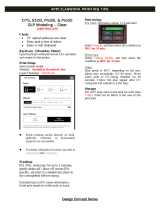
Please always refer to the http://www.prusa3d.com/drivers/ for an updated version of this 3D
printing handbook (PDF download).
Translated versions of the handbook are available at:
•
Czech: www.prusa3d.cz/ovladace/
•
French: www.prusa3d.fr/drivers/
•
German: www.prusa3d.de/treiber/
•
Polish: https://www.prusa3d.pl/sterowniki/
•
Italian: www.prusa3d.it/driver/
•
Spanish: www.prusa3d.es/drivers-y-manuales/
QUICK GUIDE TO YOUR FIRST PRINT
1. Read the safety instructions carefully
2. Place the printer on a flat and stable surface
3. Download and install updated firmware and software packages
4. Calibrate the printer by following the on-screen calibration flow / wizard
5. Inspect the FEP film (bottom of the tank) for any kind of damage
6. Pour resin into the tank
7. Use the Print menu file browser to select a sample object to print
Important notice, tip, hint or information that helps you print with ease.
Read carefully! This part of the text has the greatest importance - either for user safety or for
proper printer service.
This symbol indicates text related to a printer kit only.
Handbook version 1.05 from June 9th, 2020 © Prusa Research a.s.

About the author
Josef Prusa (born Feb 23rd, 1990) became interested in the 3D printing phenomenon before joining
Prague’s University of Economics in 2009 - at first it was a hobby, a new technology open to changes
and improvements. The hobby soon became a passion and Josef grew into one of the leading
developers of Adrien Bowyer’s international, open source, RepRap project. Today, you can see the
Prusa design in different versions all around the world, it is one of the most popular printers and
thanks to it, knowledge about the 3D printing technology significantly increased among the public.
Jo’s work on self-replicating printers (you can print the other printer parts with your printer) still
ongoing and the latest model, Prusa i3 MK3S, is currently on the market - it’s an improved version
of the original 3D printer’s third iteration. Prusa Research keeps expanding into new territories and
the Original Prusa SL1 you just purchased is just one of the examples.
Josef Prusa also organizes workshops for the public, participates in professional conferences
dedicated to the popularization of 3D printing. For example, he lectured at the TEDx conference in
Prague and Vienna, at World Maker Faire in New York, Maker Faire in Rome or at the Open Hardware
Summit hosted by MIT. Josef also teaches Arduino at Charles University and was also a lecturer at
the Academy of Arts in Prague.
In his own words, he imagines 3D printers will be available in every home in the not-too-distant
future. “If anything is needed, you can simply print it. In this field, you just push the boundaries every
day… We're glad you're part of it with us!”
Josef Prusa
3

1 Introduction 8
2 Glossary 9
2.1 Accessories - bundled and optional 10
3 Quick-start information 11
3.1 How to contact tech support and send log files 12
4 Your First Print 14
4.1 Unpacking 14
4.2 First start and Calibration 14
4.3 Navigating the menus 17
4.4 Updating the printer’s firmware 18
4.5 Network connection - recommended 18
4.5.1 Internet connection - Ethernet cable 18
4.5.2 Internet connection - Wireless connection 18
4.6 Time and time zone configuration (optional) 19
4.7 Pouring resin into the tank 19
4.8 Running out of resin / Adding resin mid-print 20
4.9 Starting the First print 21
4.10 Removing the print 21
4.11 Removing a print stuck to the bottom of the tank 23
4.12 Removing supports 23
4.13 Bundled 3D models 23
5 After-print checks and actions 24
5.1 Washing / Curing / Drying models 24
5.1.1 Washing 24
5.1.2 Drying and curing 25
5.2 Disposing of resins 25
5.3 Menu structure and advanced functions 26
6 Printing your own models 27
6.1 Obtaining a printable model 27
6.2 Creating your own models 28
6.3 What are SL1 files? 28
6.4 PrusaSlicer 29
6.5 Slicing objects for the SL1 30
6.6 Importing an object into PrusaSlicer 31
6.7 Positioning an object 31
6.8 How to generate supports for SLA prints 32
6.9 Pad, supports, layer height and exposure times 34
6.9.1 Pad 35
6.9.2 Supports 35
6.9.3 Layer height explained 35
6.9.4 Exposure time explained 36
6.10 Slicing, exporting and printing custom models 37
6.11 Object orientation and slicing examples 37
6.11.1 Reims Cathedral 37
6.11.2 Eiffel tower 38
6.11.3 Jewelry 38
6.11.4 Characters and props 39
6.12 How to recognize problematic areas 39
6.13 Printing large and heavy objects 41
6.14 Hollowing objects in PrusaSlicer 41
7 Connecting PrusaSlicer to the SL1 over the network 43
8 Updating the printer’s firmware 44

9 Material Guide 45
9.1 Important information about resins 45
9.2 Which resins to buy? 46
9.3 Types of resins 46
9.4 Custom resin calibration 47
10 Software/driver package 47
11 Controlling the printer via a web browser 47
12 Optional Accessories 48
12.1 Original Prusa Curing and Washing Machine - CW1 48
12.2 FEP Films - Original and Aftermarket 49
12.3 Additional accessories 49
13 Regular Printer Maintenance 49
13.1 Keeping the printer clean 49
13.2 FEP film / Tank maintenance 50
13.3 Print platform maintenance 51
13.4 Exposure screen maintenance 51
13.5 Acrylic lid 52
13.6 UV light and potential health risks 52
13.7 Fan cleaning / Removing dust 52
13.8 Carbon filter replacement 53
13.9 Tower maintenance 53
13.10 Tilt maintenance 53
14 Hardware troubleshooting 54
14.1 FEP film / Tank bottom replacement 54
14.2 Replacing the print screen 56
14.3 Spilled resin 57
15 Print quality troubleshooting 57
15.1 Removing an object stuck to the bottom of the tank 57
15.2 First layer doesn’t stick (Non-Adherence) 58
15.3 Printed object has missing parts 59
15.4 Printed object is missing small details 60
15.5 Printed object detached from supports 60
15.6 Broken supports 61
15.7 Printed object is skewed / deformed 61
15.8 Print doesn’t appear / resin does not solidify 62
15.9 Printed object has very visible layers 62
15.10 Delamination / Separated layers 63
15.11 Warped layers 64
15.12 Large holes in printed objects 64
16 FAQ - Frequently Asked Questions 65

About this handbook
This handbook is designed to help you start printing with the Original Prusa SL1 as fast as possible.
It’s divided into several main parts - pay close attention to chapters about correct usage, health
risks, calibration and first print.
Product details
•
Title: Original Prusa SL-1 / Original Prusa SL-1 (kit)
•
Manufacturer: Prusa Research a.s., Partyzánská 188/7A, Prague, 170 00, Czech Republic
•
Contact e-mail: [email protected]
•
EEE group: 3 (IT and/or telecommunication equipment)
•
Device use: indoor only
•
Power supply: 100-240 VAC, 1.8 A (50-60 Hz)
•
Working temperature range: 18 °C - 32 °C, indoor use only
•
Working humidity: 85 % or less
•
Compatible resins: 405nm wavelength
Declaration of conformity can be downloaded from http://shop.prusa3d.com
Assembled printer weight (gross / net): 14.5 kg / 10.4 kg. The serial number is located on the back
of the printer, in the printer’s support menu and also on the packaging.
Original Prusa SL1 is equipped with a wireless network card. This wireless module complies with
IEEE 802.11 b/g/n standard and it can achieve a speed of up to 72.2Mbps with single stream in
802.11n draft, 54Mbps as specified in IEEE 802.11g, or 11Mbps for IEEE 802.11b to connect to the
wireless LAN. The integrated module provides SDIO interface for Wi-Fi.
Licenses
The Original Prusa SL1 is published under a GNU GPL v3 license (-
www.gnu.org/licenses/gpl-3.0.en.html). If you improve, or alter any part of, the printer, and you want
to sell them, then you have to publish the source code under the same license. Source codes can be
found at https://www.github.com/prusa3d
Warranty
The pre-assembled Original Prusa SL1 printer is covered by a 24-month warranty for end customers
in the EU and 12 months for businesses and non-EU customers.
Wear and tear category components and consumables are excluded from this warranty. The Original
Prusa SL1 assembly kit provides a 24-month warranty on the functionality of individual parts for end
users in the EU and 12-month warranty for businesses and non-EU customers.
The warranty period begins with the day when the customer receives the goods. WARNING: The
exposure display and the FEP foil fall into the category of normal wear and tear components, which
are not covered by our standard warranty. The lifespan of the exposure display is a maximum of
500 hours of printing - the SLA 3D printing process on the Original Prusa SL1 is considered the
6

standard way of using and wearing the original display.
The lifespan of the FEP foil is 10 cycles. When used properly in accordance to the instructions in
the official guides (such as this handbook), the life expectancy of the FEP foil can be several times
longer.
Neither the Seller's liability for defective products nor the quality warranty apply to printers or parts
damaged by handling, which is in conflict with the instructions and recommendations in the official
manuals and guides, or improper handling caused by unofficial modifications, such as modifications
to hardware or software.
Safety instructions
Please be very cautious during any interaction with the printer. This printer is an electrical
device with moving parts and UV light emission.
1. The device is for indoor use only. Do not expose the printer to rain or snow. Always keep
the printer in a dry environment at a minimum distance of 30 cm from other objects. Make
sure none of the vents/fan outlets are blocked.
2. Always place the printer on a stable place, where it cannot fall or tip over.
3. The printer supply is household power outlet 230 VAC, 50 Hz or 110 VAC / 60 Hz. Never
connect the printer to a different power supply; it may cause malfunction or damage to the
printer.
4. Place the power cord so you cannot stumble over it, step on it, or otherwise expose it to any
potential damage. Also make sure that the power cord is not mechanically or otherwise
damaged. If so, stop using the damaged power cord immediately and replace it.
5. When you disconnect the power cord from the socket, pull the plug rather than the cord to
reduce the risk of damage to the plug or to the AC outlet.
6. Never disassemble the printer’s power supply; it does not contain any parts that could be
repaired by an unskilled worker. All repairs must be performed by a qualified technician.
7. Do not reach inside the printer while it is still in operation. An injury may be caused by its
moving parts or electrical current.
8. Prevent children from unsupervised access to the printer even when the printer is not
printing.
9. Do not leave the printer unattended while it's still on!
10. Do not print with a disassembled printer or with a printer that has an open lid or any parts
missing.
11. Never look directly into the UV light.
12. Keep in mind that resins are liquids which produce odors. Make sure the printer is set in a
ventilated place. Use the bundled plastic tray to shield the machine from drops of liquid.
13. Some people may be allergic to resins - either to skin contact or even the vapors. If you
experience any kind of discomfort when working with resins (like itching), stop immediately
and consult your doctor
7

1 Introduction
Thank you for purchasing the Original Prusa SL1 printer! No matter which version you’ve bought,
an assembled unit or a kit, your purchase supports us in the further development of our machines.
Please, read this handbook carefully, since all chapters contain valuable information regarding the
use, maintenance, and troubleshooting of the SL1 printer.
The SL1 is our first SLA printer, but the team behind it has years of experience in the field, which
enabled us to bring you an easy-to-use machine with plenty of useful features. The SL1 has a number
of smart sensors, calibration wizard, high-resolution display combined with a powerful UV panel,
and it’s completely open-source!
You can find more information about the SL1 and other printers on our official website
https://www.prusa3d.com or on our community hub https://www.prusaprinters.org, where you
can download models for printing, chat with other users or create local printing communities!
How does SLA 3D printing work?
The Original Prusa SL1 is an SLA, or more specifically, an MSLA 3D printer. SLA stands for
Stereolithography Apparatus and the “M” at the beginning means “Masked”. SLA printers use
UV light to cure (solidify) photosensitive liquid resins.
The SL1 has a built-in high-resolution LCD screen which displays a mask in the shape of a
single layer. Then, the UV LED panel shines UV light through the mask into the resin tank, which
has a transparent bottom. UV light cures (solidifies) a single layer of the printed object, which
adheres to the print platform. After a layer is cured, the print platform moves by a small increment
upwards, creating space for another layer. SLA is thus an additive printing method.
8

2 Glossary
Print platform - Print platform is made of a single-block of aluminum and it is connected via a
cantilever to the motorized tower. The large flat part is the area to which the printed object is
attached to. The print platform can be easily removed by loosening the Knob without affecting the
calibration
Knob - Large black knob at the top of the cantilever is designed for an easy mounting/dismounting
of the print platform.
Tank - The container for liquid resin. It has a transparent bottom that allows UV light to pass through.
The bottom of the tank is an FEP film, a consumable that will degrade after some time. The FEP film
is replaceable (see chapter on Printer Maintenance). Use only warm water and dishwashing soap to
clean the FEP.
Tilt - The general name for the whole bed with the motorized tilt function. The tilting platform is one
of the biggest advantages of this machine. Thanks to this solution, smaller forces are required to
pull the object from the bottom of the tank, which results in better-looking models and more reliable
printing.
Tower / Z-Axis - The mechanism that raises and lowers the cantilever with the print platform. The
cantilever is secured with a ball screw.
Lid - The orange-colored lid is made of acrylic and its layers protect the liquid resin from UV light
(such as sunlight), which would otherwise cure it. Still, it’s not a 100% shield and the printer should
not be placed in direct sunlight. It must be closed during printing.
Liquid resin - Liquid materials used for printing in SLA 3D printers. It requires special care during
handling - see chapter Resins
Curing / solidifying - Curing is the process of solidifying liquid resin using UV light. Even sunlight
contains UV light and it can cause the liquid resin to solidify. The recommended curing time per
single layer is usually between 5-12 seconds depending on the resin used - there may be exceptions.
Layer height, object size, and exposure (curing) time are the three factors that have a major impact
on the length of the printing process and quality of the printed object.
9

Touchscreen Display / Touch screen - The main control interface of the SL1. The capacitive
touchscreen is used to navigate through the menus, start prints, adjust settings, or calibrate the
printer.
Power Button - Turns the printer on or off. This button won’t disconnect the power supply. To cut
off power completely, always disconnect the power cord from the back of the printer.
2K screen / Print display / Exposition display - This display is part of the tilt assembly. It shows a
mask (shape) of a single layer at a time, allowing UV light to pass through and solidify a single layer.
The fixed resolution of the display means that the X/Y resolution of the printed object is also fixed.
UV LEDs / UV panel - The UV LED panel emits UV light through the mask shown on the print
display and solidifies (cures) the resin in the tank, creating the desired object layer by layer.
Ethernet port - Can be used to connect the printer to the local network. It is located on the back of
the device.
USB port - Used for reading SL1 print files from a USB drive
SL1 file - File containing printing instructions compatible with the SL1. SL1 files are created by
slicing a 3D object using PrusaSlicer
2.1 Accessories - bundled and optional
There’s a number of accessories and tools you will find in the package. They will help you to use the
printer more effectively and safely.
•
Gloves - for safer handling of resins
•
Protective tray - to shield the printer from
resins during object removal
•
Sharp pliers - for support removal
•
Funnel with a filter - for filtering resin
•
Plastic spatula - the only spatula you can
use to carefully clean the FEP film
•
Metal spatula - for removing objects from
the print platform only
•
Allen and torx keys - for maintenance
•
Orange resin - 0.5l bottle
•
FEP film - spare FEP films (not pictured)
Optional accessories you should consider buying:
•
Paper towels - for cleaning up the printer, drying printed models…
•
Isopropyl alcohol - for cleaning the prints
•
Plastic tablecloth - to contain resin spillage and to make cleaning up easier
•
Pipette - for removing larger resin drops/stains
•
Respirator / protective glasses
10

3 Quick-start information
The SL1 requires maintenance and regular care. It doesn’t take a lot of time and it’s not
complicated, however, there are several parts on the 3D printer that can be potentially damaged as
a result of incorrect use. Please keep that in mind - failure to follow the instructions in this manual
may lead to severe damage to your printer and/or to a loss of warranty. Here is a quick run-down
of things you should and shouldn’t do with your Original Prusa SL1.
SL1 3D printer
Place in a well-ventilated
room with ambient
temperatures between
18-32°C
Connect to the internet and
download the latest firmware
updates
Calibrate the printer before
the first use
Keep clean at all times
Use the bundled drip
tray when filling the tank or
removing prints
Do not place the printer in
direct sunlight
Do not keep the lid open
while printing
Resin tank
Empty and clean the tank
after every print because tiny
bits of cured resin might
remain in the tank
Clean only with warm water
and a bit of dishwashing soap
or regular soap
Replace the FEP film with a
new one in case it’s damaged
Do not clean the FEP foil with
IPA or similar chemicals
Do not use sharp objects
to remove prints (e.g. metal
spatula)
Do not print with damaged
(punctured) FEP foil
Do not pour more than the
recommended amount of resin
(max 200 ml)
11

Print display and UV LED panel
Use a soft paper towel
or cloth and an LCD screen
cleaning spray to clean the
protective glass
You can test the LCD from
the Advanced Settings Menu
(‘Display Test’ option)
Do not look directly in UV
light, use a camera to check
the UV panel!
Do not leave spilled resin on
the print screen
Do not use sharp objects to
clean the screen
Resins
Wear gloves when handling
resins, also consider wearing
a simple respirator and
protective goggles
Store at room temperature
in opaque bottles, away from
kids or animals
Treat as dangerous liquids
Follow your country’s laws
for disposing of dangerous
liquids
Avoid skin contact
Do not drink
Do not mix different resins
Do not mix used and unused
resins
Do not flush resins down the
drain / into sewage
Do not leave spilled
resin anywhere - clean it
immediately
3.1 How to contact tech support and send log files
If you encounter an issue with your SL1 3D printer, please check the last pages of this handbook
for general troubleshooting guides. However, in case the suggested solutions don’t work,
please contact our tech support via e-mail at [email protected] or via the Live chat at
https://shop.prusa3d.com - the chat is in the lower right corner. Please try to attach a log file if
possible. To save a log file, please follow these steps:
1. Insert a FAT32-formatted USB flash drive into the printer
2. Navigate to Settings - Advanced Settings - Save Logs to USB
3. Wait until the logs are written on the USB drive. Once the procedure is finished, the printer will
return to the Advanced Settings menu
4. Remove the USB drive, plug it in your PC and look for the saved log file (.txt.gz). Send this file
along with your description of the issue to our tech support
12

13

4 Your First Print
We know that you are eager to start printing immediately, however, there are a couple of steps users
need to take before they can start printing. Read these chapters carefully.
4.1 Unpacking
After you open the box, remove the accessories case first (1), then remove the top foam (2). Grab the
box using the two handles on the side and pull it up (3). Open the cardboard locks (4) and remove
the protective wrap (5). Finally, take the unpacked SL1 and place it on a stable surface (6). This is
all for now! Do not open the cover yet!
If the printer was kept in low temperature environment for an extended period of time, let it warm
up in ambient room temperature for at least one hour before you start it. Otherwise, you may get
errors related to low temperatures.
Start the printer and run the initial wizard. Continue in chapter 4.2 First start and calibration.
4.2 First start and Calibration
The calibration is essential for correct operation
Without a properly calibrated tilt and print platform, the printed object won’t stick to the platform,
or even worse - you may damage your printer.
Connect the power cord and turn on the printer using the switch on the back of the machine,
located directly next to the power plug. Then push the round power button on the front side. The
start of the booting sequence is signalized by a slow-flashing light around the power button. After
a few seconds the display will show the Prusa Research logo and then the Wizard appears. Use the
touchscreen to navigate through the wizard. Take your time, read all instructions carefully and
remember you scan swipe left/right to reveal more information about the current step.
Each described step has to be confirmed by pressing the on-screen Continue button!
The first is the Unpacking Wizard, which will help you to remove the remaining parts of the
packaging:
14

1. Peel off the sticker on the right side of the printer and open the cover
2. Remove the foam protectors
3. Remove the tank and the foam layer underneath it
4. Carefully peel off the sticker from the display
Once the 3D printer is fully unpacked, the Selftest starts. This procedure will make sure your printer
arrived in a good shape:
1. Remove the resin tank
2. Remove the print platform
3. Close the orange cover
15

4. Take a look through the top of the cover. Do you see the Prusa Research company logo? Do not
open the cover!
5. Return the tank to its original position and tighten both resin tank screws.
6. Insert the print platform rotated by 60° and tighten the black knob
7. (Optional) Set a timezone
8. Sound test - can you hear music coming from the printer?
9. All done! You can move onto the Calibration Wizard
Finally, there’s the Calibration wizard.
Please note that certain printer models may have two hexagonal screws on the cantilever - this
is normal and it does not affect the printer in any way.
1. Make sure the print platform is clean, slide it onto the platform holder on the cantilever and
tighten the black knob.
2. Loosen the screw on the cantilever using an Allen key (some printer models have two screws
on the cantilever - loosen them both). The platform should move quite freely, but the knob on
top has to remain tightened
3. Take the empty resin tank, remove both large screws, rotate it by 90° and place it across the
silver printer frame as depicted in the picture. Make sure the tank rests flat and level on the
printer frame lip and not on the display
4. Use the on-screen controls to move the tilt until the display and frame are in direct contact
with the resin tank. The tank must not be lifted above the frame. See the picture below for a
reference. Tap or hold the on-screen buttons to move the platform.
5. Before you proceed further, make sure that both the platform and the tank are perfectly clean.
6. Place the resin tank on the tilt bed and secure it with both screws. Tighten them evenly and
with the same amount of force, otherwise, the tank may end up in a skewed position
7. The platform will now go all the way down to the bottom of the tank. Rotate the platform so it’s
parallel to the side of the tank
8. Now use an allen key to tighten the screw on the cantilever. If you have a printer with two
screws, tighten them evenly little by little.
16

That’s it! The printer is now calibrated and doesn’t have to be calibrated again unless you transport
it to a new location or replace certain parts of the printer (e.g. the FEP foil). The print platform is
secured by the black knob at the top of the cantilever and removing it from the printer won’t affect
the calibration.
Once the calibration is done, the Main Menu is displayed. Please see chapters Navigating the menus
and Menu structure for more information.
4.3 Navigating the menus
SL1 uses a touchscreen display for navigation and for configuration of basic and advanced features.
To enter a sub-menu (e.g. Print, Settings…), press the desired icon on the screen. To go back to the
previous screen, press the Back on-screen button. To change values in various sub-menus, use the
on-screen symbols (such as + and - or arrows up and down). Pressing and holding a symbol results in
a continuous increase or decrease of the associated value. Some screens can be swiped to reveal
additional information - these screens are marked with little dots at the bottom of the page.
Use touchscreen controls to navigate the menus. Use short or long button presses to change the
on-screen values
Menus with dots at the bottom can be swiped left/right to reveal additional information
17

4.4 Updating the printer’s firmware
We recommend keeping the printer updated at all times. Updated firmware packages bring various
benefits, such as new features, bug fixes and various improvements. There are two ways to update
the printer’s firmware:
It’s a good practice to keep the firmware up-to-date all the time because newer versions come with
new features, bugfixes, and improvements.
If you don’t have the printer connected to the internet, you can update the firmware using a USB
drive. Download the firmware file from https://prusa3d.com/drivers, place it on a USB drive and
plug it into the printer. The system will recognize the file on the drive and initiate the update process
automatically.
Starting with firmware 1.3.0, the printer (when connected to the internet) performs automated
checks whether a newer firmware is available to download. Firmware 1.4.0 brings a manual check
option - press an on-screen button to manually check for newer firmware.
4.5 Network connection - recommended
Before you start the calibration process, it is advised to connect the printer to the internet, so that
it can download updated firmware files (if they are available). There are two ways how to connect
the printer to the internet.
4.5.1 Internet connection - Ethernet cable
You can use a standard RJ-45 ethernet cable. Connect it to your router, and the printer should
obtain an IP address automatically - however, this depends on your network configuration. Since
every network is different, please refer to your router’s instructions or your provider’s tech support
in case you run into trouble. To check whether the connection has been successfully created, go to
Main Menu - Settings - Network.
4.5.2 Internet connection - Wireless connection
The SL1 3D printer has a built-in Wi-fi network card
compatible with 2.4GHz networks. To open the Wi-Fi
network browser, go to Settings - Network. A list of all
available networks will be displayed. Select your Wi-Fi
network and connect to it by typing your password using
the on-screen touch keyboard. You can connect a USB
keyboard to the front USB port in case the on-screen
keyboard is too small.
Network troubleshooting
Since every network is different, we cannot provide exact instructions on how to connect to your
wireless/wired network. If you encounter any trouble, please refer to your router’s manual, or
contact your internet provider’s tech support. Quality of your wireless connection depends on
many factors - such as the type/configuration of the router, distance of the printer from the router
or wireless interference in your area.
You can recognize a successful connection by looking at the Wi-Fi icon - it should now display
connection strength. To see more details about the connection, please navigate to Main Menu -
Settings - Network - Network Info.
18

4.6 Time and time zone configuration (optional)
You can configure the printer’s time zone and current time in Settings - Advanced Settings - Time
Settings. If you have the printer connected to the internet, you can use Automatic time settings to
have the time updated automatically depending on your time zone. Next, you should go to Timezone
menu and select your continent and nearest town/city. If you don’t have the printer connected to
the internet, please set the time manually using Date and Time options.
Setting the correct time is useful during printing - the screen will show you when the print job is
going to finish.
4.7 Pouring resin into the tank
Before you start printing, always make sure the FEP film on the bottom is clear (transparent),
clean and has no holes, dents or deep scratches. Check the tilt platform with the display and make
sure it is completely clean and there is no debris anywhere.
Wear gloves when handling resins!
Place the tank on the tilt platform. There is a small groove running around the tilt bed that will help
you to position the tank properly. You may hear a little “click” as it falls into place. Use the two resin
tank screws to secure it to the tilt bed. Tighten screws simultaneously and with the same amount
of force, otherwise the tank may end up in an uneven position.
Tighten both screws simultaneously and with the same amount of force. Pour the recommended
amount of resin - there is a max level mark in the tank.
Once the tank is secure, pour the resin in it. Notice that there is a max level mark in the tank that
will help you measure the optimal volume. The SL1 features a built-in resin level sensor, so in case
there’s too little or too much resin, the printer will pause and display an on-screen info message.
Please follow the on-screen instructions to fix the issue.
19

The max resin level mark in the tank.
Do not overfill the tank!
Any time you are asked to refill the resin to the max, it always means adding it up to the 100% mark,
not to the edge of the tank!
4.8 Running out of resin / Adding resin mid-print
The SL1 features a built-in resin level sensor, which measures the amount of resin in the tank before
every print. Some models might be too large and require more than the maximum amount of 200
ml resin in the tank. The printer can recognize when the resin starts running low and pauses the
print. An on-screen message is displayed, asking you to fill resin back to the max level mark. Once
you refill the resin, you can press the on-screen Continue button to resume the print.
Keep in mind that in certain cases (especially if the print has been paused for a long time), the
new layer may not adhere perfectly to the rest of the object - or not adhere at all.
20
/