Just the way you like it
Picture Mode
Standard
Back Light
Features
White Balance
Tint
Colour
Sharp
Bright
Contrast
Cool
Picture
IMPORTANT! PREPARE USE
SETTINGS
TROUBLE?
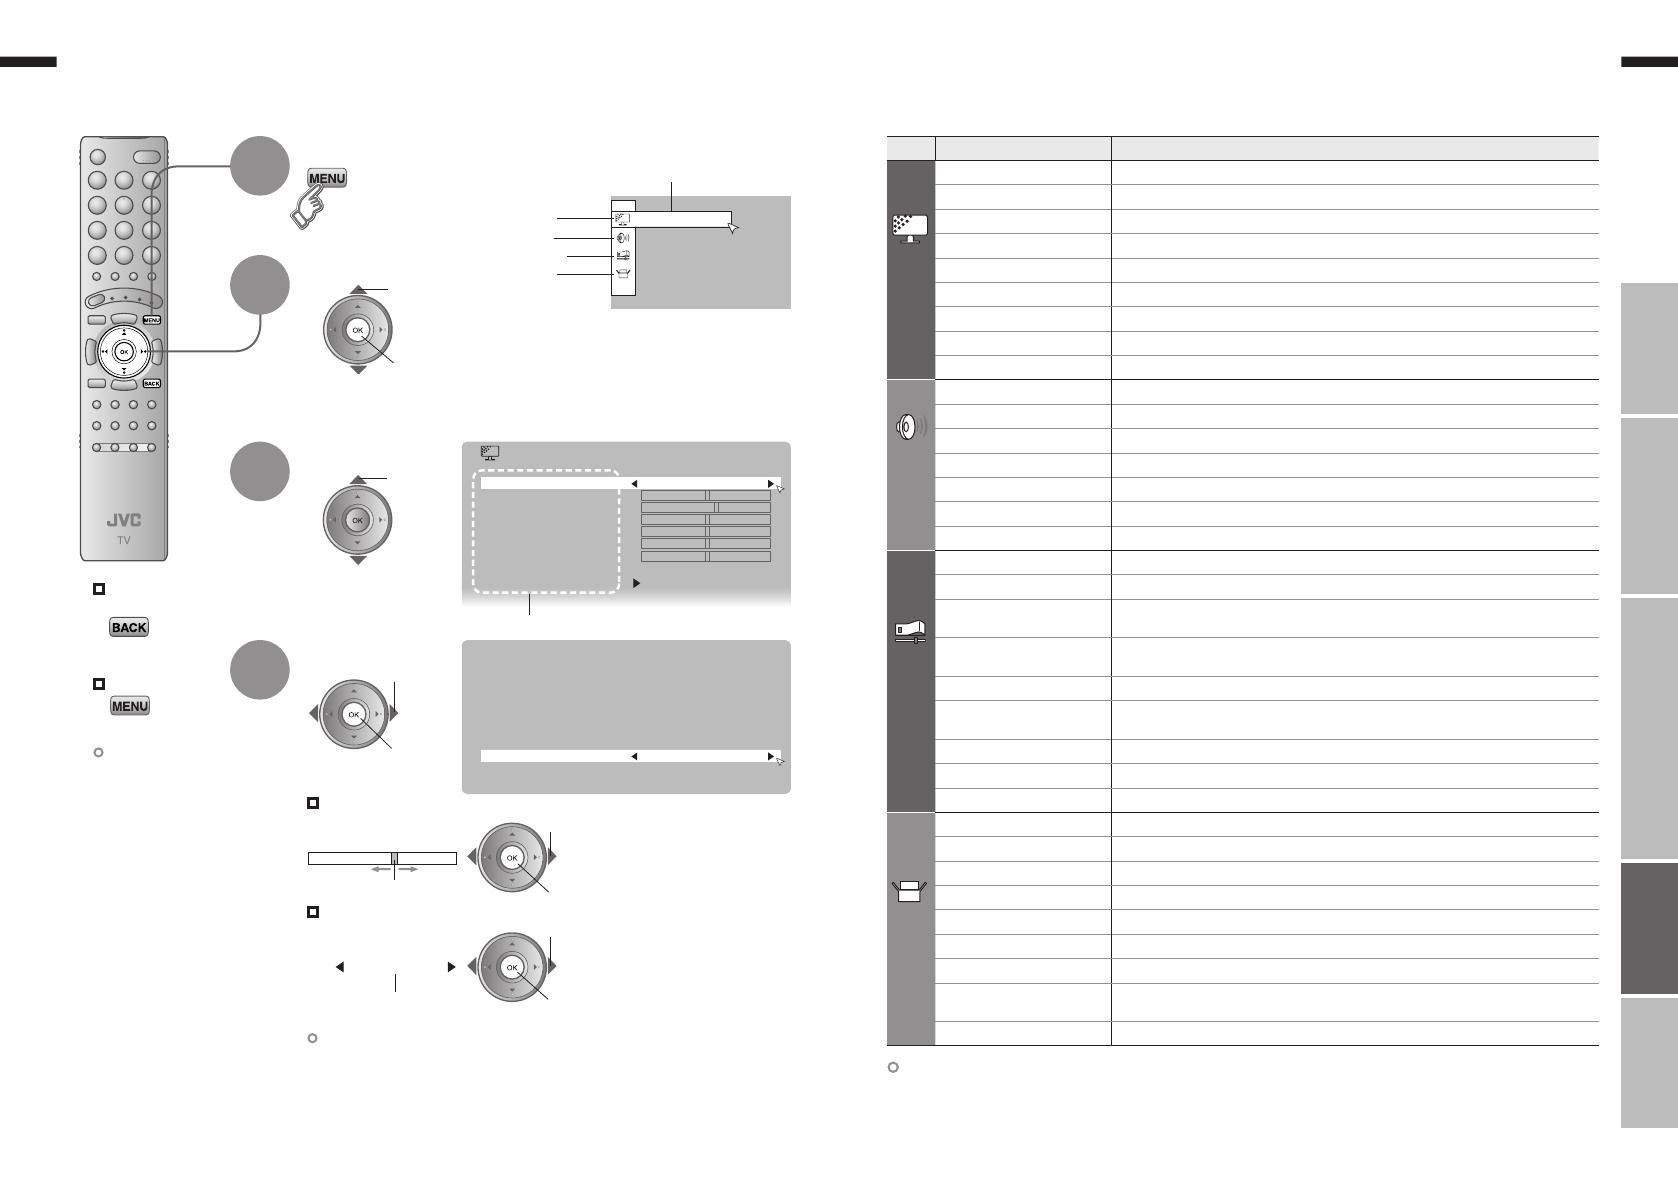
Display the menu bar
Select a menu
Select an item
Adjust / Configure
Move
The item will change.
Selected menu’s title
Items
Picture
Sound
Features
Set Up
Customising your TV
To the previous
screen
Exit
1
The menu disappears
after one minute of
inactivity.
When adjusting
with the sliding-bar
2
3
4
When selecting
from presets
2 next
1 select
select
2 set
1 adjust /
select
2 set
1 adjust
2 set
1 select
Some items have a
sub-menu.
Other settings · Change the aspect ratio “ZOOM” (P. 17)
· Turn on “Cinema Surround” “CINEMA SURROUND” (P. 17)
Menu Item Adjustments / Configurations
Picture
Picture Mode
Picture mode (Bright / Standard / Soft)
Back Light
Backlight brightness (Darker Brighter)
Contrast
Contrast (Lower Higher)
Bright
Brightness (Darker Brighter)
Sharp
Sharpness (Softer Sharper)
Colour
Colour (Lighter Deeper)
Tint
Tint (Reddish Greenish)
White Balance
Colour temperature (Warm / Mid / Cool)
Features
Finer picture adjustments (P. 31)
Sound
Stereo / t · u
Mode / Language (v : MONO / s : STEREO / t : SUB1 / u : SUB2 / MONO) (P. 38)
Bass
Low tones (Weaker Stronger)
Treble
High tones (Weaker Stronger)
Balance
Speaker balance (Left Stronger Right Stronger)
Cinema Surround
Ambience level (High / Low / Mono / Off)
MaxxBass
*1
Emphasize the bass sound (Off / Low / High)
Voice Enhancer
Sound enhancement technology (On / Off)
Features
Sleep Timer
Timer for turning off the TV (P. 24)
Channel Guard
Stops children from watching specific channels (P. 24)
Appearance
Format for displaying the channel number
(Type A / Type B)
Blue Back
Displays a blue screen and mute the sound
when the signal is weak or absent (P. 26)
Child Lock
Disables the front control buttons of the TV
Auto Shutoff
Set the power to turn off if no signal is received and no operation is performed
for about 15 minuites. (P. 26)
Favourite Setting
Clear favourite channel settings (P. 25)
Illumination
Lights illumination lamp (P. 5) while the TV is on (Bright / Soft / Off)
Power Lamp
Lights power lamp (P. 5) while the TV is on (On / Off)
Set Up
Auto Program
Automatically registers channels (P. 10, !)
Edit / Manual
Change registered channels or add new ones (P. 11)
Language
Select a language for on-screen menus (P. 10, Ÿ)
Video-1 Setting
For use with video players and other devices (P. 22)
Video-3 Setting
For use with video players and other devices (P. 22)
AI Volume
Prevent sudden increase or decrease of sound when changing channels (P. 26)
Teletext Language
Select a language for Teletext programmes (P. 10, !)
HDMI Setting
HDMI-1 : Size (1 / 2 / Auto) HDMI-2 : Size (1 / 2 / Auto)
Audio (Digital / Analogue / Auto)
PC Position
PC position adjustment (P. 21)
*1 MaxxBass is a registered trademark of Waves Audio Ltd. in the USA, Japan and other countries.
29-30 4/12/2006 11:39:24 AM


