LG PD239 User manual

Type
User manual
For more details, please refer to the Owner’s Manual at LG Pocket Photo App or
http://popoguide.lge.com.
MODEL :
PD239W/ PD239P/ PD239Y/ PD239TW/ PD239TP/ PD239TY/ PD239SP/ PD239B/
PD239TWA/ PD239SL/ PD239SA/ PD239PH/ PD239BH/ PD239YH/ PD239WH/ PD239G
Simple manual/ 简短说明/ 簡短說明/ 簡易マニュアル/ Manual básico/
Kurzanleitung/ Manuel simple/ Краткое руководство
www.lg.com
ポケット フォト プリンター
Reg. No.I.24.LG2.01902.1113
2
y For more details, please refer to the Owner’s Manual at LG Pocket Photo App or
http://popoguide.lge.com.
y
关于更多详细信息,请参见 LG Pocket Photo 应用程序的用户手册或登陆
http://popoguide.lge.com。
y
若要瞭解更多詳細資訊,請參見 LG Pocket Photo 應用程式的相關使用手冊或登入 http://popoguide.lge.com
y
本製品に関する詳細な情報は、LG Pocket Photoアプリまたはウェブ取扱説明書(http://popoguide.lge.
com)からもご覧いただけます。
y
Para más detalles, consulte el Manual del Propietario en LG Pocket Photo App o http://popoguide.lge.com.
y
Weitere Informationen nden Sie im Bedienerhandbuch der LG Pocket Photo App oder unter
http://popoguide.lge.com.
y
Pour plus de détails, reportez-vous au Manuel d’utilisateur disponible sur l’App Pocket Photo de LG ou
téléchargeable sur le site http://popoguide.lge.com.
y
Для подробной информации, пожалуйста, обратитесь к руководству по использованию на LG Pocket
Photo App или http://popoguide.lge.com.
y
További részletekért, kérjük tanulmányozza az LG Pocket Photo App felhasználói kézikönyvét vagy a
http://popoguide.lge.com honlapot.
y
Толық ақпарат алу үшін, өтінеміз, LG Pocket Photo App қолдану жөніндегі нұсқаулығына немесе
http://popoguide.lge.com жүгініңіз.
5
y
Voor meer informatie verwijzen wij u naar de handleiding van de LG Pocket Photo App of
http://popoguide.lge.com.
y
Lisätietojen osalta, ks. Käyttöohjekirjaa LG Pocket Photo -sovellukselle tai sivustolla
http://popoguide.lge.com.
y
Pour de plus amples renseignements, veuillez consulter le manuel de l’utilisateur sur l’application LG Pocket
Photo ou http://popoguide.lge.com.
y
Για περισσότερες πληροφορίες, ανατρέξτε στο Εγχειρίδιο Χρήσης της εφαρμογής LG Pocket Photo ή
επισκεφθείτε τον ιστότοπο http://popoguide.lge.com.
y .http://popoguide.lge.comLG Pocket Photo
All other product and brand names are trademarks or registered trademarks of their respective owners.
6
STEP 1 Getting Started
1. Basic Operation
Reset hole
(Press Reset
button to
initialize.)
LED indicator
PUSH
OPEN
POWER
OFF
, This device uses a built-in battery. Before using it,
fully charge the battery.
, When power is turned on, you cannot open the
cover. To open it, turn o the power rst.
, As shown in the picture on the right, place papers
with the smart sheet aligned and insert them in the
direction of the arrow.
Photo Papers with White
side up,
Smart Sheet (Blue) with
Barcode side down
, Smart Sheet cleans printer head and calibrates
colors on photo. Keep the best print quality by
using it repeatedly.
2. Smart sheet (Cleaner)
Photo paper
pouch
English
The blue paper
should be aligned
in front of the white
paper.
7
When using Smart Sheet, it should be used
with photo papers in the same pouch.
y
Using smart sheet from other pouch may
result in low quality.
y
If print quality is abnormal or low, print
out the smart sheet 3-5 times repeatedly.
y
Reuse the smart sheet until use up the
photo papers from same pouch.
Note on Smart sheet
3. Photo Paper
Use exclusive photo paper for LG Pocket Photo.
Otherwise, the print quality cannot be guarranteed,
and it may cause damage of Pocket Photo.
y
Do not damage or bend the papers.
y
Using soiled paper may result in malfunction.
y
Ensure to use the papers within its valid date.
Note on Photo paper
y
Once unpacked, the papers may begin to
curl up or change the color after a period of
time. It is recommended to use them as soon
as possible.
STEP 2 Installing App
Search for “LG Pocket Photo from Play Store (Android
market) / App Store (iPhone)/ Windows Phone Store.
STEP 3 Pairing Bluetooth
1. Turn on the Pocket Photo device.
2. Search for the device to pair through Bluetooth.
ex ) LG PD239 (XX : XX)
3. When you nd the device, touch the model name of
Pocket Photo on the screen.
In case of iPhone/iPad, the last paired iPhone/
iPad is paired to Pocket Photo automatically when
you turn on Pocket Photo if the Bluetooth on your
iPhone/iPad is on.
English
8
< Android Phone> < iPhone> <Windows Phone>
STEP 4 Printing Photo
1. After pairing, run LG Pocket Photo App on smart
phone.
2. Select a photo to print, and touch [ ].
If the smart sheet is in the device, the selected image
will be printed after optimizing the image’s quality.
NFC-enabled android phone is available for NFC
tagging.
The printed image may dier from the orginal
image due to the printing method (thermal transfer
printing).
y
Use the lastest App of LG Pocket Photo ( when
printing a photo, it optimizes the image.)
y
Check the quality of original image. (The
printed images may dier from the original
image.
y
Do not pull the paper out by force during
printing.
y
Do not open the upper cover during printing.
The product may be damaged.
y
If the device is vibrated or given shock, the
quality of the printed photo may be reduced.
y
The high resolution the image has, the high
quality the printed photo has. (The proper
resolution is more than 1280 x 2448 pixel.)
Note on the print
9
y
The printing quality may dier depending on
the original image (When too dark or dim).
Print the image after correcting it using Pocket
photo App.
y
Printing for Passport / VISA image may be
unsuitable as the case may be. Printing the
image taken in studio is recommended.
STEP 5 See “User manual” for details
1. Run LG Pocket Photo App on the smartphone.
2. Touch the setting menu [ ] / [ ] to see user
manual for details.
Symptom Cause / Solution
The paper
jammed before
printing.
Turn the device o and on
again then paper is ejected
automatically.
The printed
photo has
lines.
Open the Upper cover, arrange the
papers and insert them with Smart
Sheet locating at the bottom.
Then try printing again.
When using Smart Sheet, it should
be used with photo papers in the
same pouch.
Quality of
printed photo
is too low.
In case you magnify an image
using [ ] menu in the App, the
quality of the printed photo may
be reduced.
Turn o the device and insert
Smart Sheet locating at the
bottom of the papers. Then try
printing again.
Be sure the photo size is bigger
than the proper resolution.(1280 x
2448 pixels)
Above
solutions do
not work.
Press Reset hole with a pointed
thing like mechanical pencil to
initialize.
If you put this device with other objects into the
pouch, the device may be scratched. (Only for
PD239SP model)
11
Smart Sheet 应与其放置在同一袋中的照片
纸一同使用。
y
使用其他袋中的 Smart Sheet 可能会降
低质量。
y
若打印质量异常或较低,重复 3 - 5 次
打印 Smart Sheet。
y
从其他袋中更换新的 Smart Sheet 前,
请重复使用 Smart Sheet。
Smart Sheet 注意事项
3.照片纸
请使用本产品专用的 LG Pocket 照片纸。
如使用其他公司的照片纸,可能无法保证打印质量
或者会损坏 Pocket Photo.
y
切勿损坏或弯曲照片纸。
y
使用污染的照片纸可能会导致工作异常。
y
确保在有效期限内使用照片纸。
y
一旦拆开,一段时间后照片纸可能会开始
卷曲或变色。建议尽快使用它们。
照片纸注意事项
步骤 2 安装应用程序
在 Android market /App Store (iPhone) /
Windows Phone Store中搜索 “LG Pocket
Photo” 或 “趣拍得”。
步骤 3 蓝牙配对
1. 打开 Pocket Photo 设备。
2. 搜索要通过 Bluetooth 进行配对的设备。
ex. LG PD239 (XX :XX)
3. 发现设备时,触摸设备屏幕上 Pocket Photo
的型号名称。
中文
15
Smart Sheet 在使用時,應與同一袋中的相片
紙一同使用。
y
使用其他袋中的 Smart Sheet 可能會降低品
質。
y
若列印品質異常或較低,請重複 3-5 次列
印 Smart Sheet。
y
使用其他袋中新的 Smart Sheet 之前,請重
複使用 Smart Sheet。
Smart Sheet 備註
3. 照片紙
使用本產品的專用 LG Pocket 照片紙。
如使用其他公司的照片紙,將無法保障列印品質或
會損壞 Pocket Photo。
y
切勿損壞或彎曲照片紙。
y
使用污染的照片紙可能會導致功能發生問
題。
y
確保在有效日期內使用照片紙。
y
一旦拆封,一段時間後照片紙可能會開始
捲曲或變色。建議儘快使用它們。
照片紙備註
步驟 2 安裝應用程式
從 Play Store (Android Market) /App Store (iPhone) /
Windows Phone Store 中搜尋「LG Pocket Photo」。
步驟 3 藍牙配對
1. 開啟 Pocket Photo 裝置。
2. 搜尋要透過藍牙配對之裝置。
ex. LG PD239 (XX :XX)
3. 尋找到裝置後,按裝置螢幕上的 Pocket Photo
型號名稱。
中文(Taiwan)
42
USA / Canada
WARNING: This product contains chemicals known
to the State of California to cause cancer and birth
defects or other reproductive harm. Wash hands after
handling.
FCC Compliance Statement
This device complies with part 15 of the FCC rules.
Operation is subject to the following two conditions:
(1) This device may not cause harmful interference,
and
(2) This device must accept any interference received,
including interference that may cause undesired
operation.
NOTE: This equipment has been tested and found
to comply with the limits for a Class B digital device,
pursuant to Part 15 of the FCC Rules. These limits are
designed to provide reasonable protection against
harmful interference in a residential installation. This
equipment generates, uses, and can radiate radio
frequency energy and, if not installed and used in
accordance with the instructions, may cause harmful
interference to radio communications. However,
there is no guarantee that interference will not occur
in a particular installation.
If this equipment does cause harmful interference
to radio or television reception, which can be
determined by turning the equipment o and on, the
user is encouraged to try to correct the interference
by one or more of the following measures:
y
Reorient or relocate the receiving antenna.
y
Increase the separation between the equipment
and receiver.
y
Connect the equipment into an outlet on a
circuit dierent from that to which the receiver is
connected.
y
Consult the dealer or an experienced radio/TV
technician for help.
CAUTION: Any changes or modications not
expressly approved by the party responsible for
compliance could void the user’s authority to operate
this equipment.
Appendix
43
FCC WARNING : This equipment may generate or use
radio frequency energy. changes or modications
to this equipment may cause harmful interference
unless the modications are expressly approved in the
instruction manual. The user could lose the authority
to operate this equipment if an unauthorized change
or modication is made.
FCC RF Radiation Exposure Statement :
This equipment complies with FCC radiation exposure
limits set forth for an uncontrolled environment.
This equipment should be installed and operated
with minimum distance 20 cm between the radiator
and your body. End users must follow the specic
operating instructions for satisfying RF exposure
compliance. This transmitter must not be co-located
or operating in conjunction with any other antenna
or transmitter.
CAUTION: Regulations of the FCC and FAA prohibit
airborne operation of radio-frequency wireless
devices because their signals could interfere with
critical aircraft instruments.
Responsible Party:
LG Electronics USA, Inc.1000 Sylvan Avenue
Englewood Clis, NJ 07632
TEL. : +1-800-243-0000
Industry Canada Statement:
This device complies with RSS-210 of the Industry
Canada Rules.
Operation is subject to the following two conditions:
1) this device may not cause interference and
2) this device must accept any interference, including
interference that may cause undesired operation of
the device
This class B digital apparatus complies with Canadian
ICES-003
CAN ICES-3 (B)/NMB-3(B)
IC Radiation Exposure Statement:
This equipment complies with IC radiation exposure
limits set forth for an uncontrolled environment.
NOTE: THE MANUFACTURER IS NOT RESPONSIBLE
FOR ANY RADIO OR TV INTERFERENCE CAUSED
BY UNAUTHORIZED MODIFICATIONS TO THIS
EQUIPMENT. SUCH MODIFICATIONS COULD VOID THE
USER’S AUTHORITY TO OPERATE THE EQUIPMENT.
Appendix
45
UK
IMPORTANT SAFETY NOTICE
The cord grip for the plug tted to this product is
built into the existing power cord as supplied. If, for
any reason you need to shorten the cord.
DO NOT RE-USE THE PLUG.
A new plug must be used to ensure your continued
safety by securing the plug to the power cord in
accordance with Plug & Socket Regulations 1994.
POWER: This unit operates on a mains supply of 100-
240V~, 50/60Hz.
Wiring: This unit is supplied with a BS 1363 approved
main plug. When replacing the fuse, always use of the
same rating approved to BS 1362. Never use this plug
with the fuse cover omitted. To obtain a replacement
fuse cover contact your dealer. If the type of plug
supplied is not suitable for the mains sockets in
your home, then the plug should be removed and
a suitable type tted. Please refer to the wiring
instructions below:
Warning: A mains plug removed from the mains lead
of this unit must be destroyed. A mains plug with
bared wires is hazardous if inserted in a mains socket.
Do not connect either wire to the earth pin, marked
with the letter E or with the earth symbol
6
or
coloured green or green and yellow. If any other plug
is tted, use same rating of fuse in the plug.
Important: The wires in this mains lead are coloured
in accordance with the following codes:
- BLUE: NEUTRAL, BROWN: LIVE - As the colours
of the wires in the mains lead of this unit may not
correspond with the coloured marking identifying
the terminals in your plug, proceed as follows: The
wire which is coloured blue must be connected to
the terminal which is marked with the letter N or
coloured black. The wire which is coloured brown
must be connected to the terminal which is marked
with the letter L or coloured red.
Please see the separate enclosed warranty card
for details on the manufacturer warranty for this
product.
46
For further product details and customer
assistance please visit our web site
www.lg.com/uk
or call the LG customer Information Centre on:
UK: 0344 847 5454 IE: 01 686 9454
MODEL
NO.*
SERIAL NO.* DATE OF
PURCHASE.*
Hong Kong
LG Electronics 在此聲明,本產品符合指令 1999/5/
EC、2004/108/EC、2006/95/EC, 2009/125/EC 及
2011/65/EU 的必備要求及其他相關規定。
請聯絡以下地址以取得 DoC(符合標準聲明)
的副本。
歐洲標準中心:
LG Electronics Inc.
EU Representative, Krijgsman 1,
1186 DM Amstelveen, The Netherlands
y
請注意,中心並非客戶服務聯絡點。如需客戶
服務資訊,請參閱保養卡或聯絡產品的經銷商。
安全注意事項
本機的插頭握柄是專爲本産品所設計 , 且與附贈
的電源線結合為一體 , 若您因爲任何理由而需截
短此電源線時
請勿再使用該插頭
應使用全新的插頭以確保連續使用之安全性。請
依據 1994 年之插頭及插座規範的規定 , 將插頭確
實地與電源線結合。
47
India
Disposal of your old appliance
1. All electrical and electronic products
shall be disposed of separately
from the municipal waste stream
via designated collection facilities
appointed by the government or the
local authorities.
2. The correct disposal of your old appliance will help
prevent potential negative consequences for the
environment and human health.
3. To locate a nearest collection centre or call for pick-
up (limited area only) for disposal of this appliance,
please contact Toll Free No. 1800-180-9999 for details.
All collection centre and pick up facilities are done by
third parties with LG Electronics India Pvt. Ltd. Merely
as a facilitator. For more detailed information , please
visit : http://www.lge.com/in.
Disposal of waste batteries/accumulators
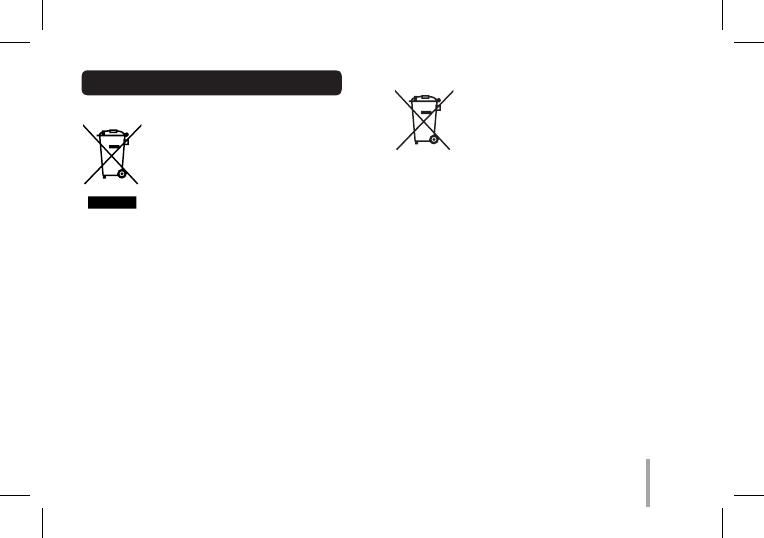
1. When this crossed-out wheeled
bin symbol is attached to batteries/
accumulators of your product it
means they are covered by European
Directive 2006/66/EC.
2. This symbol may be combined with chemical
symbols for mercury(Hg), cadmium(Cd) or lead(Pb) if
the battery contains more than 0.0005% of mercury,
0.002% of cadmium or 0.004% of lead.
3. All batteries/accumulators should be disposed
separately from the municipal waste stream via
designated collection facilities appointed by the
government or the local authorities.
4. The correct disposal of your old batteries/
accumulators will help to prevent potential negative
consequences for the environment, animal and
human health.
5. For more detailed information about disposal of
your old batteries/ accumulators, please contact your
city oce, waste disposal service or the shop where
you purchased the product.
48
India
Contact oce for compliance of this product:
LG Electronics India Pvt. Ltd.
Plot No. 51
Udhyog Vihar Surajpur Kasna Road
Greater Noida - 201306 (UP)
y
Please note that this is NOT a Customer Service contact point. For Customer Service Information, see
Warranty Card or contact the dealer that you purchased this product.
Japan
この装置は、 クラス B 情報技術装置です。 この装置は、 家庭環境で使用することを目的としていますが、
この装置がラジオやテレビジョン受信機に近接して使用されると、 受信障害を引き起こすことがあります。
取扱説明書に従って正しい取り扱いをしてください。 VCCI - B
Printed in China
  • Page 1 1
  • Page 2 2
  • Page 3 3
  • Page 4 4
  • Page 5 5
  • Page 6 6
  • Page 7 7
  • Page 8 8
  • Page 9 9
  • Page 10 10
  • Page 11 11
  • Page 12 12
  • Page 13 13
  • Page 14 14
  • Page 15 15
  • Page 16 16
  • Page 17 17
  • Page 18 18
  • Page 19 19
  • Page 20 20
  • Page 21 21
  • Page 22 22
  • Page 23 23
  • Page 24 24
  • Page 25 25
  • Page 26 26
  • Page 27 27
  • Page 28 28
  • Page 29 29
  • Page 30 30
  • Page 31 31
  • Page 32 32
  • Page 33 33
  • Page 34 34
  • Page 35 35
  • Page 36 36
  • Page 37 37
  • Page 38 38
  • Page 39 39
  • Page 40 40
  • Page 41 41
  • Page 42 42
  • Page 43 43
  • Page 44 44
  • Page 45 45
  • Page 46 46
  • Page 47 47
  • Page 48 48
  • Page 49 49
  • Page 50 50
  • Page 51 51
  • Page 52 52
  • Page 53 53
  • Page 54 54
  • Page 55 55
  • Page 56 56

LG PD239 User manual

Type
User manual

Ask a question and I''ll find the answer in the document

Finding information in a document is now easier with AI