Page is loading ...

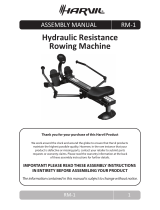
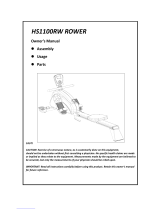
Rower
OWNER’S MANUAL
20JULY2010

2
Congratulations on
purchasing your
exercise equipment from
York Fitness.
You have chosen a high quality, safe and innovative
piece of equipment as your training partner and we
are certain it will keep you motivated on the way to
achieving your personal tness goals.
Please take the time to read this owner’s manual
as it will help you to get the most out of your new
exercise equipment.
For more information visit www.yorktness.com

3
contents
safety information 04
customer support 05
assembly instructions 06
operational instructions 12
fitness guide 14
warranty 17
exploded drawing 18
part list 19

4
safety information
Please read this instruction manual before you begin
assembly. Great care has been taken to design these
instructions and following them will help you with
quicker assembly and minimize the risk of injury.
It is important that you keep these instructions for
future reference.
This list is not exhaustive - You are responsible for
your own safety!
• Always assemble and operate the product on a level surface
• Always use the product on a level surface, ensure that the
product is stable before use.
• The safety level of this equipment can only be maintained only
if it is regularly examined for wear and tear.
• Replace defective components immediately, and/or keep the
equipment out of use until it is repaired.
• Use only the adjustment settings as described in the
instructions. Always use the correct adjustment pin/xing.
• Always check that any pins / xings are tight and secure before
use and / or after adjustment.
• Never leave any adjustment devices projecting from the
product.
• Always consult your doctor before undertaking any exercise
program.
• Always wear suitable clothing and footwear e.g. tracksuit /
shorts / training shoes
• Remove all personal jewelry before exercising.
• Ensure you warm-up well before using the equipment as this
will help to prevent muscle strain.
• After eating, allow 1-2 hours before exercising as this will help
to prevent muscle strain.
• Never use the equipment in any other manner other than the
ways explained in these instructions and/or any wall- chart
supplied.
• Injuries to health may result from incorrect or excessive
training.
• Parents and others in charge of children should be aware of
their responsibility, because the natural play instinct and the
fondness of experimenting of children can lead to situations
and behavior for which the training equipment is not intended
• If children are allowed to use the equipment, their mental
and physical development and above all their temperament
should be taken into account. They should be controlled and
instructed in the correct use of the equipment.
• The equipment is under no circumstances suitable as a
children’s toy.
• Children should not be allowed on, or around the equipment -
especially when it is not in use.
• This appliance is not intended for use by persons (including
children) with reduced physical, sensory or mental capabilities,
or lack of experience and knowledge, unless they have
been given supervision or instruction concerning use of the
appliance by a person responsible for their safety.
Maximum user weight: 115kg
Safety Standards
This equipment meets the requirements of the EU’s EMC and Low
Voltage directives (where applicable), EN957 1 & 7-CLASS HC / BS
EN 60335-1. Therefore the equipment carries the following marks:
Protect the environment by not disposing of this
product or batteries with household waste. Check
your local authority for recycling advice and
facilities.

5
customer supportcustomer support
Customer Support
Should you require any assistance regarding this product please
gather the following information and then contact us using the
details below:
• Serial No. - This can be found on the sticker below, located as
indicated.
• Original purchase date
• Place of purchase
• Information about the place and conditions of use
• Precise description of the issue / defect
IMPORTANT!! - Please retain your sales receipt, York Fitness
Customer Care may request proof of purchase to validate
eligibility for warranty service. Warranty cover starts from the
date shown on the proof of purchase.
Care & Maintenance
• Always place the equipment in a dry environment.
• Use a warm, damp cloth to keep the product clean.
• No wet cleaning of electrical components. Unplug before
any care and maintenance.
• The safety level of the equipment can be maintained
only if it is regularly examined for damage and wear. This
includes any ropes, pulleys, nuts, bolts, moving parts,
bushes, chains, wheels, bearings & connection points etc.
• Ensure that you inspect the product regularly - at least
once a week is recommended.
• Ensure that all xings are tight before use.
• Always replace damaged / worn components with
original parts from the manufacturer.
Contact Us
ENGLAND
The best way to contact us is via the website:
www.yorktness.com > Select “Customer Support”
York Barbell UK Ltd.
York Way, Daventry,
England, NN11 4YB
Tel: 0844 255 3112
England Warranty Registration
www.yorktness.com > Select “Customer Support”
AUSTRALIA
The best way to contact us is via the website:
www.yorktness.com.au > Select “Contact Us”
York Fitness Australia
1/2 Swaham Rd, Minto,
PO Box 5130, NSW 2566
Tel: 1800 730 149
Australia Warranty Registration
www.yorktness.com.au > Select “Warranty Registration”
Use only on a level surface
Not suitable for therapeutic purpose
MANUFACTURER: YORK BARBELL
CONTACT: www.yorktness.com
PRODUCT NAME: Y0RK NEXUS ROWER
SAFETY STANDARDS: EN957 1 & 7-CLASS HC
MAX USER WEIGHT: 115KG
SERIAL NO:
56012-XXXXXXXXXX
Product’s Name
Serial Number
This product label is an example only, it is not the real
product name and serial number of the item you
have bought.

6
assembly instructions
35
x 6
ROUND ALLEN HEAD BOLT
(M8 X 15L)
36
x 4
FLAT WASHER
(Ø28 X Ø8 X 2.0T)
80
x 2
COUNTERSUNK
ALLEN HEAD BOLT
(M8 X 15L)
83
x 3
ROUND ALLEND HEAD BOLT
(M10 X 100L)
86
x 1
HEX HEAD BOLT
(M8 X 15L)
87
x 5
SPRING WASHER
(M8)
98
x 3
NYLON LOCKNUT
(M10 X 10L)
102
x 2
FLAT ALLEN HEAD
SHOULDER BOLT
(M8 X 20L)
103
x 4
CURVED WASHER
(Ø10)
111
x 4
ROUND ALLEN
HEAD BOLT
(M8 X 25L)
Getting Started
Place all parts from the box in a cleared area and position them on the oor in front of you. Remove all packing materials from your area
and place them back into the box. Do not dispose of the packing materials until assembly is completed. Read each step carefully before
beginning. If you are missing a part, please contact our technical support.
After unpacking the unit, open the hardware bag and make sure that you have all the following items. Some hardware may be already
attached to the part.

7
102
102
87
87
83
103
103
70
71
98
x 2
87
x 2
103
x 4
98
x 2
83
x 2
35
x 2
87
91
87
35
3
x 2
STEP 1
STEP 2

8
assembly instructions
111
x 4
80
x 2
86
C
A
B
x 1
87
x 1
85
86
87
111
85
80
111
84
84
71
72
STEP 3
STEP 4

9
83
98
83
x 1
98
x 1
82
STEP 5
STEP 6

10
35
36
35
37
75
24
40
41
36
35
37
x 4
36
x 4
21
STEP 7
FINAL CHECK
assembly instructions
Your Rower is now assembled. Please make the following nal checks:
• Make sure all screws / bolts are tightened.
• Make sure the equipment is on a at, level surface.

11
Battery Replacement Instructions:
1. Open the battery compartment cover (Diagram 1).
2. Remove battery by pulling the battery in direction of
spring and lift opposite end upwards (Diagram 2).
3. Insert 2 AA batteries ensuring you match the polarity
markings (+ and -) on the batteries with the indicators in
the battery compartment. Push at end ( - ) against spring
and when clear push other end into holder.
4. Close the battery compartment.
Tips & Warnings
• Always change both batteries at the same time.
• Always use the same type of batteries.
• Never recharge Alkaline AA batteries.
• Do not try to heat, ignite, disassemble or throw AA
batteries into a re.
• Do not leave old batteries in the console, and remove
batteries from the console if you won’t be using it for a
long time.
*Picture may vary from actual model.
Protect the environment by not disposing of this
product or batteries with household waste. Check
your local authority for recycling advice and
facilities.
Diagram 1
Diagram 2

12
Using Your Exercise Monitor:
To provide ease of use, there is 3 buttons on your Exercise Monitor:
» SET - Setting increasing values of count distance, time and calories.
» RESET - To erase the data values to zero.
» MODE - To select the function which you want.
Your exercise monitor has 2 pages with one pieces LCD display screens.
When the signal input, the Exercise Monitor will display 2 pages in turn.
These are in order:
» PAGE 1 - STROKES per MINUTE, DISTANCE and TIMER.
» PAGE 2 - COUNTER SPEED and CALORIES.
Pressing and holding the RESET button when you are on each PAGE will
enable you to set to zero any previous gures remaining in each individual
function.
Either presses the MODE button or start to exercise and the Exercise Monitor
will begin to register the various functions.
Exercise Monitor Functions
Functions Description
Calories: Computer theoretical calorie burn
Counter: Total strokes
Distance: Exercise distance (KM)
Speed: Rowing speed (KM/H)
Strokes per Minute: Count up stroke rate
Timer: Count up (Minutes and seconds)
Monitor Function Specifications
Functions Description
Calories: 0.00 - 999.9 Kcal (Theoretical)
Counter: 0-9999 (Count up)
Distance: KM (Count up)
Speed: 0.00 - 99.9KM/H
Strokes per Minute: 0 - 999 (Count up)
Timer: 0.00 - 99.59 MINUTES (Count up)
operational instructions

13
To Fold the Air Rower for Storage:
Step 1 - Remove pin
Lift Rower Seat Track slightly with right hand and remove locking pin with your left hand.
* Refer to LOCKPIN INSERT LOCATION
Step 2 - Lift track
Hold seat in middle of track and lift upwards.
Holding track fully back, lower seat to rest.
* Refer to LOCKPIN INSERT LOCATION
Step 3 - Insert pin (IMPORTANT)
Insert pin into lower pin location.
STEP 3
STEP 2
STEP 1
1. LIFT
2. PULL
LOCKPIN IS INSERTED
IN THIS LOCATION
IN FOLDED POSITION

14
fitness guide
Exercising with Your Rower
Rowing is an extremely eective form of exercise. It strengthens the heart, improves circulation, as well as exercising all the major muscle
groups - back, waist, arms, shoulders, hips & legs.
ALWAYS CONSULT YOUR DOCTOR BEFORE UNDERTAKING A NEW EXERCISE REGIME.
IF YOU EXPERIENCE NAUSEA, DIZZINESS OR OTHER ABNORMAL SYMPTOMS DURING EXERCISE, STOP AT ONCE
AND CONSULT YOUR DOCTOR.
How to Row:
1. Take up the initial position leaning forward, knee bent and arms straight.
2. Push yourself backwards, straightening your back and legs at the same time.
3. Continue movement until you are leaning slightly backwards, bending return to Step 1 and repeat.
THIS PRODUCT IS COMPLIANT WITH EUROPEAN STANDARDS (EN957). THE USER MUST REMAIN AWARE THAT
IF THIS PRODUCT IS NOT USED CORRECTLY THE POTENTIAL FOR INJURY REMAINS. THERE ARE MANY MOVING
PARTS ON THIS PRODUCT, WHICH THE USER MUST BE AWARE OF. WHEN MOVING THE ROWER OR ADJUSTING
POSITION, THE USER SHOULD PAY PARTICULAR ATTENTION THE SEAT & RUNNER ASSEMBLY.
Please ensure that ngers are not placed inside of the runner assembly when moving the product.
When adjusting your exercise position and you need to steady yourself by holding onto the rower, ensure that it is the underside of
the seat upholstery that you are grasping.
Alternative Exercise - Leg Only Rowing:
This exercise will help tone and strengthen the muscles in your legs and back. With your back straight and arms outstretched, bend your
legs until the row arms are in the starting position. Use your legs to push your body back whilst keeping your arms and back straight, slowly
return to start position and repeat.
1. 2. 3.
1. 2. 3.

15
Conditioning Guidelines:
How you begin your exercise program depends on your physical condition. If you have been inactive for several years or are out of shape,
start slowly and increase your workout gradually. Increase your workout intensity gradually by monitoring your heart rate while you
exercise.
Remember to follow these essentials:
• Have your doctor review your training and diet programs.
• Begin your training program slowly with realistic goals that have been set by you and your physician.
• Warm up before you exercise and cool down after you work out.
• Take your pulse periodically during your workout and strive to stay within a range of 60% (lower intensity) or 90% (higher intensity) of
your maximum heart rate zone. Start at the lower intensity and build up to higher intensity as you become more aerobically t.
• If you feel dizzy or light-headed you should slow down or stop exercising.
Initially you may only be able to exercise within your target zone for a few minutes; however, your aerobic capacity will improve over the
next six to eight weeks. It is important to pace yourself while you exercise so you don’t tire too quickly.
To determine if you are working out at the correct intensity, use a heart rate monitor or use the table below. For eective aerobic exercise,
your heart rate should be maintained at a level between 60% and 90% of your maximum heart rate. If just starting an exercising program,
work out at the low end of your target heart rate zone. As your aerobic capacity improves, gradually increase the intensity of your workout
by increasing your heart rate.
Measure your heart rate periodically during your workout by stopping the exercise but continuingly to move your legs or walk around. Place
two or three ngers on your wrist and take a six second heartbeat count. Multiply the results by ten to nd your heart rate. For example, if
your six second heartbeat count is 14, your heart rate is 140 beats per minute. A six second count is used because your heart rate will drop
rapidly when you stop exercising. Adjust the intensity of your exercise until your heart rate is at the proper level.
Target Heart Rate Zone Estimated by Age*
AGE TARGET HEART RATE ZONE
(55% - 90% OF MAXIMUM HEART RATE)
AVERAGE MAXIMUM
HEART RATE 100%
20 YEARS 110-180 BEATS PER MINUTE 200 BEATS PER MINUTE
25 YEARS 107-175 BEATS PER MINUTE 195 BEATS PER MINUTE
30 YEARS 105-171 BEATS PER MINUTE 190 BEATS PER MINUTE
35 YEARS 102-166 BEATS PER MINUTE 185 BEATS PER MINUTE
40 YEARS 99-162 BEATS PER MINUTE 180 BEATS PER MINUTE
45 YEARS 97-157 BEATS PER MINUTE 175 BEATS PER MINUTE
50 YEARS 94-153 BEATS PER MINUTE 170 BEATS PER MINUTE
55 YEARS 91-148 BEATS PER MINUTE 165 BEATS PER MINUTE
60 YEARS 88-144 BEATS PER MINUTE 160 BEATS PER MINUTE
65 YEARS 85-139 BEATS PER MINUTE 155 BEATS PER MINUTE
70 YEARS 83-135 BEATS PER MINUTE 150 BEATS PER MINUTE
*For cardiorespiratory training benets, the American College of Sports Medicine recommends working out within a heart rate range of 55%
to 90% of maximum heart rate. To predict the maximum heart rate, the following formula was used:
220 - Age = predicted maximum heart rate

16
Suggested Stretches
The correct form for several basic stretches is shown at the
right. Move slowly as you stretch—never bounce.
1. Hamstring Stretch
Sit with one leg extended. Bring the sole of the opposite foot toward you and
rest it against the inner thigh of your extended leg. Reach toward your toes
as far as possible. Hold for 15 counts, then relax. Repeat 3 times for each leg.
Stretches: Hamstrings, lower back and groin.
2. Calf/Achilles Stretch
With one leg in front of the other, reach forward and place your hands against a
wall. Keep your back leg straight and your back foot at on the oor. Bend your
front leg, lean forward and move your hips toward the wall. Hold for 15 counts,
then relax. Repeat 3 times for each leg. To cause further stretching of the achilles
tendons, bend your back leg as well. Stretches: Calves, achilles tendons and
ankles.
3. Quadriceps Stretch
With one hand against a wall for balance, reach back and grasp one foot with
your other hand. Bring your heel as close to your buttocks as possible. Hold for
15 counts, then relax. Repeat 3 times for each leg. Stretches: Quadriceps and hip
muscles.
4. Inner Thigh Stretch
Sit with the soles of your feet together and your knees outward. Pull your feet
toward your groin area as far as possible. Hold for 15 counts, then relax. Repeat
3 times. Stretches: Quadriceps and hip muscles.
fitness guide

17
This product is supplied with a standard warranty as follows:
• Lifetime frame
• 12 months other parts
• 12 months labour
This product is warranted for use in a home, personal, family or household environment Please Note: Warranty details may vary from one
market area to another.
Warranty Terms
York Fitness warrants that the Product you have purchased from an authorized York Fitness reseller is free from defects in materials and
workmanship. The Warranty is valid subject to normal and reasonable use in the environment as described above, and correct assembly of
the product during the warranty period. The warranty period extends to the original purchaser only. It is not transferable to anyone who
subsequently purchases the Product from you.
The warranty excludes normal wear and tear on parts. Your sales receipt, showing the date of purchase of the product, is your proof of the
date of purchase.
This warranty becomes valid only if the Product is assembled / installed according to the instructions / directions included with the product.
This warranty does not extend to any product that has been damaged or rendered defective: (a) as a result of accident, misuse, abuse or lack
of reasonable care; (b) by the use of parts not manufactured by York Fitness or sold by York Fitness; (c) by modication of the product; (d) as
a result of service by anyone else other than York Fitness or an authorized York Fitness warranty service provider.
During the warranty period, York Fitness will at no additional charge provide replacement part(s) or repair the product (at York Fitness’s
option) if it becomes defective, malfunctions or otherwise fails to conform with this warranty under normal, non-commercial, personal,
family or household use. In repairing the product, York Fitness may replace defective parts or at the option of York Fitness, use serviceable
used parts that are equivalent to new parts in performance. All exchanged parts and products replaced under this warranty will become the
property of York Fitness. York Fitness reserves the right to change manufacturers of any part to cover any existing warranty.
If the product must be returned, you must return the Product or defective part to York Fitness in its original container (or equivalent) with
Proof of Purchase. Any evidence of alteration, erasing or forgery of proof of purchase documents will be cause to void this warranty. You
must prepay any shipping charges and you are responsible for insuring any product or part that is returned. Should any product submitted
for warranty service be found to be ineligible, an estimate of repair cost will be furnished and the repair will be made if requested, upon
York Fitness’s receipt of payment or acceptable arrangement of payment. Under no circumstances will returns be accepted without return
authorization by our Customer Service department.
To obtain warranty service you must provide the following information:
Name of Product, Product Code, Batch No, Date Purchased, and Nature of fault or part number required.
Neither dealer of this product nor any retail establishment selling this product has any authority to make any warranties or to promise
remedies in addition to, or inconsistent with, those stated above. This warranty does not aect your statutory rights.
Please note that warranty terms may vary from one market area to another.
warranty

18
exploded drawing

19
KEY PART NO. DESCRIPTION QTY
1 56012-1
FRONT POST
1
2 56012-2
MAIN FRAME
1
3 56012-3
PEDAL SUPPORT
1
4 56012-4
ROWER SEAT TRACK
1
5 56012-5
REAR STABILIZER
1
6 56012-6
COMPUTER CONSOLE FIXING BRACKET
1
7 56012-7
SEAT CARRIAGE BRACKET
1
8 56012-8
SEAT HANDLEBAR
1
9 56012-9
MOVING ROLLER A (Ø33 X 40L)
2
10 56012-10
NYLON LOCKNUT (M8)
4
11 56012-11
PHILLIPS HEAD SELF TAPPING SCREW (M5 X 15L)
18
12 56012-12
FRONT COVER
1
13 56012-13
ROUND ALLEN HEAD BOLT (M10 X 75L)
1
14 56012-14
FLAT WASHER (Ø32 X Ø10 X 1.5T)
2
15 56012-15
BEARING (6000Z)
2
16 56012-16
MOVING ROLLER B (Ø58 X 42L)
1
17 56012-17
NYLON CAP NUT (M6)
1
18 56012-18
NYLON LOCKNUT (M10 X 7H)
4
19 56012-19
CONSOLE FIXING PLATE
2
20 56012-20
PHILLIPS HEAD MACHINE SCREW (M6 X 68L)
1
21 56012-21
PHILLIPS HEAD MACHINE SCREW (M5 X 12L)
5
22 56012-22
FLAT WASHER (Ø11 X Ø5 X 1.0T)
6
23 56012-23
FLAT WASHER (Ø16 X Ø6 X 1.0T)
4
24 56012-24
COMPUTER CONSOLE
1
25 56012-25
BEARING (698Z)
4
26 56012-26
HANDLEBAR HOLDER END CAP
2
27 56012-27
HANDLEBAR
1
28 56012-28
HANDLEBAR FOAM GRIPS
2
29 56012-29
ROUND INTERNAL END CAP (Ø35 X Ø22.5)
2
30 56012-30
BRACKET
1
31 56012-31
FLAT WASHER (Ø28.3 X Ø25.5 X 0.4T)
2
32 56012-32
FLAT WASHER (Ø22 X Ø17 X 0.5T)
2
33 56012-33
REAR STABILIZER TRACTION PAD
1
34 56012-34
FRONT STABILIZER END CAP
1P
35 56012-35
ROUND ALLEN HEAD BOLT (M8 X 15L)
6
36 56012-36
FLAT WASHER (Ø28 X Ø8 X 2.0T)
4
37 56012-37
FOOT PEDAL ASSEMBLY
1P
38 56012-38
PEDAL PIVOT ROD BUSHING A (Ø22 X Ø16 X 18L)
2
39 56012-39
PEDAL PIVOT ROD BUSHING B (Ø22 X Ø16 X 18L)
2
40 56012-40
PEDAL PIVOT ROD A (Ø16 X 392L) - SILVER
1
41 56012-41
PEDAL PIVOT ROD B (Ø16 X 389L) - BLACK
1
42 56012-42
FLAT WASHER (Ø25.5 X Ø6 X 1.5T)
1
43 56012-43
BELT HOLDER (Ø31 X Ø16 X 24H)
1
44 56012-44
C CLIP (Ø17)
1
45 56012-45
BEARING (6903Z)
2
46 56012-46
RUBBER BUSHING (Ø36X 10H)
2
47 56012-47
PIVOT SHAFT (Ø17 X 177L)
1
48 56012-48
C CLIP (Ø16)
1
49 56012-49
TYPE A ROUND HEAD KNOB (5 X 5 X 10)
1
50 56012-50
ONE WAY BEARING (HG1616)
1
51 56012-51
FAN
1
52 56012-52
BEARING (R8Z)
2
53 56012-53
METAL SLEEVE (Ø28 X Ø22 X 20H)
1
54 56012-54
RECTANGULAR END CAP (30 X 60)
2
55 56012-55
C CLIP (Ø28.5)
1
56 56012-56
FLAT WASHER (Ø12.9 X Ø15.5 X 0.4T)
5
57 56012-57
C CLIP (Ø12.7)
1
58 56012-58
PHILLIPS HEAD SELF TAPPING SCREW (M4 X 25L)
6
59 56012-59
FAN FRONT COVER
1
60 56012-60
FAN BOTTOM STRIP
1
61 56012-61
FIXING BRACKET
1
KEY PART NO. DESCRIPTION QTY
62 56012-62
METAL SLEEVE (Ø16 X Ø10.2 X Ø15.5H)
1
63 56012-63
CARRIAGE BOLT (M8 X 57L)
2
64 56012-64
CHAIN ROLLER
1
65 56012-65
METAL SLEEVE (Ø13 X Ø8.2 X 10H)
1
66 56012-66
FLAT ALLEN HEAD BOLT (Ø8 X 30L)
1
67 56012-67
SPRING (Ø15 X Ø1.5 X 55L)
1
68 56012-68
METAL SLEEVE (Ø12 X Ø10.2 X 26H)
1
69 56012-69
METAL SLEEVE (Ø10.5 X Ø8.2 X 28H)
2
70 56012-70
SENSOR WIRE A
1
71 56012-71
SENSOR WIRE B
1
72 56012-72
SPLIT END SENSOR WIRE A
1
73 56012-73
BELT (240J4)
1
74 56012-74
SNUB BUSHING (Ø12.5)
4
75 56012-75
SENSOR WIRE C
1
76 56012-76
FLAT WASHER (Ø10.5 X Ø8.2 X 1.5T)
4
77 56012-77
FRONT PEDAL MOVING ROLLER
2
78 56012-78
PIVOT ROD
2
79 56012-79
ROUND ALLEN HEAD BOLT (M8 X 35L)
1
80 56012-80
COUNTERSUNK ALLEN HEAD BOLT (M8 X15L)
2
81 56012-81
REAR STABILIZER END CAP
1
82 56012-82
SPHERE HEAD LOCKING PIN
1
83 56012-83
ROUND ALLEN HEAD BOLT (M10 X 100L)
3
84 56012-84
RECTANGULAR END CAP (40 X 80)
2
85 56012-85
BUMPER (25 X 25 X 45)
2
86 56012-86
HEX HEAD BOLT (M8 X 15L)
1
87 56012-87
SPRING WASHER (M8)
5
88 56012-88
ROWER SEAT
1
89 56012-89
PHILLIPS HEAD MACHINE SCREW (M6 X 15L)
6
90 56012-90
ROUND ALLEN HEAD BOLT (M10 X 105)
3
91 56012-91
HAND WHEEL KNOB (M8 X 1.25P X 15L)
1
92 56012-92
FLAT WASHER (Ø35.5 X Ø24 X 0.4T)
2
93 56012-93
METAL SLEEVE (Ø16 X 10.2 X 6H)
8
94 56012-94
SEAT CARRIAGE ROLLER (Ø45 X Ø36 X 13H)
6
95 56012-95
METAL SLEEVE (Ø12 X Ø10.2 X 65H)
2
96 56012-96
FAN BACK COVER
1
97 56012-97
METAL SLEEVE POST
1
98 56012-98
NYLON LOCKNUT (M10 X 10H)
3
99 56012-99
SPLIT END SENSOR WIRE B
1
100 56012-100
ROUND HEAD SELF TAPPING SCREW (M5 X 12L)
2
101 56012-101
MOTOR ASSEMBLY
1
102 56012-102
FLAT ALLEN HEAD SHOULDER BOLT (M8 X 20L)
2
103 56012-103
CURVE WASHER (Ø10)
4
104 56012-104
MAGNET (Ø15 X 6.5H)
1
105 56012-105
MAGNET (Ø12.5 X 8H)
1
106 56012-106
TPR TRACTION PAD
2
107 56012-107
COUNTERSUNK PHILLIPS HEAD SCREW (M5 X 10L)
1
108 56012-108
WIRE CLIP
1
109 56012-109
NYLOC CAP NUT (M5)
1
110 56012-110
ROUND SELF TAPING SCREW (M4 X 15L)
4
111 56012-111
ROUND ALLEN HEAD BOLT (M8 X 25L)
4
112 56012-112
ELASTIC BELT
2
113 56012-113
HANDLEBAR SLEEVE (Ø32 X Ø26.5 X 26L)
1
114 56012-114
BRACKET SLEEVE COVER (Ø12 X 7.0T X 55L)
2
115 56012-115 BRACKET SLEEVE COVER (Ø12 X 7.0T X 30L) 1
116 56012-116
BRACKET SLEEVE COVER (Ø12 X 7.0T X 10L)
1
117 56012-117
WRENCH (13, 16)
1
118 56012-118
ALLEN KEY (M5)
1
119 56012-119
ALLEN KEY (M6)
1
120 56012-120
ALLEN KEY (M6)
1
121 56012-121
FIXINGS BLISTER PACK
1
part list

/