Epson 83+ User manual

Category
Print & Scan
Type
User manual
Printer Basics
Printed on recycled paper
EPSON Stylus Color
880/880i/8
3
®
ii
Copyright Notice
All rights reserved. No part of this publication may be reproduced, stored in a retrieval system, or transmitted in
any form or by any means, electronic, mechanical, photocopying, recording, or otherwise, without the prior
written permission of SEIKO EPSON CORPORATION. The information contained herein is designed only for
use with this EPSON printer. EPSON is not responsible for any use of this information as applied to other
printers.
Neither SEIKO EPSON CORPORATION nor its affiliates shall be liable to the purchaser of this product or third
parties for damages, losses, costs, or expenses incurred by purchaser or third parties as a result of: accident, misuse,
or abuse of this product or unauthorized modifications, repairs, or alterations to this product, or (excluding the
U.S.) failure to strictly comply with SEIKO EPSON CORPORATION’s operating and maintenance instructions.
SEIKO EPSON CORPORATION shall not be liable for any damages or problems arising from the use of any
options or any consumable products other than those designated as Original EPSON Products or EPSON
Approved Products by SEIKO EPSON CORPORATION.
Trademarks
EPSON, EPSON Stylus, Micro Piezo, and EPSON Photo Stickers are registered trademarks of SEIKO EPSON
CORPORATION.
PhotoEnhance, EPSON Software, and EPSON Store are trademarks of Epson America, Inc.
Fix-it Flix and Print Lab are service marks of Epson America, Inc.
General Notice: Other product names used herein are for identification purposes only and may be trademarks of
their respective owners. EPSON disclaims any and all rights in those marks.
The E
NERGY
S
TAR
emblem does not represent EPA endorsement of any product or service.
CPD-10637R1
Copyright © 2000 by Epson America, Inc. 11/00
iii
Contents
WELCOME! 1
About Your Documentation 1
Warnings, Cautions, Notes, and Tips 1
Viewing Your Electronic Printer Manual 2
Watching Printer Movies 4
PRINTING FROM START TO FINISH 5
Printing with Windows 5
Loading Paper 5
Opening the Printer Software 6
Selecting Printer Software Settings 7
Controlling Printing 8
Printing on a Macintosh 9
Loading Paper 9
Opening the Printer Software 10
Selecting Printer Software Settings 11
Controlling Printing 12
Using Advanced Settings 13
Enhancing Photos 13
Using Custom Project Types 14
Using Advanced Custom Settings 15
Printing on Envelopes 16
Double-Sided Printing 17
Using Special Papers 18
EPSON Matte Paper - Heavyweight 19
EPSON Photo Paper 19
Choosing the Correct Media Type Setting 20
MAINTAINING YOUR PRINTER 21
Cleaning the Print Head 21
Examining the Nozzle Check Pattern 22
iv
Replacing an Ink Cartridge 23
Ink Cartridge Precautions 23
Removing and Installing Ink Cartridges 24
Replacing an Outdated Ink Cartridge 26
Aligning the Print Head 28
Cleaning the Printer 29
Transporting the Printer 30
PROBLEM SOLVING 31
Identifying Printer Parts 31
Diagnosing Printer Problems 32
Checking the Control Panel Lights 32
Running a Printer Check 33
Problems and Solutions 34
Problems Setting Up the Printer or Installing Software 34
Problems with Printing 35
Problems Getting Good Print Quality 36
Problems with Paper Feeding 38
Solving Miscellaneous Printout Problems 39
Uninstalling Printer Software 40
Where To Get Help 41
EPSON Technical Support 41
Creative Software Technical Support 42
REQUIREMENTS AND NOTICES 43
Windows System Requirements 43
Macintosh System Requirements 44
ENERGY STAR Compliance 44
Important Safety Instructions 44
Ink Cartridge Safety Instructions 45
FCC Compliance Statement 46
Declaration of Conformity 47
Warranty 48
INDEX 49
1
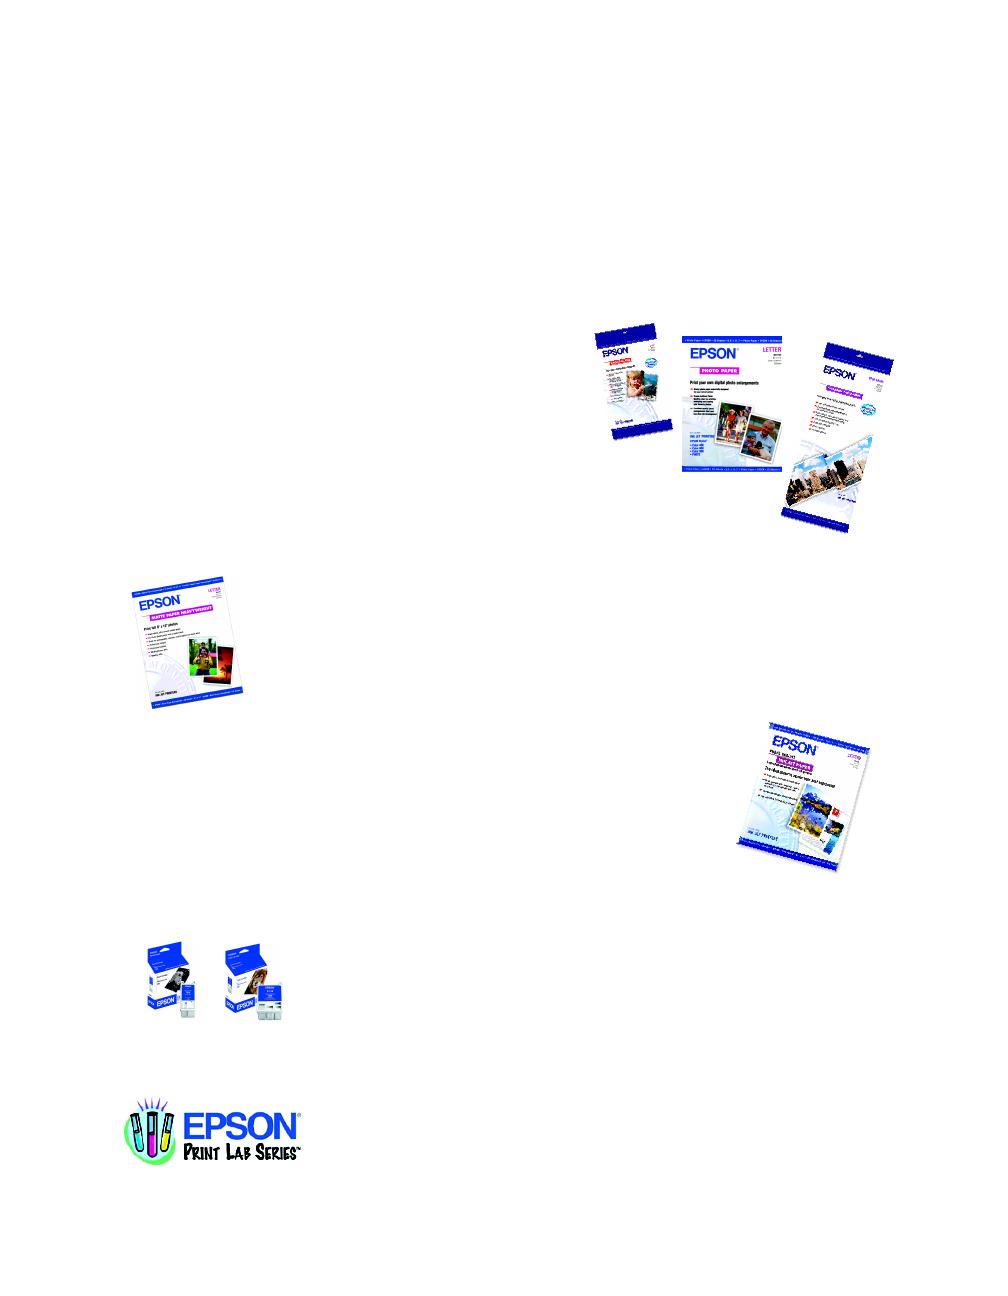
EPSON Ink Jet Papers and Ink Cartridges
Use EPSON paper and inks to get the same photo quality results that have earned EPSON’s printers all
of their awards! EPSON papers are specially coated to work with EPSON’s quick drying inks. You’ll
notice that when prints come out of your printer, you can immediately handle them. There is no
drying time, no smearing or smudging, and your image is crisp and smooth. Here are the inks for your
printer and just a few of EPSON’s papers:
Photo Paper and Panoramic Photo Paper
Photo lab quality, heavier weight glossy paper available in a
variety of sizes. Perfect for color photo keepsakes of
snapshots, framed art, banners, and panoramics.
Matte Paper - Heavyweight
Heavyweight, bright white, ultra smooth coated paper with matte finish. Perfect
for photographs, signs, and crafts.
Photo Quality Ink Jet Paper
Bright white, with a smooth matte finish to create your best impression.
Perfect for presentations, newsletters, color reproductions, and all your photo
and craft projects.
EPSON Ink Cartridges
For best results, always use genuine EPSON ink cartridges.
Black T019201 (U.S.), or T019311 (Canada)
Color T020201 (U.S.), or T020311 (Canada)
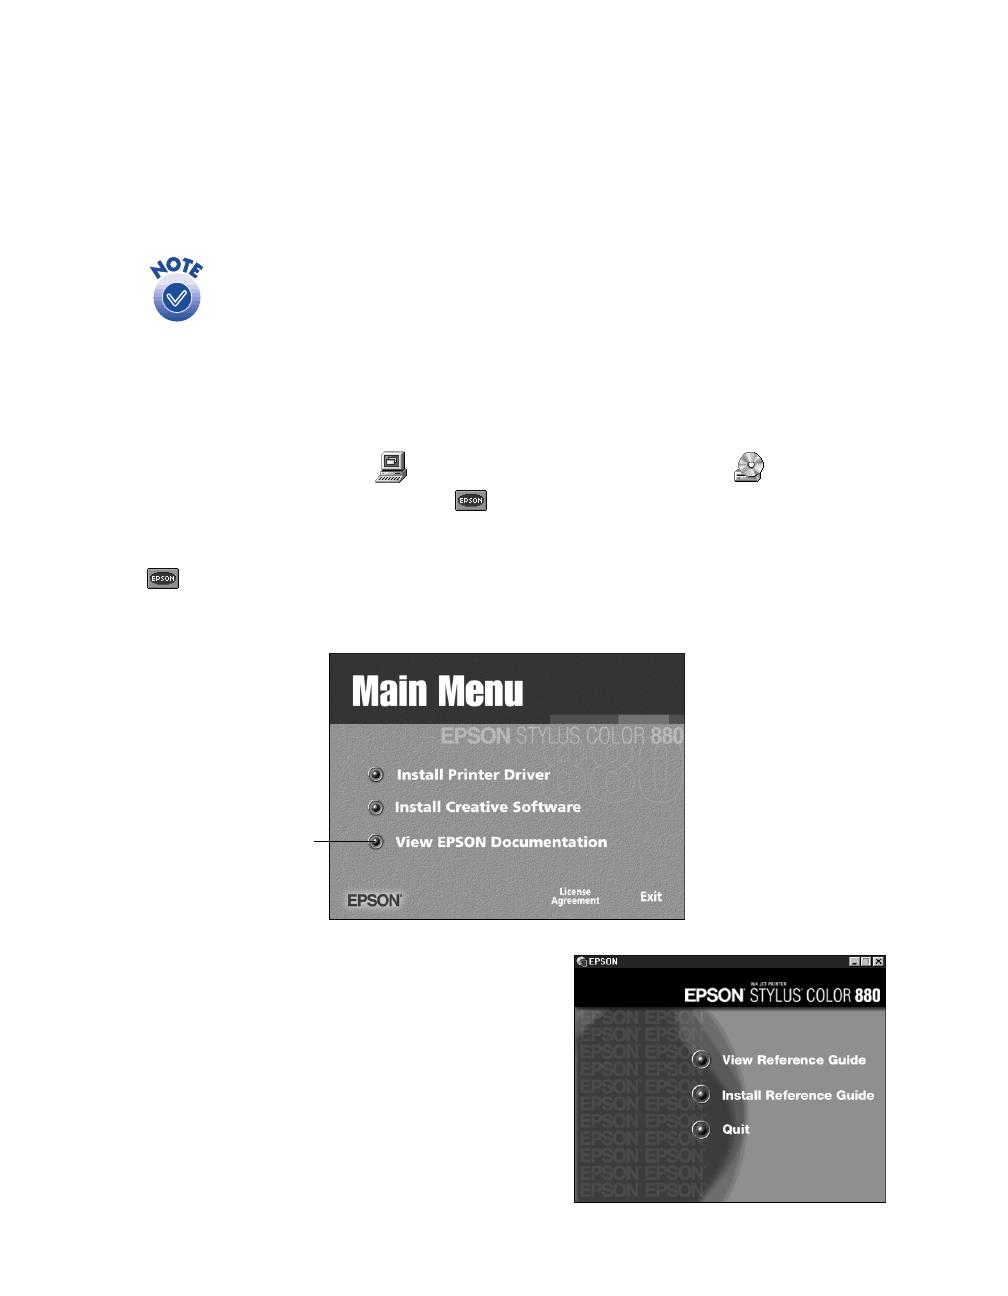
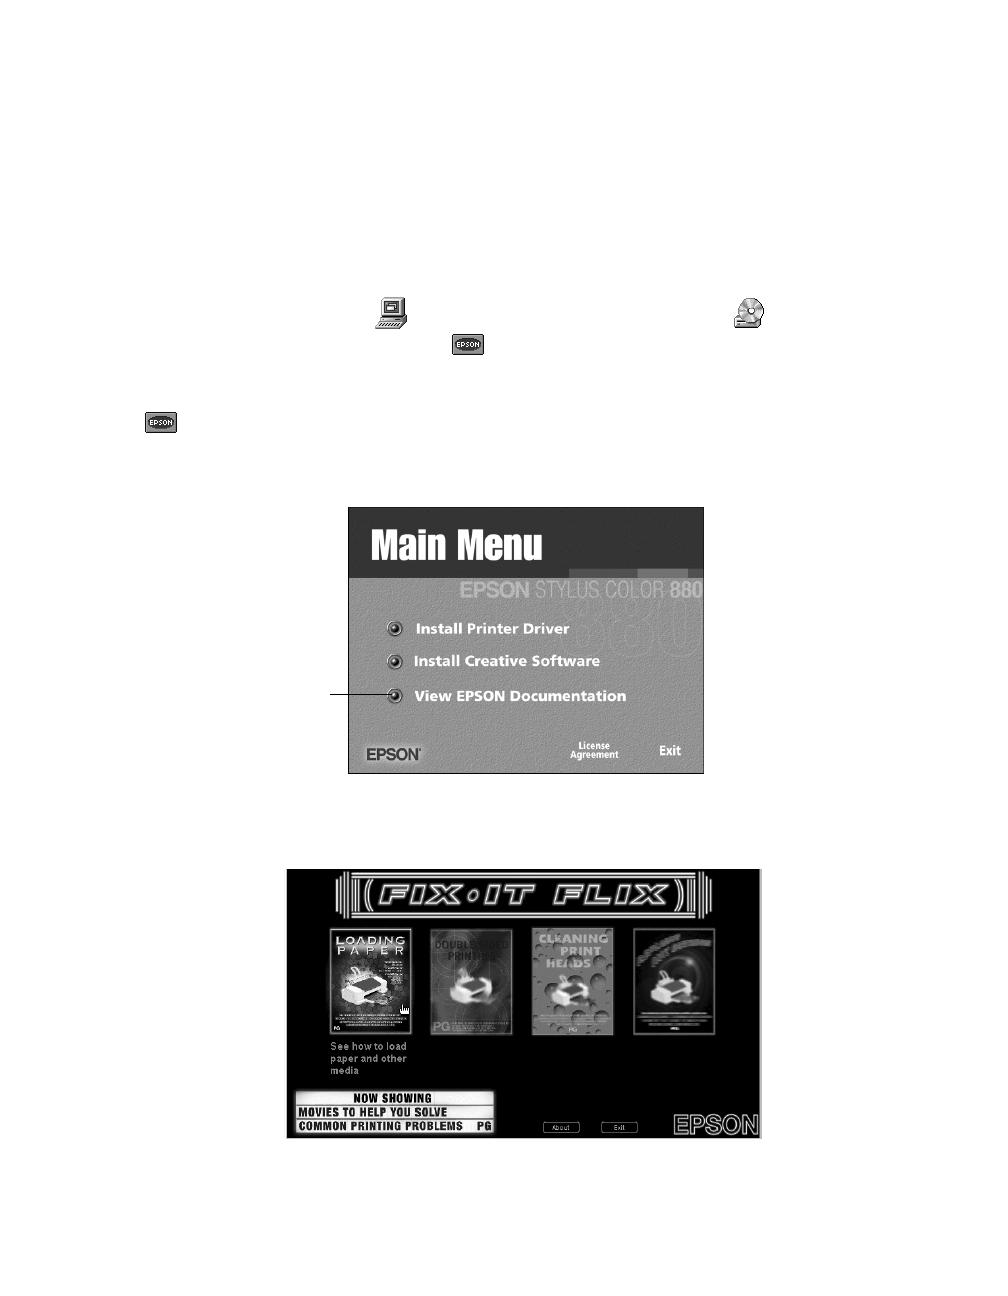
For more information on other EPSON products and fun project ideas,
look for the EPSON Print Lab
SM
Series at www.epson.com.
See the inside back cover for a list of EPSON papers and ink cartridges, and ordering information.
1
Welcome!
Your EPSON Stylus
®
Color 880, 880i, or 8
3
printer is the ideal output device for
small office or home printing. With resolutions of up to 2880 by 720 dpi, you can
print anything from reports and resumes to photos and newsletters with great results.
The EPSON Stylus Color 880i and EPSON Stylus Color 8
3
printers are
functionally identical to the EPSON Stylus Color 880 printer. Therefore,
this guide refers to the printer as the EPSON Stylus Color 880.
About Your Documentation
To set up your printer and install its software, see the Start Here poster. This book
contains system requirements, important safety information, and instructions on:
printing with Windows
®
or on a Macintosh
®
maintaining the printer
solving basic problems
viewing your electronic printer manual and printer movies
To learn detailed information about using your printer and printer software, see your
electronic Reference Guide. Instructions on viewing your Reference Guide are on page 2.
Warnings, Cautions, Notes, and Tips
Please follow these guidelines:
Warnings must be followed carefully to avoid bodily injury.
Cautions must be observed to avoid damage to your equipment.
Notes contain important information about your printer.
Tips contain additional hints for better printing.
2
Viewing Your Electronic Printer Manual
Your printer software CD-ROM includes an electronic Reference Guide for your
printer. The manual is in HTML format, so you need a browser—such as Microsoft
®
Internet Explorer 3.0 or later or Netscape Navigator
®
3.0 or later—to view it. If you
are using a different browser, the pages may not display correctly.
A browser is not included on the printer software CD-ROM.
You can view your electronic Reference Guide from the CD-ROM or copy it to your
hard drive and view it from there. Follow these steps:
1. Insert your printer software CD-ROM.
2. Windows: Double-click
My Computer
, double-click your CD-ROM
drive icon, then double-click the
EPSON
icon.
Macintosh: Double-click the
EPSON
CD-ROM icon, then double-click the
EPSON
icon.
The Main Menu appears:
3. Click
View Electronic Documentation
.
The main screen for your printer appears:
4. You can either view the manual from the
CD-ROM (
View Reference Guide
) or
copy the manual to your hard drive (
Install
Reference Guide
) and view it from there.
For details on viewing the manual, see
the next section.
Click here
3
If you copied the manual to your hard drive, you can access it at any time, as follows:
Windows: Select Start, Programs, EPSON, and double-click ESC880 Guide.
Macintosh: Open the EPSON Stylus Color 880 folder and double-click View
Reference Guide
.
When you first open the Reference Guide, you see this screen:
Click a topic on the left to expand the table of contents.
After expanding the table of contents, you can click on the topic you want to view.
If there’s a right arrow , click it to view subtopics, then click on a topic to go to it.
Click the down arrow to close a subtopic list.
If you see an icon in place of a graphic when viewing your
Reference
Guide
in Netscape Navigator, click the Reload button to load the
graphic.
Click here to
expand the
table of
contents
Closed list,
click to
expand
Click to go
to topic
4
Watching Printer Movies
Need help loading envelopes, replacing ink cartridges, or printing on both sides of the
paper? Your printer software CD-ROM includes helpful Fix-it Flix
SM
movies that
explain these and other common tasks.
Follow these steps to watch your printer movies:
1. Insert your printer software CD-ROM.
2. Windows: Double-click My Computer, double-click your CD-ROM
drive icon, then double-click the EPSON icon.
Macintosh: Double-click the EPSON CD-ROM icon, then double-click the
EPSON icon.
The Main Menu appears:
3. Click View EPSON Documentation, then click Watch Printer Movies. The
main Fix-it Flix screen appears:
4. Click the poster for the movie you want to see. If necessary, select an option on
the next screen. The movie starts playing.
Click here
5
Printing from Start to Finish
Here’s what to do to print a basic document—such as a newsletter or photograph—
from loading the paper to selecting print settings to controlling the print job. Follow
the instructions here for:
printing with Windows (below)
printing on a Macintosh (on page 9)
If you’re already familiar with ink jet printing, you can skip ahead to these topics:
using advanced settings (on page 13)
printing on envelopes (on page 16)
double-sided printing (on page 17)
using special papers (on page 18)
selecting the correct media type (on page 20)
Printing with Windows
This section describes the basic steps for printing with Windows.
(To print on a Macintosh, see page 9.)
Loading Paper
Make sure your printer and computer
are turned on.
Place your paper against the right edge
guide and slide the left edge guide
against the paper.
Load paper only
up to this arrow
Slide paper
against the
right edge
guide
6
Follow these guidelines when loading paper:
Load the printable side face up. It’s usually whiter or brighter than the other side.
Load letterhead or preprinted paper into the printer top edge first.
Don’t load paper above the arrow on the left edge guide.
If you’re printing on envelopes, see page 16 for loading instructions.
Opening the Printer Software
After you open your application program and create your document, you’re ready to
select your printer software settings.
From the File menu, click
Print
. You see your application’s Print dialog box (your
dialog box may look slightly different):
Make the following selections on the Print dialog box:
Make sure your
EPSON Stylus COLOR 880
is selected.
If the Print dialog box contains a
Properties
button, click it. (If you see a Setup,
Printer, or Options button, click it. Then click
Properties
on the next screen.)
If you click the print icon on your application’s tool bar instead of
selecting Print from the File menu, you may not get the option to
change the printer software settings before printing.
Click here to
open your printer
software
Select your printer here
7
Selecting Printer Software Settings
Once you click Properties, you see your printer software Properties dialog box.
The most important thing to remember is to set the correct Media Type for the paper
you’re using. The Media Type setting affects the other options you can choose. If
necessary, click the Main tab to display the settings shown below:
Make the following settings on the Properties dialog box:
Choose the Media Type you’re printing on (click
the arrow button to display the list). If you’re not
sure which setting to select, see page 20.
Set the Ink option to
Color
to print a color
document. To print a black text document, click
Black
.
Set the Mode option to
Automatic
. This lets the
printer software determine the best settings for your print job. It’s the easiest way
to get good printing results on all types of paper.
Set the slider in the Mode box to
Quality
or
Speed
. This lets you choose between
a higher resolution or faster printing (or an in-between setting) for the paper
you’re using. (The slider is not available when certain media types are selected.)
When you’ve selected your settings, click OK to return to your application’s Print
dialog box.
Select faster or higher-quality
printing, or in-between
Select the type of paper you loaded
Select Automatic mode
Select the Ink color
Click OK
8
For more information about printer settings, click the Help button. Or
you can right-click any item on the screen and then click What’s This?.
Selecting the Settings You Use Most Often
The printer settings you make apply only to the application you’re currently using. If
you usually print one type of document in different applications—for example,
double-sided, letter-sized documents with black ink—you can change the default
printer settings for all your programs. You do this using the Windows Printer utility.
1. Click
Start
, point to
Settings
, and then select
Printers
.
2. Right-click the
EPSON Stylus COLOR 880
icon.
3. Select
Properties
in Windows 98 or Windows 95,
Document Defaults
in
Windows NT, or
Printing Preferences
in Windows 2000. Then click the
Main
tab.
4. Select the default settings you want to use for all your applications. Click
OK
when you’re finished.
Remember that you can always change the settings in your application when you want
to print different types of documents.
Controlling Printing
At the Print dialog box, click
OK
(or
Print
, depending on your application) to start
printing.
Click OK to start
printing
9
After a moment, the Progress Meter appears and shows the progress of your print job.
You can use the buttons to cancel, pause, or restart printing. You can also see how
much ink you have left.
For advanced settings and more information on printing—for example, previewing
your printout, changing the paper size, or adding a watermark—see your electronic
Reference Guide (described on page 2).
Printing on a Macintosh
This section describes the basic steps for printing on a Macintosh.
(To print with Windows, see page 5.)
Loading Paper
Make sure your printer and
computer are turned on.
Place your paper against the right
edge guide and slide the left edge
guide against the paper.
Click to cancel printing
Does not appear if
you are printing
over a network
Click to pause or resume
printing
Load paper only
up to this arrow
Slide paper
against the
right edge
guide
10
Follow these guidelines when loading paper:
Load the printable side face up. It’s usually whiter or brighter than the other side.
Load letterhead or preprinted paper into the printer top edge first.
Don’t load paper above the arrow on the left edge guide.
If you’re printing on envelopes, see page 16 for loading instructions.
Opening the Printer Software
After you open your application program and create your document, you’re ready to
select your page setup and other printer software settings.
From the File menu, click
Page Setup
. You see your application’s page setup dialog
box (your dialog box may look slightly different):
Make the following selections on the page setup dialog box:
Make sure your EPSON Stylus Color 880 printer model (
SC 880
) is selected. (If
the model is incorrect, you need to select your printer in the Chooser; see the Start
Here poster for instructions.)
Select the correct
Paper Size
,
Orientation
, and
Printable Area
settings for your
document. See your electronic Reference Guide for details.
Click
OK
to close the page setup dialog box and return to your application
window.
Verify your printer model here
Select your Paper Size, Orientation,
and Printable Area settings
Click OK
11
Selecting Printer Software Settings
Now open the File menu and click Print. You see the main printer settings dialog box
for your application (your dialog box may look slightly different):
The most important thing to remember is to set the correct Media Type for the paper
you’re using. The Media Type setting affects the other options you can choose.
Make the following settings on the dialog box:
Choose the Media Type you’re printing on (click
the arrow button to scroll through the list). If you’re
not sure which setting to select, see page 20.
Set the Ink option to Color to print a color
document. To print a black text document, click
Black.
Set the Mode option to Automatic. This lets the printer software determine the
best settings for your print job. It’s the easiest way to get good printing results on
all types of paper.
Set the slider in the Mode box to
Quality
or
Speed
. This lets you choose between
a higher resolution or faster printing (or an in-between setting) for the paper
you’re using. (The slider is not available when certain media types are selected.)
When you’ve selected your settings, click
Print
to print your document.
Select faster or higher-quality printing, or in-between
Select the type
of paper you
loaded
Select Automatic mode
Select the
Ink color
12
Controlling Printing
Once you’ve clicked Print, your printer begins printing. If you turned on background
printing, you can select EPSON Monitor3 from the Application menu at the right
side of the menu bar to check the progress of your print job. You see the EPSON
Monitor3 dialog box:
If you’re not using background printing, but you need to
cancel the current print job, hold down the
J
key and
press the
.
(period) key.
For custom project type settings, see pages 13 through 16. For more information on
printing—for example, using advanced settings, previewing your printout, changing
the paper size, or adding a watermark—see your electronic Reference Guide (described
on page 2).
Click to cancel printing
Click to pause printing
Click to restart your print job
Click on your
print job. . .
Then click here to
view the details
below and control
print job priorities
13
Using Advanced Settings
Your printer software includes advanced settings that let you have more control over
your printouts. See the following sections:
“Enhancing Photos” below
“Using Custom Project Types” on page 14
“Using Advanced Custom Settings” on page 15
Enhancing Photos
Your printer software includes PhotoEnhance
options that adjust brightness and
contrast to improve the appearance of low-resolution and improperly exposed photos.
PhotoEnhance also lets you add special effects. To use PhotoEnhance, set the Mode
option to PhotoEnhance in your printer settings dialog box.
If your photograph was taken with a digital camera, you can select Digital Camera
Correction
to improve your printed images. You can also select from a list of
specialized settings for photographs, such as People and Nature, or add special effects,
such as
Soft Focus
or
Sepia
tint.
PhotoEnhance does not affect your original image; it only affects your
printout.
PhotoEnhance works only with Color ink; you cannot turn on
PhotoEnhance with Black ink selected.
Printing with PhotoEnhance may take longer on some systems.
14
Using Custom Project Types
Your EPSON Stylus Color 880 printer software includes custom project types with
preset options for printing specific types of documents—such as reports, graphs, or
drafts. These options let you quickly select the best settings for your particular type of
document and paper, or select a color-matching method for your project. See the list
of options on the next page.
Click Custom, then click here
to select a project type
Always choose your Media Type
and Ink settings before you select
a custom project type
Windows
Click Custom, then click here to select a project type
Always choose your Media Type and Ink settings
before you select a custom project type
Macintosh
15
You can select from these project types:
Text/Graph: For printing graphics-intensive documents like presentations
with charts and graphs.
Economy: For printing rough drafts of text on plain paper. Saves ink.
ICM (Image Color Matching; Windows 95, Windows 98, and
Windows 2000 only): For printing documents created in an ICM compatible
application.
sRGB (standard Red Green Blue; recommended only with Windows 98 or
Windows 2000): For printing documents created in an sRGB compatible
application using sRGB colors, such as those designed for the World Wide
Web. See your Windows 98 online help for details.
ColorSync (Macintosh only): For printing documents in conjunction with
ColorSync compatible devices and applications.
Using Advanced Custom Settings
For maximum control over your project, you can customize your print settings—such
as Print Quality, Halftoning, and Gamma—and use special effects.
To access these settings in your printer software, click Custom and then click the
Advanced button.
  • Page 1 1
  • Page 2 2
  • Page 3 3
  • Page 4 4
  • Page 5 5
  • Page 6 6
  • Page 7 7
  • Page 8 8
  • Page 9 9
  • Page 10 10
  • Page 11 11
  • Page 12 12
  • Page 13 13
  • Page 14 14
  • Page 15 15
  • Page 16 16
  • Page 17 17
  • Page 18 18
  • Page 19 19
  • Page 20 20
  • Page 21 21
  • Page 22 22
  • Page 23 23
  • Page 24 24
  • Page 25 25
  • Page 26 26
  • Page 27 27
  • Page 28 28
  • Page 29 29
  • Page 30 30
  • Page 31 31
  • Page 32 32
  • Page 33 33
  • Page 34 34
  • Page 35 35
  • Page 36 36
  • Page 37 37
  • Page 38 38
  • Page 39 39
  • Page 40 40
  • Page 41 41
  • Page 42 42
  • Page 43 43
  • Page 44 44
  • Page 45 45
  • Page 46 46
  • Page 47 47
  • Page 48 48
  • Page 49 49
  • Page 50 50
  • Page 51 51
  • Page 52 52
  • Page 53 53
  • Page 54 54
  • Page 55 55
  • Page 56 56
  • Page 57 57

Epson 83+ User manual

Category
Print & Scan
Type
User manual

Ask a question and I''ll find the answer in the document

Finding information in a document is now easier with AI