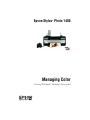
Epson Stylus Photo 1400 User guide
- Category
- Print & Scan
- Type
- User guide
This manual is also suitable for
The Epson Stylus Photo 1400 is a versatile printer designed to produce stunning, professional-quality photos and documents. With its advanced features and exceptional print quality, this printer is ideal for photographers, graphic designers, and anyone who demands the best from their printing projects.
The Epson Stylus Photo 1400 is a versatile printer designed to produce stunning, professional-quality photos and documents. With its advanced features and exceptional print quality, this printer is ideal for photographers, graphic designers, and anyone who demands the best from their printing projects.


-
 1
1
-
 2
2
-
 3
3
-
 4
4
-
 5
5
-
 6
6
-
 7
7
-
 8
8
-
 9
9
-
 10
10
-
 11
11
-
 12
12
-
 13
13
-
 14
14
-
 15
15
-
 16
16
-
 17
17
-
 18
18
-
 19
19
-
 20
20
-
 21
21


Epson Stylus Photo 1400 User guide
- Category
- Print & Scan
- Type
- User guide
- This manual is also suitable for
The Epson Stylus Photo 1400 is a versatile printer designed to produce stunning, professional-quality photos and documents. With its advanced features and exceptional print quality, this printer is ideal for photographers, graphic designers, and anyone who demands the best from their printing projects.
Ask a question and I''ll find the answer in the document
Finding information in a document is now easier with AI
Related papers
-
Epson NX100 - Stylus All-In-One User guide
-
Epson Stylus Pro 7900 User guide
-
-
Epson R2400 User manual
-
Epson 1800 r stylus photo User manual
-
-
-
Epson Stylus Pro 7700 User manual
-
-
Epson Stylus Pro 9880 UltraChrome User guide
