11
English
Care and Cleaning
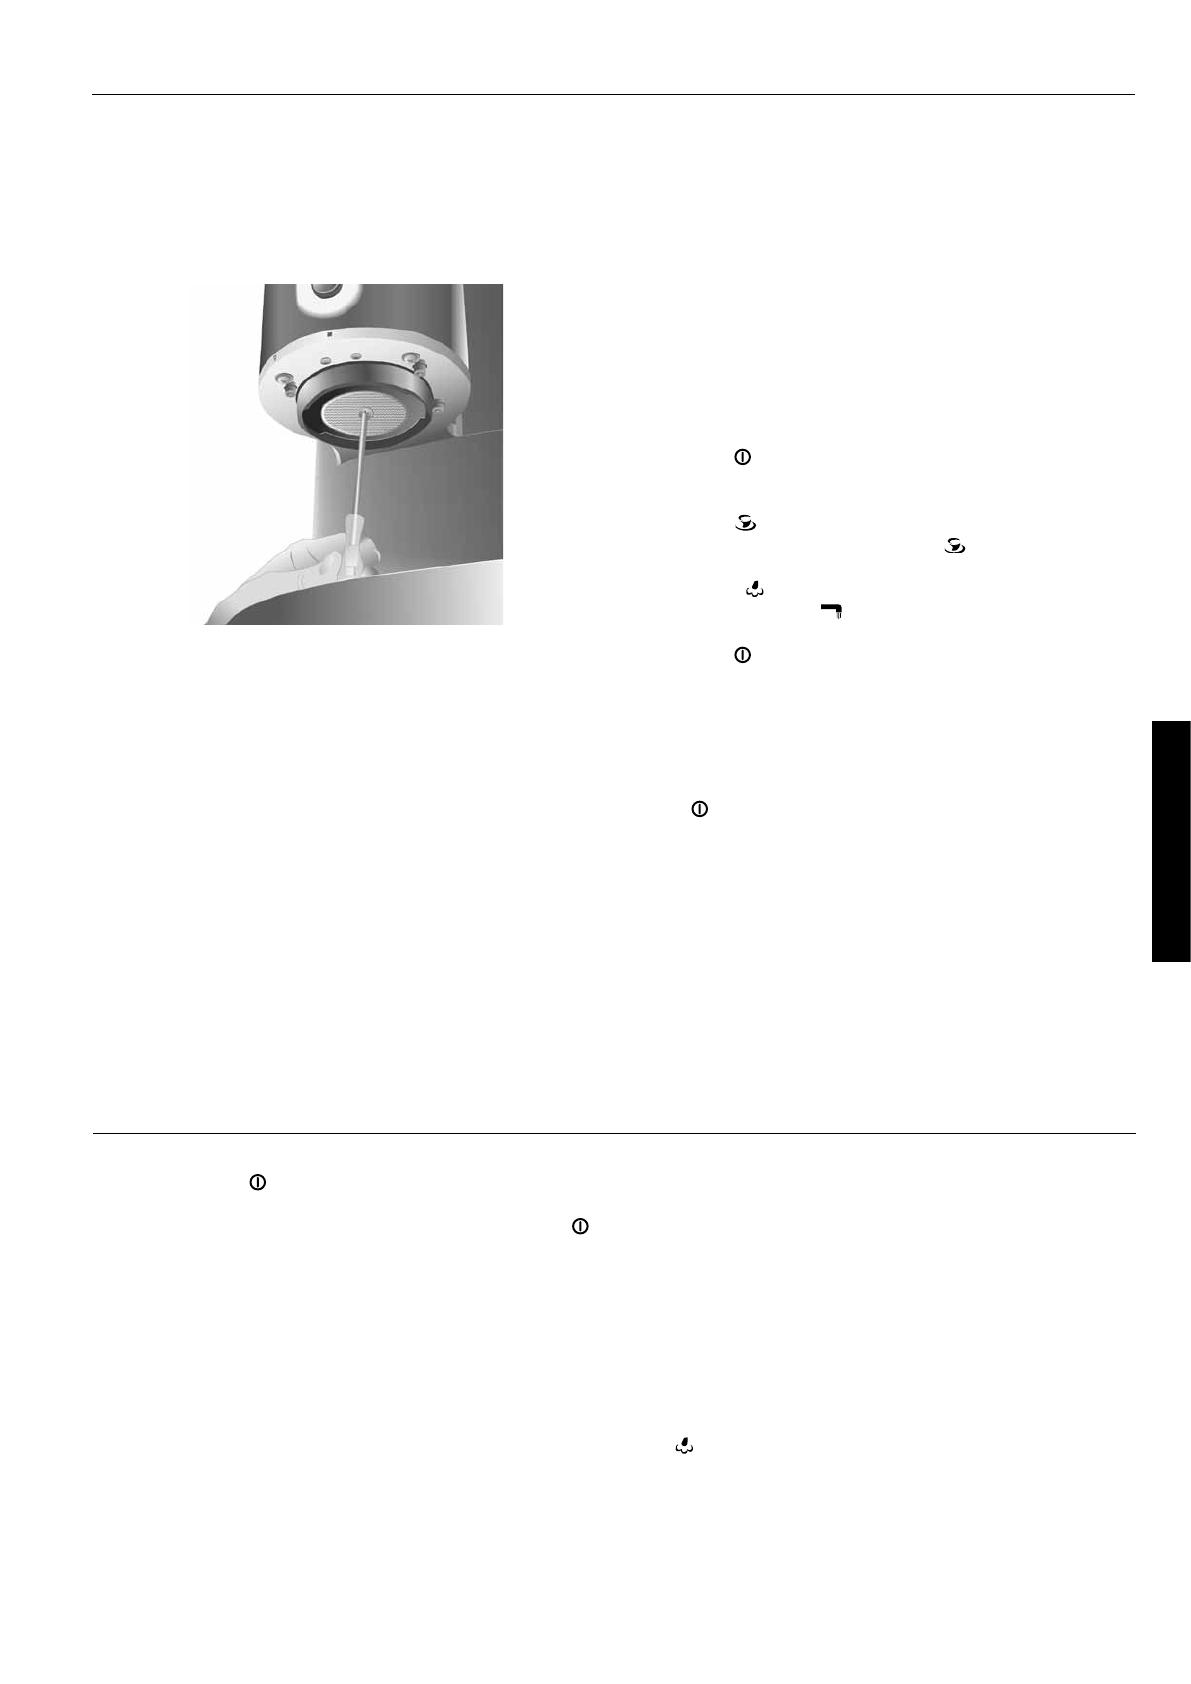
Cleaning the Shower Screen
Once every 75 to 100 cups of espresso, the shower screen
should be removed from the brew head to clean thoroughly.
1. Using a short screwdriver, remove the screw at the center of
the shower screen by turning it counter-clockwise. Once the
screw is free, the shower screen should drop from the brew
head.
2. Wash the shower screen in warm, soapy water, and rinse
with clean water.
3. Place the shower screen into the brew head with the
smooth side facing down, and attach with the shower
screen screw. Turn the screw clockwise until snug.
NOTE: When the shower screen is attached, the center screw
should be flush with the surface of the screen. If it is not,
remove the screen, turn it over, and re-attach.
Priming After Long Periods of Non-Use
For the best tasting espresso, prime the espresso machine with
fresh water after a long period of non-use. Priming will also
ensure that the boilers are filled and the espresso machine is
ready to operate.
1. Remove the tank, empty any stale water, replace, and fill the
tank with fresh water to the max fill line.
2. Fill the boilers with the fresh water. For instructions, see “Fill
and Rinse the Boilers” on page 6.
Descaling
Calcium deposits (“scale”) from water will build up in the
espresso machine over time and may impair espresso quality.
Scale should be removed every four months; local hard-water
conditions may require more frequent descalings. Use a
packaged descaling agent or appropriate decalcification tablets
to remove scale.
1. Remove the shower screen from the brew head. See
“Cleaning the Shower Screen” to the left for instructions.
2. Make certain the water tank is empty. Following the
directions on the descaling agent packet, mix the descaling
solution and add it to the tank.
3. To catch the cleaning solution, place a large cup under the
brew head (do not attach the filter holder), and another
under the frothing nozzle.
4. Press the “
” Button to turn the espresso machine on. It is
not necessary for the boilers to heat before proceeding to
the next step.
5. Press the “ ” Button and dispense cleaning agent through
brew head for 15 seconds; press the “ ” Button again to shut
off.
6. Open the “ ” Dial by turning it counter-clockwise, then
press and hold the “ ” Button for 15 seconds to dispense
cleaning agent through the frothing arm and nozzle.
7. Press the “ ” Button to turn the espresso machine off.
8. Wait 20 minutes, then repeat steps 4–7. Every 20 minutes,
keep repeating steps 4–7 until nearly all the solution in the
tank has been run through the espresso machine. Do not
allow the tank to run completely dry.
9. Remove the water tank and rinse with fresh water, then
replace and fill with fresh water to the max fill line. Press
the “ ” Button to turn the espresso machine on, and flush
the espresso machine by quickly dispensing the contents
of the tank, alternating between the brew head and
frothing arm. Do not allow the water tank to run
completely dry.
10. Attach the shower screen to the brew head. See “Cleaning
the Shower Screen” on this page for instructions. Be sure to
add additional fresh water to the tank for brewing.
Troubleshooting Problems
If the power-on (I) indicator remains off and the boilers fail
to heat when the “ ” Button is pressed:
Check to see if the espresso machine is plugged in; if it is,
unplug the espresso machine, plug it back in, and press the “ ”
Button again. If the espresso machine still does not operate,
check the fuse or circuit breaker on the electrical circuit the
espresso machine is connected to and make certain the circuit
is closed.
If coffee does not flow from the filter holder, the…
– water tank may be empty, or the brewing boiler may not
be filled
– water tank siphon hoses may be kinked or
improperly placed
– shower screen may require cleaning
– espresso machine may need to be descaled
– coffee may be too finely ground
– coffee may be too firmly tamped
If the water pump is noisy, the…
– water tank may be empty
– water tank siphon hoses may be kinked or
improperly placed
– boilers may not be filled
If water leaks from the filter holder…
– the filter holder may not be properly attached to the
brew head
– coffee grinds may be clinging to rim of filter holder or
brew head gasket
– the brew head gasket may be dirty or worn
If little steam or froth is being produced, the…
– frothing boiler may not be at operating temperature
– “
” Dial may not be completely open
– frothing nozzle may be need to be cleaned
– water tank may be empty, or the frothing boiler may not
be filled
If the problem cannot be fixed with the steps above, see the
KitchenAid™ Espresso Machine Warranty on page 16.*
* Do not return the Espresso machine to the
retailer – they do not provide service.


