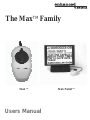
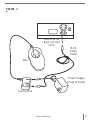
ENHANCED VISION MAX is a portable video magnifier that gives you the highest quality and convenience available.
ENHANCED VISION MAX consists of an auto focus camera that captures and projects images on to a TV or a pair of Enhanced Vision LCD glasses. Images can be switched between true color, black & white, high contrast positive or negative to provide the best experience for the user.
The ENHANCED VISION MAX allows you to magnify text, pictures, and much more easily and effectively. It is designed to be used by either a right or left-handed user.


-
 1
1
-
 2
2
-
 3
3
-
 4
4
-
 5
5
-
 6
6
-
 7
7
-
 8
8
-
 9
9
-
 10
10
-
 11
11
-
 12
12
-
 13
13
-
 14
14
-
 15
15
-
 16
16
-
 17
17
-
 18
18
-
 19
19
-
 20
20
-
 21
21
-
 22
22
-
 23
23
-
 24
24
-
 25
25
-
 26
26
-
 27
27
-
 28
28
-
 29
29
-
 30
30
-
 31
31
-
 32
32


ENHANCED VISION MAX is a portable video magnifier that gives you the highest quality and convenience available.
ENHANCED VISION MAX consists of an auto focus camera that captures and projects images on to a TV or a pair of Enhanced Vision LCD glasses. Images can be switched between true color, black & white, high contrast positive or negative to provide the best experience for the user.
The ENHANCED VISION MAX allows you to magnify text, pictures, and much more easily and effectively. It is designed to be used by either a right or left-handed user.
Ask a question and I''ll find the answer in the document
Finding information in a document is now easier with AI
Related papers
Other documents
-
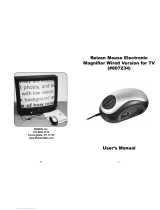 REIZEN 807234 User manual
-
Sierra 180-MaxTrak User manual
-
Kmart 42608110 User manual
-
Fast Unity Operating instructions
-
Amino Kamai 7X User guide
-
-
-
-
-
Sony ILCE-7RM3 Owner's manual
