Page is loading ...

Eco Pro
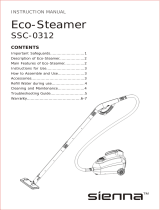
Steamer
SSC-0412
INSTRUCTION MANUAL

INTRODUCTION
Thank you for choosing Sienna for your household cleaning needs. Our steamer products use the
active power of steam to clean without the use of chemicals; making it a green product that is
safe for the ecosystem. You have begun the first step into transforming your house into a green,
environmentally safe home. Our Sienna steam products are a modern way of cleaning that is
efficient and far more sanitary than conventional methods.
With the power of germ killing steam, dirt and grime can be eliminated in a matter of seconds.
The tiny hot vapor molecules penetrate porous surfaces being cleaned, expanding and forcing
dirt, debris, and bacteria to the surface. When used correctly, our steamers can kill dust mites
and certain types of bacteria pathogens such as salmonella and E-coli on contact.
Since you do not need chemicals in order to use our products, not only will you see the savings in
your wallet, but you have provided a safer place for you and your family to live in. We encourage
you to improve your way of life, better the environment, and spend time enjoying your clean
chemical free home.
Eco Pro
The Eco Pro steamer is a multipurpose steam cleaning system that is a natural and safe
alternative to using harsh chemical cleaning products to sanitize and deodorize everywhere in
your home. This powerful steamer provides professional steam pressure of up to 4 BAR and is
ready in minutes. The accessory kit includes attachments that are useful for every household
cleaning job. You can clean floors, counters, bathrooms, windows, walls, and the list goes on. The
Eco Pro is environmentally safe using only water for cleaning. You can steam up to 40 minutes
on high steam with just one fill. There is a steam ready light indicator that lets you know when
you can begin steaming and it also comes equipped with a refill indicator light that lets you know
when the water tank is low or empty. The Eco Plus requires no assembly, just attach the tools and
go. It features a 1500 Watt heating element, a 40.57 fl oz water tank, and a 23 piece accessory
kit.
2

When using an electrical appliance, basic precautions should always be followed. To reduce the
risk of fire, electric shock, or injury:
Be sure to unplug the electrical cord when appliance is not in use and while servicing.
This steamer is not intended for use by persons (including children) with reduced physical, sensory,
mental capabilities or lack of experience and knowledge unless they have been instructed to do so
by a person responsible for their safety.
Do not leave appliance unattended while plugged in.
Children should be supervised at all times and cautioned that the steamer is not a toy and should
not be played with.
Do not direct steam towards people, pets, electrical outlets, or electrical appliances such as ovens.
Do not immerse the steamer in water or other liquids.
Do not handle steamer with wet hands.
Do not pull power cord, use cord as a handle, or close a door on the cord.
Be sure to keep cord away from heat, water, and sharp edges.
Do not use if cord or plug is damaged. If the power cord is damaged, it must be replaced by the
manufacturer, its service agent or similarly qualified persons in order to avoid hazard.
Do not use extension cords or outlets with inadequate current carrying capacity.
Do not use steamer on any steam sensitive material such as velvet, leather, wax polished furniture
or floors, synthetic and other delicate fabrics.
Do not use on unsealed hardwood floors. By doing so, you may remove the sheen from the floor .
It is recommended to test an isolated area with the steam mop before proceeding. As a precaution,
you should check the manual made by the floor manufacturer for proper care instructions.
Never put additives such as cleaning detergents or chemicals into the water tank. It will make the
product unsafe and damage the unit as well as be dangerous to use.
Use only manufacturer’s recommended accessories.
Stop using steamer if circuit breaker activates. Beware of risk of shock.
Wear proper shoes when operating your steamer. Open-toed shoes, slippers or bare feet may
cause you to slip and fall or cause hot steam on your feet.
Allow your steamer to cool down and empty out water before storing in a cool, dry place.
•
•
•
•
•
•
•
•
•
•
•
•
•
•
•
•
•
•
SAFETY GUIDELINES
The Sienna Eco Pro (SSC-0412) Steamer is for indoor domestic use only. Any commercial
use will void warranty. It is designed for sanitizing and cleaning an array of surfaces such as
windows, ceramic tile, grout and more.
Safety Instructions:
WARNING: DANGER OF SCALDING. BE SURE TO READ AND FOLLOW ALL SAFETY
INSTRUCTIONS BEFORE USING YOUR STEAMER. PROPER CARE AND MAINTENANCE WILL HELP
TO EXPAND THE LIFE OF YOUR STEAMER.
3

A. TRIGGER HANDLE
B. TRIGGER RELEASE SWITCH
C. STEAM TRIGGER
D. ATTACHMENT RELEASE BUTTON
E. STEAM NOZZLE
F. HOSE
G. BASE HANDLE
H. ADJUSTABLE STEAM DIAL
I. WATER TANK CAP
J. PRESSURE GAUGE
K. ON/OFF BUTTON
L. STEAMER BODY
M. GREEN REFILL LIGHT
N. RED POWER AND ORANGE STEAM READY LIGHT
O. ACCESSORY BAG
P. CARPET GLIDER
Q. FLOOR CLOTH PAD(S)
R. STEAMER HEAD
S. SMALL CLOTH PAD
T. TRIANGLE FABRIC BRUSH HEAD
U. REFILL CUP
V. FUNNEL
W. EXTENSION ARM(S)
X. DRAIN SANITIZER NOZZLE
Y. CYLINDER ROLLER
Z. CYLINDER ROLLER CLOTH PAD
AA. ANGLE CONCENTRATOR
BB. CONNECTOR(S)
CC. SQUEEGEE
DD. ROUND NYLON BRUSH(ES)
EE. ROUND WIRE BRUSH(ES)
4
KEY FEATURES
C
B
A
F
G
H
K
L
D
E
I
J
M N
O
S
T
U
V
W
X
Y
Z
AA
BB
R
CC
Q
DD EE
P

Connector:
The connector (BB) aIready comes attached to the triangle fabric brush head (T) and the steamer
head (R). To connect the parts together, match the flat side of the connector (BB) tip to the
rectangular bump in the triangle fabric brush head (T) and steamer head (R). Push the connector
(BB) all the way in and turn 180 degrees for a tight fit. (If you purchase additional accessories, the
connector will need to be used on other parts in the same way.)
Extension Arm (s):
The extension arm (W) can be inserted into the trigger handle (A). You can attach the triangle
fabric brush head (T), angle concentrator (AA), cylinder roller (T), or steamer head (R) to the
extension arm (W) to help extend your reach.
Steamer Head/Floor Cloth Pad:
Set floor cloth pad (AA) on the ground with microfiber side down. Align self adhesive strips at the
bottom on the steamer head (R) with the floor cloth pad (AA). Place steamer head (R) on top of
floor cloth pad (AA) and apply pressure to assure hold. The steamer head (R) can be inserted into
extension arm (W).
Triangle Fabric Brush Head/Small Cloth Pad:
The triangle fabric brush head (T) can be inserted into the trigger handle (A) or extension arm (W)
using the connector (BB). Place small cloth pad (S) over the triangle fabric brush head (T).
Cylinder Roller/Cylinder Roller Pad:
The cylinder roller pad (Z) can be placed over the cylinder roller (Y) thru the open end on the
side. Secure the cylinder roller pad (Z) with drawstring.
Squeegee:
The squeegee (CC) connects onto the triangle fabric brush head (T) and can be used for mirrors
or windows. Insert the tabs on rear of the squeegee (CC) into the hooks located on the bottom
rear of the triangle fabric brush head (T) and firmIy snap the pieces together.
5
ASSEMBLY AND USE

Angle Concentrator/Round Brush:
Attach the angle concentrator (AA) to the trigger handle (A) or extension arm (W). You can attach the
round brush (DD) or (EE) if you need additional scrubbing. Fit tip of concentrator into the end of the
round brush.
Drain sanitizer Nozzle:
The drain sanitizer nozzle (X) attaches to the angle concentrator (AA).
IMPORTANT: Make sure the accessory is pushed as far as possible onto tip to ensure the fit is sealed.
This will prevent steam from seeping out unwanted areas and prevent injury.
NOTE: The steamer does not require distilled water. Residents in areas with hard water should use
distilled water for better performance.
USE:
Before plugging in your steamer, unscrew the water tank cap (I). Use the refill cup (U) and funnel
(V) to fill water tank. You will only need to fill refill cup 3 times to fill tank. Screw water tank cap (I)
back onto the steamer body (L) firmly.
Place desired attachment onto trigger handle (A). To switch attachments, press attachment
release button (D) to remove attachment pieces from trigger handle (A).
Plug in steamer and turn power on/off button (K) on. A red power light (N) will illuminate to
indicate unit is working. Be sure desired attachments are already in place before you turn on
your steamer. Be sure steam trigger (C) is not Iocked while steamer is heating up.
A orange steam ready light (N) will illuminate when steamer is ready for use. The pressure gauge
(J) will be between 3-4 bars of pressure when ready. It may take several minutes. Press steam
trigger (C) and begin steaming. The pressure gauge (J) will maintain around 1 bar when steaming
continuously.
WARNING: BUILT UP PRESSURE IN THE STEAMER BODY WILL FORCE THE STEAM OUT WITH
MORE FORCE THAN IT WOULD NORMALLY WHEN TRIGGER IS INITIALLY PRESSED. BE SURE TO
INITIALLY AIM THE STEAM NOZZLE AT A SINK OR INTO THE AIR WHERE NO PERSON OR OBJECT IS
STANDING.
The steam trigger will immediately begin steaming in constant steam mode. To stop emitting
steam, slide trigger release switch (B).
1)
2)
3)
4)
5)
6

6)
7)
8)
9)
10)
The amount of steam used when cleaning can be adjusted by turning adjustable steam dial (H)
to desired steam pressure. An arrow on the dial will indicate how much steam you are using.
A green refill light (M) indicator will illuminate when steamer is low on water, steamer will likely
stop emitting steam around this time. Simply press power on/off button (K) to turn off unit,
unplug, then wait for it to cool down a bit and refill the water tank with water.
NOTE: It is recommended that another high wattage appliance is not operated on the same circuit to
avoid a circuit overload.
WARNING: ON SURFACES THAT HAVE BEEN TREATED WITH WAX, THE WAX MAY BE REMOVED
BY THE HEAT AND STEAM ACTION. DO NOT USE ON UNSEALED WOOD FLOORS OR LET UNIT STAND
ON ANY WOOD FLOOR FOR AN EXTENDED PERIOD OF TIME. THIS MAY CAUSE THE WOOD GRAIN
TO RISE. IT IS RECOMMENDED THAT A SECTION BE TESTED IN AN ISOLATED AREA OF THE FLOOR.
IT IS ALSO RECOMMENDED THAT YOU CHECK THE USE AND CARE INSTRUCTIONS FOR CLEANING
FROM THE FLOOR MANUFACTURER TO ENSURE STEAM CLEANING IS ACCEPTABLE FOR YOUR
WAXED SURFACE.
Lay carpet glider (P) on the floor in an upright position with the rectangular flat surface facing
downward. Place steamer head(R)on top of glider.
IMPORTANT: The carpet glider is not designed to be fixed to the steamer head for safety reasons
including preventing burns. It is designed for use on soft carpet areas only, not for hard floor surfaces.
WARNING: NEVER RUN THE STEAMER WITHOUT WATER.
When you finish cleaning, unplug power cord from outlet then release pressure from steamer by
slowly turning water tank cap (I).
NOTE: Let the steamer cool down before releasing pressure from steamer. If you try to unscrew the
cap while still hot, it will burn you.
Be sure to empty water tank and carefully remove any accessories for drying.
CAUTION: The cloth pad may be very hot.
7

SUGGESTED USES
Angle Concentrator/Round Brush:
The angle concentrator combined with the round brush can be used to clean grout, around
faucets, sinks, appliances, blinds, vehicle rims, grills, etc.
Steamer Head/Floor Cloth Pad:
The steamer head combined with the floor cloth pad can be used to clean hard floor surfaces
such as tile, sealed hardwood, linoleum, stone, and laminate. Use with carpet glider to sanitize
and refresh your carpet.
Triangle Fabric Brush/Triangle Brush Pad:
The triangle fabric brush combined with the triangle brush pad can be used on different
upholstered furniture as well as curtains, pet beds and bedding.
Triangle Fabric Brush/Squeegee:
The triangle fabric brush combined with the squeegee can be used on flat surfaces such as
windows, shower walls, and mirrors.
8

Cylinder Roller/Cylinder Cloth Pad:
The cylinder roller works best on blinds, ceiling fans, and in narrow tight spaces.
Drain Sanitizer Nozzle:
The drain sanitizer nozzle can be used in kitchen, bathroom and outdoor sink drains to clean and
sanitize.
CLEANING AND MAINTENANCE
CAUTION: Prior to cleaning or maintaining your steamer, isolate the unit by removing the
cord from the power socket and avoid immersing the unit in water.
The cloth pads can be machine washed in hot water. Do not tumble dry. Do not iron. Allow to
fully dry before use. Do not use bleach or fabric softener.
Wipe steamer with soft cloth when/if necessary.
Periodically, when unit is cooled, removed water cap, using your measuring cup add one cup
of water into the unit. Replace cap and shake unit to lift any calcium build up left in water
tank. Remove cap and pour out water in sink. Repeat as necessary.
Product Specs:
Voltage supply: 120V, 60 Hz
Output: 1500 W
Water tank capacity: max. 40.57 fl oz.
Cord: 16.4 ft.
Weight: 8.8 lbs.
Protection class: 2
Pads: SSC-0412-FP
9
1)
2)
3)

CUSTOMER SUPPORT
For problems with your Sienna steamer, please refer to Troubleshooting guide. Additional
inquiries should be directed to our Customer Service department by calling 1-888-574-3662 or by
e-mail to: customerservice@anvidproducts.com.
You may purchase replacement pads and accessories on our website at: www.siennadirect.com.
TROUBLESHOOTING
CAUTION: Prior to assessing your steamer, isolate the unit by removing the cord from the
power socket.
10
PROBLEM SOLUTION
•
•
•
•
•
•
•
•
•
Ensure water tank is full.
Calcium and mineral deposits can build up and impact the performance
of your steamer, use distilled water if necessary.
•
•
•
•
•
•
Be sure steamer is at proper steam level before steaming.
The microfiber cloth pad may be overused and needs to be changed
out with additional cloth pad(s) provided. Cloth pads can be cleaned in
washer. Over time, however, the cloth pads can start to wear.
Be sure microfiber cloth pad is attached properly.
Condensation may form inside the unit dripping water upon initial
use; continue to press the steam release button until steam appears. If
necessary, lay a towel on the floor underneath unit during process.
Be sure to use light detergent when cleaning cloth pads, any residue on
pad may be transferred onto floor. To remove, wash your pads at least
once, sometimes twice to remove the film from the pads. Go over your
floor again and streaks should disappear.
Replace cloth pad with a new; clean one for effective cleaning.
If initial use of steamer, past cleaning products may have left a residue on
your floor, continue to go over affected area until there is no residue or
streaks left behind.
Ensure steamer power cord is correctly plugged into a 120V AC power
outlet only.
Ensure circuit breaker is operational.
Try operating steamer from another power outlet.
If unit is still not working, call customer service at 1-888-574-3662.
This can be caused by leaving the steamer in the same spot for too long.
This residue can be removed by using a decalcifying product or with a few
drops of vinegar on a cloth and wiped away.
Alternatively, reheat the area for one minute to remove residue (do not
overheat area.)
Steamer is leaking water all
over the floor
Floors are cloudy, streaky or
spotty after mopping floor
Red power button is not on
Pale residue left on floor
No steam

ONE YEAR LIMITED WARRANTY
Our Sienna product warranty extends only to the original customer purchaser of the product. It is
warranted by the manufacturer to be free from all defects in materials or workmanship for a period
of one year from the date of original purchase. This warranty is subject to the following conditions,
exclusions and exceptions.
Exclusions:
This warranty does not cover normal wear and tear of parts and does not apply to any product that
has been tampered with or used for commercial purposes. This warranty does not cover damage
cause by misuse, abuse or negligent handling or damage due to mishandling in transit or shipping.
This warranty does not cover damage or defects caused by or resulting from repairs, service or
alterations to the product or any of its parts, which have been performed by a repair person not
authorized by the manufacturer. This warranty is effective only if the product is purchased and
operated in the USA, and does not extend to any units which have been used in violation of written
instructions furnished by the manufacturer, or to units which have had the serial number removed,
altered, defaced or rendered illegible.
Performance:
During the limited warranty period, the manufacturer will, at its option, repair or replace free of
charge a defective product or part that is covered by this warranty. As a matter of warranty policy,
the manufacturer will not refund the purchase price. A refurbished or replacement product will be
covered by this warranty for the balance of the initial one year warranty period.
To contact Customer Service:
Write: Anvid Products, Inc.
1401-1499 Greenville Rd.
Livermore, CA 94550
E-mail: customerservice@anvidproducts.com
Call: 1-888-5SIENNA (1-888-574-3662)
Please refer to your product name and model number when contacting Customer Service.
Customer Service will give you further instructions for returning a defective product. When
returning a defective product, carefully pack the item to avoid damage in shipping, the
manufacturer cannot assume responsibility for loss or damage during incoming shipment. We
recommend that you insure the package, as damage in shipping including the shipping cost is
not covered under our warranty. Be sure to include the following items with your product: any
accessories related to the product, completed warranty form, and a copy of your sales receipt or
other proof of purchase to determine warranty status. C.O.D. shipments cannot be accepted.
11

Limitations of Remedies: No representative or person is authorized to assume for the manufacturer
any other liability in connection with the sale of our products. This limited warranty is not
transferable and any sale, transfer or other disposition of the product voids this limited warranty.
There shall be no claims for defects or failure of performance or product failure under any theory
of tort, contract or commercial law including, but not limited to, negligence, gross negligence,
strict liability, breach of warranty and breach of contract.
ANY IMPLIED WARRANTIES, OBLIGATIONS, OR LIABILITIES, INCLUDING, BUT NOT LIMITED TO,
THE IMPLIED WARRANTY OF MERCHANTABILITY AND FITNESS FOR A PARTICULAR PURPOSE,
SHALL BE LIMITED TO THE DURATION OF THIS WARRANTY. Some states do not allow limitations
on how long an implied warranty lasts, so the above limitations may not apply to you.
REPAIR OR REPLACEMENT SHALL BE THE SOLE REMEDY OF THE PURCHASER UNDER THIS
LIMITED WARRANTY, AND IN NO EVENT SHALL THE MANUFACTURER BE LIABLE FOR ANY
SPECIAL, INCIDENTAL, OR CONSEQUENTIAL DAMAGES, LOSSES OR EXPENSES YOU MAY INCUR
IN CONNECTION WITH YOUR PURCHASE PRIOR TO USE OF THE PRODUCT OR FOR ANY BREACH
OF THIS OR ANY OTHER WARRANTY, EXPRESS OR IMPLIED, WHATSOEVER. Some states do
not allow exclusion or limitation of special, incidental, or consequential damages, so the above
limitation may not apply to you. This limited warranty gives you specific legal rights, and you
may also have other rights which vary from state to state.
Correct Disposal of this Product
Copyright © 2014 Anvid Products, Inc. Made in China ● Printed in China
This marking indicates that this product should not be disposed with other
household wastes throughout the US. To prevent possible harm to the
environment or human health from uncontrolled waste disposal, we
recommend recycling it responsibly to promote the sustainable reuse of
material resources. To dispose of your used device, please contact your local
city for proper disposal locations.
12

Eco Pro
Limpiador a vapor
SSC-0412
MANUAL DE INSTRUCCIONES

PRINCIPALES CARACTERÍSTICAS
A. MANGO DEL GATILLO
B. INTERRUPTOR DE LIBERACIÓN
DEL GATILLO
C. GATILLO DE VAPOR
D. BOTÓN DE LIBERACIÓN DEL ACCESORIO
E. BOQUILLA DE VAPOR
F. MANGUERA
G. MANGO DE LA BASE
H. DIAL DE VAPOR AJUSTABLE
I. TAPÓN DEL DEPÓSITO DE AGUA
J. MANÓMETRO
K. BOTÓN DE ENCENDIDO/APAGADO
L. CUERPO DEL LIMPIADOR A VAPOR
M. INDICADOR VERDE DERELLENADO
N. NDICADORROJO DE ENCENDIDO
Y INDICADORANARANJADO DEVAPORLISTO
O. BOLSA DE ACCESORIOS
P. DESLIZADOR DE ALFOMBRAS
Q. PAÑO(S) PARA PISO
R. CABEZAL DE LIMPIADOR A VAPOR
S. PAÑO PEQUEÑO
T. CABEZAL DE CEPILLO TRIANGULAR PARA TELA
U. RECIPIENTE DE RELLENADO
V. EMBUDO
W. BRAZO(S) DE EXTENSIÓN
X. BOQUILLA DEDESINFECCIÓN
DELDESAGÜE
Y. RODILLO CILÍNDRICO
Z. PAÑO PARA RODILLO CILÍNDRICO
AA. CONCENTRADOR DE ÁNGULO
BB. CONECTOR(ES)
CC. JALADOR
DD. CEPILLO(S)REDONDO(S) DE NYLON
EE. CEPILLO(S) REDONDO(S) METÁLICO(S)
C
B
A
F
G
H
K
L
D
E
I
J
M N
O
S
T
U
V
W
X
Y
Z
AA
BB
R
CC
Q
DD EE
P
28
/