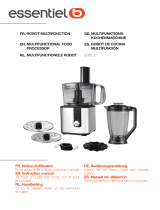
Brandt ROB506BG User manual

Category
Food processors
Type
User manual
MANUELD’INSTRUCTIONFR
INSTRUCTIONMANUALEN
MANUALDEINSTRUCCIONESES
GEBRUIKSHANDLEIDINGNL
ﻝﻳﻐﺷﺗﻟﺍﻭ ﺕﺍﺩﺎﺷﺭﻹﺍ ﻝﻳﻟﺩ ﺔﻳﺑﺭﻌﻟﺍ ﺔﻐﻠﻟﺍ
Robot Compact
Compact Food Processor
Robot compacto
Compacte Foodprocessor
ﺮﻐﺼ
ُ
ﻣ ﻲﻟﺁ ﻡﺎﻌﻁ ﺮ
ِ
ﻀﺤ
ُ
ROB506BG
13
Dear Customer,
Thank you for buying a BRANDT product and for your confidence in our company.
This product has been designed and manufactured for you considering your lifestyle and
your requirements, so that it meets your expectations in the best way possible. We have
invested it with our expertise, spirit of innovation and all the enthusiasm which has
driven us for more than 60 years.
So that we are always able to satisfy your requirements as well as possible, our
customer service is available, ready to listen and answer all your questions or
suggestions
You can also visit our website www.brandt.com where you will find our latest
innovations as well as additional useful information.
BRANDT is happy to support you daily and hopes you will enjoy your purchase to the
full.
Important: Before starting your machine, please read this guide for
installation and use carefully in order to familiarise yourself with how it
operates quickly.
14
CONTENTS
1) FOR THE USER’S ATTENTION ...................................................................................... 15
a) Safety Instructions ................................................................................................... 15
b) Technical Data ......................................................................................................... 18
c) Environmental Protection .......................................................................................... 18
2) PREPARATION OF YOUR MACHINE .............................................................................. 18
a) Description of the Food Processor ............................................................................. 18
b) Before Using for the First Time ................................................................................. 19
3) USING YOUR MACHINE ............................................................................................... 19
a) Using the Chopper/Mincer ........................................................................................ 19
b) Using the Grating and Slicing discs ............................................................................ 20
c) Using the Emulsifier ................................................................................................. 20
d) Using the dough blade ............................................................................................. 21
e) Using the Blender .................................................................................................... 21
4) LOOKING AFTER AND CLEANING YOUR MACHINE ......................................................... 21
a) Cleaning the Machine ............................................................................................... 21
b) Storing your Machine ............................................................................................... 22
15
1) FOR THE USER’S ATTENTION
Keep these instructions with your machine. If you sell
this machine to another person second-hand, make sure
you give the new owner these instructions. Please read
these instructions before installing and using your
machine. They are written for your safety and that of
others.
a) Safety Instructions
Installation and connection
This machine is for domestic use only. It may only be used
in a covered, enclosed and heated environment such as a
kitchen or any other room meeting the same specifications.
Having taken your product out of its packaging, check that
the machine is in perfect condition and, in particular, that
the plug or the power cable is not damaged. If there is any
doubt contact your dealer's after-sales service.
Before connecting the machine make sure that the mains
voltage corresponds with that indicated on the machine's
rating plate.
The use of adaptors and/or extension leads is not
recommended. If these items prove to be indispensable,
only use adaptors and extension leads compliant with the
safety standards in force.
This machine is not intended to be put into operation using
an external timer or a separate remote control system.
Before using this machine place it on a smooth, dry, stable
surface.
Keep the machine and its power cable out of reach of
children under the age of 8.
16
Never pull the lead but disconnect the machine by holding
the plug.
Children must be supervised to ensure they do not play with
the machine.
During Use
This machine is not designed to be used by children unless
they are older than 8 and they are supervised or instructed
in the use of the machine by someone who is responsible
for their safety.
This machine may be used by people with reduced physical,
sensory or mental capacities, but only after having given
them the necessary information concerning the use of the
machine, so that they are aware of the dangers that may be
incurred.
Do not leave the machine when it is working because it
could be a source of danger.
Only hold the blade by the shaft and the discs by the edge
to avoid cutting yourself.
Disconnect the machine before removing or changing any of
the sharp parts.
Wait until the blades stop completely before removing the
lid.
Never put food into the machine with bare hands. Always
use the pusher.
Check that the lid is properly closed before using the
machine.
The use of accessories not recommended by the
manufacturer may cause danger or injuries.
17
Maintenance and cleaning
Before cleaning ensure that the power cable for the
machine is unplugged. Allow the machine to cool before
cleaning.
The power cable cannot be replaced. If the cable is
damaged the machine should be discarded. However, this
product is guaranteed by your distributor. For more details
please refer to the guarantee conditions provided by your
distributor.
To protect yourself from the risk of electric shock, do not
immerse any part of the machine in water or other liquids.
Do not use chemical products, steel wool or abrasive
cleaners to clean the outside of the machine. This risks
damaging it.
Cleaning and maintenance of the machine should not be
carried out by children.
Non-compliant use
Only use this machine for the purposes described in this
manual.
The manufacturer denies all responsibility in the event of
non-compliant use.
This machine is exclusively intended for domestic use in
private dwellings. The use of this product in communal or
professional premises such as rooms for breaks in offices or
workshops, camping or hotel premises, does not represent
compliant use as defined by the manufacturer.
18
b) Technical Data
Model ROB506BG
Power supply 220-240 V~50 Hz
Normal power 500 W
Bowl capacity 2000 ml
Dimensions mm (HxWxD) 385 x 240 x 180 mm
Net weight 6.5 kg
c) Environmental Protection
At the end of its life this product must not be discarded with household waste. It
must be taken to a recycling centre or to your dealer. This makes it possible to avoid
consequences resulting from inappropriate disposal that are harmful to health and
the environment, and to recycle materials to save energy and significant resources.
A logo appears on the product reminding you not to discard it with household waste.
For further information, contact your council offices or the shop where you bought
this product.
2) PREPARATION OF YOUR MACHINE
a) Description of the Food Processor
1. Motor unit
2. Drive shaft
3. Bowl
4. Disc support
5. Bowl lid
6. Pusher
7. Blade holder
8. Slicing blade
9. Coarse grating blade
10. Fine grating blade
11. Chopper/mincer blade
12. Dough kneader
13. Emulsifier
14. Blender measuring jar
15. Blender lid
16. Blender jar
17. Blender blade
18. Transmission head
19
On/Off switch
Pulse: To chop in brief pulses press the centre of
the button as many times as you wish.
Start: ON
Stop: OFF
b) Before Using for the First Time
1. When unpacking the product, carefully handle the slicing blade and the slicing disc as they
are very sharp.
2. Before using this machine for the first time clean the motor unit with a damp cloth.
3. Wash the bowls and blades in hot soapy water.
4. Dry all the parts carefully.
3) USING YOUR MACHINE
1. Feed tube
2. Bowl
3. Motor unit
4. Open
5. Close
a) Using the Chopper/Mincer
Assembly
Place the bowl (3) on the motor unit (1) making sure that the parts are properly attached.
Turn the bowl (3) clockwise making sure it locks in correctly.
Insert the chopping blade (11) onto the shaft.
Put the food to be chopped in the bowl (3). The maximum quantities are listed further on.
Operation
Plug in the machine.
Put the food into the feed tube slowly. Push the food down with the pusher (6).
Turn the switch to "ON".
Wait until the blade stops completely before removing the lid.
Remove the blade gently and empty the bowl.
Unplug the machine.
20
Never allow the chopper to work for more than 2 minutes each time.
After 2 minutes' operation allow the machine to cool for 5 minutes.
This machine is not suitable for very hard foodstuffs such as coffee beans, ice cubes,
sugar, rice, spices, etc.
Before mincing meat remove the bones, tendons and nerves. Do not use the machine to
chop or slice food such as tomatoes, lemons, dates, peaches or frozen products.
Allow hot food to cool before putting it in the processor bowl.
If you want to chop different foodstuffs start with the hardest.
Stop the processor if you see food collecting on the sides of the bowl. Remove this food
using a spatula.
b) Using the Grating and Slicing discs
Assembly
Place the bowl (3) on the motor unit (1) making sure that the parts are properly attached. Turn
the bowl (3) clockwise making sure it locks in correctly.
Insert the disc support (4) and then put the grating (9 or 10) or slicing (8) disc on the support.
Operation
Plug in the machine.
Put the food into the feed tube slowly. Push the food down with the pusher (6).
Turn the switch to "ON".
Wait until the grating or slicing disc stops completely before removing the lid from the
disc.
Unplug the machine.
Never allow the disc to work for more than 2 minutes each time. After 2 minutes'
operation allow the machine to cool for 5 minutes.
c) Using the Emulsifier
Assembly
Place the bowl (3) on the motor unit (1) making sure that the parts are properly attached.
Turn the bowl clockwise making sure it locks in correctly.
Insert the disc support (4) and then place the emulsifier (13) on the disc support.
Operation
Plug in the machine.
Put the food into the feed tube slowly. Push the food down with the pusher (6).
Turn the switch to "ON".
Wait until the emulsifier stops completely before removing the bowl from the disc.
Unplug the machine.
21
d) Using the dough blade
Assembly
Place the bowl (3) on the motor unit (1) making sure that the parts are properly attached.
Turn the bowl clockwise making sure it locks in correctly.
Insert the disc support (4) and then place the dough blade (12) on the disc support.
Operation
Plug in the machine.
Put the food into the feed tube slowly. Push the food down with the pusher (6).
Turn the switch to "ON".
Wait until the dough blade stops completely before removing the bowl from the disc.
Unplug the machine.
e) Using the Blender
Assembly
Place the blender jar (16) on the motor unit (1) making sure that the parts are properly
attached. Turn the jar clockwise making sure it locks in correctly.
Operation
Plug in the machine.
Put the food in the blender jar (16).
Turn the switch to "ON".
Wait until the blender stops completely before removing the jar.
Unplug the machine.
4) LOOKING AFTER AND CLEANING YOUR MACHINE
a) Cleaning the Machine
To avoid any danger:
Unplug the machine before cleaning it.
Never wash the motor unit in the dishwasher and never immerse it in water or rinse it
under the tap.
Dismantle the machine proceeding in the reverse order to Chapter
Clean all the parts of the machine immediately after use to remove the food residues.
Clean the motor unit with a damp cloth.
Wash the detachable parts with a mixture of warm water and detergent. They can also be
washed in the dishwasher.
Do not use a scraper on the metal and plastic parts
Do not fill the bowl with boiling water or place any of the parts in boiling water.
22
Carotene may stain some parts of the food processor. This can be removed using
cooking oil.
b) Storing your Machine
After cleaning the parts dry them with a clean cloth. Assemble the parts and keep the machine
in a dry place. Clean all the parts after each use.
BRANDT FRANCE - Simplified Joint Stock Company with capital of 1,000,000 Euros
89/91 Boulevard Franklin Roosevelt - 92854 Rueil-Malmaison (France)
  • Page 1 1
  • Page 2 2
  • Page 3 3
  • Page 4 4
  • Page 5 5
  • Page 6 6
  • Page 7 7
  • Page 8 8
  • Page 9 9
  • Page 10 10
  • Page 11 11
  • Page 12 12
  • Page 13 13
  • Page 14 14
  • Page 15 15
  • Page 16 16
  • Page 17 17
  • Page 18 18
  • Page 19 19
  • Page 20 20
  • Page 21 21
  • Page 22 22
  • Page 23 23
  • Page 24 24
  • Page 25 25
  • Page 26 26
  • Page 27 27
  • Page 28 28
  • Page 29 29
  • Page 30 30
  • Page 31 31
  • Page 32 32
  • Page 33 33
  • Page 34 34
  • Page 35 35
  • Page 36 36
  • Page 37 37
  • Page 38 38
  • Page 39 39
  • Page 40 40
  • Page 41 41
  • Page 42 42
  • Page 43 43
  • Page 44 44
  • Page 45 45
  • Page 46 46
  • Page 47 47
  • Page 48 48
  • Page 49 49
  • Page 50 50
  • Page 51 51
  • Page 52 52
  • Page 53 53

Brandt ROB506BG User manual

Category
Food processors
Type
User manual

Ask a question and I''ll find the answer in the document

Finding information in a document is now easier with AI