Unbranded 1812WPS Installation guide

Type
Installation guide
TECHNICAL GUIDE
Natural Wood Siding
Selection, Installation & Finishing
Western Wood Products Association
2
Premium grades have fewer
characteristics such as knots, pitch
streaks and so forth. The highest
designations are reserved for clear
wood free of characteristics. These
grades are generally more expen-
sive and usually sold kiln dried.
While some B&Btr is available,
Select grades usually include C and
D Select. (Equivalent grade desig-
nations in Idaho White Pine are
Supreme, Choice and Quality.)
Western Red Cedar may be graded
as Selects or according to Cedar
Rules where comparable grades
are Clear Heart, A and B grades.
Finish grades include Superior and
Prime, and can be used for most
Western species but are seldom
used for the cedars and pines.
Additional grades for bevel patterns
are shown in Table 1. Specify exact
grade desired, by grade rule book
and paragraph number.
Knotty grades such as
Common, Alternate Board, Select
Knotty and Quality Knotty are more
abundant as they include material
with knots and other characteris-
tics.
Knot size and quality are defined
in the grading rules. Sound, tight
knots will not adversely affect the
performance of the siding.
However, encased or unsound
knots can become loose and may
eventually fall out.
WWPA knotty grades include 1, 2
and 3 Common. (Equivalent grades
in Idaho White Pine are Colonial,
Sterling and Standard.) These
grades are generally referenced as
2&Btr Common and 3&Btr
Common for most Western
species. (Refer to notes under
Table 1 for additional information.)
The WCLIB knotty grades for
Alternate Boards are Select
Merchantable, Construction and
Standard. Similar knotty grades for
cedar siding are Select Knotty and
Quality Knotty.
When selecting knotty siding in
any species, specify the exact
grade or paragraph number of the
grade rule book from an ALSC-
Natural Wood Siding
Solid wood has long been used
as a siding material. Its natural
beauty is timeless and the color
and textures available are
unmatched by other building prod-
ucts. Such properties make wood
siding adaptable to a wide variety
of regional preferences, architectur-
al styles and climates.
When correctly installed and
maintained, natural wood siding will
last for decades and sometimes
centuries. It is a prestige product
that adds value to a home or com-
mercial building, reflecting both
quality materials and professional
workmanship.
Grades
Building codes usually consider
wood siding a non-structural mater-
ial and place few restrictions on its
use. In addition, model codes do
not require that it be grade-
stamped.
However, all Western species
used for siding are listed under at
least one industry-recognized grade
rule published by an American
Lumber Standard Committee, Inc.
accredited rules-writing agency,
such as Western Wood Products
Association (WWPA).
Western species of the United
States include Douglas Fir and
Larch, Hemlock and the True Firs,
Ponderosa Pine, Lodgepole Pine,
Idaho White Pine, Sugar Pine,
Engelmann Spruce, Sitka Spruce,
White Spruce and the Western
Cedars.
Cedar’s weather resistance and
dimensional stability make it
particularly well suited to siding
applications, with the added benefit
that cedar’s heartwood is naturally
durable against decay. Clear Heart
and Clear VG Heart grading rules
include the heart designation. If
heartwood is desired in other
grades, and sapwood to be limited,
then it must be so specified
through buyer/seller agreement.
Siding products are generally cat-
egorized as either premium or
knotty grades.
Contents
Grades . . . . . . . . . . . . . . . . . . . . . 2
Pattern Selection . . . . . . . . . . . . . 3
Moisture Content . . . . . . . . . . . . . 3
Checklist for a
Siding Specification . . . . . . . . . . 4
Priming and Prefinishing . . . . . . . . 4
Installation . . . . . . . . . . . . . . . . . . . 5
Pattern & Installation (Nailing)
Diagrams . . . . . . . . . . . . . . . . . . 6
Nails & Nailing . . . . . . . . . . . . . . . 8
Finishing . . . . . . . . . . . . . . . . . . . . 9
Coverage Calculations . . . . . . . . 10
Checklist for High
Performance Siding . . . . . . . . . 11
Additional Information . . . . . . . . . 11
Western Lumber Grade
Reference Chart . . . . . .
back cover
Natural Wood Siding:
Selection, Installation & Finishing
Western Wood Products Association
522 SW Fifth Avenue, Suite 500
Portland, OR 97204-2122
503-224-3930 fax: 503-224-3934
website: www.wwpa.org
©2007 WWPA
3
accredited agency. (Paragraph
numbers are included in Table 1.)
Some manufacturers market
their siding under a variety of
names such as STK (select tight
knot or sound tight knot) or NPS
(no prior selection). These names
are helpful but it is important to
understand that these are
marketing terms and not grade
designations from grading
agencies.
There are no uniform standards
for STK, NPS, etc. Consequently
the products so-named may vary
in quality from one source to
another. STK cedar may be a
combination of Select Knotty and
Quality Knotty, with a percentage
of the order in Quality Knotty.
Pattern Selection
Boards in standard dimensions
can be readily used for such siding
applications as board-and-batten or
board-on-board. However, most
siding products are milled or run to
a pattern.
Standard patterns are published
by the rules-writing agencies to
encourage uniformity and to serve
as a common reference throughout
the industry. The popular patterns
are bevel or bungalow, Dolly Varden
and channel. (Refer to Figure 3 for
profiles of these and other patterns.
WWPAs Standard Patterns can be
downloaded from www.wwpa.org.)
Patterns not only allow for
different effects in design and
appearance but also affect perfor-
mance. Patterns like tongued-and-
grooved, which are primarily panel-
ing patterns, should only be
installed in exterior applications
where the greatest degree of pro-
tection from climatic conditions can
be provided. Tongued-and-grooved
patterns allow for very little dimen-
sional change as the siding accli-
mates to the environment, or as a
result of seasonal dimensional
adjustments. Climate, humidity lev-
els, architectural detailing and
exposure to prevailing weather con-
ditions should all be considered
when selecting a pattern.
As a rule of thumb, narrow
patterns perform best because
there is less dimensional change in
the siding as the environment
changes from wet to dry, or from
the freezing conditions of winter to
the blistering heat of late summer.
Thicker patterns have less tenden-
cy to cup or split than do thinner
patterns.
Siding surfaces are manufactured
smooth, rough, or saw-textured.
The type of surface and pattern, in
combination with the finishing
material, will affect performance. In
general, saw-textured surfaces hold
finishes longer than smooth
surfaces.
Moisture Content
As wood loses or gains moisture,
it will shrink or swell until it reaches
equilibrium with the level of mois-
ture in the air of its immediate sur-
roundings. Because of its cell struc-
ture, wood shrinks primarily in
thickness and width and very little
in length.
Wood siding is no exception. It
will shrink and swell regardless
of pattern or material quality.
Problems can occur after instal-
lation if the siding shrinks or swells
unevenly or very rapidly, particularly
if it has been improperly nailed and
its natural movement has been
restricted. However, problems such
as twist, cup, warp, splits and
checks can be minimized.
To avoid potential problems and
to minimize dimensional change
after installation, the moisture con-
tent of the siding should match the
local climate as closely as possible
at the time of installation.
Table 1: GRADES
GRADES
7
Grade Rule Paragraph
WESTERN SPECIES CEDAR
Numbers for
Western &
Reference & Specifying
Selects
1
Finish Canadian WWPA
2
WCLIB
3
NLGA
4
Clear Heart
5
20.11 102-b 200a
A Grade
5
20.12 102-c 200b
C Select
5
10.12
Superior 10.51
D Select
5
10.13
Prime 10.52
B Grade 20.13 102-d 200c
Clear VG Heart
5
21.11 106-aa 201a
A Bevel
5
21.12 106-a 201b
Superior Bevel 16.11
B Bevel 21.13 106-b 201c
Rustic 201d
C Bevel 21.14 106-c 201e
Prime Bevel 16.12
Select Knotty
6
205a
Quality Knotty
6
205b
Commons
1
Alternate
Boards
2 Common Select Merch. 30.12 118-a 114a
Construction Select Knotty
6
111-e 204a
3 Common 30.13 118-b
8
114b
8
Standard Quality Knotty
6
111-f 204b
118-c
9
114c
9
All Patterns
All Patterns
Knotty
Premium
Knotty Grades
Premium Grades
Additional Grades for
Bevel Patterns
1 Equivalent grades, under the same paragraph numbers in WWPA Rules, are available in Idaho White Pine. Refer to
Western Lumber Grading Rules.
2 Western Wood Products Association’s Western Lumber Grading Rules.
3 West Coast Lumber Inspection Bureau’s Standard Grading Rules for West Coast Lumber.
4 National Lumber Grades Authority’s Standard Grading Rules for Canadian Lumber.
5 Some clear grades may be specified VG (vertical grain). Common practice is to ship orders as a combination of verti-
cal and flat grain, unless specified otherwise.
6 The widely used marketing term, “STK” usually describes a combination of Select Knotty and Quality Knotty, some-
times marketed with approximately 15% of the order in Quality Knotty.
7 The grades listed in these three columns are arranged in order of highest to lowest appearance quality; Clear Heart is
the highest and Standard and Quality Knotty are the lowest grades in this table.
8 Construction grade paragraph reference number.
9 Standard grade paragraph reference number.
The grade names in bold face type are the most widely available grades. These are often specified as a
grade combination that includes some portion of material in the next higher grade; i.e. C&BTR Select, D&BTR Select,
A&BTR Cedar, 2&BTR Common, 3&BTR Common or STAND&BTR (Standard & Better).
General
Categories
(Note that there
are additional
grades for bevel
pattern.)
4
days or longer, for unseasoned siding
or if acclimating in exceptionally
humid conditions.
Further precautions must be taken
if unseasoned or green materials,
with a moisture content of more than
19%, are to be used successfully:
1) Allow materials to acclimate, as
described, over a longer period
—at least 30 days and longer in
damp or humid conditions—
before installation.
2) Use patterns which allow for
some shrinkage, such as bevel,
channel or board-and-batten.
These patterns have a profile that
includes a gap that can more
easily accommodate dimensional
change.
3) Use as narrow a width as
possible. Dimensional change is
proportional; the wider the width,
the greater the change.
Priming and Prefinishing
Often, material which has been
properly seasoned, stored and han-
dled will pick up moisture after instal-
lation but prior to finishing. Later,
when the siding loses that moisture,
joints may open up.
Research from the U.S. Forest
Products Lab indicates that siding
exposed to the elements for two
stamped ‘S-DRY’’ or “KD”.
However, knotty grades can be
specified MC 15 or KD 15, and are
available through a buyer/seller
agreement, when a maximum
moisture content of 15% is desired.
Method of Drying — Lumber
may be air dried or kiln dried. These
terms do not necessarily refer to a
specific moisture content but refer
instead to the method used for dry-
ing. Air dried lumber has been
seasoned by exposure to the
atmosphere, without artificial heat.
Kiln dried lumber has been sea-
soned in a chamber with the use of
artificial heat. To assure compliance
with a moisture content level, a
moisture percentage should always
be referenced.
Siding Storage — All siding
may pick up or lose moisture in
transit or storage so it is important
to allow it to acclimate with the sur-
rounding air of its final site prior to
installation.
Stack the siding on evenly
spaced, vertically aligned stickers
(spacers between the layers) in an
area where there will be good air
flow through the stack. This should
be done in an open garage or other
area that is protected from the ele-
ments.
If stacked over concrete, use
2x4s or 2x6s on edge to elevate
the first course of siding at least 3¹⁄₂
inches above the surface of the
concrete. If the stack is over wet
ground or wet concrete, lay down a
vapor barrier so the wood doesn’t
pick up moisture from beneath the
stack.
Allow air to flow through and
around the stack for a week to 10
days for dry siding, prior to installa-
tion. Extend the time period to 30
For instance, if the climate in a
particular region causes wood to
maintain 9% to 14% moisture con-
tent, then the moisture content of
the siding should be within that
range when installed.
Siding can be dried at the time of
manufacturing to a variety of mois-
ture content levels or it can be
shipped from the mill unseasoned
or green.
Unseasoned or green wood
has a moisture content of more
than 19%.
Dry wood will be at a maximum
moisture content of 19% or 15%.
Dry siding will take less time to
acclimate to the air of its final
surroundings (refer to Table 2) and
it will have less dimensional
change, before and after instal-
lation, than unseasoned or green
siding.
When ordering siding, specify the
required moisture content level, but
keep in mind the reality of the mar-
ketplace: premium grades of siding
are readily available dry; some knot-
ty grades are available dry.
Remember too, dry has a differ-
ent meaning for the premium
grades than it does for the
knotty grades.
Dry for the premium grades
means that the siding has been
dried to a maximum of 15% mois-
ture content (MC 15). In addition,
under WWPA rules, MC 15 means
that at least 85% of the pieces in
the order will be at a moisture con-
tent of 12% or less.
When knotty grades are dried at
the mill, the siding is air- or kiln-
dried so that it will not exceed 19%
moisture content. Thus, dry knotty
siding will have a moisture content
of 19% or less and may be grade-
Checklist for a Siding
Material Specification
Select species suited to the
project.
List grade names, paragraph
numbers and rules-writing
agency. (Refer to Table 1.)
Specify surface texture for
exposed face.
Specify moisture content
suited to the project.
If gradestamped, specify
lumber be stamped on back
or ends. (WWPAs Lumber
Specifying offers additional
information.)
Specify VG (vertical grain) if
appropriate and available.
(Refer to Table 1, footnote 5.)
Specify pattern and size.
(WWPAs Standard Patterns
offers additional information.)
Table 2: MOISTURE CONTENT GUIDELINES
Recommended Moisture Content at Time of Installation
Use of Wood Most Areas Dry, Southwestern Damp, Warm South-
in Exterior of the U.S. States eastern Coastal Areas
Individual Individual Individual
Siding, Trim
Average
1
Pieces Average
1
Pieces Average
1
Pieces
and Sheathing
12% 9-14% 9% 7-12% 12% 9-14%
1
To obtain a realistic average, test at least 10% of each item, i.e. 10% of the siding pieces, 10% of
the trim pieces and random checks of the sheathing material. It is particularly important to check the
sheathing prior to the siding application if it has become wet after installation.
Source: Wood Handbook, 1999, from Table 12-2.
5
weeks weathers enough to reduce
the adhesion of film-forming
finishes.
Priming or prefinishing the siding
(all sides, edges and cut ends)
after it has reached climatic
balance but before it is installed
can provide extra protection and
often prevent adhesion problems
and/or premature finish failure.
Back-priming the siding eliminates
the leaching of chemical extractives,
which have the potential to degrade
sheathing wraps.
Prefinishing is recommended in all
circumstances. Prefinishing will min-
imize objectionable unfinished lines
where joints open up due to face-
width shrinkage during exceptionally
dry summers.
Make certain the prefinish is com-
patible with the final coat. For
example, clear water repellents
should not be used if a bleaching
oil is to be the final finish. (Refer to
the Finishing section.)
Installation
Natural wood siding should be
installed over a weather-resistive
barrier
regardless of the sheathing
material. A weather-resistive barrier
is a vapor-permeable sheathing
wrap that resists any liquid water
that gets behind the siding, and
acts as a drainage plane. There are
three basic types of sheathing
wrap: asphalt felt, Grade D building
paper and plastic housewrap. In
order to function as a drainage
plane, a sheathing wrap should
have an air gap between the wrap
and the siding. (An appropriate
vapor barrier, on the warm side of
the insulation, should be used to
reduce moisture movement from
inside.) (See Figure A.)
Sometimes referred to as a “rain-
screen” wall, the air space behind
the exterior siding promotes
drainage and ventilation, and allows
the drainage plane surface to shed
water back to the exterior rather
than absorb it. Typically, a 1/8-in. to
1/2-in. air space between the
Figure B: CORNER DETAILS
Figure A: FURRING STRIPS AND
DRAINAGE PLANE
Inside Corner Detail-b
a. HORIZONTAL SIDING
b. BUILDING PAPER
c. METAL FLASHING OR BUILDING PAPER
d. USE CAULK AT INSIDE CORNER OR
OPEN JOINT. PROVIDE METAL FLASHING
BEHIND JOINT IF CAULK IS NOT USED.
e. SHEATHING
a
c
b
e
d
Outside Corner Detail-b
a. PROVIDE ADDITIONAL STUD TO ALLOW
FOR NAILING AT ENDS OF SIDING
b. BUILDING PAPER
c. CAULK
d. CORNER BOARDS
e. SHEATHING
b
b
d
d
a
c
e
a
b
c
b
a. HORIZONTAL SIDING
b. BUILDING PAPER
c. TRIM
d. SHEATHING
e. CAULK
d
e
Inside Corner Detail-a
Outside Corner Detail-a
a. HORIZONTAL SIDING
b. BUILDING PAPER
c. CAULK
d. CORNER BOARDS
e. SHEATHING
a
b
b
d
e
d
c
a. STUD
b. SHEATHING
c. BUILDING PAPER OR HOUSEWRAP
d. PRESSURE-TREATED OR NATURALLY
DURABLE FURRING STRIP
e. HORIZONTAL SIDING
f. DRAINAGE MAT WITH INSECT BARRIER
a
b
c
a
e
f
d
d
¹⁄₂"
⁵⁄₁₆ ¹³⁄₃₂
¹³⁄₃₂
2
¹₃₂
6
*Note: Refer to WWPAs Standard Patterns (G-16) for scale profiles and actual dimensions of run-to-pattern products.
TRIM
BOARD-ON-BOARD
BOARD-AND-BATTEN
Boards are surfaced
smooth, rough or saw-
textured. Rustic ranch-
style appearance.
Provide horizontal nailing
members. Do not nail
through overlapping
pieces. Vertical
applications only.
BEVEL or BUNGALOW
Bungalow (“Colonial”) is
slightly thicker than
Bevel. Either can be used
with the smooth or saw-
faced surface exposed.
Patterns provide a
traditional-style appear-
ance Recommend a 1"
overlap. Do not nail
through overlapping
pieces. Horizontal
applications only. Cedar
Bevel is also available in
⁷⁄₈ x 10, 12.
DOLLY VARDEN
Dolly Varden is thicker
than Bevel and has a
rabbeted edge. Surfaced
smooth or saw-textured.
Provides a traditional-
style appearance. Allows
for a ¹⁄₂" overlap, includ-
ing an approximate ¹⁄₈"
gap. Do not nail through
overlapping pieces.
Horizontal applications
only. Cedar Dolly Varden
is also available in ⁷⁄₈ x
10, 12.
DROP
Drop siding is available in
13 patterns, in smooth,
rough or saw-textured
surfaces. Some are T&G,
others shiplapped. Refer
to Standard Patterns
(G-16) for dimensional
pattern profiles. A variety
of looks can be achieved
with the different patterns.
Do not nail through
overlapping pieces.
Horizontal or vertical
applications. Tongued
edge up in horizontal
applications
1 x 2
1 x 4
1 x 6
1 x 8
1 x 10
1 x 12
1¹⁄₄ x 6
1¹⁄₄ x 8
1¹⁄₄ x 10
1¹⁄₄ x 12
¹⁄₂ x 2
¹⁄₂ x 4
¹⁄₂ x 5
¹⁄₂ x 6
⁵⁄₈ x 8
⁵⁄₈ x 10
³⁄₄ x 6
³⁄₄ x 8
³⁄₄ x 10
Standard
Dolly Varden
³⁄₄ x 6
³⁄₄ x 8
³⁄₄ x 10
Thick
Dolly Varden
1 x 6
1 x 8
1 x 10
1 x 12
³⁄₄ x 6
³⁄₄ x 8
³⁄₄ x 10
Nominal Sizes*
Thickness & Width
Recommend ¹⁄₂" overlap. One
siding or box nail per bearing.
Increase overlap proportion-
ately. Use two siding or box
nails, 3-4" apart.
Recommend 1" overlap. One
siding or box nail per bearing,
just above the 1" overlap.
Recommend 1" overlap. One
siding or box nail per bearing,
just above the 1" overlap.
Allows for ¹⁄₂" overlap. One
siding or box nail per bearing,
1” up from bottom edge.
Allows for ¹⁄₂" overlap. One
siding or box nail per bearing,
1” up from bottom edge.
Use casing nails to blind nail
T&G patterns, one nail per
bearing. Use siding or box nails
to face nail shiplap patterns, 1"
up from bottom edge.
Use two siding or box nails,
3-4" apart to face nail, 1" up
from bottom edge.
Figure C: SIDING PATTERNS, NOMINAL SIZES & RECOMMENDED NAILING
Board
and
Batten
T&G
Patterns
Shiplap
Patterns
Board
and
Batten
Board
on
Board
¹⁵⁄₃₂
³⁄₄
³⁄₁₆
³⁄₁₆
¹⁄₂" = full depth
of rabbet
approximate
¹⁄₈" gap for
dry material
8" and wider
approximate
¹⁄₈" gap for
dry material
8" and wider
¹⁄₂" = full depth
of rabbet
Shiplap
Patterns
T&G
Patterns
Rabbeted Edge
Rabbeted Edge
Plain
Plain
Siding Patterns
Nailing
6" and Narrower 8" and Wider
approximate
¹⁄₈" gap for
dry material
8" and wider
¹⁄₂" = full depth
of rabbet
7
*Note: Refer to WWPAs Standard Patterns (G-16) for scale profiles and actual dimensions of run-to-pattern products.
TONGUED
& GROOVED
Tongued & Grooved
siding is available in a
variety of patterns. T&G
lends itself to different
effects aesthetically. Refer
to Standard Patterns (G-
16) for pattern profiles.
Sizes given here are for
Plain Tongued & Grooved.
Do not nail through over-
lapping pieces. Horizontal
or vertical applications.
Tongued edge up in
horizontal applications.
CHANNEL RUSTIC
Channel Rustic has a ¹⁄₂"
overlap, including an
approximate ¹⁄₈" gap, and
a 1" to 1¹⁄₄" channel
when installed. The pro-
file allows for maximum
dimensional change with-
out adversely affecting
appearance in climates of
highly variable moisture
levels between seasons.
Available smooth, rough
or saw-textured. Do not
nail through overlapping
pieces. Horizontal or
vertical applications.
LOG CABIN
Log Cabin siding is 1¹⁄₂"
thick at the thickest
point. Ideally suited to
informal buildings in
rustic settings. The pat-
tern may be milled from
appearance grades
(Commons) or dimension
grades (2x material).
Allows for ¹⁄₂" overlap,
including an approximate
¹⁄₈" gap. Do not nail
through overlapping
pieces. Horizontal or
vertical applications.
Siding Installation Tips
Do not nail through overlapping pieces. Use stainless steel, high tensile strength aluminum, or hot-dipped
galvanized nails with ring or spiral-threaded shanks. Use casing nails to blind nail; siding or box nails to face nail.
Horizontal applications only for Bevel, Bungalow and Dolly Varden.
Vertical applications only for Board-on-Board or Board-and-Batten; bevel cut ends of pieces and install so water
is directed to outside.
Horizontal or vertical applications for Tongued & Grooved, Channel Rustic, Log Cabin or Drop patterns. Tongued
edge up in horizontal applications of Drop and T&G patterns.
Read the section on Nail Penetration and Spacing to determine nail size.
Read the sections on Moisture Content and Priming and Prefinishing before installing siding.
³⁄₄ x 6
³⁄₄ x 8
³⁄₄ x 10
1¹⁄₂ x 6
1¹⁄₂ x 8
1¹⁄₂ x 10
1¹⁄₂ x 12
1 x 4
1 x 6
1 x 8
1 x 10
1 x 12
Use one siding or box nail to
face nail once per bearing, 1"
up from bottom edge.
Use one siding or box nail to
face nail once per bearing, 1¹⁄₂"
up from bottom edge.
Use two siding or box nails,
3-4" apart, per bearing to
face nail.
Use two siding or box nails
3-4" apart per bearing.
Use two siding or box nails
3-4" apart to face nail.
Note: T&G
patterns may
be ordered with
¹⁄₄, ³⁄₈, or ⁷⁄₁₆"
tongues. For
wider widths,
specify the
longer tongue
and pattern.
approximate
¹⁄₈" gap for
dry material
8" and wider
¹⁄₂" = full depth
of rabbet
Nominal Sizes*
Thickness & Width
Figure C: SIDING PATTERNS, NOMINAL SIZES & RECOMMENDED NAILING
Siding Patterns
Nailing
6" and Narrower 8" and Wider
Plain
Plain
Use one casing nail per
bearing to blind nail.
of wood used for the siding.
Avoid fasteners that may result
in stains.
Do not use staples
or electro-plated nails. These
fasteners often result in
black iron stains which can
be permanent.
Copper nails are not suitable for
Western Red Cedar as cedar’s
natural extractives will react with
the copper, causing the nails to
corrode and resulting in stains on
the siding.
While budgets are always a
consideration, high-quality nails for
solid wood siding are a wise
investment. The discoloration,
streaking or staining that can
occur with inappropriate nails
ruins the appearance of the
project and can be very difficult to
remove.
Nail Shanks
Many nails have smooth shanks
and will loosen as the siding
expands and contracts under the
extremes of seasonal changes in
temperature and humidity. Ring or
spiral-threaded nail shanks will
increase the holding power. Both
types of shanks are readily
available.
Nail Points
The most commonly used nail
points include:
Blunt — reduces splitting.
Diamond — most commonly
used.
Needle — should be avoided
as needle points tend to cause
splitting.
8
Nails and Nailing
Correct nails and nailing practices
are essential in the proper applica-
tion of wood siding. In general, sid-
ing and box nails are used for face
nailing and casing nails are used for
blind nailing. Nail locations are
included with the individual patterns
in Figure C.
Recommended Nails
Nails must be corrosion-
resistant and preferably rust proof.
Avoid using staples.
1. Stainless steel. The best
choice.
2. High tensile strength alu-
minum. An economical choice.
This nail is corrosion resistant and
will not discolor or cause deterio-
ration of the wood siding.
However, aluminum nails will
react with galvanized metal caus-
ing corrosion. Do not use alu-
minum nails on galvanized flash-
ing (nor galvanized nails on
aluminum flashing).
3. Hot-dipped galvanized. This
nail is the least expensive, but
may result in discoloration if pre-
cautions are not taken.
(a) Make certain the nails are of
top quality, as the degree of pro-
tective coating varies with the
hot-dip galvanization process.
(b) In some instances, the use
of hot-dipped galvanized nails
along with clear finishes on
Western Red Cedar has resulted
in stains around the nails. While
this occurrence seems to be lim-
ited to the northeastern and north
central regions of the country, the
combination of hot-dipped
galvanized nails with clear
finishes on Western Red
Cedar is not recommended.
(c) Plastic hammer-head covers
can be used when driving hot-
dipped galvanized nails. This will
reduce the potential for chipping
and the subsequent potential for
corrosion.
4. Other fasteners. Other types
of corrosion-resistant fasteners
may perform satisfactorily. Before
selecting an alternative fastener,
check with the fastener manu-
facturer to determine whether or
not it is suitable with the species
sheathing wrap and siding is
achieved by applying vertical furring
strips over the wrap.
Should water find a way behind
the siding, the vented space allows
moisture to dissipate naturally,
reducing premature finish failures
and directing water downward and
outward, away from moisture sensi-
tive materials. Corrugated sheathing
wraps and three-dimensional
drainage fabrics also have been
developed to provide drainage, even
when siding is installed directly
against the material.
When sheathing material or
sheathing wrap surfaces become
wet, allow surfaces to dry before the
wood siding is nailed into position.
Many patterns may be installed
horizontally or vertically. Pattern ori-
entation should restrict the entrance
of moisture and weather. Some pat-
terns, such as board-and-batten,
may be installed only in a vertical
fashion. Others, such as bungalow,
bevel and drop, may be installed
only horizontally.
Where two pieces of siding
meet—particularly in vertical appli-
cations—miter cut the ends at 45
degree angles to create an overlap-
ping joint. Make sure the joints meet
on studs, blocking or furring strips
for secure nailing.
Use caulk where siding abuts
openings or trim. Latex-silicone
blends, polyurethane and polysulfide
caulks should give satisfactory per-
formance. Caulks made of 100%
silicone are not recommended.
Theoretically, any pattern which
can be installed in either direction,
such as channel or tongued-and-
grooved, can also be installed diag-
onally. However, diagonal installation
tends to channel water directly into
door jambs, window casings or
other joinery details on a structure.
If siding is to be installed
diagonally, the project must be de-
signed from the outset to accom-
modate the direction of run-off.
When wood siding is installed
over metal studs, concrete or
masonry, provide 2x nailers of suffi-
cient spacing and size to meet the
nailing requirements. This procedure
is sometimes used when wood sid-
ing is installed over foam sheathing.
(Refer to Nail Penetration and
Spacing.)
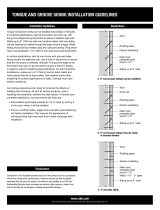
Figure D: NAIL TYPES
BOX CASING SIDING
RING SPIRAL
BLUNT DIAMOND
HEADS
SHANKS
POINTS
9
Nail Penetration and Spacing
Recommended penetration into
studs or blocking, or into a combi-
nation of wood sheathing and these
members, is 1¹⁄₂". Penetration is
1¹⁄₄" with ring shank nails.
Vertical siding, when applied over
wood-based sheathing, should be
nailed to horizontal blocking or other
wood framing members not exceed-
ing 36" on center when face-nailed,
or 32" on center when blind-nailed.
Vertical siding, when installed
without sheathing, should be nailed
to wood framing or blocking mem-
bers at 24" on center. Some building
codes require 24" on center with or
without sheathing; check your local
code to verify requirements. Cut
bevel (scarf) joints for vertical
installations.
Horizontal and diagonal siding
should be nailed to studs at 24" on
center maximum when applied over
wood-based, solid sheathing and
16" on center maximum when
applied without sheathing.
The siding pattern will determine
the exact nail size, placement and
number of nails required. (Refer to
Figure C.) Nails are placed to allow
the wood to move, that is to shrink
and swell, as well as to adequately
hold the siding in place.
As a general rule, each piece of
siding is nailed independently of its
neighboring pieces. Do not nail
through two overlapping pieces of
siding with the same nail as this
practice will restrict the natural
movement of the siding and may
cause unnecessary problems. Nail
joints into the studs or blocking
members.
Drive nails carefully. Hand nailing
is preferred over pneumatic nailing
because there is less control of
placement and driving force with
pneumatic nailers. Nails should be
snug, but not overdriven. Nails that
are overdriven can distort the wood
and may cause excessive splitting.
Overdriven nails also provide an
avenue for moisture to collect and
move through the piece. Predrilling
near the ends will help reduce any
splitting that can occur with thinner
patterns.
For additional information
regarding pneumatic nailing,
contact the International Staple,
Nail and Tool Association at
www.isanta.org
Finishing
Natural wood siding can be
finished with a variety of products
to achieve just about any look
desired. Finishes not only enhance
the appearance of the wood, but
also protect the siding against the
detrimental effects of water, mildew
and ultraviolet light.
Among the wide range of exterior
finishing products available, most
finishes fall into four general
categories: clear water repellents,
bleaching oils, stains and paints.
When choosing a particular finish,
consider the desired appearance,
preparation and maintenance
requirements of the finish, location
of the structure and current condi-
tion of the siding.
Some people prefer to leave
natural wood siding unfinished, in
hopes for a weathered appearance.
This is not recommended. Siding
without a finish can weather
unevenly and is prone to surface
mold, ultraviolet degradation and
moisture-related problems such as
cupping and splitting. With the cor-
rect type of finish, a natural weath-
ered look can be achieved while
providing protection for the siding
to promote optimum performance
over the years.
Clear Water Repellents
Clear water repellents are one
way to achieve a natural look.
These products do not add color to
the siding and the natural colors
and grain patterns can be seen
through the finish. These repellents
are often used on cedar siding
when a weathered, silvery-grey
color is desired.
Clear water repellents will not
maintain the brand new look of sid-
ing because they do not prevent
the sun’s ultraviolet rays from fading
the wood. Instead, water repellents
allow the wood to fade naturally
according to the amount of expo-
sure the wood receives. However,
some water repellents do contain
ultraviolet inhibitors or UV blockers
that help minimize the effects of the
sun.
Always choose a water repellent
that is formulated for wood and
contains a mildewcide to help pre-
vent discoloration caused by
mildew.
Water repellents are sometimes
formulated with a preservative,
such as zinc naphthanate, that
offers additional protection against
decay. These are particularly useful
in areas where the siding is con-
stantly subjected to high moisture.
Some copper-based preserva-
tives, such as copper naphthanate,
may not be desirable because they
have a green tint.
When paint is to be the final
finish, paintable clear water-
repellent preservatives can also be
applied prior to the prime coat to
increase the service life of the top
coats. Clear water repellents should
not be used under a bleaching oil
finish.
Clear water repellents can be
expected to last from six months to
two years, depending on the sur-
face texture of the siding and the
location and exposure of the
structure.
Bleaching Oils and
Bleaching Stains
Bleaching oils and bleaching
stains, sometimes called
weathering stains, are another way
to achieve a grey weathered look,
but the effect happens faster and
the protection offered is longer-lived
than with a clear water repellent.
Bleaching products are similar to
semi-transparent stains but contain
an added ingredient which causes
the wood to bleach to a silver color
within approximately six to 12
Table 3: NAIL LENGTHS
12d 3 ¹⁄₄"
10d 3"
9d 2 ³⁄₄"
8d 2 ¹⁄₂"
7d 2 ¹⁄₄"
6d 2"
5d 1 ³⁄₄"
4d 1 ¹⁄₂"
3d 1 ¹⁄₄"
2d 1"
10
a more rigid film that can crack or
blister if the wood moves exces-
sively as a result of changes in
humidity.
Acrylic latex paints are more flexi-
ble and will consequently shrink
and expand with the wood, making
them less prone to cracking.
The recommended application for
most species is one brush coat of
acrylic latex primer followed by two
coats of 100% acrylic latex paint.
For species high in extractives
such as Cedar, use an oil-based
primer or stain-blocking latex
primer, then two coats of acrylic
latex paint.
To enhance the performance of a
paint finish, prefinish the siding with
one coat (or dip) of a paint-compat-
ible water-repellent preservative
prior to priming and painting. This
can increase the life of the finish by
up to 10 years.
Finishes to Avoid
Do not use varnishes, lacquers or
other clear, film-forming finishes on
exposed wood. These finishes
become brittle, allow UV degrada-
tion, can crack and peel, and are
difficult to remove. Also avoid pure
linseed oil or linseed oil/turpentine
mixtures. Such finishes attract dirt
and are prone to mildew.
Application Methods
The best method for applying
most finishes is with a brush (water
repellents may be dipped).
Brushing usually puts more finish
on the wood surface, extending its
service life. On rough-sawn siding,
a brush serves to work the finish
around the rough wood fibers.
All siding surfaces (face, edges,
ends and back side) should have a
coat of protection before
installation.
When all surfaces are coated,
moisture movement in and out of
the siding is equalized and the
potential for cupping and splitting is
minimized.
Prefinishing also minimizes unfin-
ished lines that can occur at joints
and laps if the siding shrinks during
exceptionally dry summers.
may last up to five years.
Semitransparent stains do not last
as long on smooth sidings.
Opaque (solid or heavy-body)
stains, have more pigment than
semitransparent stains. Think of
them as thin paints. Wood grain
and color are not visible through
opaque stains, but surface texture
(roughness) is.
Opaque stains are available in oil-
or water-based formulations; how-
ever, oil-based formulations are rec-
ommended for cedar siding.
Opaque stains may form a thin film
on the wood surface and some can
be subject to flaking. Opaque stains
are not recommended over smooth
siding unless a compatible primer is
used prior to staining.
Service life is typically three to
seven years, depending on the sur-
face texture, exposure of the build-
ing and number of previous appli-
cations.
Primers and Paint
A paint system, properly applied,
will provide more protection and
last longer than other finishes.
Paints are film-forming finishes that
resist moisture absorption and
block ultraviolet rays. The variety of
colors makes paint a popular finish;
lighter colors are recommended
over darker colors.
If good performance is to be
expected, primers must be used.
Primers are generally oil or water-
based. Acrylic latex (water-based)
primers are recommended for most
wood species.
However, for woods naturally
high in extractive content, such as
Western Red Cedar, stain-blocking
(oil-based or latex) primers must be
used to help minimize discol-
orations that can occur when water
interacts with the natural extrac-
tives, causing them to bleed
through the surface of the primer.
The primer must prevent the natur-
al extractives in the wood from
interacting with the water in subse-
quent finish coats.
Paints are formulated using either
an oil (or alkyd) base or water base.
Oil-based paints are generally
more effective at blocking moisture
than are acrylic latex paints. How-
ever, oil-based paints tend to form
months. They are typically used on
cedar siding.
Because of the pigmentation
included in the formulation, bleach-
ing oils and stains will color the
wood grey upon application. Then,
as the siding is exposed to sun and
water, the bleaching oils begin to
bleach the wood itself, resulting in a
more uniform weathered look than
can be achieved naturally.
Bleaching oils bring about a
silvery-grey appearance that can
last for many years. However, the
protection offered by the oils may
only last two or three years.
Consequently, it is a good idea to
periodically apply a clear water
repellent to the siding, over the
bleaching oil, to protect it but not
alter the color. If siding color
becomes uneven over time, simply
reapply another coat of bleaching
oil.
Stains
Stains are pigmented finishes that
provide color and protection
against ultraviolet rays. Many are
also water repellents and may
include mildewcides and
preservatives as well.
When selecting a stain, make
sure it is a water-repellent stain that
contains at least a mildewcide.
Stains are recommended
for use on rough or saw-textured
siding.
Stains are classified as semitrans-
parent and opaque.
Semitransparent stains have a
moderate amount of pigment, pro-
vide a fairly uniform color without
hiding the wood grain. Oil-based,
semi-transparent stains are recom-
mended as they penetrate the
wood surface more than water-
based products.
As semitransparent stains do not
form a film, they are not subject to
peeling or blistering but do wear off
gradually.
Semitransparent stains can be
expected to last from two to five
years, depending on the surface
texture of the wood, the exposure
conditions and the number of previ-
ous applications. For first-time
applications on saw-textured siding,
semitransparent stains may last two
years. Subsequent applications
Table 4: COVERAGE ESTIMATOR
Width
Factor for Factor for
Nominal Exposed Lineal Board
Pattern Width Dressed Face Feet
1
Feet
2
43¹₂ 2¹₂ 4.8 1.60
Bevel & 6 5¹₂ 4¹₂ 2.67 1.33
Bungalow 8 7¹⁄₄ 6¹⁄₄ 1.92 1.28
10 9¹⁄₄ 8¹⁄₄ 1.45 1.21
43¹₂ 3 4.0 1.33
Dolly 6 5¹₂ 5 2.4 1.2
Varden 8 7¹⁄₄ 6³⁄₄ 1.78 1.19
10 9¹⁄₄ 8³⁄₄ 1.37 1.14
12 11¹⁄₄ 10 ³⁄₄ 1.12 1.12
43³⁄₈ 3¹⁄₈ 3.84 1.28
Drop,T&G and 6 5³⁄₈ 5¹⁄₈ 2.34 1.17
Channel Rustic 8 7¹⁄₈ 6⁷⁄₈ 1.75 1.16
10 9¹⁄₈ 8 ⁷⁄₈ 1.35 1.13
65⁷₁₆ 4¹⁵₁₆ 2.43 2.43
Log Cabin 8 7¹⁄₈ 6⁵₈ 1.81 2.42
10 9¹⁄₈ 8⁵₈ 1.39 2.32
21¹₂
43¹₂
Boards 6 5¹₂
87¹⁄₄
10 9¹⁄₄
11
Coverage Calculations
Siding is usually sold either by the
lineal (running) foot or by the board
foot.
To simplify cost and coverage
estimations, select the appropriate
factor from Table 4 according to
how the siding is priced. The factors
provided in Table 4 can be used to
calculate the amount of siding
required either in lineal feet or in
board feet.
In either case, the square footage
of the area to be covered is calcu-
lated first, then multiplied by the
appropriate factor.
Procedure:
A) Calculate the square footage
in walls:
length x width = sq. ft.
B) Calculate and then subtract the
square footage of openings.
Now add 10% for trim and
waste.
C) Multiply the result by either the
factor for lineal feet or
the factor
for board feet.
D) Multiply the total footage
required by price.
Additional Information
Technical information on Western
lumber products manufactured by
WWPA mills is available through the
Association’s Online Technical
Guide at www.wwpa.org. Free
registration is required. The Online
Guide features sections on lumber
grades, design values, specifica-
tions and properties of Western
lumber.
For a full description of technical
publications available for purchase
or download, go to the Online
Literature Store on the WWPA web
site.
Checklist for High Performance, Long-Lasting,
Beautiful Natural Wood Siding
Select climate- and design-appropriate patterns with surface textures
appropriate for the desired finish.
Specify species and grade compatible with budget.
Allow siding to acclimate at job site.
Prefinish all surfaces (sides, edges, ends) with:
• water repellent that contains a mildewcide (and is compatible with the
final finish), and/or*
• stain or bleaching oil, if one of these is to be the final finish, or
• primer, if paint is to be the final finish.
Use an appropriate sheathing wrap. Make certain it is dry before
applying siding.
Allow for drainage between the sheathing wrap and the siding.
Apply siding, using the right nails, in accordance with correct nailing pro-
cedures. Incorporate appropriate construction practices at corners.
Provide additional coats of protective finish as required.
*While water repellents are not recommended for use under most stains, they can be used to
coat the backside of siding when stain or bleaching oil will be applied to face, edges and
ends.
The exposed face width will vary depending on
size selected and on how the boards-and-battens
or boards-on-boards are applied. Minimum over-
lap is ¹₂". Determine the exposed face, then refer
to footnotes to calculate factor.
1
Lineal Foot Factor is derived by dividing 12" by the exposed face width.
2
Board Foot Factor is derived by dividing the nominal width by the exposed face width and is based on
nominal 1" stock, except log cabin. Log cabin is based on 2" thickness. For nominal 1¹₂" log cabin,
multiply by .75.
Note: Factors do not include any allowance for trim or waste and do not apply to diagonal installations. A
10% allowance for trim and waste (25-30% for diagonal installations) should be added to the square footage
required before the factors are used. Refer to Procedure at left.
Western Lumber Grades
for Siding Products
Western Wood Products Association
522 SW Fifth Avenue, Suite 500
Portland, OR 97204-2122
503-224-3930 fax: 503-224-3934
website: www.wwpa.org
TG-8/0717/Rev.7-07/5M
©2007 WWPA
Photocopy this chart and post in a convenient place.
GRADES
7
Grade Rule Paragraph
WESTERN SPECIES CEDAR
Numbers for
Western &
Refer
ence & Specifying
Selects
1
Finish Canadian WWPA
2
WCLIB
3
NLGA
4
Clear Heart
5
20.11 102-b 200a
A Grade
5
20.12 102-c 200b
C Select
5
10.12
Superior 10.51
D Select
5
10.13
Prime 10.52
––
B Grade 20.13 102-d 200c
Clear VG Heart
5
21.11 106-aa 201a
A Bevel
5
21.12 106-a 201b
Superior Bevel 16.11
B Bevel 21.13 106-b 201c
Rustic
201d
C Bevel 21.14 106-c 201e
Prime Bevel 16.12
Select Knotty
6
––205a
Quality Knotty
6
205b
Commons
1
Alternate
Boards
2 Common Select Merch. 30.12 118-a 114a
Construction Select Knotty
6
111-e 204a
3 Common 30.13 118-b
8
114b
8
Standard Quality Knotty
6
111-f 204b
118-c
9
114c
9
All Patterns
All Patterns
Knotty
Premium
Knotty Grades
Premium Grades
Additional Grades for
Bevel Patterns
1 Equivalent grades, under the same paragraph numbers in WWPA Rules, are available in Idaho White Pine. Refer to
Western Lumber Grading Rules.
2 Western Wood Products Association’s Western Lumber Grading Rules.
3 West Coast Lumber Inspection Bureau’s Standard Grading Rules for West Coast Lumber.
4 National Lumber Grades Authority’s Standard Grading Rules for Canadian Lumber.
5 Some clear grades may be specified VG (vertical grain). Common practice is to ship orders as a combination of verti-
cal and flat grain, unless specified otherwise.
6 The widely used marketing term, “STK” usually describes a combination of Select Knotty and Quality Knotty, some-
times marketed with approximately 15% of the order in Quality Knotty.
7 The grades listed in these three columns are arranged in order of highest to lowest appearance quality; Clear Heart
is the highest, and Standard and Quality Knotty are the lowest grades in this table.
8 Construction grade paragraph reference number.
9 Standard grade paragraph reference number.
The grade names in bold face type are the most widely available grades. These are often specified as a
grade combination that includes some portion of material in the next higher grade; i.e. C&BTR Select, D&BTR Select,
A&BTR Cedar, 2&BTR Common, 3&BTR Common or STAND&BTR (Standard & Better).
General
Categories
(Note that there
are additional
grades for bevel
pattern.)
  • Page 1 1
  • Page 2 2
  • Page 3 3
  • Page 4 4
  • Page 5 5
  • Page 6 6
  • Page 7 7
  • Page 8 8
  • Page 9 9
  • Page 10 10
  • Page 11 11
  • Page 12 12

Unbranded 1812WPS Installation guide

Type
Installation guide

Ask a question and I''ll find the answer in the document

Finding information in a document is now easier with AI