Page is loading ...

Do not use in wet locations
Personal Security
Window or Door Alarm
User Manual

Window or Door Alarm
Activating Batteries
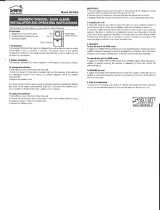
Before attempting to use the Window/
Door Alarm, you must activate the batteries
installed. Slide open the battery door and
locate the battery isolation tape. Hold the
Chime/Off/Alarm
Switch
Battery
Compartment
Window or
Door Alarm
Indicator Light
Battery
Test
Button
Magnet
BATTERY
TEST

4
batteries in place while pulling the battery
isolation tape out. Once the isolator tape is
removed the alarm is active.
Low Battery Indicator
The alarm has a low battery indicator light.
Push the ‘Battery Test’ button located inside
the battery compartment. If the green light
illuminates when the button is pressed, the
batteries are still good. If the light fails to
illuminate, replace all batteries.
INSTALLING BATTERIES
The alarm requires (4) LR44 (or 357) button
batteries (included). Average battery life for

5
typical usage is up to one year.
1. Slide cover off the battery compartment
located on the front of the main unit.
2. Insert (4) LR44 button batteries noting
polarity.
3. Replace battery compartment cover.
INSTALLATION
NOTE: The magnet must be placed on the
right side of the alarm. The arrows on the
alarm and the magnet must align.
1. Locate a postion on the window or door
to be protected that allows easy access to

6
the OFF/CHIME/ALARM switch. Make sure
switch is in OFF position. Make sure the
surface you are mounting to is clean and
dry. For best results, clean the mounting
surface with a mixture of 50% isopropyl
alcohol and 50% water.
2. Peel the protective covering from one side
of the double-sided tape and then apply to
the back of the alarm. Remove protective
covering from the back side of the double-
sided tape and lightly mount the alarm or
the magnet on the part of the entry that
opens (i.e. the window or door itself)

7
Window and Door Prefered Mounting Method

8
Alarm
Double-sided
tape
3. Mount the other piece of the unit on the
stationary part of the entry way (i.e. the
window or door frame). Ensure that when
the door or window is closed, the gap
between the two pieces of the alarm unit is
less than 1/2” (preferably less).
4. Once correct placement is established, apply
pressure to secure double-sided tape.

9
OPERATION
1. To arm the unit, locate the
OFF/CHIME/ALARM switch on the side.
Slide the switch to the desired position.
When in the ALARM position, if the
protected window or door is opened
(causing the alarm to be separated from
the magnet by more than 1/2"), the
alarm siren will sound continuously until
disarmed or when the door or window is
closed (and the gap between the alarm
and the magnet is less than 1/2”).
When in the chime position, if the door or

10
window is opened, the chime will sound.
It will sound once again when the door or
window is closed and reopened.
2. To disarm the unit toggle the switch to OFF
position. Make sure the window, door or
cabinet is closed before rearming. NOTE:
To test, a cloth can be used to cover the
alarm to reduce risk of hearing damage.
CARE AND MAINTENANCE
To clean the unit housing, use a soft cloth
slightly dampened with water and wipe dry.

11
Do not use chemical agents as this may
damage and discolor the unit.
WARNING
Limitations of Alarm Products
This product should be tested periodically to make sure
it is working properly. The product, if used properly, may
reduce the risk of burglary, robbery, or other adverse
events. However, JASCO is not an insurer, this product is
neither insurance nor a guarantee that such an event will be
prevented, and users should protect themselves with proper
insurance. JASCO makes no representation that this product
cannot be compromised or circumvented, that it will provide
an adequate warning, or that it will prevent any personal
injuries, property damage, or other losses. Like any alarm
product, including expensive commercial systems, it may be
bypassed, it is subject to compromise, and it may fail to warn
for a variety of reasons, including, but not limited to: improper
installation or positioning; improper maintenance; tampering;

12
dead or improperly installed batteries; sensing limitations;
component failures; receivers; for infrared products,
intrusions may be outside of a product’s designed range and
certain environmental conditions may impact performance
and audible alarm signals may be outside of hearing range,
muted by doors, walls, and floors, unheard by deep sleepers
or the hearing-impaired, or overwhelmed by other sounds.
WARNING
Risk of personal injury
• Prolonged exposure to alarm siren may cause permanent
hearing loss
Battery Warning
• Remove batteries before storing the Alarm for extended
periods
• Batteries may leak harmful liquids or ignitable materials or
explode causing injury and product damage
• Do not mix old and new or other battery types
• Replace all batteries at the same time
• Replace fully discharged batteries immediately
For indoor use only; do not use in wet locations.

13
This Jasco product comes with a 90 day limited warranty.
Please contact Customer Service at 800-654-8483 between
7:30AM—5:00PM CST or via our website (www.jascoproducts.
com) if the unit should prove defective within the warranty
period.
is a trademark of the General Electric Company and is
used under license to Jasco Products Company LLC, 10 E.
Memorial Road, Oklahoma City, OK 73114.
3555
56789-3
11/07/2012
/


