Sony DSX-A60BT User manual

Category
Car media receivers
Type
User manual
2GB
Made in Thailand
The nameplate indicating operating voltage,
etc., is located on the bottom of the chassis.
Hereby, Sony Corp., declares that this DSX-
A60BT is in compliance with the essential
requirements and other relevant provisions
of Directive 1999/5/EC.
For details, please access the following URL:
http://www.compliance.sony.de/
Italy: Use of the RLAN network is governed:
with respect to private use, by the
Legislative Decree of 1.8.2003, no. 259
(“Code of Electronic Communications”). In
particular Article 104 indicates when the
prior obtainment of a general
authorization is required and Art. 105
indicates when free use is permitted;
with respect to the supply to the public of
the RLAN access to telecom networks and
services, by the Ministerial Decree
28.5.2003, as amended, and Art. 25
(general authorization for electronic
communications networks and services) of
the Code of electronic communications.
Norway: Use of this radio equipment is not
allowed in the geographical area within a
radius of 20 km from the centre of Ny-
Alesund, Svalbard.
Notice for customers: the following
information is only applicable to
equipment sold in countries applying EU
Directives
Manufacturer: Sony Corporation, 1-7-1 Konan
Minato-ku Tokyo, 108-0075 Japan
For EU product compliance: Sony
Deutschland GmbH, Hedelfinger Strasse 61,
70327 Stuttgart, Germany
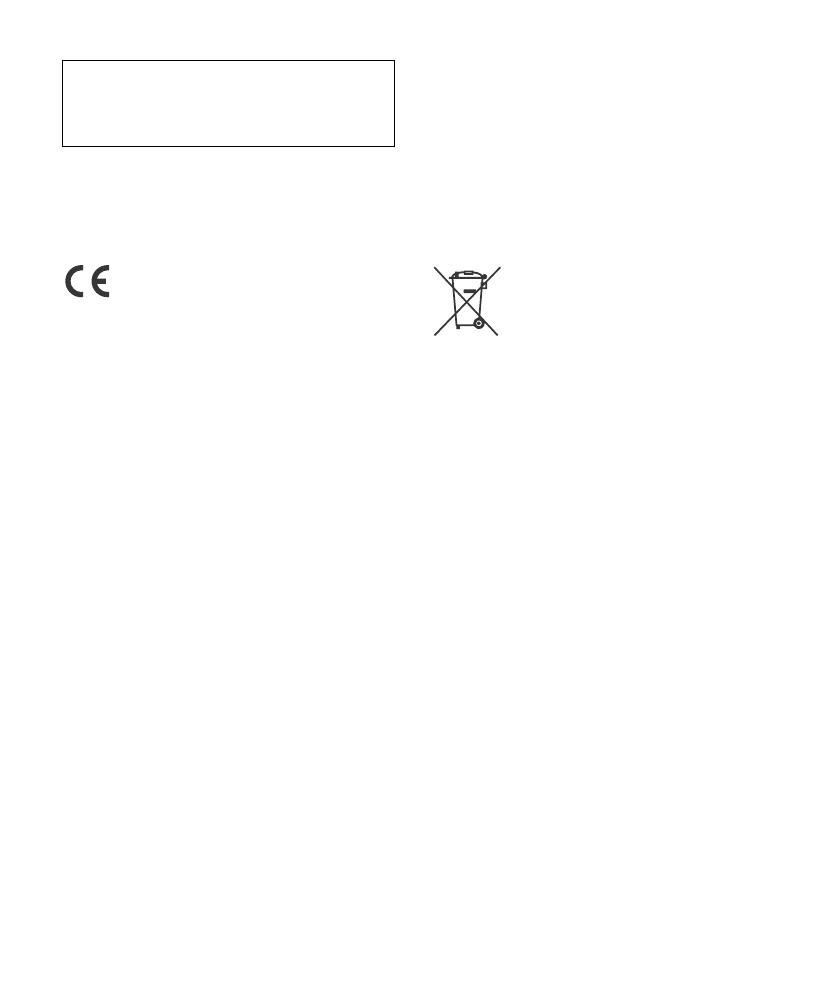
Disposal of waste batteries
(applicable in the European
Union and other European
countries with separate
collection systems)
This symbol on the battery or on the
packaging indicates that the battery
provided with this product shall not be
treated as household waste. On certain
batteries this symbol might be used in
combination with a chemical symbol. The
chemical symbols for mercury (Hg) or lead
(Pb) are added if the battery contains more
than 0.0005% mercury or 0.004% lead. By
ensuring these batteries are disposed of
correctly, you will help prevent potentially
negative consequences for the environment
and human health which could otherwise be
caused by inappropriate waste handling of
the battery. The recycling of the materials
will help to conserve natural resources. In
case of products that for safety, performance
or data integrity reasons require a
permanent connection with an incorporated
battery, this battery should be replaced by
qualified service staff only. To ensure that the
battery will be treated properly, hand over
the product at end-of-life to the applicable
collection point for the recycling of electrical
and electronic equipment. For all other
batteries, please view the section on how to
remove the battery from the product safely.
Be sure to install this unit in the dashboard of
the car for safety.
For installation and connections, see the
supplied installation/connections manual.
3GB
Hand the battery over to the applicable
collection point for the recycling of waste
batteries. For more detailed information
about recycling of this product or battery,
please contact your local Civic Office, your
household waste disposal service or the
shop where you purchased the product.
Note on the lithium battery
Do not expose the battery to excessive heat
such as direct sunlight, fire or the like.
Caution
IN NO EVENT SHALL SONY BE LIABLE FOR
ANY INCIDENTAL, INDIRECT OR
CONSEQUENTIAL DAMAGES OR OTHER
DAMAGES INCLUDING, WITHOUT LIMITATION,
LOSS OF PROFITS, LOSS OF REVENUE, LOSS
OF DATA, LOSS OF USE OF THE PRODUCT OR
ANY ASSOCIATED EQUIPMENT, DOWNTIME,
AND PURCHASER’S TIME RELATED TO OR
ARISING OUT OF THE USE OF THIS PRODUCT,
ITS HARDWARE AND/OR ITS SOFTWARE.
IMPORTANT NOTICE!
Safe and efficient use
Changes or modifications to this unit not
expressly approved by Sony may void the
user’s authority to operate the equipment.
Please check for exceptions, due to national
requirement or limitations, in usage of
BLUETOOTH equipment before using this
product.
Driving
Check the laws and regulations on the use of
cellular phones and handsfree equipment in
the areas where you drive.
Always give full attention to driving and pull
off the road and park before making or
answering a call if driving conditions so
require.
Connecting to other devices
When connecting to any other device, please
read its user guide for detailed safety
instructions.
Warning if your car’s ignition has no ACC
position
Be sure to set the AUTO OFF function
(page 19). The unit will shut off completely
and automatically in the set time after the
unit is turned off, which prevents battery
drain. If you do not set the AUTO OFF
function, press and hold OFF until the display
disappears each time you turn the ignition
off.
Notes on BLUETOOTH function
4GB
Radio frequency exposure
RF signals may affect improperly installed or
inadequately shielded electronic systems in
cars, such as electronic fuel injection
systems, electronic antiskid (antilock)
braking systems, electronic speed control
systems or air bag systems. For installation
or service of this device, please consult with
the manufacturer or its representative of
your car. Faulty installation or service may be
dangerous and may invalidate any warranty
that may apply to this device.
Consult with the manufacturer of your car to
ensure that the use of your cellular phone in
the car will not affect its electronic system.
Check regularly that all wireless device
equipment in your car is mounted and
operating properly.
Emergency calls
This BLUETOOTH car handsfree and the
electronic device connected to the handsfree
operate using radio signals, cellular, and
landline networks as well as user-
programmed function, which cannot
guarantee connection under all conditions.
Therefore do not rely solely upon any
electronic device for essential
communications (such as medical
emergencies).
Remember, in order to make or receive calls,
the handsfree and the electronic device
connected to the handsfree must be
switched on in a service area with adequate
cellular signal strength.
Emergency calls may not be possible on all
cellular phone networks or when certain
network services and/or phone features are
in use.
Check with your local service provider.
5GB
Table of Contents
Guide to Parts and Controls. . . . . . . . . . . . . . 6
Getting Started
Detaching the Front Panel . . . . . . . . . . . . . . . 8
Setting the Clock. . . . . . . . . . . . . . . . . . . . . . . 8
Preparing a BLUETOOTH Device . . . . . . . . . . 8
Connecting an iPod/USB Device . . . . . . . . . 10
Connecting Other Portable Audio
Device. . . . . . . . . . . . . . . . . . . . . . . . . . . . 10
Listening to the Radio
Listening to the Radio . . . . . . . . . . . . . . . . . .11
Using Radio Data System (RDS). . . . . . . . . . 12
Playback
Playing an iPod/USB Device . . . . . . . . . . . . 13
Playing a BLUETOOTH Device . . . . . . . . . . . 14
Searching and Playing Tracks . . . . . . . . . . . 15
Handsfree Calling
Receiving a Call. . . . . . . . . . . . . . . . . . . . . . . 16
Making a Call. . . . . . . . . . . . . . . . . . . . . . . . . 17
Available Operations during Call. . . . . . . . . 18
Settings
Canceling the DEMO Mode . . . . . . . . . . . . . 19
Basic Setting Operation . . . . . . . . . . . . . . . . 19
General Setup . . . . . . . . . . . . . . . . . . . . . . . . 19
BT INIT (BLUETOOTH initialize) . . . . . . . . 20
Sound Setup . . . . . . . . . . . . . . . . . . . . . . . . . 20
EQ3 PRST (EQ3 preset) . . . . . . . . . . . . . . 20
EQ3 LOW, EQ3 MID, EQ3 HIGH . . . . . . . . 20
BLUETOOTH Setup . . . . . . . . . . . . . . . . . . . . 21
Additional Information
Precautions . . . . . . . . . . . . . . . . . . . . . . . . . . 21
Maintenance . . . . . . . . . . . . . . . . . . . . . . . . . 24
Specifications . . . . . . . . . . . . . . . . . . . . . . . . 24
Troubleshooting . . . . . . . . . . . . . . . . . . . . . . 26
6GB
Guide to Parts and Controls
The number 2/ALBUM button has a tactile dot.
(browse) (page 15)
Enter the browse mode during playback.
SOURCE
Turn on the power.
Change the source.
-OFF
Press and hold for 1 second to turn off
the power.
Press and hold for more than 2 seconds
to turn off the power and the display.
If the unit is turned off and the display
disappears, it is unable you to operate
with the remote.
Control dial
Rotate to adjust the volume.
ENTER
Enter the selected item.
SELECT
Enter sound setting.
Press and hold to open the general setup
menu.
(handsfree)
Receive/end a call.
CALL
Enter the call menu.
Press and hold more than 2 seconds to
switch the BLUETOOTH signal.
Display window
Main unit
7GB
(back)
Return to the previous display.
MODE (page 11, 14, 18)
(front panel release)
SEEK +/–
Tune in radio stations automatically.
Press and hold to tune manually.
/ (prev/next), /
(reverse/fast-forward)
Receptor for the remote commander
AF (alternative frequencies)/TA (traffic
announcement)
Set AF and TA in RDS.
-PTY (program type)
Press and hold to select PTY in RDS.
Number buttons
Receive stored radio stations. Press and
hold to store stations.
Call a stored phone number. Press and
hold to store a phone number.
ALBUM /
Skip an album for audio device. Press and
hold to skip albums continuously.
PAUSE
SHUF (shuffle)
MIC (page 18)
DSPL (display)
Change display items.
-SCRL (scroll)
Press and hold to scroll a display item.
USB port
AUX input jack
The VOL (volume) + button has a tactile dot.
Remove the insulation film before use.
 ()/ ()
VOL (volume) +/–
SOUND
Open the SOUND menu directly.
-MENU
Press and hold to open the general setup
menu.
 (+)/ (–)
RM-X231 Remote
8GB
Detaching the Front Panel
You can detach the front panel of this unit to
prevent theft.
1 Press and hold OFF .
The unit is turned off.
2 Press , then remove the panel
by pulling it towards you.
Caution alarm
If you turn the ignition switch to the OFF
position without detaching the front panel,
the caution alarm will sound for a few
seconds. The alarm will only sound if the
built-in amplifier is used.
Setting the Clock
1 Press and hold SELECT.
The setup display appears.
2 Rotate the control dial to select
[CLOCK-ADJ], then press it.
The hour indication flashes.
3 Rotate the control dial to set the
hour and minute.
To move the digital indication, press SEEK
+/–.
4 After setting the minute, press
SELECT.
The setup is complete and the clock
starts.
To display the clock, press DSPL.
Preparing a BLUETOOTH
Device
You can enjoy music, or perform handsfree
calling, by connecting a suitable BLUETOOTH
device. For details on connecting, refer to the
operating instructions supplied with the
device.
Before connecting the device, turn down the
volume of this unit; otherwise, loud sound
may result.
Getting Started
Attaching the front panel
9GB
When connecting a BLUETOOTH device
(cellular phone, audio device, etc.) for the
first time, mutual registration (called
“pairing”) is required. Pairing enables this
unit and other devices to recognize each
other.
1 Place the BLUETOOTH device within
1 m (3 ft) of this unit.
2 Press CALL, rotate the control dial to
select [PAIRING], then press it.
flashes.
The unit enters pairing standby mode.
3 Perform pairing on the BLUETOOTH
device so it detects this unit.
4 Select [Sony Automotive] shown in
the display of the BLUETOOTH
device.
If [Sony Automotive] does not appear,
repeat from step 2.
5 If passkey* input is required on the
BLUETOOTH device, input [0000].
* Passkey may be called “passcode,” “PIN
code,” “PIN number” or “Password,” etc.,
depending on the device.
When pairing is made, stays lit.
6 Select this unit on the BLUETOOTH
device to establish the BLUETOOTH
connection.
or lights up when the connection is
made.
Note
While connecting to a BLUETOOTH device, this unit
cannot be detected from another device. To enable
detection, enter the pairing mode and search for
this unit from another device.
To cancel pairing
Perform step 2 to cancel the pairing mode
after this unit and the BLUETOOTH device are
paired.
To use a paired device, connection with this
unit is required. Some paired devices will
connect automatically.
1 Press CALL, rotate the control dial to
select [BT SIGNL], then press it.
Pairing and connecting with a
BLUETOOTH device
Connecting with a paired
BLUETOOTH device
[0000]
Input passkey
10GB
Make sure that lights up.
2 Activate the BLUETOOTH function
on the BLUETOOTH device.
3 Operate the BLUETOOTH device to
connect to this unit.
or lights up.
Icons in the display:
To connect the last-connected device
from this unit
Activate the BLUETOOTH function on the
BLUETOOTH device.
Press SOURCE.
Select [BT PHONE] or [BT AUDIO].
Press (handsfree) to connect with the
cellular phone, or PAUSE to connect with the
audio device.
Note
While streaming BLUETOOTH audio, you cannot
connect from this unit to the cellular phone.
Connect from the cellular phone to this unit
instead.
Tip
With BLUETOOTH signal on: when the ignition is
turned to on, this unit reconnects automatically to
the last-connected cellular phone.
Connecting an iPod/USB
Device
1 Turn down the volume on the unit.
2 Connect the iPod/USB device to the
unit.
To connect an iPod/iPhone, use the USB
connection cable for iPod (not supplied).
Connecting Other Portable
Audio Device
1 Turn off the portable audio device.
2 Turn down the volume on the unit.
3 Connect the portable audio device
to the AUX input jack (stereo mini
jack) on the unit with a connecting
cord (not supplied)*.
* Be sure to use a straight type plug.
Lights up when a cellular phone is
connected to the unit.
Lights up when an audio device is
connected to the unit.
When connecting an iPhone
11GB
4 Press SOURCE to select [AUX].
To match the volume level of the
connected device to other sources
Start playback of the portable audio device
at a moderate volume, and set your usual
listening volume on the unit.
Press SELECT, and rotate the control dial to
select [AUX VOL] (page 20).
Listening to the Radio
To listen to the radio, press SOURCE to select
[TUNER].
1 Press MODE to change the band.
2 Press and hold SELECT (FM1, FM2,
FM3, MW or LW).
The setup display appears.
3 Rotate the control dial to select
[BTM], then press it.
The unit stores stations in order of
frequency on the number buttons.
1 Press MODE to change the band
(FM1, FM2, FM3, MW or LW).
2 Perform tuning.
To tune manually
Press and hold SEEK +/– to locate the
approximate frequency, then press SEEK
+/– repeatedly to fine adjust to the
desired frequency.
To tune automatically
Press SEEK +/–.
Scanning stops when the unit receives a
station. Repeat this procedure until the
desired station is received.
Listening to the Radio
Storing automatically (BTM)
Tuning
12GB
1 While receiving the station that you
want to store, press and hold a
number button (1 to 6) until [MEM]
appears.
1 Select the band, then press a
number button (1 to 6).
Using Radio Data System
(RDS)
AF continuously retunes the station to the
strongest signal in a network, and TA
provides current traffic information or traffic
programs (TP) if received.
1 Press AF/TA to select [AF-ON], [TA-
ON], [AF/TA-ON] or [AF/TA-OFF].
To store RDS stations with the AF and TA
setting
You can preset RDS stations along with an
AF/TA setting. Set AF/TA, then store the
station with BTM or manually. If you preset
manually, you can also preset non-RDS
stations.
To receive emergency announcements
With AF or TA on, emergency
announcements will automatically interrupt
the currently selected source.
When adjusting the volume level during
a traffic announcement
Level will be stored into memory for
subsequent traffic announcements,
independently from the regular volume level.
To stay with one regional program
(REGIONAL)
When the AF and REGIONAL functions are
on, you will not be switched to another
regional station with a stronger frequency. If
you leave this regional program’s reception
area, set [REG-OFF] in the general setup
during FM reception (page 20).
This function does not work in the UK and
some other areas.
Local Link function (UK only)
This function enables you to select other
local stations in the area, even if they are not
stored on your number buttons.
During FM reception, press a number button
(1 to 6) on which a local station is stored.
Within 5 seconds, press again a number
button of the local station. Repeat this
procedure until the local station is received.
Use PTY to display or search for a desired
program type.
1 Press and hold PTY during FM
reception.
Storing manually
Receiving the stored stations
Setting alternative frequencies (AF)
and traffic announcement (TA)
Selecting program types (PTY)
13GB
2 Rotate the control dial until the
desired program type appears,
then press it.
The unit starts to search for a station
broadcasting the selected program type.
Type of programs
The CT data from the RDS transmission sets
the clock.
1 Set [CT-ON] in the general setup
(page 19).
Playing an iPod/USB Device
In these Operating Instructions, “iPod” is
used as a general reference for the iPod
functions on an iPod and iPhone, unless
otherwise specified by the text or
illustrations.
For details on the compatibility of your iPod,
see “About iPod” (page 22) or visit the
support site on the back cover.
MSC (Mass Storage Class)-type USB devices
(such as a USB flash drive, digital media
player, Android™ phone) compliant with the
USB standard can be used.
Depending on the digital media player or
Android phone, setting the USB connection
mode to MSC is required.
Notes
For details on the compatibility of your USB
device, visit the support site on the back cover.
Playback of the following MP3/WMA files is not
supported.
lossless compression files
copyright-protected files
DRM (Digital Rights Management) files
Multi-channel audio files
1 Connect an iPod/USB device to the
USB port (page 10).
Playback starts.
If a device is already connected, to start
playback, press SOURCE to select [USB].
2 Adjust the volume on this unit.
NEWS (News), AFFAIRS (Current Affairs),
INFO (Information), SPORT (Sports),
EDUCATE (Education), DRAMA (Drama),
CULTURE (Culture), SCIENCE (Science),
VARIED (Varied), POP M (Pop Music),
ROCK M (Rock Music), EASY M (M.O.R.
Music), LIGHT M (Light classical), CLASSICS
(Serious classical), OTHER M (Other Music),
WEATHER (Weather), FINANCE (Finance),
CHILDREN (Children’s program), SOCIAL A
(Social Affairs), RELIGION (Religion), PHONE
IN (Phone In), TRAVEL (Travel), LEISURE
(Leisure), JAZZ (Jazz Music), COUNTRY
(Country Music), NATION M (National Music),
OLDIES (Oldies Music), FOLK M (Folk Music),
DOCUMENT (Documentary)
Setting clock time (CT)
Playback
14GB
To stop playback
Press and hold OFF for 1 second.
To remove the device
Stop playback, then remove the device.
Caution for iPhone
When you connect an iPhone via USB, phone
call volume is controlled by the iPhone, not
the unit. Do not inadvertently increase the
volume on the unit during a call, as sudden
loud sound may result when the call ends.
Press and hold MODE during playback to
display [IPOD] to enable operation by the
iPod directly.
Note that the volume can be adjusted only
by the unit.
To exit passenger control
Press and hold MODE until [AUDIO] appears.
Playing a BLUETOOTH
Device
You can play contents on a connected device
that supports BLUETOOTH A2DP (Advanced
Audio Distribution Profile).
1 Make BLUETOOTH connection with
the audio device (page 9).
2 Press SOURCE to select [BT AUDIO].
3 Operate the audio device to start
playback.
4 Adjust the volume on this unit.
5 Press PAUSE to start playback.
Notes
Depending on the audio device, information such
as title, track number/time and playback status
may not be displayed on this unit.
Even if the source is changed on this unit,
playback of the audio device does not stop.
To match the volume level of the
BLUETOOTH device to other sources
Start playback of the BLUETOOTH audio
device at a moderate volume, and set your
usual listening volume on the unit.
Press SELECT, and rotate the control dial to
select [BTA VOL] (page 20).
Operating an iPod directly
(Passenger control)
15GB
Searching and Playing
Tracks
Repeat play:
1 During playback, press and hold
SELECT.
2 Rotate the control dial to select
[REPEAT], then press it.
3 Rotate the control dial to select the
desired play mode, then press it.
4 Press (back) to return to the
previous display.
Shuffle play:
1 During playback, press SHUF
repeatedly to select the desired
play mode.
Playback in selected play mode may take
time to start.
Available play modes differ depending on
the selected sound source.
1 During USB playback, press
(browse)* to display the list of
search categories.
When the track list appears, press
(back) repeatedly to display the desired
search category.
* During playback, press (browse) for more
than 2 seconds to directly return to the
beginning of the category list.
2 Rotate the control dial to select the
desired search category, then press
it to confirm.
3 Repeat step 2 to search the desired
track.
Playback starts.
To exit the Quick-BrowZer mode
Press (browse).
1 Press (browse)
2 Press SEEK +.
3 Rotate the control dial to select the
item.
The list is jumped in steps of 10% of the
total number of items.
Repeat play and shuffle play
Searching a track by name (Quick-
BrowZer™)
Searching by skipping items
(Jump mode)
16GB
4 Press ENTER to return to the Quick-
BrowZer mode.
The selected item appears.
5 Rotate the control dial to select the
desired item, then press it.
Playback starts.
To use a cellular phone, connect it with this
unit. For details, see “Preparing a
BLUETOOTH Device” (page 8).
Receiving a Call
1 Press (handsfree) when a call is
received with a ringtone.
The phone call starts.
Note
The ringtone and talker’s voice are output only from
the front speakers.
To reject the call
Press and hold OFF for 1 second.
To end the call
Press (handsfree) again.
Handsfree Calling
17GB
Making a Call
You can make a call from the phonebook or
call history when a cellular phone supporting
PBAP (Phone Book Access Profile) is
connected.
1 Press CALL, rotate the control dial to
select [PH BOOK], then press it.
2 Rotate the control dial to select an
initial from the initial list, then press
it.
3 Rotate the control dial to select a
name from the name list, then
press it.
4 Rotate the control dial to select a
number from the number list, then
press it.
The phone call starts.
1 Press CALL, rotate the control dial to
select [RECENT], then press it.
A list of the call history appears.
2 Rotate the control dial to select a
name or phone number from the
call history, then press it.
The phone call starts.
1 Press CALL, rotate the control dial to
select [DIAL NUM], then press it.
2 Rotate the control dial to enter the
phone number, and lastly select [ ]
(space), then press (handsfree)*.
The phone call starts.
* To move the digital indication, press SEEK +/–.
Note
[_] appears instead of [#] on the display.
1 Press CALL, rotate the control dial to
select [REDIAL], then press it.
The phone call starts.
You can store up to 6 contacts in the preset
dial.
1 Select a phone number that you
want to store in the preset dial,
from the phonebook, call history or
by inputting the phone number
directly.
The phone number appears in the
display of this unit.
2 Press and hold a number button (1
to 6) until [MEM] appears.
The contact is stored in the selected
preset number.
Calling from the phonebook
Calling from the call history
Calling by phone number input
Calling by redial
Presetting phone numbers
18GB
1 Press CALL.
2 Press a number button (1 to 6) to
select the contact you want to call.
3 Press (handsfree).
The phone call starts.
You can make a call by saying the voice tag
stored in a connected cellular phone that has
a voice dialing function.
1 Press CALL, rotate the control dial to
select [VO DIAL], then press it.
2 Say the voice tag stored on the
cellular phone.
Your voice is recognized, and the call is
made.
Available Operations
during Call
To preset the volume of the ringtone
and talker’s voice
You can preset the volume level of the
ringtone and talker’s voice.
Adjusting the ringtone volume:
Rotate the control dial while receiving a call.
Adjusting the talker’s voice volume:
Rotate the control dial during a call.
To adjust the volume for the other party
(Mic gain adjustment)
Press MIC.
Adjustable volume levels: [MIC-LOW], [MIC-
MID], [MIC-HI].
To reduce echo and noise (Echo
Canceler/Noise Canceler Mode)
Press and hold MIC.
Settable mode: [EC/NC-1], [EC/NC-2].
To transfer a call
In order to activate/deactivate the
appropriate device (this unit/cellular phone),
press MODE or use your cellular phone.
Note
Depending on the cellular phone, handsfree
connection may be cut off when call transfer is
attempted.
Calling by preset number
Calling by voice tags
19GB
Canceling the DEMO Mode
You can cancel the demonstration display
which appears while this unit is turned off.
1 Press and hold SELECT.
The setup display appears.
2 Rotate the control dial to select
[DEMO], then press it.
3 Rotate the control dial to select
[DEMO-OFF], then press it.
The setting is complete.
4 Press (back).
The display returns to normal reception/
play mode.
Basic Setting Operation
You can set items in the menu to the
following procedure.
The following items can be set depending on
the source and setting.
1 Press SELECT for the sound setup,
press and hold SELECT for the
general setup, or press CALL for the
BLUETOOTH setup.
2 Rotate the control dial to select the
desired item, then press it.
3 Rotate the control dial to select the
options, then press it.
To return to the previous display
Press (back).
General Setup
Settings
CLOCK-ADJ (clock adjust) (page 8)
CT (clock time)
Activates the CT function: [ON], [OFF].
BEEP
Activates the beep sound: [ON], [OFF].
CAUT ALM (caution alarm)
Activates the caution alarm: [ON], [OFF]
(page 8). (Available only when the unit is
turned off.)
AUX-A (AUX audio)
Activates the AUX source display: [ON],
[OFF]. (Available only when the unit is
turned off.)
AUTO OFF
Shuts off automatically after a desired
time when the unit is turned off: [NO],
[30S] (30 seconds), [30M] (30 minutes),
[60M] (60 minutes).
DEMO (demonstration)
Activates the demonstration: [ON], [OFF].
DIMMER
Changes the display brightness: [ON],
[OFF].
AUTO SCR (auto scroll)
Scrolls long items automatically: [ON],
[OFF].
20GB
Sound Setup
REPEAT (page 15)
REGIONAL
Restricts reception to a specific region:
[ON], [OFF]. (Available only when FM is
received.)
LOUDNESS (dynamic loudness)
Reinforces bass and treble for clear sound
at low volume levels: [ON], [OFF].
BTM (page 11)
BT INIT (BLUETOOTH initialize)
Initializes all the BLUETOOTH related
settings (pairing information, preset
number, device information, etc.).
When disposing the unit, initialize all the
settings. (Available only when the unit is
turned off.)
EQ3 PRST (EQ3 preset)
Selects an equalizer curve from 7 equalizer
curves or off: [XPLOD], [VOCAL], [EDGE],
[CRUISE], [SPACE], [GRAVITY], [CUSTOM],
[OFF].
The equalizer curve setting can be
memorized for each source.
EQ3 LOW, EQ3 MID, EQ3 HIGH
Sets [CUSTOM] of EQ3.
Customizes the equalizer curve.
The volume level is adjustable in 1 dB
steps, from -10 dB to +10 dB.
BALANCE
Adjusts the sound balance: [RIGHT-15
(R15)] – [CENTER (0)] – [LEFT-15 (L15)].
FADER
Adjusts the relative level: [FRONT-15 (F15)]
– [CENTER (0)] – [REAR-15 (R15)].
AUX VOL (AUX volume level)
Adjusts the volume level for each
connected auxiliary device:
[+18 dB] – [0 dB] – [-8 dB].
This setting negates the need to adjust
the volume level between sources.
BTA VOL (BLUETOOTH audio volume level)
Adjusts the volume level for each
connected BLUETOOTH device: [+18 dB] –
[0 dB] – [-8 dB].
This setting negates the need to adjust
the volume level between sources.
21GB
BLUETOOTH Setup
Precautions
Cool off the unit beforehand if your car has
been parked in direct sunlight.
Do not leave the front panel or audio
devices brought in inside the car, or it may
cause malfunction due to high
temperature in direct sunlight.
Power antenna (aerial) extends
automatically.
To maintain high sound quality
Do not splash liquid onto the unit.
PAIRING (page 9)
PH BOOK (phone book) (page 17)
REDIAL (page 17)
RECENT (recent call) (page 17)
VO DIAL (voice dial) (page 18)
DIAL NUM (dial number) (page 17)
RINGTONE
Selects whether this unit or the connected
cellular phone outputs the ringtone: [1]
(this unit), [2] (cellular phone).
AUTO ANS (auto answer)
Sets this unit to answer an incoming call
automatically: [OFF], [1] (about 3 seconds),
[2] (about 10 seconds).
BT SIGNL (BLUETOOTH signal) (page 9)
Activates the BLUETOOTH function: [ON],
[OFF].
Additional Information
Playback order of MP3/WMA files
MP3/WMA
Folder (album)
MP3/WMA file
(track)
  • Page 1 1
  • Page 2 2
  • Page 3 3
  • Page 4 4
  • Page 5 5
  • Page 6 6
  • Page 7 7
  • Page 8 8
  • Page 9 9
  • Page 10 10
  • Page 11 11
  • Page 12 12
  • Page 13 13
  • Page 14 14
  • Page 15 15
  • Page 16 16
  • Page 17 17
  • Page 18 18
  • Page 19 19
  • Page 20 20
  • Page 21 21
  • Page 22 22
  • Page 23 23
  • Page 24 24
  • Page 25 25
  • Page 26 26
  • Page 27 27
  • Page 28 28
  • Page 29 29
  • Page 30 30
  • Page 31 31
  • Page 32 32
  • Page 33 33
  • Page 34 34
  • Page 35 35
  • Page 36 36
  • Page 37 37
  • Page 38 38
  • Page 39 39
  • Page 40 40
  • Page 41 41
  • Page 42 42
  • Page 43 43
  • Page 44 44
  • Page 45 45
  • Page 46 46
  • Page 47 47
  • Page 48 48
  • Page 49 49
  • Page 50 50
  • Page 51 51
  • Page 52 52
  • Page 53 53
  • Page 54 54
  • Page 55 55
  • Page 56 56
  • Page 57 57
  • Page 58 58
  • Page 59 59
  • Page 60 60
  • Page 61 61
  • Page 62 62
  • Page 63 63
  • Page 64 64
  • Page 65 65
  • Page 66 66
  • Page 67 67
  • Page 68 68
  • Page 69 69
  • Page 70 70
  • Page 71 71
  • Page 72 72
  • Page 73 73
  • Page 74 74
  • Page 75 75
  • Page 76 76
  • Page 77 77
  • Page 78 78
  • Page 79 79
  • Page 80 80
  • Page 81 81
  • Page 82 82
  • Page 83 83
  • Page 84 84
  • Page 85 85
  • Page 86 86
  • Page 87 87
  • Page 88 88
  • Page 89 89
  • Page 90 90
  • Page 91 91
  • Page 92 92
  • Page 93 93
  • Page 94 94
  • Page 95 95
  • Page 96 96
  • Page 97 97
  • Page 98 98
  • Page 99 99
  • Page 100 100
  • Page 101 101
  • Page 102 102
  • Page 103 103
  • Page 104 104
  • Page 105 105
  • Page 106 106
  • Page 107 107
  • Page 108 108
  • Page 109 109
  • Page 110 110
  • Page 111 111
  • Page 112 112
  • Page 113 113
  • Page 114 114
  • Page 115 115
  • Page 116 116
  • Page 117 117
  • Page 118 118
  • Page 119 119
  • Page 120 120
  • Page 121 121
  • Page 122 122
  • Page 123 123
  • Page 124 124
  • Page 125 125
  • Page 126 126
  • Page 127 127
  • Page 128 128
  • Page 129 129
  • Page 130 130
  • Page 131 131
  • Page 132 132
  • Page 133 133
  • Page 134 134
  • Page 135 135
  • Page 136 136
  • Page 137 137
  • Page 138 138
  • Page 139 139
  • Page 140 140
  • Page 141 141
  • Page 142 142
  • Page 143 143
  • Page 144 144
  • Page 145 145
  • Page 146 146
  • Page 147 147
  • Page 148 148
  • Page 149 149
  • Page 150 150
  • Page 151 151
  • Page 152 152
  • Page 153 153
  • Page 154 154
  • Page 155 155
  • Page 156 156
  • Page 157 157
  • Page 158 158
  • Page 159 159
  • Page 160 160
  • Page 161 161
  • Page 162 162
  • Page 163 163
  • Page 164 164
  • Page 165 165
  • Page 166 166
  • Page 167 167
  • Page 168 168
  • Page 169 169
  • Page 170 170
  • Page 171 171
  • Page 172 172

Sony DSX-A60BT User manual

Category
Car media receivers
Type
User manual

Ask a question and I''ll find the answer in the document

Finding information in a document is now easier with AI