Page is loading ...

ENG
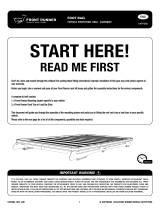
Jeep Wrangler JKU 4 Door (2007-Current)
inner brackets and Foot Rail
FAJK007 / FAJK008_REV_A02 © 2020 FRONT RUNNER VEHICLE OUTFITTERS
1
IMPORTANT WARNING!
Don’t be a hero and muscle through this without first reading these fitting instructions! Improper installation of this gear may void certain aspects of
your warranty.
Before you begin, take a moment and open all your Front Runner rack kit boxes and gather the assembly instructions for the various components.
A complete kit will contain:
1. A Front Runner Mounting System specific to your vehicle
2. A Front Runner Rack Tray or Load Bar Slats
This document will guide you through the assembly of the mounting system and assist you in fitting the roof rack tray or load bars to your specific
vehicle.
Please refer to the next page for a list of all the components, quantities and tools required.
FAJK007 / FAJK008
READ ME FIRST
START HERE!
FRONT RUNNER CAN NOT RECOMMEND A MAXIMUM LOAD CARRYING CAPACITY. PLEASE REFER TO YOUR VEHICLE MANUFACTURER'S RECOMMENDATIONS. IT IS CRITICAL
THAT ALL FRONT RUNNER PRODUCTS BE PROPERLY AND SECURELY ASSEMBLED AND ATTACHED TO YOUR VEHICLE. IMPROPER ATTACHMENT COULD RESULT IN AN
AUTOMOBILE ACCIDENT, AND COULD CAUSE SERIOUS BODILY INJURY OR DEATH. YOU ARE RESPONSIBLE FOR ASSEMBLING AND SECURING ALL FRONT RUNNER PRODUCTS
TO YOUR VEHICLE. CHECKING THE ATTACHMENTS PRIOR TO USE, AND PERIODICALLY INSPECTING THE PRODUCTS FOR ADJUSTMENT, WEAR AND DAMAGE. THEREFORE YOU
MUST READ AND UNDERSTAND ALL OF THE INSTRUCTIONS AND PRECAUTIONS SUPPLIED WITH YOUR FRONT RUNNER PRODUCT PRIOR TO INSTALLATION OR USE. IF YOU
DO NOT UNDERSTAND ALL OF THE INSTRUCTIONS AND CAUTIONS, OR IF YOU HAVE NO MECHANICAL EXPERIENCE AND ARE NOT THOROUGHLY FAMILIAR WITH THE
INSTALLATION PROCEDURES, YOU SHOULD HAVE THE PRODUCT INSTALLED BY A PROFESSIONAL INSTALLER OR OTHER QUALIFIED PERSONNEL.

FAJK007 / FAJK008_REV_A02 © 2020 FRONT RUNNER VEHICLE OUTFITTERS
2
IN THE BOX
FIGURE 1.1
1 2 X Rear Support Bracket - 1LH + 1RH
2 2 X Middle Support Bracket - 1LH + 1RH
3 2 X Outer Roll Bar Clamp
4 2 X Inner Roll Bar Clamp
5 28 X M6 Nut Cap
6 8 X M6 x 30 Hex Bolt
7 12 X M6 x 19 x 1SS Flat Washer
8 8 X Aluminum Spacer
9 8 X Foam Seal Washer
10 8 X M6 x 20 Hex Bolt
11 12 X M6 Nyloc Nut
12 8 X M6 x 12 x 1SS Flat Washer
13 2 X M8 Cage Nut
14 2 X M8 Large Washer
15 2 X M8 x 75 Hex Bolt
16 8 X Sealing Plug Assembly
IN THE BOX TOOLS NEEDED
T40
Torx Wrench
IN THE BOX
1RH
1LH
2RH
12
11
5
2LH
14
15
9
8
7
6
4
7
10
5
9
8
7
6
5
16
1GET ORGANIZED
FAJK007
13MM
10MM 10MM
13MM
4mm
22mm (7/8") Hole Saw
5
10
7
3
7
11
5
5
13

© 2020 FRONT RUNNER VEHICLE OUTFITTERS
3
FAJK007 / FAJK008_REV_A02
17L
17R
1GET ORGANIZED
FIGURE 1.2
IN THE BOX
16 14 X M8 X 16 Hex Bolt
17 2 X Foot Rail - 1LH + 1RH
18 14 X M8 x 16 x 1.6SS Flat Washer
19 14 X M8 Nyloc Nut
20 14 X M8 Nut Cap
IN THE BOX IN THE BOX
16
18
19
20
FAJK006

© 2020 FRONT RUNNER VEHICLE OUTFITTERS
4
FAJK007 / FAJK008_REV_A02
4
PREP FOR INSTALLATION OF INNER BRACKETS (FAJK002)
2
13mm
2.1
2.2
2.3
Loosen the velcro, unzip and remove the
padding covering the roll bars.
Remove the wiring harness and plastic
clip from the roll bar.
Loosely attach the Rear Support Arms
(Item 1) to the outside of the Roll Bar
Clamps using M6 x 20 Hex Bolts, M6 x 19
x 1SS Flat Washers and M6 Nyloc Nuts
(Items 7, 10 & 11). Make sure the foot
faces the inside of the vehicle as shown.
Mark the position of the holes in the foot
onto the roof.
Once the holes have been marked
remove the Rear Support Arms.
Drill 4mm pilot holes on the marks you
have made.
Locate the two threaded holes on the
underside of the roll bar and fasten the
two halves of the Roll Bar Clamps (Items
3 & 4) to the roll bar using M6 x 19 x 1SS
Flat Washers and M6 x 20 Hex Bolts
(Items 7 & 10). Place the Outer Roll Bar
Clamp (Item 3) first, followed by the
Inner Roll Bar Clamp (Item 4).
10mm
10mm
10mm
6mm MEASURE TWICE, DRILL ONCE. HAVE A
FRIEND DOUBLE CHECK BEFORE
DRILLING.

© 2020 FRONT RUNNER VEHICLE OUTFITTERS
5
FAJK007 / FAJK008_REV_A02
4
PREP AND INSTALLATION OF FOOT RAILS (FAJK006)
3
13mm
3.1
3.2
3.3
Place the Foot Rail on the roof and align
the rear slots of the Foot Rail centre with
the holes drilled in 2.3.
FRONT OF VEHICLE
SIDE VIEW OF FOOT RAIL
TOP VIEW OF FOOT RAIL
REAR FOOT
10mm
10mm
6mm
Front Of Vehicle
Align the Foot Rail with the rib on the roof
so that it runs parallel with the rib before
marking the two front holes.
Mark the position of the two front holes of
the Foot Rail onto the outside of the roof.
Remove the rail and from the outside, drill
4mm pilot holes on the marks just made.
Do this on both sides of the vehicle.
Using the Foot Rail as a template check that
all four holes are centered in the slots of the
Foot Rail.
4mm Pilot Holes
Mark Front Holes
Change the 4mm drill bit to a 22mm hole
saw. From the outside of the vehicle, drill all
the 4mm holes (8 in total) out to 22mm.
Let the drill do the work. You do not want to
scratch or damage your vehicle's roof. Have
your friend hold the vacuum cleaner
underneath where you are drilling to catch
all the dust and keep your vehicle clean.
After drilling, clean the area around all the
22mm holes in the roof with a rag and
methylated spirits/denatured alcohol.
22mm
MEASURE TWICE, DRILL ONCE. HAVE A
FRIEND DOUBLE CHECK BEFORE
DRILLING.

© 2020 FRONT RUNNER VEHICLE OUTFITTERS
6
FAJK007 / FAJK008_REV_A02
4
FIT AND SECURE
3
13mm
3.4
3.5
3.6
From the inside of the vehicle, in the
same position as where you just
inserted the bolt in 3.4, push the Middle
Support Bracket (Item 2LH & 2RH)
through the hole in the roll bar padding
and loosely fasten it to the roll bar.
Please note that there is a left hand and
right hand bracket. The arrow on the
bracket must point to the rear of the
vehicle.
Pull back the padding around the roll bar
above the rear seats and insert an M8 x
75 Hex Bolt and M8 Large Washer (Items
14 & 15 from FAJK007 box) through the
hole as shown.
13mm
Refit and fasten the Rear Support Arms
as in 2.3
NOTE: Use the worm slots to adjust the
height of the rear support brackets.
This will be important to create a
weatherproof Seal.
10mm
10mm

80mm
© 2020 FRONT RUNNER VEHICLE OUTFITTERS
7
FAJK007 / FAJK008_REV_A02
4
FIT AND SECURE
4
13mm
3.4
3.5
3.6
Clean the area around all the 22mm holes
drilled in the roof with a rag and
methylated spirits/denatured alcohol.
Insert the Aluminum Spacers (Item 8)
into the Foam Washer (Item 9). Remove
the paper backing from the Foam washer
to expose the adhesive.
Insert the washer/spacer assembly,
adhesive side down, into the 22mm holes
so that the spacer comes to rest on the
Rear Support Brackets underneath.
Firmly press the foam washer all the way
around securing it to the roof.
13mm
If not already assembled, assemble your
Tray as per the Universal Tray Assembly
Instructions (Document RRSTUNI)
NOTE: Before fitting the Wind
Deflector, insert two M8 x 16 Hex
Bolts (Item 16 from FAJK008) or
(Item 1 from FAJK007) into the first
slat (Combined Slat), using the
Machined slots. Slide a bolt to each
of the outer corners.
After fitting the wind deflectors, the tray
should still be upside down, loosely
mount the Foot Rails (Item 17L & 17R
from FAJK008 box) to the Tray using M8
x 16 Hex Bolts, M8 X 16 X 1.6SS Flat
Wahsers and M8 Nyloc Nuts (Items 16,
18 & 19). As before use the machined
slots to insert the hex bolts into the
Slats. The Foot Rail should be mounted
at the opposite end of the Tray to the
wind deflector.
The rear of the Foot Rail must mount
onto the very last Slat (Combined Slat)
and approximately 80mm in from the
outer edge of the side of the Tray. Do not
tighten the bolts yet.
9
8

Half Rack Shown
© 2020 FRONT RUNNER VEHICLE OUTFITTERS
8
FAJK007 / FAJK008_REV_A02
4
6
6.1
6.2
MOUNT YOUR TRAY
With the help of a friend, flip the Tray
end over end so that it is in the upright
position. (The Tray is flipped end over
end so that bolts and brackets do not
slide left and right).
With one of you on either side of the
Tray, lift the Tray and walk it into
position above the vehicle, approaching
from either the front or the rear of the
vehicle.
The Foot Rail should still be loose
enough to move. Line the brackets up
with the holes on the roof and fasten
them into position using M6 x 30 Hex
Bolts, M6 x 19 x 1SS Flat Washers, M6 x
12 x 1SS Flat Washers and M6 Nyloc
Nuts (Items 6, 7, 11 & 12). Centre the tray
from left to right. Use a tape measure to
double check. Once you are happy that
the Tray is in the correct position, fasten
all the nuts and bolts, both inside and
outside of the vehicle on all brackets
that were installed.
Place M6 Nut Caps (Item 5) over all the
exposed bolts and close up all the roll
bar padding.
REMOVING YOUR RACK
5
11
12
15
13mm
5
5.3
Should you wish to remove your rack,
you will need to plug the holes you
drilled in the roof (Step 3.4), using the
supplied Sealing Plug Assemblies.
Remove the Tray, Front Uprights and the
Foot Rail, by reversing the instillation
procedure. Leave the Foam Washer and
the Aluminum Spacers in place. Screw in
the Sealing Plugs reusing the M6 Nyloc
Nuts and Washers that held the Foot Rail
in position.
10mm
10mm
12
2RH

© 2020 FRONT RUNNER VEHICLE OUTFITTERS
9
FAJK007 / FAJK008_REV_A02
4
TAKE A TRIP
8
After your first adventure, check that all nuts, bolts, screws and fittings are tight. Re-tighten where needed. You'll find a
small amount of settling has happened.
Go on many more adventures, periodically checking all nuts, bolts, screws and fittings.
8.1
Front Runner can not recommend a maximum load carrying capacity. Please refer to your vehicle manufacturer's
recommendations
COMPLETION
9
9.1
Congratulations! You did it. Take a step back and admire your work!
INSTALL OTHER VEHICLE AND RACK ACCESSORIES
10
Now's the time to visit your favorite Front Runner Dealer in person or online.
IMPORTANT!
Be sure to tag us. We love to see our gear in action! #FrontRunnerOutfitters #BornToRoam
Share your adventures on:
FRONT RUNNER RACK KITS OFTEN HAVE A HIGHER LOAD RATING THAN THE VEHICLES THEY ARE MOUNTED TO. PLEASE REFER TO YOUR SPECIFIC VEHICLE MANUFACTURER
FOR A RECOMMENDED ROOF RATING. FRONT RUNNER CANNOT BE RESPONSIBLE FOR IMPROPER LOADING BEYOND THE VEHICLE MANUFACTURER'S STATED LOAD CAPACITY.
/