Gigabyte GeForce GT 430 GV-N430-1GI User manual

Category
Graphics cards
Type
User manual
GV-N430-2GI/
GV-N430OC-1GI/
GV-N430OC-1GL/
GV-N430-1GI Rev 2.0
NVIDIA
®
GeForce
TM
GT 430 Graphics Accelerator
User's Manual
Rev. 104
12MM-N430OGL-104GR
Copyright
© 2011 GIGABYTE TECHNOLOGY CO., LTD
Copyright by GIGA-BYTE TECHNOLOGY CO., LTD. (“GBT”). No part of this manual may be reproduced or trans-
mitted in any form without the expressed, written permission of GBT.
Trademarks
Third-party brands and names are the properties of their respective owners.
Notice
Please do not remove any labels on this graphics card. Doing so may void the warranty of this card.
Due to rapid change in technology, some of the specications might be out of date before publication of this this
manual.The author assumes no responsibility for any errors or omissions that may appear in this document nor does
the author make a commitment to update the information contained herein.
Rovi Product Notice:
This product incorporates copyright protection technology that is protected by U.S. patents and other intellectual
property rights.Use of this copyright protection technology must be authorized by Rovi Corporation, and is intended
for home and other limited viewing uses only unless otherwise authorized by Rovi Corporation. Reverse engineering
or disassembly is prohibited.
VGA Card
GV-N430OC-1GL/
GV-N430OC-1GI
Nov.12,2010
Nov.12,2010
VGA Card
GV-N430OC-1GL / GV-N430OC-1GI
VGA Card
GV-N430-1GI Rev 2.0
Nov.12,2010
Nov.12,2010
VGA Card
GV-N430-1GI Rev 2.0
VGA Card
GV-N430-2GI
Oct.12,2011
Oct.12,2011
VGA Card
GV-N430-2GI
- 5 -
Table of Contents
1. Introduction ..................................................................................................................6
1.1. Features ......................................................................................................................... 6
1.2. Minimum System Requirements .................................................................................... 6
2. Hardware Installation ...................................................................................................7
2.1. Board Layout .................................................................................................................. 7
2.2. Hardware Installation ................................................................................................... 10
3. Software Installation .................................................................................................. 11
3.1. Driver and Utility Installation ........................................................................................ 11
3.1.1. Driver Installation ............................................................................................................11
3.2. Display Properties Pages ............................................................................................. 13
3.3. Accessing NVIDIA Control Panel ................................................................................. 14
4. Troubleshooting Tips .................................................................................................22
5. Appendix ....................................................................................................................23
5.1. How to Reash the BIOS in MS-DOS Mode ................................................................ 23
5.2. Resolutions and Color Depth Tables ........................................................................... 24
5.3. Regulatory Statements ................................................................................................ 26
- 6 -
GV-N430 Series Graphics Accelerator
1. Introduction
1.1. Features
Powered by NVIDIA
®
GeForce
TM
GT 430 Graphics Processing Unit (GPU)
Supports PCI Express 2.0
Integrated with 2GB DDR3 memory (for GV-N430-2GI)
Integrated with 1GB DDR3 memory
(for GV-N430OC-1GI / GV-N430OC-1GL / GV-N430-1GI Rev 2.0)
Supports DirectX 11
Supports 1 HDMI connector
Supports 1 D-Sub connector
Supports 1 DVI-I connectors
Supports HDCP (High-Bandwidth Digital Content Protection) technology
1.2. Minimum System Requirements
Hardware
- Intel
®
Pentium
®
Core
TM
2 or AMD Athlon
TM
/ Phenom
TM
- 128 MB of system memory; 2 GB or more for best performance
- Optical drive for software installation (CD-ROM or DVD-ROM drive)
- A 400 Watt power supply or above is a recommended
Operating System
- Windows
®
7
- Windows
®
Vista
- Windows
®
XP with Service Pack 2 (SP2)
- Windows
®
XP Professional x64 Edition
- 7 - Hardware Installation
2. Hardware Installation
2.1. Board Layout
DVI-I Connector
DVI-I Connector
D-Sub monitor Connector
(15-pin)
D-Sub monitor
Connector
(15-pin)
1.GV-N430OC-1GL
HDMI Connector
HDMI Connector
Digital LCD Monitor
DVI Output
HDMI TV
Analog LCD Monitor Analog Monitor
or
- 8 -
GV-N430 Series Graphics Accelerator
DVI-I Connector
D-Sub monitor Connector
(15-pin)
2.GV-N430OC-1GI / GV-N430-1GI Rev 2.0 / GV-N430-2GI
HDMI Connector
DVI-I Connector
D-Sub monitor
Connector
(15-pin)
HDMI Connector
Digital LCD Monitor
DVI Output
HDMI TV
Analog LCD Monitor Analog Monitor
or
- 9 - Hardware Installation
Expansion cards contain very delicate Integrated Circuit (IC) chips. To
protect them against damage from static electricity, you should follow
some precautions whenever you work on your computer.
1. Turn off your computer and unplug power supply.
2. Use a grounded wrist strap before handling computer components. If you do not
have one, touch both of your hands to a safely grounded object or to a metal
object, such as the power supply case.
3. Place components on a grounded antistatic pad or on the bag that came with
the components whenever the components are separated from the system.
The card contains sensitive electric components, which can be easily damaged by
static electricity, so the card should be left in its original packing until it is installed.
Unpacking and installation should be done on a grounded anti-static mat. The op-
erator should be wearing an anti-static wristband, grounded at the same point as the
anti-static mat.
Inspect the card carton for obvious damage. Shipping and handling may cause dam-
age to your card. Be sure there are no shipping and handling damages on the card
before proceeding.
DO NOT APPLY POWER TO YOUR SYSTEM IF THE GRAPHICS CARD IS
DAMAGED.
In order to ensure that your graphics card can work correctly, please use
ofcialGIGABYTEBIOSonly.Usingnon-ofcialGIGABYTEBIOSmight
cause problem(s) on the graphics card.
- 10 -
GV-N430 Series Graphics Accelerator
2.2. Hardware Installation
Now that you have prepared your computer, you are ready to install your graphics card.
Step 3.
Plug the display cable into your card; then turn on the computer
and monitor. To connect a D-Sub monitor to your graphics card,
use the D-Sub connector. To connect a at panel display to your
graphics card, use the DVI-I connector. To connect an HDMI
monitor to your graphics card, use the HDMI connector.
Connect a D-Sub monitor
Connect an HDMI monitor
To Flat Panel DisplayTo D-Sub MonitorTo HDMI Monitor
Step 1.
Locate the PCI Express x16 slot. If necessary, remove the metal
cover from this slot; then align your graphics card with the PCI
Express x16 slot, and press it in firmly until the card is fully
seated.
Step 2.
Replace the screw to fasten the card in place, and replace the
computer cover.
Make sure that the gold edge connector of the graphics card is
securely inserted.
Connect a at panel display
- 11 - Software Installation
3. Software Installation
Notice the following guidelines before installing the drivers:
1. First make sure your system has installed DirectX 9 or later version.
2. Make sure your system has installed the appropriate motherboard drivers (for the motherboard
drivers, please contact the motherboard manufacturer.)
3.1. Driver and Utility Installation
3.1.1. Driver Installation
After installing the operating system, insert the driver disk into your optical drive. The driver Autorun screen
is automatically displayed which looks like that shown in the screen shot below. (If the driver Autorun screen
does not appear automatically, go to My Computer, double-click the optical drive and execute the setup.exe
program.)
For software MPEG support in Windows XP, you must install DirectX rst. Users who run Windows
XP with Service Pack 2 or above do not need to install DirectX separately.
Step 1:
Click the Install Display Driver item.
Step 2:
Click the Next button.
- 12 -
GV-N430 Series Graphics Accelerator
The system is installing the components.
Step 4:
Click the Finish button to restart the computer.
Then the driver installation is completed.
Step 3:
Click the Yes button.
- 13 - Software Installation
You can move the slider to change the resolution.
You can click the item to change the color quality.
Click the Advanced button for advanced settings.
3.2. Display Properties Pages
Display Settings (Resolutions and Color Quality for Windows)
To access Display Settings page, right-click on desktop and select Personalize, then the Personalization
windows will show up. Select Display Settings to adjust the screen resolution and color quality settings.
- 14 -
GV-N430 Series Graphics Accelerator
Or you can right-click on the desktop and select Personalize, and then the Control Panel\Appearance Per-
sonalization\Personalization window will show up. Select Display Settings. When the Display Settings
dialog box appears, click Advanced Settings.
After clicking the Advanced Settings button in Display Settings, you'll see the Generic PnP Monitor and
NVIDIA GeForce GT 430 Properties dialog box.Click the GeForce GT 430 tab to access the NVIDIA Control
Panel.
3.3. Accessing NVIDIA Control Panel
After installation of the display driver, right-click on the desktop and select NVIDIA Control Panel.
The NVIDIA Control Panel is used to congure all your graphics card settings.
Right-click on the desktop and select NVIDIA Control Panel.
On the GeForce GT 430 tab page, click Start the NVIDIA
Control Panel to launch the NVIDIA Control Panel.
- 15 - Software Installation
Select the view of the NVIDIA Control Panel that is
most appropriate for you.
Standard Settings
Advanced Settings
The following pages provide details on configuring
advanced settings.
In the NVIDIA Control Panel, select a category to alter
specic NVIDIA display settings.
The categories are:
3D Settings
Display
Video
In the NVIDIA Control Panel, change a view if you
want.
The supported modes are:
Standard
Advanced
Custom
- 16 -
GV-N430 Series Graphics Accelerator
Adjust Image Settings with Preview
If you are unfamiliar with 3D technology or not
an advanced graphics user, use the Adjust Im-
age Settings with Preview page to preview any
changes you make for improved image quality
and rendering.
Manage 3D Settings
(Note 1)
The Manage 3D Settings page enables you to
establish default 3D settings to use for all your
Direct3D or OpenGL applications and to estab-
lish a unique set of 3D settings for a particular
game or application.
(Note 1) This item is present only in Advanced view mode.
3D Settings
Tasks in the 3D Settings pages allow you to do the following:
Change the image and rendering settings of your 3D applications and games that utilize Direct3D and
OpenGL technology.
Override the shipped clocked frequencies of your GPU and GPU memory to increase your GPU perfor-
mance.
Assign specic 3D settings to a game so that these settings automatically load when a game is launched.
- 17 - Software Installation
Display
A variety of display features enable you to further manipulate and congure your display settings to optimize
the use of your displays. Tasks in the Display pages allow you to do the following:
Move CRT screen position
Change resolution
Adjust desktop color settings
Rotate display
Manage custom resolutions
(Note)
Set up multiple displays
(Note) This item is present only in Advanced view mode.
Move CRT Screen Position
You can use your mouse (by clicking on the ar-
row keys on this page) or the arrow keys on your
keyboard to adjust the position of your desktop
to better t your display. This is a useful alterna-
tive to using the controls (buttons) on your actual
physical display.
Change Resolution
Using the Change Resolution controls, you can
change the color setting, reduce screen icker-
ing, or adjust the amount of information appear-
ing on your display.
- 18 -
GV-N430 Series Graphics Accelerator
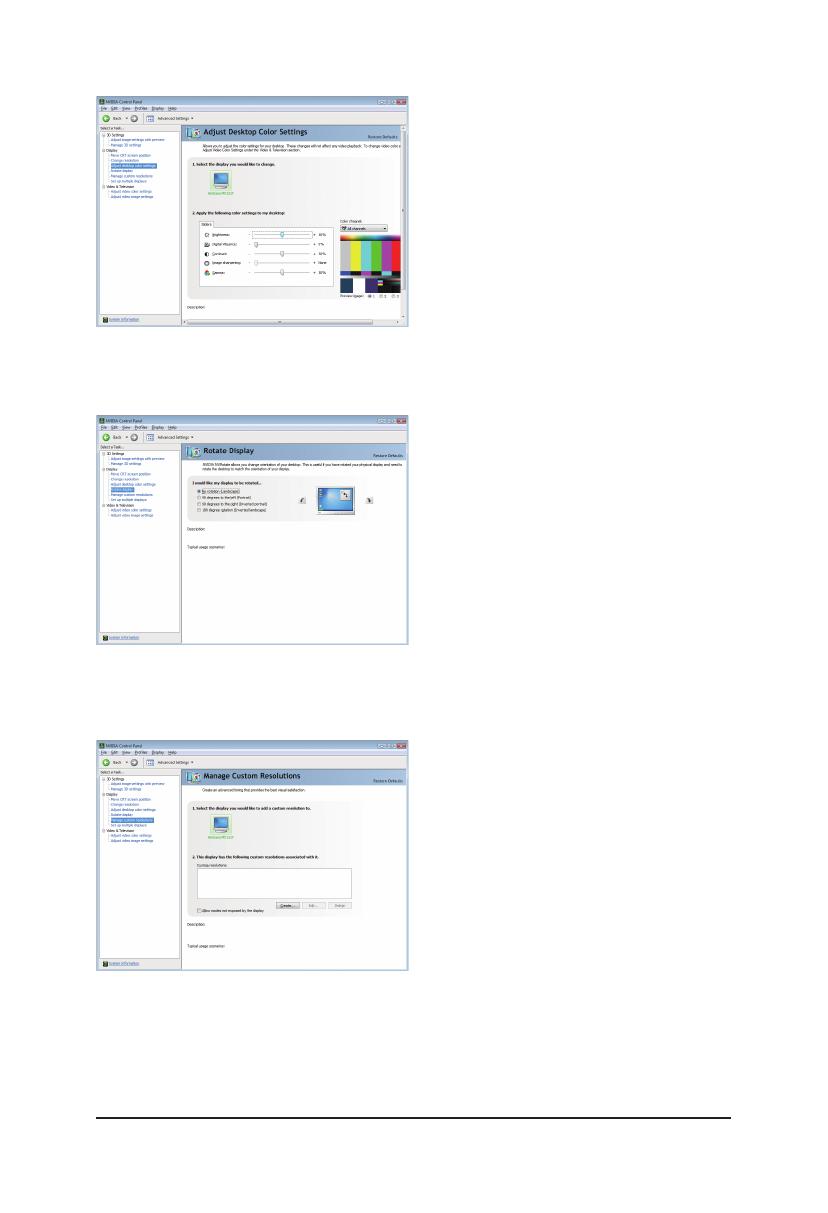
Adjust Desktop Color Settings
Use this page to set the contrast, sharpness,
and color depth (Digital Vibrance) of the images
on your desktop. These changes will not affect
any video playback. To change video color set-
tings, go to Adjust Video Color Settings under
the Video and TV section from the Start page.
Manage Custom Resolutions
(Note)
If you are an advanced user, you can create cus-
tom timing modes with the width, height, bit-color
depth, and the refresh rate etc. The Advanced
Timing page enables you to adjust timings for
your graphics card in order to support a variety
of different display timings for ultimate exibility
for analog CRT and DVI connections. You can
use the advanced Change Resolution Attributes
page to view custom display modes you have
saved in the Create Custom Resolutions page.
(Note) This item is present only in Advanced view mode.
Rotate Display
The NVIDIA Rotate features enable you to
change the orientation of your desktop to portrait,
landscape, and inverted modes. This is useful if
you have rotated your physical display and need
to rotate the desktop to match the orientation of
your display.
- 19 - Software Installation
Set Up Multiple Displays
NVIDIA nView technology enables you to view
your desktop in one of several multi-display
modes to make the best use of the displays
(monitors) that are connected to your computer.
Dual-Monitor Setup
You can set the display to output from two monitors on the Set Up Multiple Displays page.
Select your preferred nView display modes here.
Only use one display (Single)
The same on both display (Clone)
Congured independently from each other
(Dualview)
As one large horizontal desktop (Horizontal span)
(Note)
As one large vertical desktop (Vertical span)
(Note)
(1) The same on both display (Clone)
Clone mode indicates that both displays in the display
pair show images of the same desktop.
Clone Mode
(Note) This item is present only in Windows XP.
(2)Conguredindependentlyfromeachother
(Dualview)
Dualview mode indicates that both displays in the
display pair function as one virtual desktop. Unlike
Horizontal Span or Vertical Span mode, Dualview
treats each display as a separate device. This means
that the taskbar will not be stretched across displays
and 3D applications are not accelerated as efciently
as when the application spans displays.
Dualview Mode
- 20 -
GV-N430 Series Graphics Accelerator
(4) As one large vertical desktop
(Vertical span)
(Note 1)
Vertical Span mode indicates that both displays in the
display pair function as one tall virtual desktop. The
height of each display is half the height of the total
virtual desktop height.
Vertical Span Mode
(3) As one large horizontal desktop
(Horizontal span)
(Note 1)
Horizontal Span mode indicates that both displays in
the display pair function as one wide virtual desktop.
The width of each display is half the width of the total
virtual desktop width.
Horizontal Span Mode
(Note 1) This item is present only in Windows XP.
(Note 2) By an HDMI-to-DVI adapter.
(Note 3) By a DVI-to-D-Sub adapter.
Display
Matrix
Model GV-N430-2GI GV-N430-1GI Rev 2.0 GV-N430OC-1GI GV-N430OC-1GL
CRT+HDMI
CRT+DVI
DVI+HDMI
DVI+HDMI+CRT
DVI +DVI
(Note2)
CRT+CRT
(Note3)
Yes
Yes
Yes
No
Yes
Yes
Yes
Yes
Yes
No
Yes
Yes
Yes
Yes
Yes
No
Yes
Yes
Yes
Yes
Yes
No
Yes
Yes
1 / 1

Gigabyte GeForce GT 430 GV-N430-1GI User manual

Category
Graphics cards
Type
User manual

Ask a question and I''ll find the answer in the document

Finding information in a document is now easier with AI

Ask the document