Page is loading ...

© Copyright LOTRONIC 2017 STROBE132LED Page 1
L
L
E
E
D
D
S
S
T
T
R
R
O
O
B
B
O
O
S
S
C
C
O
O
P
P
E
E
S
S
T
T
R
R
O
O
B
B
O
O
S
S
C
C
O
O
P
P
E
E
A
A
L
L
E
E
D
D
L
L
E
E
D
D
B
B
L
L
I
I
T
T
Z
Z
L
L
E
E
U
U
C
C
H
H
T
T
E
E
L
L
E
E
D
D
S
S
T
T
R
R
O
O
B
B
O
O
S
S
C
C
O
O
O
O
P
P
S
S
T
T
R
R
O
O
B
B
O
O
S
S
C
C
O
O
P
P
I
I
O
O
D
D
E
E
L
L
E
E
D
D
L
L
E
E
D
D
S
S
T
T
R
R
O
O
B
B
O
O
S
S
K
K
O
O
P
P
S
S
T
T
R
R
O
O
B
B
O
O
S
S
C
C
O
O
P
P
C
C
U
U
L
L
E
E
D
D
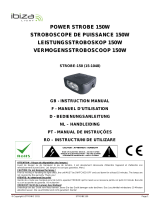
Réf. STROBE132LED
GB - INSTRUCTION MANUAL
F - MANUEL D’UTILISATION
D – BEDIENUNGSANLEITUNG
NL- HANDLEIDING
ES – MANUAL DE INSTRUCCIONES
SL – NAVODILA ZA UPORABO
RO –MANUAL DE UTILIZARE
Imported from China by
LOTRONIC SA – Avenue Zénobe Gramme 9 – B – 1480 SAINTES

© Copyright LOTRONIC 2017 STROBE132LED Page 2
Thank you for having chosen our LED STROBE. For your own safety, please read this user manual carefully before
installing the device.
SAFETY INTRODUCTION
• If the device has been exposed to temperature changes due to environmental changes, do not switch it on
immediately. The arising condensation could damage the device. Leave the device switched off until it has
reached room temperature.
• It is essential that the device is earthed. A qualified person must carry out the electric connection.
• This device is only allowed to be operated with an alternating current of max. 220-240VAC/50-60Hz and was
designed for indoor use only.
• When choosing the installation spot, please make sure that the device is not exposed to extreme heat, moisture
or dust. The minimum distance between light-output from the projector and the illuminated surface must be more
than 1 meter. Keep a distance to any flammable objects of at least 5m.
• Make sure the power cord is never crimped or damaged. If it is damaged, ask your dealer or authorized agent to
replace the power cord.
• Always disconnect from the mains, when the device is not in use or before cleaning it. Only handle the power cord
by plug. Never pull out the plug by tugging the power cord.
• DISCONNECT DEVICE: Where the MAINS plug or an appliance coupler is used as the disconnect device, the
disconnect device shall remain readily operable.
• Shields, lenses or ultraviolet screens shall be changed if they have become visibly damaged to such an extent
that their effectiveness is impaired, for example by cracks or deep scratches.
• Be very careful during installation. Since you will be working with a dangerous voltage you can suffer a
life-threatening electric shock when touching live wired.
• Never look directly into the light source, as sensitive persons may suffer an epileptic shock.
• Please be aware that damages caused by manual modifications to the device are not subject to warranty. Keep
away from children and non-professionals.
• The light doesn’t include any spare parts for repair, please check if all the parts are well installed and screws are
fitted tightly before operating. Do not use the light when the cover is open.
MOUNTING
This fixture may be mounted in any position, provided there is adequate room for ventilation
It is important never to obstruct the fan or vents pathway.
Safety cables must always be used.
Make sure the installation position is stable before you fix the light. When the light is reverse hanging, make sure the
light will not fall from the truss, use the safety cable go through the truss and bracket of the light as a supporting, to
avoid the light to fall down. There is no entrance to the work area during mounting. Periodically check if the safety
cable has fretted away or clamp is loosened. We will not take any responsibility for damages caused by a badly
installed unit.
Connection of Signal Cable
You can use the 3-pin XLR cable to connect the output socket of the master and the input socket of the slave light.
Connect the DIGITAL OUT socket of the master and the IN socket of the slave light, then, connect the OUT socket to
the IN socket of the next light. Ordinal to connect all the lights as below:
GB

© Copyright LOTRONIC 2017 STROBE132LED Page 3
IN
OUT
IN
OUT OUT
IN
1 2 3
D M X IN
DM X O UT
Use the provided 3 pin XLR cable to connect the DMX output of the controller to the input of the first master, and
connect to the DMX input of second slave light from the DMX output of the first master light, analogously, till
connected all the slave lights, and insert the last connector to the output of the final light. (Notice: the core diameter
of every cable should be at least 0.5mm, double core shielded cable should be used).
A DMX signal terminator is recommended on the last unit of the chain. DMX terminator is a XLR connector with a
120Ω resistor between the pin 2 and pin 3 of the XLR connector
DMX512 [Address Settings]
This feature allows you to change the device address value.
Press the "MENU" key one or more times until ADDR is displayed, and then use "UP" or "DOMN" button to choose
the value of "A001 ---- A512".
Press ENTER to confirm the address.
MASTER SLAVE OPERATION
Press MENU button until SLND is displayed. Press ENTER. Choose NAST to set the unit as a master or press the
UP/DOWN buttons to select SL1/SL2/SL3/SL4 to set the unit as a slave. The slave devices will do the same effect
as master device.
Please note: In MASTER/SLAVE mode, only 1 unit can be set as a MASTER. All others must be set to SLAVE.
Please set the address and operation mode before you operate the unit.
STROBE EFFECT
Press MENU until SHND is displayed. Press ENTER and select a strobe effect via the UP/DWON buttons from SH0
– SH6.
MANUAL STROBE ADJUSTMENT
Press MENU until STOB is displayed. Press ENTER and adjust the strobe between 0-255.
DIMMER
Press MENU until DIMM is displayed. Press ENTER and adjust the dimmer between 0-255.
LED
Press MENU until LED is displayed. Select ON or OFF to switch the LED display on or off.
FHRS
Press MENU until FHRS is displayed. Press ENTER and the operation time of the unit is displayed.
1. Working channel table
DMX channel DMX Value Detailed functional
1. DIMMER 1~255 From dark to bright
2. FLASH SPEED 1~255 From slow to fast

© Copyright LOTRONIC 2017 STROBE132LED Page 4
The following points have to be considered during the inspection:
All screws for installing the devices or parts of the device have to be tightly connected and must not be corroded.
There must not be any deformations on the housing, glass pane, fixations and installation spots.
The electric power supply cables must not show any damage, material fatigue or sediments. Further instructions
depending on the installation spot and usage have to be adhered to by a skilled installer and any safety problems
have to be removed.
We recommend a frequent cleaning of the device. Please use a moist, lint-free cloth. Never use alcohol or solvents.
CAUTION: Disconnect from mains before starting maintenance operation!
Cleaning and Using Frequency of Product
Please make sure that the light is power off before dismantling or maintaining, it’s very important to keep the light
clean. Frequent cleaning will ensure maximum brightness output, but also prolong the life time. It’s suggested to use
the high quality, professional glass detergent and soft cloth to clean the light. It’s not allowed to use alcohol or
chemical solvent. The inner part of the light should be cleaned by vacuum cleaner at least once a year.
When the light doesn’t work, please check if the fuse is burnt out or not. If it is, the same fuse should be replaced,
find out the faulty and restart the light. But please note the repair must be handled by professional.
TECHNICAL SPECIFICATIONS
Channels: ................................................................................................... 2 DMX Channels
Control mode: .................................................. Sound activated, Auto, Master/ Slave, DMX
LED power: .......................................................................................... 132 white SMDLEDs
Working environment: .......................................................................... indoor, 20°C – 40°C
Voltage: ............................................................................................. AC 220-240V 50/60Hz
Consumption: ................................................................................................................. 60W
Dimensions: ............................................................................................. 310 x 140 x 90mm
N.W ............................................................................................................................... 1.8kg
Electric products must not be put into household waste. Please bring them to a recycling centre.
Ask your local authorities or your dealer about the way to proceed.
/