Page is loading ...

No.
*
Please read this manual carefully before using
Please keep this manual for future use
AB212BCBAA
0010571570
Haier Network Air Conditioner
Two by One Room Air Conditioner
CONTENTS
Before Use
Name of Parts
************* 3-4
Safety Precautions
********** 5-6
Operation Instruction
Fan Operation
************** 7
Auto, Cooling, Dehumidifying,
Heating operation
************ 8
Timer On/Off Function
******** 11
Timer On-Off Function
******** 12
Maintenance
Maintenance
*************14-18
Usersí Attention
************ 13
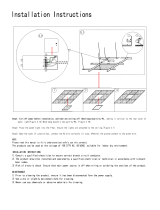
Installation of Indoor Unit
Installation Instruction
****** 21
22
Installation Procedure
****** 23*36
*
Operation Points
*********** 1-2
Troubleshooting
*********** 19-20
Sleep Function
************* 10
Swing Operation
************ 9

Characteristics of Products
Far distance monitoring
There is a pre-set far distance control communication interface on the control
panel of indoor unit. After installing the peripheral equipment according to the
manual attached with the Haier made far distance control detector, the computer
management or other place monitoring can be achieved to the air conditioner.
Characteristics of Products
1.Free combination multi-split.
2.Four-direction air sending, more even temperature adjustment.
3.Inner hidden type installation, space-saving; harmonized with the ceiling, exquisite
and beautiful.
4.Powerful circular air volume, quick temperature adjustment.
5.This air conditioner has POWER FAILURE RESUME FUNCTION.
6.Anti-bacteria mildew resistant air filter, fresher air creates more healthy.
This unit has the function of far distance monitoring. Through the telephone
network, it can be effectively controlled in any other far-distance place. (Only
after equipped with the ìfar distance detectorî made by our company can this
function be fulfilled.)
7.This unit has the function of far distance monitoring. Through the telephone network,
it can be effectively controlled in any other far-distance place. (Only after equipped
with the ìfar distance detectorî made by our company can this function be fulfilled.)

Operation points
1
Operation of air conditioner
When the ambient humidity is too high,
in COOLING or DEHUMIDIFYING
mode, there may be water dropped
in the air outlet.
Far distance monitoring
There is a pre-set far distance control communication interface on the
control panel of indoor unit. After installing the peripheral equipment
according to the manual attached with the Haier made far distance
control detector, the computer management or other place monitoring
can be achieved to the air conditioner.
If start the unit immediately only after
it is turned off, the compressor will start
after 3 minutes have elapsed to protect the
compressor.
3-minute protection function
Change of fan speed
In COOLING mode, the air sending is set at AUTO, when the indoor
temperature is near the set temperature,
the fan speed will lower automatically.
In HEATING mode, when room
temperature reaches the set temperature,
the compressor will stop running, and
the fan will change to LOW FAN or stop.
In DEHUMIDIFYING mode, the fan speed
will change automatically.

Operation points
Anti-cold air blowing out
Defrosting function
During Heating operation, after
starting the unit, the indoor fan
motor will not rotate immediately
to prevent cold air from blowing out.
During Heating operation, when frost formed
on the heat exchanger of outdoor unit, the air
conditioner will defrost automatically for
several minutes. During defrosting, both
the fan of indoor and outdoor unit do not
run. After finishing defrosting, the air
conditioner will automatically resume operation.
Hint
When the air conditioner is in Heating mode,
it absorbs heat from outside and release to
indoors. So the outdoor temperature may
affect the Heating effect.
Power failure resume function
(please set and use this function according to actual condition)
After setting power failure resume function, if there is a sudden power
failure during unit operation, when power on for again, the unit will
resume the previous state.
Setting method: when the wire controller is in ON state (except for
TIMER and FAN mode), press the SLEEP button for 10 times in 5
seconds, after the buzzer sounds 4 times, the unit will change to
POWER FAILURE RESUME function.
Cancellation method: press the SLEEP button 10 times in 5 seconds, after
the buzzer 2 times, the POWER FAILURE RESUME function is cancelled.
Note: After the unit is set POWER FAILURE RESUME function, if there
is a sudden power failure in using, during this period of time if there is no
need to use the unit for a long time, please cut off power to prevent the air
conditioner from automatically resuming to the previous setting if power
failure resumes, or press the ON/OFF button to turn off the unit after power
failure resumes.
2
?
Please wait

Connection pipes
and electric wire
Drain hose Louver
Louver
Air filter
(inside of air outlet)
(inside of air inlet grille)
Air inlet grille
Air outlet
Name of Parts
Indoor Unit
Wire Controller
** ** **
**
**
**
**
**
**
****
AUTO
**
**
**
**/**
3

Name of Parts
Wire Controller
14.Network control display
Used to adjust the
time of timer and
clock
When the wire
controller appears
abnormal condition,
use a sharp-pointed
article to press this
button to make the
wire controller
resume normal
After cleaning the
air inlet, press this
button, the unit
can start to operate
12.Humidifying state display
Used to turn on/off unit
1.ON/OFF button
6.Air filter cleaning display
*
7.Super/Soft operation display
13.Sleep state display
2.Temperature display
24.Time Adjusting
button
23.Sleep button
Used to set Sleep
state or Power
Failure Resume
Function
When there is too much dust
collected on the air inlet, the
wire controller will show
this display to remind the
user to clean the air inlet.
After cleaning and installation,
just press the air filter reset button.
8.Fan speed display
9.Auto Swing display
11.Fresh air state display
25.Reset button
26.Air Filter Reset
button
27.Timer button
Used to set the
mode of timer
28.Lock state display
29.Electric heating button
4.Timer ON/OFF display
3.Clock display
17.Operation mode button
5.Humidity display
22.Setting button
Used to confirm
the time of timer
and clock
15.Working mode display
21.Clock button
Used to calibrate the time of
timer and clock
16.Electric heating display
Used to set working mode:
Auto, Cooling, Dehumidifying,
Heating, Fan
18.Fan speed button
Used to set fan speed: Low
Fan, Med Fan, High Fan, Auto
20.Temperature Setting button
29
** ** **
**
**
**
**
**
**
****
**
**
**
**/**
1
2
3
4
5
6
7
8
9
11
12
13
14 15 16 17 18
20
21
22
23
24
25
26
27
28
AUTO
10.Health state display
Used to set temperature,
temperature range: 16*~30*
10
19
19.Swing button
Used to set Auto Swing or
Fixed air sending direction
4
Calibration of clock
When turning on the unit for the first time, the clock should be calibrated. The
method of calibration is:
1.Press “Clock” button, the Clock display “AM” “PM” will flash.
2.Press * or * to adjust time. For each press, the time will increase or*decrease 1
*minute. If depressing the button, the time will increase or decrease*rapidly.
3.After confirming the time, press “Set” button, “AM” or “PM” will stop flashing,
*the clock will begin to work.
Note:
1.This model does not have the following related display and function
2.Non-electric heating type, there is no electric heating button and electric heating
display
* * 10 11 12 28
16
29
Auto
Low Fan Med Fan High Fan Auto
Working
mode
Auto
operation
Cooling
operation
Dehumidifying
operation
Heating
operation
Fan
operation
Wire
controller

When repair is needed, please ask
the after-sales service worker for
help.
Improper repair and maintenance
may cause water leakage,
electric shock
and fire.
If finding abnormal phenomenon
(e.g. smell of firing), please cut off
the power first, and contact the
after-sales service worker
for treatment.
Under this
circumstance,
if continue using
the air conditioner,it may be
damaged, it may also cause electric
shock or fire accident.
During unit operation, do not insert
fingers or other objects into air inlet,
air outlet and louver.
Because high
rotation speed
fan is dangerous,
it may cause injury.
Ask after-sales service worker to take
measure to prevent refrigerant from
leaking.
If the leaked refrigerant exceeds a
certain density, it will cause
lack of oxygen. If the room
installed with air conditioner
is too small, do take enough
measure in order to avoid lack of
oxygen even if refrigerant leaks.
When have to dismantle and reinstall
the air conditioner, please ask the
after-sales service worker to perform
the work.
Improper installation may
cause water leakage,
electric shock or fire.
Cut off
power
Safety Precautions
The following lists four kinds of safety precaution items and suggestions:
Warning: Improper use may cause death or serious injury.
* Those contents marked with “Forced” are definitely forced action,
otherwise, it may cause unit damage or risk to users’ safety.
Notice: Improper use may cause body hurt or unit damage; in some
circumstance, it may cause serious results.
Those contents marked with “Prohibition” are definitely prohibited
action, otherwise, it may cause unit damage or risk to users’ safety.
The following safety precautions must be observed.
This safety precautions should keep in hand for reference.
If the air conditioner is given to a new user, this manual should be attached with
unit to the new user.
!
!
Warning
!
*
Please read the following Safety Precautions carefully and use the
air conditioner properly.
5

Safety Precautions
6
Notice
Do not use wet hands to operate the
air conditioner.
Otherwise, it may
cause electric shock.
Only use the proper specified fuse.
Do not use cable or
other materials to
replace the fuse,
otherwise it may
cause fire and
other trouble.
Do not use water to
clean air conditioner,
otherwise
may cause
electric shock.
Connected with the grounding wire.
The grounding wire shouldn’t be
connected with gas pipe, tap water pipe,
lightning rod or
telephone line.
Improper grounding
may cause electric shock accident.
The drain hose should be
arranged properly to have a
smooth drainage.
If the drain hose is
not arranged properly, the leaked
drain water may damage the
furniture or other articles alike.
Do not install the air conditioner
in a place where the inflammable
gas maybe exists.
The inflammable gas around the
air conditioner may cause fire
accident.
The Creepage breaker should
be equipped.
If not equipped
with Creepage breaker, it may
cause Creepage.
When using indoor smoky type
pesticide, do not use air
conditioner.
Otherwise, it
may cause the
chemicals
accumulate
in the unit, result in
doing harm to the people’s health
who is extremely sensitive to
these chemicals.
Do not put the fire devices in the
places, which the air from the air
conditioner can directly blow.
It may cause the
fire devices
cannot burn
completely.
Only after cutting off the power, can
the cleaning of the air conditioner be
performed to
avoid leading
to electric
shock or
injury.
Do not put or use any spray near the
air conditioner,
otherwise it
may cause
fire.
Not in
operation

Fan operation
About FAN operation:
FAN operation refers the air conditioner does not perform COOLING and
HEATING operation, but FAN operation. In this mode, the air conditioner
cannot perform AUOT FAN operation, and does show the temperature
value on the wire controller.
Turn on the unit
Press the ON/OFF button to turn on the
unit The LCD display of the wire controller
will show the previous working state
(except for Timer, Sleep, Swing mode), the
operation indicator light on the wire controller
will light up.
2
Choose of working mode
Press MODE button, each press the
working mode will change as the
following sequence:
.
choose FAN operation
Adjusting FAN SPEED
Press the FAN SPEED button to change fan
speed:
3
4
Turn off the unit
Press the ON/OFF button to turn off the
unit.
The wire controller only shows the clock and
room temperature.
Choose the desired fan speed
7
COOLING
DEHU
AUTO
HEATING
FAN
1
LOW FAN MED FAN HIGH FAN
Operation instruction
** ** **
**
**
**
**
**
****
**
**/**
**
1
4
3
2

Operation instruction
Auto/Cooling/Dehumidifying/Heating operation
Hints:
The wire controller can memorize the working condition of each time. When
start the unit for the second time, just need to press ON/OFF button, the air
conditioner will work according to the previous working mode. (except for
Timer, Sleep and Swing)
Turn on the unit
Press the ON/OFF button to turn on the
unit The LCD display of the wire
controller will show the previous
working state (except for TIMER,
SWING, SLEEP mode). The operation
indicator light on the wire controller
will light up.
3
1
Choose of working mode
Press MODE button, each press the
working mode will change as the
following sequence:
then choose AUTO, COOLING,
DEHUMIDIFYING, HEATING operation.
Set temperature
*Each press , the set temperature will
increase 1 degree.
*Each press, the set temperature will
decrease 1 degree.
Set the desired temperature.
Press the TEMP. SET button
Adjusting FAN SPEED
Press the FAN SPEED button, for each
press, the fan speed will change as the
following sequence:
Choose the desired fan speed.
In Heating operation, after start
the unit, the air conditioner will
sending warm air a moment
later to prevent the cold air
blowing out. In Dehumidifying,
when the room temperature drops
2* higher than the set
temperature, regardless the set fan
speed, the air conditioner will
intermittently operate in low fan
speed.
4
** ** **
**
**
**
**
**
**
****
**
**
**/**
5
1
4
3
2
3
5
Turn off the unit
Press the ON/OFF button to turn off
the unit.
The wire controller only shows the clock
and room temperature.
2
8
AUTO COOLING DEHUMIDIFYING HEATING FAN
AUTO
LOW FAN MED FAN HIGH FAN AUTO
Set temperature + 2*
Set temperature
When room temperature
reaches set temperature
+ 2*, the unit will
operate in mild
dehumidifying
operation.
Ultra-low air flow
When room temperature
is higher than set
temperature, unit in
COOLING operation.

Operation instruction
Swing
Fixed air sending direction
When the Auto SWING of the air conditioner swings
to an appropriate angle, press SWING button, the
display “ ” on the LCD of the wire controller will
disappear, the air sending direction is fixed.
When fixing the air sending direction, the louver
should be kept in the following position:
In COOLING and DEHUMIDIFYING, it is better to
be upward.
In HEATING, it is better to be downward.
Always use the SWING button of the wire controller to
adjust the louver. If adjust the louver manually, it may
damage the louver.
During COOLING and DEHUMIDIFYING, do not make
the louver downwards for a long time. Because the vapor
around the air outlet grille may be condensed and may
have drop of water.
When the infant, children, ages and the patients use the
air conditioner, please pay attention to the set
temperature.
Auto swing
Press SWING button, the LCD of the wire controller
display “ ”, the louver of the air conditioner begins
automatic swing and air sending.
9
** ** **
**
**
**
**
**
**
****
**
**
**/**

Operation instruction
Sleep operation
Use of SLEEP function
After turning on the unit, setting the working mode, then press SLEEP button to
make the air conditioner have the previous Sleep time (powered on for the first
time or after performing Sleep is 1h). The Sleep symbol will appear. Press time
*/* button, you can choose between 1~8h. Each press, it may increase/decrease
1h and will display in the humidity area with “xh”, and display “Timer Off” in
Timer Off area and the time to turn off; press Sleep button again to cancel Sleep
function. The Sleep symbol disappears.
Before going to bed, you can press the SLEEP button, the air conditioner will
operate in comfort sleep mode to make you have a sound sleep.
Before using this function, you should calibrate the clock first, otherwise, the SLEEP
function will be out of order.
2.In HEATING operation
1 hour later in SLEEP operation, the temperature
will decrease 2* from the set temperature, another
1 hour later increase another 2*, then the unit will
operate continuous at this temperature for 3 hours,
then it increases 1*, after operating at this
temperature for another 3 hours, the unit will turn
off automatically. The temperature is lower than set
temperature to prevent you from feeling
uncomfortable during sleep.
3.In AUTO operation
The air conditioner will perform the relative SLEEP
operation according to automatically chosen operation
mode.
4.In FAN operation
Cannot use SLEEP function
Operation modes
1.In COOLING, DEHUMIDIFYING operation
1 hour later in SLEEP operation, the temperature
will increase 1* from the set temperature, another
1 hour later increase another 1*, then the unit will
operate continuous for 6 hours, then it turns off
automatically. The temperature is higher than set
temperature to prevent you from getting a cold.
** ** **
**
**
**
**
**
**
****
**
**
**/**
Note:
lAfter setting Sleep function, it is not permitted to adjust clock.
lThe Sleep time is less than 8h, after reaching the set time, the unit will automatically stop.
lSet Sleep function after setting “Timer Off” function, the air conditioner will perform
Sleep function.
lAfter setting Sleep function, the Timer function cannot be set.
lSet Sleep function after setting “Timer On” function, the Sleep function can only be set
in the set time of Timer On.
10
Set temperature
SLEEP operation starts
SLEEP operation stops
turn off
1 hour
about 3 hours
3 hours
decrease 2*
increase 1*
in HEATING operation
1 hour
decrease 2*
in COOLING* DEHUMIDIFYING operation
Set temperature
SLEEP operation starts
SLEEP operation stops
turn off
1 hour
about 6 hours
increase 1*
1 hour
increase 1*

Before using TIMER function, calibrate the
clock first (referring to page 4). When you
wake up in the morning, before going back
to home after work or after going to bed, you
can let your air conditioner automatically turn
on or turn off.
2.Set of TIMER mode
Press the TIMER button to change the
TIMER mode, each press the TIMER
mode will change as the following
sequence:
1.Turn on the unit
Cancel TIMER
Press the TIMER button several times until the TIMER mode display
disappears.
*
After turning on the unit, set the desired
working mode.
The LCD of the wire controller will show
working mode. (except for Timer, Sleep, Swing)
** ** **
**
**
**
**
**
**
****
**
**
**/**
* Each press, the set time increases 10 minutes. If depress the button, the
time will increase rapidly.
*Each press, the set time decreases 10 minutes. If depress the button, the time will
decrease rapidly.
3.Set time
Press the time adjusting button
This LCD will show the time set, the time can be adjusted within 24h.
(AM stands for morning, PM stands for afternoon).
4.Confirm the time
After calibration of the clock, press SET button to confirm time.
The time displayed is: at x o’clock x minutes the unit will be turned on
(TIMER ON) or turned off (TIMER OFF).
Hints:.
After power failure, the clock should be calibrated again.
The wire controller has memory function, when you use this function for the
second time, if the time set is the same as the previous one, you just need to
choose the TIMER mode then press the SET button to confirm.
At this time, the* *or* *will not flash.
ON
OFF
Then choose the timer mode as you need
(TIMER ON or TIMER OFF.)
At this time the or will flash.
ON
OFF
" " " "
11
Timer On/Off function
Operation instruction
OFFON OFFON
AM
PM
AM
PM
TIMER ON TIMER OFF TIMER ON-OFF
Blank

Operation instruction
Timer On-Off function
Cancel TIMER
Press the TIMER button several times until the TIMER mode display
disappears.
According to the sequence of TIMER ON & TIMER OFF setting, you can realize
turning on unit first, then turning off unit.
After adjusting time, press SET button to confirm time.
The time displayed is: at x o’clock x minutes the unit will be turned on.
At this time, the" "will not flash ," "begins to flash.
5.Set the TIMER OFF time
Press the TIME button, the adjustment method is the same as the one of
setting TIMER ON time.
6.Confirm the time of TIMER OFF
After adjusting time, press SET button to confirm time.
The time displayed is: at x o’clock x minutes the unit will be turned off.
ON
OFF
** ** **
**
**
**
**
**
**
****
**
**
**/**
5
6
2.Set of TIMER mode
Press the TIMER button to change the
TIMER mode, each press the TIMER
mode will change as the following
sequence:
1.Turn on the unit
After turning on the unit, set the desired
working mode.
The LCD of the wire controller will show
working mode. (except for Timer, Sleep, Swing)
* Each press, the set time increases 10 minutes. If depress the button, the
time will increase rapidly.
*Each press, the set time decreases 10 minutes. If depress the button, the time will
decrease rapidly.
3.Set time
Press the time adjusting button
This LCD will show the time set, the time can be adjusted within 24h.
(AM stands for morning, PM stands for afternoon).
4.Confirm the time
At this time, the" "will not flash.
OFF
12
OFFON OFFON
AM
PM
AM
PM
TIMER ON TIMER OFF TIMER ON-OFF
Blank
Then choose the TIMER ON-OFF mode.
At this time the" "will flash.
ON

Users’ Attention
Set proper room temperature
Not too low or high and make every peop-
le in the
room
feel
comfortable.
Do not let the cold air blows directly to
human body for a long time and do not
make the room temperature drop too
low.
Otherwise, it may
cause uncomfortable
or bad to your health.
Cut off
power
The room should often ventilate.
After a long-time
of using air
conditioner, the
room must be
ventilated.
Do not keep the doors and windows
open
Otherwise, it
may lower the
efficiency of
the air conditioner.
Television, radio and acoustics, etc.
equipment should keep over 1m from
indoor unit and wire controller.
Otherwise, they may
disturb the image
and cause noise.
Do not put any drying
devices under
the indoor unit.
The heat may cause
the deformation of
indoor unit.
If do not use the air conditioner
for a long time, it is necessary to
cut off power.
If do not cut
off power, the
unit may consume
power. In order to protect the unit,
before using the air conditioner
again, turning on the power at least
12 hours in advance.
The windows should be hung
with curtains or blinds.
Do not let the sun
shine directly shine
in the room; do not
let the outdoor air
enter room.
The articles must keep dry cannot
be put under the indoor unit.
When the humidity
is over 80% or
the drainage
outlet is blocked,
the indoor unit may drop water.
Do not put articles around the
air inlet and outlet.
This kind of obstacle can lower the
efficiency of the air conditioner or
cause unit trouble.
The air conditioner can only be used
in air conditioning. It can not be
used in other purpose.
Do not use the air conditioner in some
specific purpose, such as storage or
protect food, animals, plants, precise
instrument and
artwork,
otherwise,
the quality
of them may
be declined.
Do not press tightly with the LCD part of
the wire controller to avoid damage of it.
The airflow cannot directly blow
to the pets and plants.
Otherwise, pets
and plants
may be hurt.
13
Cooling is
26~28*
Heating is
18~23*

Notice
Only after turning off the unit and
cutting off the power can the
cleaning of the unit be performed.
Otherwise, it may cause electric
shock or injury.
Do not use water to clean the air
conditioner.
Otherwise, it
may cause
electric
shock
The repair can only be performed
by the professional workers.
Before touch the wire connection
device, cut off the power first.
Use stable stand support.
Please pay high attention when
cleaning the unit
Daily maintenance
Clean the air filter
Instructions:
When not for cleaning, do not dismantle the air filter, otherwise it may
cause trouble.
When the air conditioner is used in a dusty environment, the air filter
should be cleaned more often
(generally once every two weeks).
1.Open air inlet grille
Pull the two handles at the same time,
slowly draw them out.
(when closing it, the
procedure
is reversed.)
Notice
14
Maintenance
Don’t in
operation
Open

Clean the air filter
2.Dismantle the air filter
Pull the two side handles
at the back of the air inlet
grille, lift the air filter to
dismantle it.
3.Clean
Notice
Do not use the hot water over 50* to clean to avoid discoloration
or deformation.
Do not dry the unit on fire, the filter may be burnt.
Use cleaner or water to clean to remove dust.
*A*Use cleaner to remove dust.
* B *When the dust is too much, use
soft brush and neutral detergent.
( C ) Throw the water off, then put it
in the shadow for airing.
4. Install air filter
(1) Put the air filter into those extruding
parts at the top of the air inlet grille.
(2) Draw the handles at the back of the
air inlet grille inwards to fix the air
filter.
5. Close air inlet grille
Referring to procedure 1.
Open and remove
15
Maintenance

Clean the air inlet grille
1. Open air inlet grille
Pull the two handles at the
same time, slowly draw
them out. (when closing
it, the procedure is
reversed.)
2. Remove air filter
Referring to “Clean the air filter”.
3. Remove the air inlet grille
Open the air inlet grille for 45o, the lift it up.
4. Clean
Notice
Do not use the hot water over 50* to clean to avoid discoloration
or deformation.
Use soft brush, water and neutral
detergent to clean, then throw the water off.
Instruction
*When there is too much dust*
Use ventilation fan or directly spray the detergent special
for kitchen ware on the air inlet grille, 10 minutes later
use water to clean.
5. Install air inlet grille
6. Install the air filter
7. Close air inlet grille
Referring to procedure 3.
Referring to “Clean the air filter”
Referring to procedure 1.
Open
16
Maintenance

Clean the air outlet and casing
Notice
Do not use gasoline, benzene, diluent, polish powder or liquid
pesticide to clean.
Do not use the hot water over 50* to clean to avoid discoloration
or deformation.
Use soft dry cloth to clean.
If cannot remove the dust, use water or neutral detergent.
If the louver of the air conditioner is too dirty, it may be dismantled
(as the following described) for cleaning.
Dismantle and install louver
Notice
When use water to clean the louver, do not clean it to hard,
otherwise the fuzz on the surface maybe fall off.
1. Fix the louver at the lowest position.
2. Dismantle louver
Referring to SWING.
Loosen the screws at
the two ends of the louver.
3. Install louver
Slightly rotate the louver, the
extruding edges at the ends
of the air inlet can be inserted
into the louver groove, then
tighten the screws.
Instruction
For details, please consult the
after-sales service worker.
Maintenance
17

Before using season
1.Check the following items:
If the air inlet and outlet of indoor and outdoor unit are blocked.
If the earth wire is proper.
If the wire connection is proper.
If there is abnormal phenomenon, please ask the after-sale
service staffs for help.
2.Cleaning the air filter or air inlet and casing
After cleaning the air filter, it must be reinstalled.
3.Turn on the power
After using season
1.In a sunny day, perform half-a-day Fan operation to make the
inner of the unit dry.
2.Cut off the power
If do not cut off power, the unit will consume power. Power
cutoff can save power.
3.Cleaning the air filter or air inlet and casing
After cleaning the air filter, it must be reinstalled.
For the details of cleaning, please refer to Maintenance.
Maintenance before and after the using season.
Maintenance
18
/