StarTech.com S2510SM12U33 User manual
- Category
- HDD/SSD enclosures
- Type
- User manual
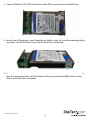
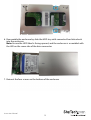
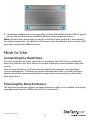
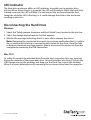
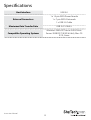
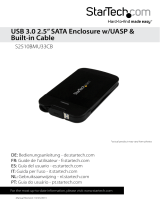
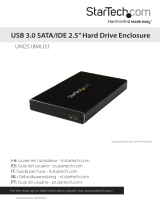
StarTech.com S2510SM12U33 is a USB 3.0 to 2.5in SATA Hard Drive Enclosure with UASP. It allows you to connect a 2.5" SATA hard drive or solid state drive to your computer through a USB 3.0 port. The enclosure supports USB 3.0 data transfer rates of up to 5 Gbps, and is also backward compatible with USB 2.0 ports. The enclosure features a built-in LED indicator that lets you monitor drive activity. It also has a power jack for connecting an optional power adapter, in case the USB port does not provide enough power. The enclosure comes with a USB 3.0 cable, a screw kit, and a set of foot pads.
StarTech.com S2510SM12U33 is a USB 3.0 to 2.5in SATA Hard Drive Enclosure with UASP. It allows you to connect a 2.5" SATA hard drive or solid state drive to your computer through a USB 3.0 port. The enclosure supports USB 3.0 data transfer rates of up to 5 Gbps, and is also backward compatible with USB 2.0 ports. The enclosure features a built-in LED indicator that lets you monitor drive activity. It also has a power jack for connecting an optional power adapter, in case the USB port does not provide enough power. The enclosure comes with a USB 3.0 cable, a screw kit, and a set of foot pads.


-
 1
1
-
 2
2
-
 3
3
-
 4
4
-
 5
5
-
 6
6
-
 7
7
-
 8
8
-
 9
9
-
 10
10
-
 11
11
-
 12
12
-
 13
13
-
 14
14


StarTech.com S2510SM12U33 User manual
- Category
- HDD/SSD enclosures
- Type
- User manual
StarTech.com S2510SM12U33 is a USB 3.0 to 2.5in SATA Hard Drive Enclosure with UASP. It allows you to connect a 2.5" SATA hard drive or solid state drive to your computer through a USB 3.0 port. The enclosure supports USB 3.0 data transfer rates of up to 5 Gbps, and is also backward compatible with USB 2.0 ports. The enclosure features a built-in LED indicator that lets you monitor drive activity. It also has a power jack for connecting an optional power adapter, in case the USB port does not provide enough power. The enclosure comes with a USB 3.0 cable, a screw kit, and a set of foot pads.
Ask a question and I''ll find the answer in the document
Finding information in a document is now easier with AI
Related papers
-
StarTech.com S2510BMU33 User manual
-
 StarTech.com S2510BMU33CB User manual
-
StarTech.com UNI3510BMU32 User manual
-
StarTech.com S2510BPU33 Owner's manual
-
 StarTech.com S2510BU3PWPS User manual
-
StarTech.com USB3S2SAT3CB User manual
-
-
 StarTech.com S3510WMU33T User manual
-
 StarTech.com S3510BMU33ET User manual
-
StarTech.com S3520WU33ER User manual


Other documents
-
 StarTech UNI251BMU33 Owner's manual
-
NewerTech AdaptaDrive User manual
-
Goodway NU6010 User manual
-
 StarTech M2-USB-C-NVME-SATA User guide
-
Dynex DX-HD302513 User manual
-
StarTech SM2NGFFMBU33 User guide
-
 archgon MH-2672-U3 User manual
-
 archgon MH-3231-U3V3 Sphere III User manual
-
Kingwin ATK-25U3-BK User manual


