Page is loading ...

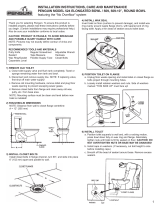
RECOMMENDED TOOLS FOR INSTALLATION
HERRAMIENTAS RECOMENDADOS PARA LA INSTALACIÓN
Wax ring Anillo (empaque) de cera
Regular screwdriver Destornillador corriente
Hacksaw Segueta
Closet bolts Pernos para la taza
Wrench Llave de tuercas
Toilet seat Asiento del inodoro
Carpenters level Nivel de carpintero
Sillicone Silicone
REMOVING YOUR OLD TOILET
PARA QUITAR EL INODORO VIEJO
1 – Turn off the water supply.
1 – Cierre las llaves de paso del suministro de agua.
2 – Flush the toilet to empty tank. Remove any water left in the tank or bowl.
2 – Mueva la palanca para vaciar el tanque. Si queda agua en el tanque o en la taza,
sáquela.
3 – Disconnect the supply line from tank.
3 – Desconecte la línea de suministro del tanque.
4 – Remove decorative caps. Unscrew nuts that attach the toilet to the floor.
4 – Quite las tapas decorativas. Destornille las tuercas que fijan el inodoro al piso.
5 – Remove toilet.
5 – Saque el inodoro.
INSTALLING YOUR NEW TOILET
PARA INSTALAR EL INODORO NUEVO
1 – Be sure the water supply valve is shut-off before installation.
1 – No se olvide de cerrar las llaves de paso de la alimentación antes de hacer la
instalación.
2 – Remove old closet bolts from closet flange. Clean any old wax, putty etc from base
area.
2 – Saque los pernos viejos de la brida de fijar la taza. Limpie bien cualquier cera vieja,
masilla, etc. que quede en el lugar donde va la base.
Page is loading ...

10 - Install the decorative bolt caps. If necessary, use silicone to secure it onto the place.
10 – Póngale las tapas decorativas a los pernos. Se necesario, usar el silicón para
asegurarlo no lugar.
INSTALLING YOUR TANK
LA INSTALACIÓN DEL TANQUE
1 – Turn the tank upside down and install a rubber gasket around
the threaded outlet. Turn the tank upright. (see Fig 4)
1 – Vire el tanque al revés e instale la junta de caucho alrededor
del agujero roscado. Enderece el tanque.(ver Fig4)
2 – Insert tank mounting bolts with metal washer followed by rubber washer from inside
the tank through the mounting holes and secure with metal washers and nuts on the
other side by using a wrench.
2 – Introduzca los pernos de montaje,pernos de metal con las arandelas de caucho desde
dentro del caucho seguida de la arandelade metal y de la tuerca y apretarlo con la
llave.
3 - Lower tank onto bowl so that tapered end of gasket fits into bowl water inlet
opening.
3 – Ponga el tanque sobre la taza de modo que la parte ahusada de la junta encaje en el
agujero para la entrada de agua en la taza.
4 – Use the metal oval washer and winged nut to secure tank to bowl, tighten the nuts
alternately until the tank is seated evenly on the bowl surface, making necessary
adjustments.
CAUTION: DO NOT OVERTIGHTEN THE NUTS, SEVERE DAMAGE MAY
OCCUR TO THE TANK AND BOWL.
4 –Use la arandela ovalada de metal y lamariposa para asegurar el tanque con la taza
de baño,apriete las tuercas alternado entre una y otra hasta que el tanque encaje
parejo sobre la superficie de la taza haciendo los ajustes necesarios para esto.
PRECAUCIÓN: NO APRIETE LAS TUERCAS DEMASIADO, YA QUE HACERLO
PUEDE CAUSAR GRAN DAÑO.
5 - Connect the water supply line, tighten coupling nuts and turn on the water.
5 – Conecte la tubería e alimentación del agua, apriete
las tuercas de acoplamiento y
abra las llaves de paso del agua.
9 – Apriete los pernos alternado entre uno y otro hasta que el inodoro quede bien
encajado en el piso.
PRECAUCIÓN: NO APRIETE LAS TUERCAS MÁS DE LA CUENTA, YA
QUE ESTO PUEDE CAUSAR GRAN DAÑO.

INSTALLING YOUR TANK LEVER HANDLE
LA INSTALLACIÓN DE LA PALANCA DEL TANQUE
1 – Turn clockwise to remove plastic nuts from the lever arm.
1 – Vire la dirección de las manecillas del reloj para quitar
tuercas del plástico de palanca.
2 – Insert lever arm through the hole on the left side of tank.
Screw the plastic nut counterclockwise to tighten it.
(see Fig 5 - Fig 6)
2 – Introduzca la palanca pasando por lo agujero no lado
izquierdo del tanque.Atornillar en la dirección opuesta de las
manecillas del reloj para apriete las tuercas del plástico.
(ver Fig 5 - Fig 6)
3 – Hook the chain onto the lever.With the lever at rest, the chain
should only be long enough for the flapper to close.
3 – Engancharse la cadena al palanca.Con la palanca en la
posición del descanso,esta debería quedarse largo solamente
suficiente para cerrar el tapón.
WATER LEVEL ADJUSTMENTS
AJUSTES AL NIVEL DEL AGUA
Hold the threaded rod and turn it clockwise to increase the water level inside the tank.
Turn it anticlockwise to lower the water level inside the tank.
Segurar la rosca e girarla no sentido de las agujas de reloj para aumentar el nivel del
agua dentro del tanque. Girarla no sentido contrário a las agujas del reloj para
reducir el nivel del agua.
CARE AND CLEANING
CUIDADO Y LIMPIEZA
Cleaners that don’t contain chlorine can be used on the china surface. Cleaners containing
chlorine (calcium hypochlorite) are not recommended. It may cause damage to the tank
flushing components.
En la superficie de porcelana se pueden usar limpiadores que no contengan cloro. No se
recomienda el uso de limpiadores que contengan cloro (hipoclorito de sodio). Esto puede
dañar los componentes que se activan al mover la palanca del tanque.
Page is loading ...
Page is loading ...
/


