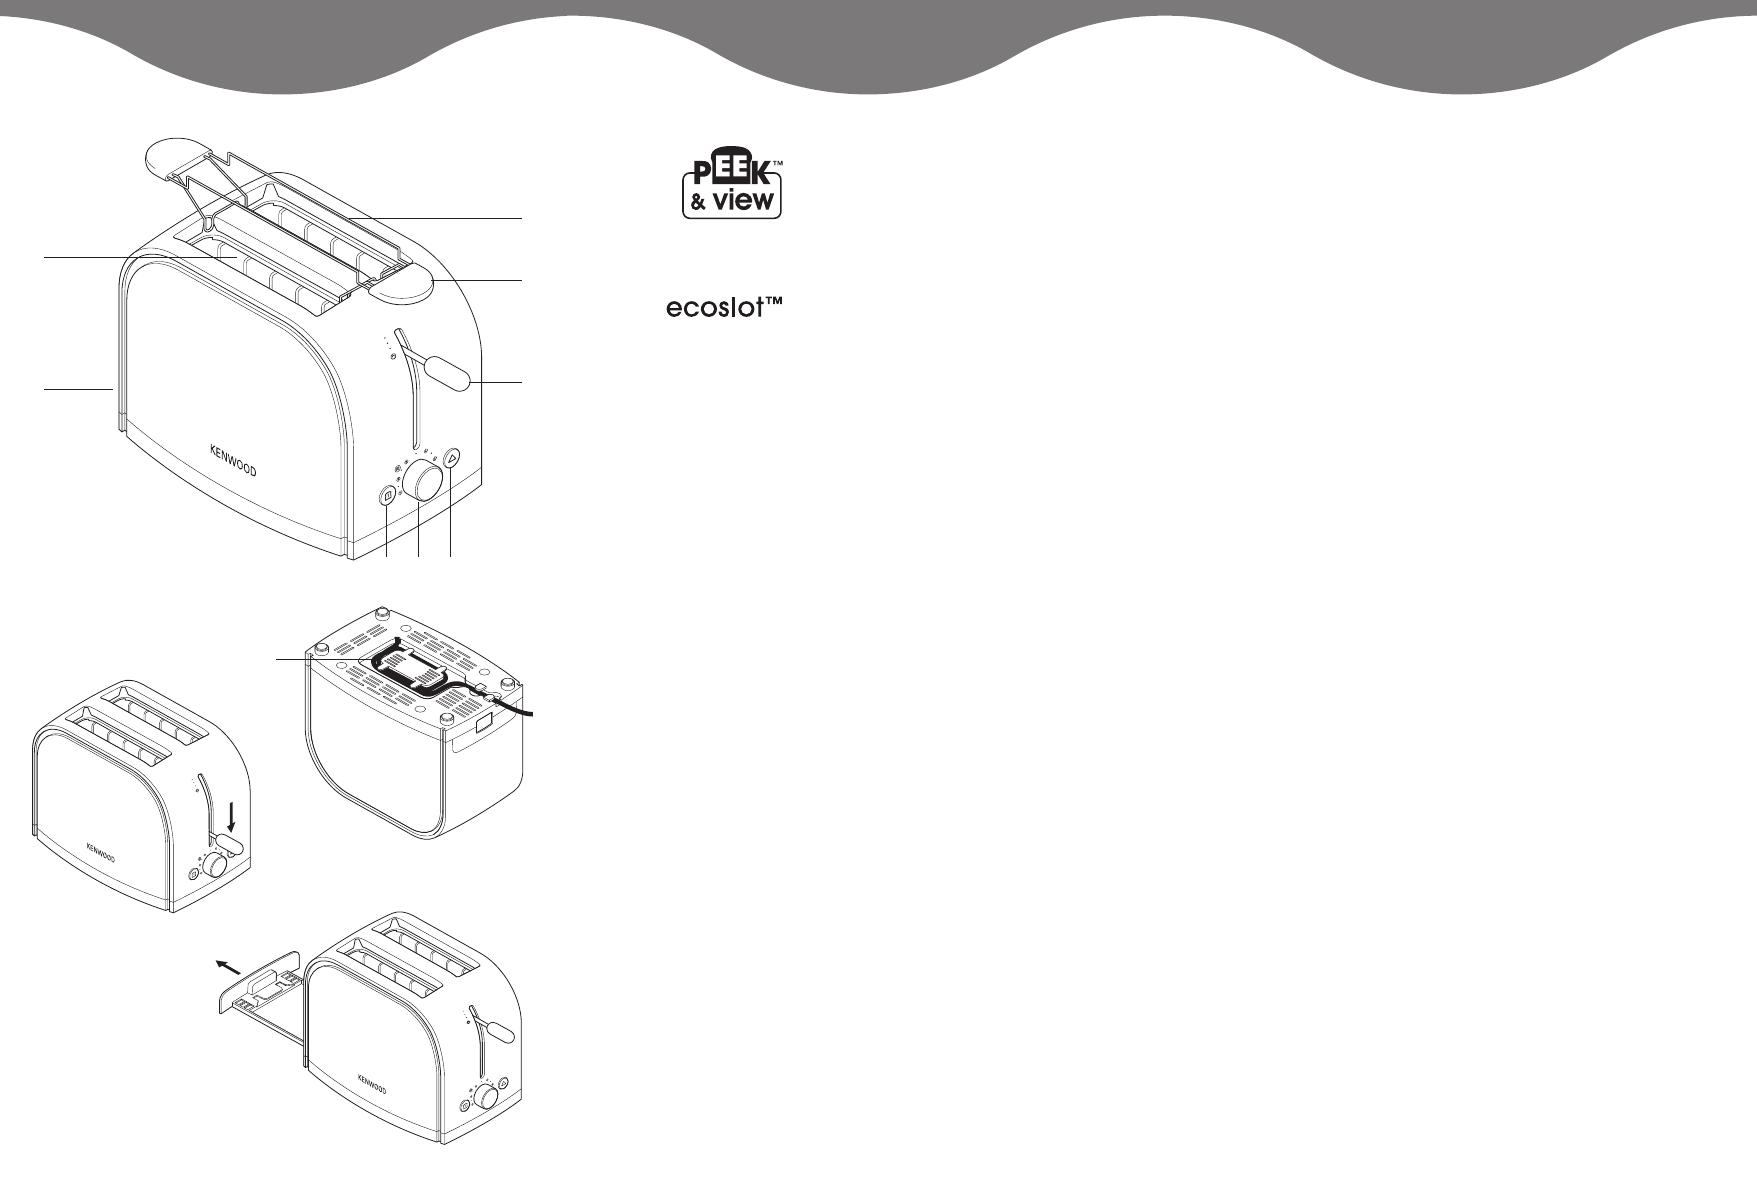
Use the carriage lever to lift the toast
to Peek & View™ at any time
without cancelling the toasting cycle.
1 slot setting, only heats what you
need, saving 50% energy.
before using your Kenwood
appliance
●
Read these instructions carefully and
retain for future reference.
●
Remove all packaging and any
labels.
safety
●
Burnt food can catch fire, so:
●●
never leave your toaster on
unattended;
●●
keep your toaster away from
anything (eg curtains) that could
catch fire;
●●
set the browning control lower for
thin or dry bread;
●●
never warm food with a topping or
filling (eg pizza): if it drips into the
toaster, it could catch fire.
●●
Clean the crumb tray regularly:
crumbs can smoke or burn.
●
To avoid electric shocks, never:
●●
let the toaster, cord or plug get wet;
or
●●
put your hand or anything metal,
eg a knife or foil, into the toaster.
●
Always unplug the toaster when not
in use, before cleaning or attempting
to clear jammed bread.
●
Never cover your toaster with a plate
or anything else - it could overheat
and catch fire.
●
Never let the cord hang down where
a child could grab it.
●
We recommend that you do not use
your toaster directly under wall
cupboards.
●
D
o not move the toaster whilst it is
in operation.
●
N
ever touch hot surfaces especially
t
he metal top area.
●
Never use an unauthorised
attachment or accessory.
●
Never use a damaged toaster. Get it
checked or repaired: see 'Service &
Customer Care'.
●
This appliance is not intended to be
operated by means of an external
timer or separate remote-control
system.
●
This appliance is not intended for
use by persons (including children)
with reduced physical, sensory or
mental capabilities, or lack of
experience and knowledge, unless
they have been given supervision or
instruction concerning use of the
appliance by a person responsible
for their safety.
●
Children should be supervised to
ensure that they do not play with the
appliance.
●
Only use the appliance for its
intended domestic use. Kenwood
will not accept any liability if the
appliance is subject to improper use,
or failure to comply with these
instructions.
before plugging in
●
Make sure your electricity supply is
the same as the one shown on the
underside of your toaster.
●
This appliance conforms to EC
directive 2004/108/EC on
Electromagnetic Compatibility and
EC regulation no. 1935/2004 of
27/10/2004 on materials intended
for contact with food.
before using for the first time
1 Wrap excess cord around the cord
storage device on the underside of
the toaster .
●
Operate the toaster once on a
medium setting without bread. (The
lever will not stay down unless the
toaster is plugged in).
English
2
햴
햲
햳
햷 햶 햵
햸
햹
햺


