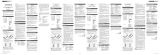
Oregon Scientific RMR682 User manual

Category
Alarm clocks
Type
User manual
EN
1
Digital Thermometer with Ice Alert and
Radio-Controlled Clock
Model: RMR682
USER MANUAL
CONTENTS
Introduction ............................................................... 2
Overview .................................................................... 2
Front View ..............................................................2
Back View .............................................................. 3
Remote Sensor (THN132N) ...................................
4
Getting Started .......................................................... 4
Power .....................................................................4
Remote Sensor ......................................................... 5
Sensor Data Transmission ..................................... 6
Clock .......................................................................... 6
Clock Reception ................................................... 6
Reception Signal .................................................. 6
Set Clock ............................................................... 6
Alarm .........................................................................7
Temperature ..............................................................
7
Temperature Trend ................................................. 8
Ice Warning ............................................................ 8
Hi / Lo Temperature Alarm ..................................... 8
Reset .......................................................................... 8
Precautions ............................................................... 8
Specifications ...........................................................
9
About Oregon Scientific ........................................ 10
EU-Declaration of Conformity ............................... 10
RMR682_M_EN_R4.indd 1 6/5/06 4:06:30 PM
EN
2
INTRODUCTION
Thank you for selecting the Oregon Scientific
TM
Digital
Thermometer with Ice Alert and Radio-Controlled
Clock
(RMR682). The main unit can support up to
3 sensors. To purchase additional sensors, please
contact your local retailer.
NOTE Please keep this manual handy as you use
your new product. It contains practical step-by-step
instructions, as well as technical specifications and
warnings you should know about.
OVERVIEW
FRONT VIEW
1. Channel number and sensor reception status
2. Sensor low battery warning
3. Maximum / minimum outdoor temperature reading
4. Indoor temperature display icon
5. Main unit low battery warning
6. Maximum / minimum indoor temperature reading
7. Alarm is set
8. AM / PM icon
9. Alarm is displayed
10. Radio-controlled clock reception icon
11. Hi / lo alarm is displayed
12. Outdoor temperature trend icon
13. Ice warning is active
14. Outdoor temperature reading
15. Indoor temperature trend icon
16. Indoor temperature reading
17. Time, alarm and date
1
2
3
4
5
6
7
9
8
10
11
12
13
14
15
16
17
RMR682_M_EN_R4.indd 2 6/5/06 4:06:36 PM
EN
3
BACK VIEW
1.
MEM: View current, maximum and minimum
temperature
2. TEMP HI / LO
: Change settings or enable /
disable hi or lo temperature alarm for channel 1
3. / : Increase / decrease setting; activate /
deactivate clock reception signal
4. CHANNEL: Switch remote sensor display
5. MODE: Change settings / display
6. ALARM
: View alarm status; set alarm
7. Battery compartment
8. °C / °F: Select temperature unit °C / °F
9. RESET
: Reset unit to default settings
10. UK / EU switch
3
1
2
8
9
10
4
5
6
7
RMR682_M_EN_R4.indd 3 6/5/06 4:06:54 PM
EN
4
GETTING STARTED
POWER
Insert batteries before first use, matching the polarity
(+ and -).
NOTE Install batteries in the remote sensor before the
main unit. Press
RESET after each battery change. Do
not use rechargeable batteries. We recommend that
you use alkaline batteries with this product for longer
usage and lithium batteries in temperatures below
freezing.
shows when batteries are low.
UNIT
LOCATION
Main Indoor temperature area
Remote Outdoor temperature area
1 2 3
1
2
3
4
6
5
1
REMOTE SENSOR (THN132N)
1. LED indicator 1. Wall mount
2. Battery compartment
3. Battery door
4. Table stand
5. RESET hole
6. CHANNEL switch
RMR682_M_EN_R4.indd 4 6/5/06 4:07:03 PM
EN
5
REMOTE SENSOR
The sensor collects temperature readings approx.
every 40 seconds and sends them to the main unit. The
main unit can collect data from up to 3 sensors.
To set up the sensor:
1. Slide open the battery door.
2. Insert the batteries, matching the polarity (+ / -).
Reset after each battery change.
3. Select a channel. Make sure you use a different
channel for each sensor.
4. Close the battery compartment.
5. Secure the sensor in the desired location using
the wall mount or table stand.
For best results:
Place the sensor out of direct sunlight and moisture.
Do not place the sensor more than 30 meters (100
feet) from the main (indoor) unit.
Position the sensor so that it faces the main (indoor)
unit, minimizing obstructions such as doors, walls,
and furniture.
Place the sensor in a location with a clear view to
the sky, away from metallic or electronic objects.
Position the sensor close to the main unit during
cold winter months as below-freezing temperatures
may affect battery performance and signal
transmission.
The transmission range may vary depending on many
factors. You may need to experiment with various
locations to get the best results.
Standard Alkaline batteries contain significant
amounts of water. Because of this they will freeze
in low temperatures of approximately -12°C (10°F).
Disposable Lithium batteries have a much lower
threshold for temperature with an estimated freezing
range of below -30°C(-22°F).
Wireless ranges can be impacted by a variety of factors
such as extremely cold temperatures. Extreme cold
may temporarily reduce the effective range between the
sensor and the base station. If the unit’s performance
fails due to low temperature, the unit will resume proper
functioning as the temperature rises to within the
normal temperature range (i.e. no permanent damage
RMR682_M_EN_R4.indd 5 6/5/06 4:07:09 PM
EN
6
MSF-60 generated from Rugby, England
The clock collects the radio signals whenever it is
within 1500 km (932 miles) of a signal.
NOTE Slide the EU / UK switch to appropriate position
for your location. Repeat each time you reset the unit.
NOTE Initial reception takes 2-10 minutes for first set up
or when RESET is pressed. Once complete, the reception
icon will stop blinking. If the signal is weak, it can take up
to 24 hours to get a valid signal.
RECEPTION SIGNAL
STRONG WEAK NO SIGNAL
To enable and force a signal search:
Press and hold for 2 seconds.
To disable the signal reception:
Press and hold for 2 seconds.
SET CLOCK
If the clock signal reception is enabled and a signal is
being received the clock does not need to be manually
set.
will occur to the unit due to low temperatures).
SENSOR DATA TRANSMISSION
The reception icon in the outdoor temperature area
shows the status.
ICON DESCRIPTION
Main unit is searching for the
sensor(s)
A channel has been found and
sensor signal is being received
The sensor cannot be found.
Search for the sensor or check
batteries
To search for a sensor:
Simultaneously, press and hold
MEM and CHANNEL
for 2 seconds.
NOTE If the sensor is still not found, check the
batteries, obstructions, and remote unit location.
CLOCK
CLOCK RECEPTION
This product is designed to synchronize its date and time
automatically once it is within range of a radio signal:
DCF-77 generated from Frankfurt, Germany for
Central Europe
and “- -.-(Outdoor
temperature area)
RMR682_M_EN_R4.indd 6 6/5/06 4:07:14 PM
EN
7
To manually set the clock:
1. Press and hold
MODE for 2 seconds.
2. Press and to change the settings.
3. Press
MODE to confirm.
4. The setting sequence is: time zone offset, 12 /
24 hour format, hour, minute, year, date / month
format, month, date, and display language.
NOTE The time zone offset can be used to set the
clock up to + / - 9 hours from the received clock signal
time. If you have disabled the clock signal reception
(i.e. manually setting the clock), do not set a value for
time zone offset.
NOTE The language options are (E) English, (F)
French, (D) German, (I) Italian, and (S) Spanish.
To switch the clock display:
Press MODE to toggle between:
Clock with seconds
Clock with day
Calendar
ALARM
To set the alarm:
1. Press ALARM to view the alarm.
will show on the
display.
2. Press and hold ALARM for 2 seconds.
3. Press
or to change the hour / minute settings.
4. Press ALARM to confirm.
To activate or deactivate the alarm:
Press ALARM when in the alarm display. appears
when the alarm is set.
To silence the alarm and reset it for the next day:
Press ALARM.
TEMPERATURE
To toggle the temperature unit:
Press °C / °F.
To view outdoor sensor temperature readings:
Press CHANNEL.
shows which remote sensor’s data you are
viewing.
is permanently displayed in the indoor
temperature area.
To auto-scan between sensors:
Press and hold
CHANNEL for 2 seconds. Each
sensor’s data is displayed for 3 seconds.
To end auto-scan:
Press CHANNEL or MEM.
To toggle between current, minimum and maximum
records for the selected sensor:
Press MEM repeatedly.
To clear all records:
RMR682_M_EN_R4.indd 7 6/5/06 4:07:18 PM
EN
8
To silence the hi / lo temperature alarm:
Press any key. The alarm resets automatically and will
resound if the hi / lo temperature selected is exceeded
again.
RESET
Press RESET to return the unit to the default
settings.
PRECAUTIONS
This product is engineered to give you years of
satisfactory service if you handle it carefully. Here are
a few precautions:
Do not immerse the unit in water. If you spill liquid
over it, dry it immediately with a soft, lint-free cloth.
Do not clean the unit with abrasive or corrosive
materials.
Do not subject the unit to excessive force, shock,
dust, temperature or humidity, which may result in
malfunction, shorter electronic life span, damaged
battery and distorted parts.
Do not tamper with the unit’s internal components.
Doing so will invalidate the warranty on the unit and
may cause unnecessary damage. The unit contains
no user-serviceable parts.
Only use fresh batteries as specified in the user’s
instructions. Do not mix new and old batteries.
Do not use rechargeable batteries.
Remove batteries when storing the product for a
long time.
Press and hold MEM for 2 seconds.
TEMPERATURE TREND
Recent indoor / outdoor temperature trends are shown
by the trend icon.
RISING STEADY FALLING
ICE WARNING
If the channel 1 sensor falls between 3°C to -2°C (37°F
to 28°F),
flashes to warn you that the temperature is
approaching freezing.
NOTE The warning will automatically stop if the
temperature goes outside the ice-warning range.
HI / LO TEMPERATURE ALARM
An alarm can be set to sound if the sensor set to
channel 1 records above or below a temperature of
your choice.
To set alarm ON / OFF :
1. Press and hold
TEMP HI / LO .
2. Use
and to select high / low temperature
alarm. Press TEMP HI / LO to confirm.
3. Press or to set alarm ON / OFF and press
TEMP HI / LO to confirm.
4. If alarm has been activated, use
or to select
the temperature.
5. Press TEMP HI / LO
to confirm.
RMR682_M_EN_R4.indd 8 6/5/06 4:07:23 PM
EN
9
Due to printing limitations, the displays shown in
this manual may differ from the actual display.
The contents of this manual may not be reproduced
without the permission of the manufacturer.
Do not dispose this product as unsorted municipal
waste. Collection of such waste separately for
special treatment is necessary.
NOTE The technical specifications for this product
and the contents of the user manual are subject to
change without notice.
SPECIFICATIONS
TYPE DESCRIPTION
Main unit
Dimensions 107 x 87 x 56 mm
(L x W x D) (4.2 x 3.4 x 2.2
in)
Weight 134 g (
4.72 oz) without
battery
Remote unit
Dimensions 96 x 50 x 22 mm
(L x W x D) (3.8 x 2.0 x 0.9 in)
Weight 62 g (2.22
oz) without
battery
Temperature unit – °C / °F
Indoor range -5°C to 50°C (23°F to 122°F)
Outdoor range -30°C to 60°C
(-22°F to 140°F)
Resolution 0.1°C (0.2°F)
Remote unit
RF frequency 433MHz
Range Up to
30 m (100 ft)
with no obstructions
Transmission Approx. every 40 seconds
Channel no. 1, 2 or 3
Clock
Synchronization Auto or disabled
Clock display HH:MM
Hour format 12hr AM/PM or 24hr
Calendar DD/MM or MM/DD
Weekday in 5 (E, G, F, I, S)
languages
Alarm 2-minute alarm
Power
Main unit 2 x UM-4 (AAA) 1.5V
batteries
Remote unit 1 x UM-3 (AA) 1.5V
battery
NOTE We recommend that you use alkaline batteries
with this product for longer usage and lithium batteries
in temperatures below freezing.
RMR682_M_EN_R4.indd 9 6/5/06 4:07:24 PM
EN
10
EU-DECLARATION OF CONFORMITY
Hereby, Oregon Scientific, declares that the Digital
Thermometer with Ice Alert and Radio-Controlled Clock
(Model RMR682) is in compliance with the essential
requirements and other relevant provisions of Directive
1999/5/EC.
A copy of the signed and dated Declaration of
Conformity is available on request via our Oregon
Scientific Customer Service.
COUNTRIES RTTE APPROVAL COMPLIED
All EU countries, Switzerland
and Norway
CH
N
ABOUT OREGON SCIENTIFIC
Visit our website (www.oregonscientific.com) to
learn more about Oregon Scientific products such as
digital cameras; MP3 players; children’s electronic
learning products and games; projection clocks; health
and fitness gear; weather stations; and digital and
conference phones. The website also includes contact
information for our Customer Care department in case
you need to reach us, as well as frequently asked
questions and customer downloads.
We hope you will find all the information you need on
our website, however if you’re in the US and would
like to contact the Oregon Scientific Customer Care
department directly, please visit:
www2.oregonscientific.com/service/default.asp
OR
Call 1-800-853-8883.
For international inquiries, please visit:
www2.oregonscientific.com/about/international.asp
RMR682_M_EN_R4.indd 10 6/5/06 4:07:24 PM
NL
1
Draadloze Binnen- / Buitenthermometer
Met RF Klok
Model: RMR682
HANDLEIDING
INHOUDSOPGAVE
Introductie .............................................................. 2
Overzicht ................................................................ 2
Voorkant ................................................................ 2
Achterkant ............................................................. 3
Buitensensor (THN132N) ...................................... 4
Starten ..................................................................... 4
Stroom ................................................................... 4
Buitensensor ......................................................... 5
Sensor gegevens verzending ................................ 6
Klok ........................................................................... 6
Klok ontvangst ....................................................... 6
Signaalontvangst ................................................... 6
Klok instellen ......................................................... 7
Alarm ........................................................................ 7
Temperatuur ........................................................... 7
Temperatuurtrend .................................................. 8
Vorstwaarschuwing ............................................... 8
Hoog / laag temperatuuralarm .............................. 8
Reset ........................................................................8
Waarschuwingen .................................................. 8
Specificaties .......................................................... 9
Over Oregon Scientific ..................................... 10
EU conformiteits verklaring ............................ 10
RMR682_M_NL_R4.indd 1 6/5/06 4:24:31 PM
  • Page 1 1
  • Page 2 2
  • Page 3 3
  • Page 4 4
  • Page 5 5
  • Page 6 6
  • Page 7 7
  • Page 8 8
  • Page 9 9
  • Page 10 10
  • Page 11 11
  • Page 12 12
  • Page 13 13
  • Page 14 14
  • Page 15 15
  • Page 16 16
  • Page 17 17
  • Page 18 18
  • Page 19 19
  • Page 20 20
  • Page 21 21
  • Page 22 22
  • Page 23 23
  • Page 24 24
  • Page 25 25
  • Page 26 26
  • Page 27 27
  • Page 28 28
  • Page 29 29
  • Page 30 30
  • Page 31 31
  • Page 32 32
  • Page 33 33
  • Page 34 34
  • Page 35 35
  • Page 36 36
  • Page 37 37
  • Page 38 38
  • Page 39 39
  • Page 40 40
  • Page 41 41
  • Page 42 42
  • Page 43 43
  • Page 44 44
  • Page 45 45
  • Page 46 46
  • Page 47 47
  • Page 48 48
  • Page 49 49
  • Page 50 50
  • Page 51 51
  • Page 52 52
  • Page 53 53
  • Page 54 54
  • Page 55 55
  • Page 56 56
  • Page 57 57
  • Page 58 58
  • Page 59 59
  • Page 60 60
  • Page 61 61
  • Page 62 62
  • Page 63 63
  • Page 64 64
  • Page 65 65
  • Page 66 66
  • Page 67 67
  • Page 68 68
  • Page 69 69
  • Page 70 70
  • Page 71 71
  • Page 72 72
  • Page 73 73
  • Page 74 74
  • Page 75 75
  • Page 76 76
  • Page 77 77
  • Page 78 78
  • Page 79 79
  • Page 80 80

Oregon Scientific RMR682 User manual

Category
Alarm clocks
Type
User manual

Ask a question and I''ll find the answer in the document

Finding information in a document is now easier with AI