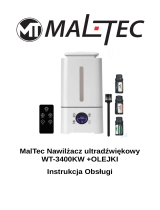
LANAFORM Vapolux Operating instructions

Category
Humidifiers
Type
Operating instructions
EN
VapoLux
INTRODUCTION
May we take this opportunity to thank you for the interest you have shown in the VAPOLUX by LANAFORM ®. This
humidifier uses a high-frequency oscillator to produce ultrasonic waves and break up the water into minute droplets
having a diameter of approximately 1 to 5 μm.
The ventilation system diffuses water in the form of a cold vapour and thus ensures the desired level of humidity. This
vapour may be seen as a fine mist issuing from the diffuser.
PLEASE READ THE INSTRUCTIONS FULLY BEFORE USING YOUR HUMIDIFIER, ESPECIALLY THESE BRIEF,
FUNDAMENTAL SAFETY INSTRUCTIONS:
Check that the mains power supply voltage corresponds to that shown on the unit.
This unit is not intended to be used by any persons, including children, with reduced physical, sensorial or mental
capacities, or by persons lacking experience or knowledge unless they have been provided, by a person in charge of
safety, with supervision or prior instructions concerning the use of the unit. Children should be supervised to ensure
that they do not play with the unit.
Do not connect or disconnect the plug if your hands are wet.
Never operate the unit with a damaged cable or plug, or after any damage or failure has occurred. In these cases, return
the unit to the nearest, approved supplier/repair shop for inspection, repair or adjustment as the case may be.
Never add any substances to the reservoir except demineralised tap water or distilled water.
Never dismantle the base unit.
Never switch on the humidifier when there is no water in the tank.
Do not shake the unit. This may cause the water to overflow inside the base unit and prevent it from operating
correctly.
Never touch the water or immersed components when the unit is operating.
To avoid any damage to components, never allow any water to splash inside the base unit.
If any unusual smell is detected during normal use, switch off the unit, disconnect it and have it checked by a qualified
person.
Disconnect the unit before cleaning or removing the water reservoir.
Never wash the whole unit in water and do not immerse it.
The ultrasonic humidifier must be cleaned regularly. To do this, refer to the cleaning instructions in this manual and
observe them fully.
Do not leave the humidifier in the sun for long periods.
Do not use the humidifier if the air in the room is already sufficiently humid (at least 50% relative humidity). In
effect, the ideal human comfort level of relative humidity is between 45 and 60%. Excess humidity is indicated by
condensation on cold surfaces or cold walls in the room. To determine the relative humidity of the room correctly, use a
hygrometer available in most large stores and equipment dealers.
Vapolux
3
EN
COMPONENTS
VAPOLUX
1. Steam diffuser
2. Water reservoir
3. Water level control
4. Protective switch for lack of water
5. Filter
6. Water filler
7. LCD Screen
8. On/Off button
9. Increase humidity level
10. Decrease humidity level
11. Anion control
12. Steam intensity
13. Timer
14. Water reservoir control
REMOTE CONTROL
The remote control works with 1 CR2025 3V battery not included
1.ON/OFF
2.Increase humidity level
3.Decrease humidity level
4.Anion control
5.Steam intensity
6.Timer
8
9
1011121314
1
2
3
6
5
7
4
1
2
5
4 3 6
1
2
8
9
1011121314
1
2
3
6
5
7
4
1
2
5
4 3 6
1
2
8
9
1011121314
1
2
3
6
5
7
4
1
2
5
4 3 6
1
2
INSTRUCTIONS FOR USE
Characteristics
Water reservoir with a 6 litre capacity.
Compact descign
LCD Screen
Generates anions (anion fan)
Remote control.
Adjustable humidity level of interior air and automatic regulating
Up to 20 hours continuous operation.
Automatic detection and display of surrounding humidity
An automatic device shuts down the unit if the reservoir is empty.
Silent operation (≤35dB).
Increases and controls the relative humidity in the room
4
EN
Improves ambient air quality
Eliminates electrostatic charges
Helps maintain good health and protects the skin
INSTALLATION OF THE DEMINERALISATION FILTER
Place the demineratlisation cartridge in the space located in the base of the unit as explained in
the diagram of figures 1 and 2.
Replace the reservoir and wait a few minutes before starting the unit so that the water is
filtered.
8
9
1011121314
1
2
3
6
5
7
4
1
2
5
4 3 6
1
2
INSTALLATION INSTRUCTIONS
Place the unit in the room half an hour before turning it on, so that it may take the surrounding temperature.
It is recommended to use the unit in a temperature located between 5°C and 40°C and with a relative humidity of less
than 50 % RH.
Remove the reservoir from the unit; unscrew the plug by swivelling it counterclockwise.
Fill the reservoir with clear water at 40°C maximum. Check that the silicone washer is in place, and then close the cover
by turning it clockwise.
Make sure it is clean and waterproof then place the reservoir delicately on the base unit.
With dry hands, plug in the unit.
Press on the button
8
9
1011121314
1
2
3
6
5
7
4
1
2
5
4 3 6
1
2
on the control panel or remote control. The light turns on, which means that the unit is
working. It will start to emit steam. After a few seconds, the humidity level is displayed
When the reservoir is empty, the corresponding light
8
9
1011121314
1
2
3
6
5
7
4
1
2
5
4 3 6
1
2
turns on and the unit turns off automatically.
VAPOLUX FUNCTIONS
Humidity level control
Press on the button
8
9
1011121314
1
2
3
6
5
7
4
1
2
5
4 3 6
1
2
or
of the control panel or remote control to choose the desired humidity level. This can
vary from 20% to 90%. After blinking for 5 seconds, the LCD screen shows the room’s humidity level. When the value of
humidity reaches the preadjusted level, the unit stops emitting steam after a few minutes.
Anion function
Press on the anion fan button
8
9
1011121314
1
2
3
6
5
7
4
1
2
5
4 3 6
1
2
. The anion fan function is activated. The anion fan indicator will blink on the LCD
screen. If you press this button again, the anion fan function will be interrupted. The indicator will stop blinking.
Steam emission intensity
It’s possible to set the steam emitted by the device. To do so, press repeatedly on the button
8
9
1011121314
1
2
3
6
5
7
4
1
2
5
4 3 6
1
2
of the control panel or
remote control. The unit will go then from position 1 «Strong Constant Steam» (320-370ML/H) to position 2 «Medium
Constant Steam « (240-290ML/H) and finally to position 3 «Light Constant Steam» (120-180 ML/H).
Timer function
The unit can work continuously for 20 hours. However, you can determine the use life of the unit. Press repeatedly on
the button
8
9
1011121314
1
2
3
6
5
7
4
1
2
5
4 3 6
1
2
of the control panel or remote control to adjust the desired use (2 h, 4 h, 8 h or 12 h). As soon as the set
time is over, the unit turns off automatically.
Attention: ALTHOUGH THE UNIT IS FITTED WITH SAFETY MECHANISMS THAT CUT OFF TRANSDUCER
OPERATION, TURN THE UNIT OFF WHENEVER POSSIBLE.
Vapolux
5
EN
MAINTENANCE AND STORAGE:
If the water is hard, that is to say it contains too much calcium or magnesium, it may deposit a “white powder” inside the
unit and cause a heavy scale on the surface of the reservoir, on the transducer (metallic button producing the ultrasound)
and on the internal walls of the water reservoir. The presence of any scale on the surface of the transducer will greatly
reduce mist production.
We strongly advise you to:
1) Clean the reservoir every 3 days, and to clean the transducer every week;
2) Change the water in the reservoir every two days so that it remains fresh.
3) Clean the unit completely to avoid any risk of bacteria and check that it has completely dried when it is not being used.
4) Clean regularly the filter.
To clean the transducer:
1) Place 2 to 5 drops of vinegar on the surface and leave for 2 to 5 minutes.
2) Brush away any deposit from the surface using a soft brush. Do not use a hard tool to scrape the surface.
3) Rinse the transducer with clean water.
4) Do not use soap or any other alkaline substances to clean the transducer.
To clean the reservoir:
1) Clean the reservoir using a soft cloth, together with some vinegar if there is any scale or calcium deposits inside;
2) If the scale covers the safety switch, place a few drops of vinegar on it and clean it with a soft brush;
3) Rinse out the reservoir with fresh water.
Storage:
1) Clean and dry the ultrasonic humidifier carefully.
2) Allow it to dry completely before putting the unit away. Do not store the unit with water still remaining in the base
unit.
3) Store the unit in a cool, dry place, out of the reach of children.
FAULTS AND CORRECTIVE ACTIONS
Should a fault occur during normal use, please consult the table below:
Fault Possible causes Corrective action
Unit does not blow, no mist
No power. The device is not plugged in correctly
or your power supply is defective
Main power switch off. Switch on the main power switch.
The water level is too high. Remove some water.
Leak from water reservoir Close the lid correctly.
6
EN
Unit blows, but no mis
No water in the reservoir. Fill the reservoir.
The water level detector is not in the
right position.
Position the water level detector
correctly.
The temperature of the unit is too
low.
Place the unit in a room at ambient
temperature for half an hour before
use.
Mist has a strange smell
The water has been standing too
long in the reservoir.
Clean out the reservoir and add fresh
water.
The unit is new. Open the water reservoir and
ventilate for 12 hours in a cool room.
Low power
The mist power level is set to
minimum.
Adjust the control button to the
correct setting.
Deposits on the transducer. Clean the transducer.
The water is too cold Use water at a normal temperature.
The water is not clean. Clean out the reservoir and add fresh
water.
The reservoir and the base unit are
not perfectly seated.
Check for correct seating
The mist does not rise
Resonance caused by the water level
in the reservoir being too low.
Add water to the reservoir.
Resonance caused by an unstable
surface.
Place the unit on a stable surface.
The fan unit is not functioning
correctly.
Ask a specialist to check the fan in
the base unit.
Noise
There is resonance with the table Position the unit on a solid table or
on the floor.
There is a gap between the diffuser
nozzle and the water reservoir.
The problem will disappear
automatically after prolonged use. If
not, plunge the diffuser nozzle into
the water before use.
The mist issues from all around the
diffuser nozzle.
There is a gap between the diffuser
nozzle and the water reservoir.
The problem will disappear
automatically after prolonged use. If
not, plunge the diffuser nozzle into
the water before use.
Vapolux
7
EN
ADVICE REGARDING THE DISPOSAL OF WASTE
All the packaging is composed of materials that pose no hazard for the environment and which can be disposed of at
your local sorting centre to be used as secondary raw materials. The cardboard may be disposed of in a paper recycling
bin. The packaging film must be taken to your local sorting and recycling centre.
When you have finished using the device, please dispose of it in an environmentally friendly way and in accordance with
the law.
LIMITED WARRANTY
LANAFORM® guarantees this product against any material or manufacturing defect for a period of two years from the
date of purchase, except in the circumstances described below.
The LANAFORM® guarantee does not cover damage caused as a result of normal wear to this product. In addition, the
guarantee covering this LANAFORM® product does not cover damage caused by abusive or inappropriate or incorrect use,
accidents, the use of unauthorized accessories, changes made to the product or any other circumstance, of whatever sort,
that is outside LANAFORM®’s control.
LANAFORM® may not be held liable for any type of circumstantial, indirect or specific damage.
All implicit guarantees relating to the suitability of the product are limited to a period of two years from the initial date of
purchase as long as a copy of the proof of purchase can be supplied.
On receipt, LANAFORM® will repair or replace your appliance at its discretion and will return it to you. The guarantee
is only valid through LANAFORM®’s Service Centre®. Any attempt to maintain this product by a person other than
LANAFORM®’s Service Centre will render this guarantee void.
8
  • Page 1 1
  • Page 2 2
  • Page 3 3
  • Page 4 4
  • Page 5 5
  • Page 6 6
  • Page 7 7
  • Page 8 8
  • Page 9 9
  • Page 10 10
  • Page 11 11
  • Page 12 12
  • Page 13 13
  • Page 14 14
  • Page 15 15
  • Page 16 16
  • Page 17 17
  • Page 18 18
  • Page 19 19
  • Page 20 20
  • Page 21 21
  • Page 22 22
  • Page 23 23
  • Page 24 24
  • Page 25 25
  • Page 26 26
  • Page 27 27
  • Page 28 28
  • Page 29 29
  • Page 30 30
  • Page 31 31
  • Page 32 32
  • Page 33 33
  • Page 34 34
  • Page 35 35
  • Page 36 36
  • Page 37 37
  • Page 38 38
  • Page 39 39
  • Page 40 40
  • Page 41 41
  • Page 42 42
  • Page 43 43
  • Page 44 44
  • Page 45 45
  • Page 46 46
  • Page 47 47
  • Page 48 48
  • Page 49 49
  • Page 50 50
  • Page 51 51
  • Page 52 52
  • Page 53 53
  • Page 54 54
  • Page 55 55
  • Page 56 56
  • Page 57 57
  • Page 58 58
  • Page 59 59
  • Page 60 60
  • Page 61 61
  • Page 62 62
  • Page 63 63
  • Page 64 64
  • Page 65 65
  • Page 66 66
  • Page 67 67
  • Page 68 68
  • Page 69 69
  • Page 70 70
  • Page 71 71
  • Page 72 72
  • Page 73 73
  • Page 74 74
  • Page 75 75
  • Page 76 76
  • Page 77 77
  • Page 78 78
  • Page 79 79
  • Page 80 80
  • Page 81 81
  • Page 82 82
  • Page 83 83
  • Page 84 84
  • Page 85 85
  • Page 86 86
  • Page 87 87
  • Page 88 88
  • Page 89 89
  • Page 90 90
  • Page 91 91
  • Page 92 92
  • Page 93 93
  • Page 94 94
  • Page 95 95
  • Page 96 96

LANAFORM Vapolux Operating instructions

Category
Humidifiers
Type
Operating instructions

Ask a question and I''ll find the answer in the document

Finding information in a document is now easier with AI