Page is loading ...

ELECRAFT
K3
HIGH-PERFORMANCE 160 – 6 METER
TRANSCEIVER
K144XV 2-METER OPTION
INSTALLATION AND OPERATION
Revision E2, June 6, 2018
E740146
Copyright © 2018, Elecraft, Inc.
All Rights Reserved

2
Contents
Introduction ............................................................................................................................................... 3
Specifications ........................................................................................................................................ 3
Customer Service and Support .............................................................................................................. 4
Assembling and Installing the K144XV ................................................................................................... 5
Preventing Electrostatic Discharge Damage ......................................................................................... 5
How ESD Damage Occurs ................................................................................................................ 5
Preventing ESD Damage ................................................................................................................... 5
Preparing for Installation ...................................................................................................................... 6
Tools Required .................................................................................................................................. 6
Parts Included .................................................................................................................................... 7
Installation Procedure ........................................................................................................................... 9
Removing the K3Top Cover ............................................................................................................. 9
Preparing the K3 for Installing the K144XV .................................................................................... 9
Installing the K144XV Module in the K3 ....................................................................................... 13
Enabling the K144XV Module ........................................................................................................ 17
Replacing the Top Cover ................................................................................................................. 18
Using the K144XV ................................................................................................................................. 19
VFO Tuning ........................................................................................................................................ 19
Output Power Adjustment ................................................................................................................... 19
Frequency Calibration ......................................................................................................................... 20
K144XV Reference Oscillator Phase Lock Option Installed .......................................................... 20
Without the K144XV Reference Oscillator Phase Lock Option ..................................................... 20
Status Light ......................................................................................................................................... 21
Using External Transverters with the K144XV .................................................................................. 21
Firmware Updates ............................................................................................................................... 21
Checking Firmware Revision .......................................................................................................... 21
Installing New Firmware ................................................................................................................. 22
Serial Port Control .............................................................................................................................. 23
DC Power On Antenna Cable During Transmit ................................................................................. 23
Elecraft manuals with color images may be downloaded from
www.elecraft.com.

3
Introduction
If your K144XV is already installed in your K3, turn to Using the K144XV on page 19
for operating instructions.
The K144XV option adds 144 to 148 MHz receive and 10-watt transmit capability to your K3 or K3S via a
separate antenna connector on the rear panel. Complete specifications and operating instructions are included in
your K3or K3S Owner’s manual. This manual covers both installation and operation of the K144XV option in a
K3 or K3S transceiver.
Only a few basic hand tools are needed (see page 6) to perform the installation. A minimal amount of soldering
is required to install a power connector on the K3 RF board on some older K3 transceivers. If you have a K3
(not K3S) see Figure 4 on page 11 for the location of the power connector to see if it is pre-installed. All K3S
transceivers have the power connector pre-installed. It is in a different location (see Figure 10 on page 16).
If you are installing the K144XV in a K3 (not K3S) transceiver that also has the newer
KSYN3A Synthesizer and the KRX3 or KRX3A sub receiver installed you may need to
modify your KREF3 Reference Oscillator to provide a higher drive level for all of the
devices. See the manual Elecraft K3 KREF3 Output Level Modification on the Elecraft web
site at www.elecraft.com or contact customer support for more information.
Specifications
General
Frequency Range: 144-148 MHz
I.F. Range: 28-30 MHz
Dimensions (HWD): 1x3.2x5 inches (2.5x8.1x12.7 cm)
Supply Voltage: 13.8 VDC
Typical Current Consumption:
Transmit: 2A
Receive: 0.25A
Off: 0.01A
Transmit
Power Output: 8 to10W Typical (13.8 V at the K3 in Transmit. Lower voltages will
reduce the maximum power out)
Spurious Output: < -60 dBc
Receive
Noise Figure: 1 dB typical
Gain: 20 dB typical
Features
PIN diode T/R switching for full QSK
Built-in temperature sensing with automatic over-temperature shut-down
Separate BNC antenna connector on K3 rear panel
Field upgradeable with built-in diagnostic and troubleshooting commands

4
Customer Service and Support
Technical Assistance
You can send e-mail to k3suppor[email protected] and we will respond quickly - typically the same day Monday
through Friday. Telephone assistance is available from 9 A.M. to 5 P.M. Pacific time (weekdays only) at
831-763-4211. Please use e-mail rather than calling when possible since this gives us a written record of the
details of your problem and allows us to handle a larger number of requests each day.
Repair / Alignment Service (We want to make sure everyone succeeds!)
If necessary, you may return your Elecraft product to us for repair or alignment. (Note: We offer unlimited email
and phone support to get your kit running, so please try that route first as we can usually help you find the
problem quickly.)
IMPORTANT: You must contact Elecraft before mailing your product to obtain authorization for the
return, what address to ship it to and current information on repair fees and turnaround times. (Frequently we
can determine the cause of your problem and save you the trouble of shipping it back to us.) Our repair location
is different from our factory location in Aptos. We will give you the address to ship your kit to at the time of
repair authorization. Packages shipped to Aptos without authorization will incur an additional shipping charge
for reshipment from Aptos to our repair depot.
Elecraft's 1-Year Limited Warranty
This warranty is effective as of the date of first consumer purchase (or if shipped from factory, date product is shipped
to customer). It covers both our kits and fully assembled products. For kits, before requesting warranty service, you
should fully complete the assembly, carefully following all instructions in the manual.
Who is covered: This warranty covers the original owner of the Elecraft product as disclosed to Elecraft at the time of
order. Elecraft products transferred by the purchaser to a third party, either by sale, gift or other method, who is not
disclosed to Elecraft at the time of original order, are not covered by this warranty. If the Elecraft product is being
bought indirectly for a third party, the third party's name and address must be provided to Elecraft at time of order to
insure warranty coverage.
What is covered: During the first year after date of purchase, Elecraft will replace defective or missing parts free of
charge (post-paid). We will also correct any malfunction to kits or assembled units caused by defective parts and
materials. Purchaser pays inbound shipping to Elecraft for warranty repair, Elecraft will pay shipping to return the
repaired equipment to you by UPS ground service or equivalent to the continental USA and Canada. Alaska, Hawaii
and outside U.S. and Canada actual return shipping cost paid by owner.
What is not covered: This warranty does not cover correction of kit assembly errors. It also does not cover
misalignment; repair of damage caused by misuse, negligence, or builder modifications; or any performance
malfunctions involving non-Elecraft accessory equipment. The use of acid-core solder, water-soluble flux solder, or any
corrosive or conductive flux or solvent will void this warranty in its entirety. Also not covered is reimbursement for loss
of use, inconvenience, customer assembly or alignment time, or cost of unauthorized service.
Limitation of incidental or consequential damages: This warranty does not extend to non-Elecraft equipment or
components used in conjunction with our products. Any such repair or replacement is the responsibility of the customer.
Elecraft will not be liable for any special, indirect, incidental or consequential damages, including but not limited to any
loss of business or profits.

5
Assembling and Installing the K144XV
If you purchased your K3 with the K144XV already installed, turn to Using the K144XV on page 19 for
operating instructions.
Preventing Electrostatic Discharge Damage
There is no climate or work location where the components of your K3 are safe from Electrostatic Discharge
(ESD) unless you take specific steps to prevent such damage. Many of the components in your K3 can be
damaged by static discharges of only a few volts: far too little for you to notice. It is those low-voltage but
destructive discharges that easily happen anywhere and under virtually any environmental conditions.
ESD damage may not be apparent at first. The damaged components may not fail completely. Instead, the
damage may result in below-normal performance for an extended period of time before you experience a total
failure.
How ESD Damage Occurs
Whenever an object containing a static charge touches a circuit in your K3, current will rush into the circuit until
the components reach the same voltage as the source of the static charge. If the voltage or current that passes
through a component during that brief period exceeds its normal operating specifications, it may be damaged or
destroyed.
Preventing ESD Damage
ESD damage cannot occur if there is no voltage difference between the components in your K3 and any object
that touches them. Anti-static bags allow the static charge to flow over their surface, so that any part of the bag
that touches the components inside are all at the same potential at all times. Anti-static foam is conductive,
keeping the leads of sensitive components at the same potential.
At your work bench, avoiding a dangerous voltage is achieved most easily by tying everything together and
connecting them to a common mains safety ground. This includes your K3, individual boards or other sensitive
components as well as everything they may touch at the work table.
Inexpensive static dissipating work mats are readily-available that will steadily and safely drain off any charges
built up on parts or circuit boards placed on them. They are supplied with a lead that connects the mat to the
common workbench ground. Also, metal cabinets on test equipment used on the bench should be tied together
and connected to the common ground.
Most importantly, you must have a way of continuously draining off any static charges that occur on your body.
Such charges are easy to create, even while sitting quietly at the work bench. Moving your feet on the floor,
shifting position in your chair or even moving your arms so that clothing rubs against itself can produce
destructive static charges. You can discharge yourself by touching an unpainted metal ground, but that will last
only until you move in a way that produces a new static charge. The safest technique is to wear a grounded wrist
strap with a series 1-megohm resistor that continuously drains off any charges. Such wrist straps are readily-
available and inexpensive.
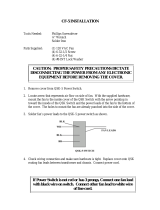
WARNING
DO NOT attach a ground directly to yourself without a current-limiting resistor as this poses
a serious shock hazard. A wrist strap must include a 1-megohm resistor to limit the current
flow. If you choose to touch an unpainted, metal ground to discharge yourself, do it only
when you are not touching any live circuits with your other hand or any part of your body.

6
We strongly recommend you take the following anti-static precautions (listed in order of importance) to avoid
trouble:
• Leave ESD-sensitive parts in their anti-static packaging until you install them. The packaging may be a
special plastic bag or the component’s leads may be inserted in conductive foam. Parts which are
especially ESD-sensitive are identified in the parts list and in the assembly procedures.
• Wear a conductive wrist strap with a series 1-megohm resistor. If you do not have a wrist strap, touch a
ground briefly before touching any sensitive parts to discharge your body. Do this frequently while you
are working. You can collect a destructive static charge on your body just sitting at the work bench. DO
NOT attach a ground directly to yourself as this poses a serious shock hazard.
• Use a grounded anti-static mat on your work bench.
• If you choose to use a soldering iron to work on your K3 for any reason, be sure your iron has an ESD-
safe grounded tip tied to the same common ground used by your mat or wrist strap.
Preparing for Installation
Tools Required
1. #0 and #1 size Phillips screwdrivers. To avoid damaging screws and nuts, a power screwdriver is not
recommended. Use the screwdriver that best fits the screw in each step.
2. Temperature-controlled soldering iron with a fine tip and small diameter rosin core solder may be
needed if the power connector is not already installed in your K3 (see Figure 4 on page 11).
3. Small diagonal cutters.
4. Needle nose pliers.
5. Soft cloth or clean, soft static dissipating pad to lay cabinet panels on to avoid scratching.
The following tools are strongly recommended:
1. ESD wrist strap.
2. Static dissipating work pad.

7
Parts Included
The following parts should be included in your kit. Check to ensure you have them all. If any parts are damaged
or missing, contact Elecraft for replacements (see Customer Service and Support, page 4).
ILLUSTRATION
DESCRIPTION
QTY.
ELECRAFT
PART NO.
K144XV PC Board Assembly mounted in
enclosure bottom cover.
CAUTION: Do not touch or move any
of the red coils. Doing so will detune
the circuits.
1
E850376
K144XV Top Cover (Normally supplied
mounted on bottom cover to protect the
pc board.)
1
E850379
KPA3 K3 Fan Panel (Top)
K3 Blank Panel (Bottom)
NOTE: Your kit may include one of these
panels depending upon serial number and
whether you have a K3/10 or K3/100.
1
E100288
1
E100215
Chassis Stiffener (with extra cutout
required to fit over the K144XV Module.)
(Serial number dependent.)
1
E100222
Hardware Package
ILLUSTRATION
DESCRIPTION
QTY.
ELECRAFT
PART NO.
One Pin Connector
1
E620176
K144XV Power Cable, 14" (36 cm) for K3
1
E850375
K144XV Power Cable, 5" (13 cm) for K3S
1
E850731
KX144 TMP-BNC Cable Assembly,
14 in (35.6 cm)
1
E850378
TMP Cable, 6-Inch (15.2 cm)
1
E100625

8
ILLUSTRATION
DESCRIPTION
QTY.
ELECRAFT
PART NO.
TMP Cable, 6-Inch (15.2 cm) marked near the
connector at each end. (Typically the marking
will be in color. White is shown here for clarity.)
1
E850389
OR
USB RS232
Serial Data Cable Assembly. USB
interface provided unless RS232 specified
at the time order is placed.
1
E850483
(USB)
Or
E850369
(RS232))
Screw, Pan Head, Zn, 4-40 1/4” (6.4 mm)
5
E700005
Screw, Flat Head, Black, 6-32 1/4” (6.4 mm)
3
E700186
Lock washer, Inside Tooth, #4
5
E700010

9
Installation Procedure
Removing the K3Top Cover
Disconnect power and all cables from your K3.
Remove the nine screws to free the top cover as shown in Figure 1. After the cover is open, lift it gently to
reach the speaker wire connector. Unplug the speaker then set the top cover aside in a safe place.
Whenever you remove screws from a panel, if one screw seems too tight to loosen
without damaging it, first loosen the other screws then try again. Sometimes one screw
binds in its hole when the other screws are tightened.
Figure 1. Removing K3 Top Cover.
CAUTION:
Touch an unpainted metal ground or wear a grounded wrist strap
before touching components or circuit boards inside the K3. See Preventing ESD Damage
on
page 5 for more information.
Preparing the K3 for Installing the K144XV
Remove the stiffener bar that runs from side to side across the top of the K3 chassis. This is the bar the
three screws across the center of the top cover thread into. The bar is held in place by a single screw at each side
and, if the KPA3 100 watt option is installed, by two screws attaching it to the KPA3 shield.

10
Remove the K3 left side panel (the side with the handle). Check the panel to determine whether it has the
three mounting holes for the K144XV module shown in Figure 2. The three mounting holes may have screws in
them:
• If the side panel does not have the mounting holes, move the handle onto the new side panel with the
required holes furnished with your K144XV kit.
• If the side panel has the three holes, remove the 6-32 flat head screws filling them.
• Do not reinstall the side panel until instructed to do so later.
Figure 2. Left Side Panel with Holes for K144XV Module.
Locate the KXV3A board visible in the lower left corner of the K3 looking in from the open side (see
Figure 6 on page 13) and verify the two coaxial TMP connectors are present. If not, your K3 has an older KXV3
board that must be replaced. (All K3S transceivers are equipped with the newer KXV3A board with the
required connectors.) Turn to your KXV3A manual and install the new board now. If your K3 is equipped with
the KRX3 sub receiver the KXV3A manual will instruct you to remove it. If so, do not replace the KRX3 sub
receiver module until instructed to do so later.
K144XV Power Connector
If you have a K3S, skip the following steps and go directly to Installing the ANT3
Connector. The following applies only to K3 transceivers.
Check to see if the one-pin power connector is already installed on the K3 RF board (see Figure 4). If so,
skip the following steps and go directly to Installing the ANT3 Connector on page 11.
Remove the forward section of the K3 bottom cover as shown in Figure 3.
Figure 3. Removing K3 Bottom Cover.

11
Solder the male half of the one –pin connector to the via (copper plated hole through the board) near the
front right area of the K3 main RF board just behind the front panel shield as shown in Figure 4. That via may
be occupied on some K3 transceivers. If so, use the alternate location shown. Mounting the connector may be
done by standing the K3 on its left side and inserting the connector in the hole in the pc board. Carefully solder
the pin to the copper via on the bottom. If necessary, you can straighten the connector after soldering by
pressing down on the shoulder with your finger while reheating the solder on the bottom.
Limit your soldering time to 2 or 3 seconds maximum to avoid melting the connector. If
you want to adjust the its position after soldering, let connector cool before reheating the
solder.
Figure 4. Installing the One-Pin Power Connector on the K3 RF Board.
Replace the forward section of the K3 bottom cover. Be sure to replace and tighten all seven screws shown
in Figure 3.
If your K3 is not equipped with the KRX3 sub receiver, skip this step and go directly to Installing the ANT3
Connector below. If you removed the sub receiver earlier, turn to your KRX3 Sub Receiver Installation and
Operation manual, Installing the KRX3 Sub Receiver Module section to replace the KRX3 module. Be
especially careful to do the following as described in that procedure:
If you have a K3, be sure the cover on battery BT1 on the K3 RF board is in place. The cover is
essential to avoid shorting the battery. The outer rim of the battery is the positive terminal, and may
come in contact with the grounded bottom of the KRX3 enclosure if the cover is not in place. The
battery in the K3S transceivers lies flat and requires no cover.
Be sure all the TMP cables are properly connected and routed as shown in the KRX3 manual.
Installing the ANT3 Connector
Remove the rear fan panel (if you have a K3/100) or the blank rear panel (if you have a K3/10) by removing
the four corner screws. If you have a K3/100, unplug the fans and the circuit breaker. The wires to the circuit
breaker have connectors that pull off of the spade terminals on the back of the breaker. They may be tight, but
will come off with a little wiggling. If your panel does not have a cutout for the ANT 3 BNC connector, a
replacement panel is included with your kit.
If you have a K3/10 with its blank rear panel, go on to the next step with a square check box. If you have an
older K3/100 without the ANT 3 hole, move the circuit breaker and the fans from the existing panel onto the

12
new panel with the ANT 3 hole. Otherwise, remove the plastic hole cover and skip to the TMP-BNC connector
cable installation step.
Transfer the fans to the new panel. The fans are held in place by four flat-head screws with the heads on
the inside surface of the fan panel. There are two different types of hardware used on the fans. If your
fans have flat head screws securing the finger guards on the outside of the fans, the four screws on the
inside of the panel screw into threaded bushings on each fan. Just remove them and fan will be free. If
your fans have cap nuts (often called acorn nuts) on the finger guards, the fans are held in place by long
screws that go all the way through the fans and thread into the cap nuts. When you remove the four
screws the finger guards will fall free too. When you reinstall the fans on the new panel, be sure you
have the ANT3 label facing the outside and place the fan with the shortest power leads farthest from the
circuit breaker. If your fans have cap nuts, be sure to orient the fans so they move air out of the K3.
Arrows embossed in the plastic on the fans show the air flow direction. Place the finger guards over the
screws before you replace the cap nuts.
Remove the knurled nut on the circuit breaker to release it, and install it on the new panel. It goes into
the lower hole (it will only fit in the correct hole).
Locate the TMP cable with a BNC connector at one end, remove the nut and lock washer (if on the
BNC) and thread the cable through the ANT3 hole in the panel from the side with the ANT3 legend,
then replace the lock washer and nut. Tighten the nut to hold the BNC securely.
Reconnect the two wires to the circuit breaker spade lugs. Either wire may go to either spade.
Reconnect the fans to the connectors on the KPAIO3 board where you removed them. Be sure you
orient the fan connectors so the red leads go to the pins on the fan connectors marked RED on the pc
board (see Figure 5).
Route the coax cable from the ANT3 connector across the fans to the opening in the KPA3 shield near
the KIO3 board. Pass it through the opening in the shield and, if the KRX3 is installed, pull the end up
on top of the KRX3 module. It will be connected to the K144XV module later.
Mount the fan panel using the four screws you removed earlier. After the panel is secured, inspect both
fans to ensure the blades turn freely and are not in danger of hitting one of the cables.
Figure 5. Reconnecting Rear Panel Fans on K3/100.

13
If you have a K3/100, skip this step. If you have a K3/10 with the blank rear panel with the ANT 3 hole,
reuse it. If it does not have the hole, a replacement was provided.
Install the TMP cable with a BNC connector at one end on the blank panel. Remove the nut and lock
washer (if on the BNC) and thread the cable through the ANT3 hole in the panel from the side with the
ANT3 legend, then replace the lock washer and nut. Tighten the nut to hold the BNC securely.
Install the blank panel on the K3 oriented so the ANT3 connector is on the left end near the SO-239
ANT1 and (if installed) ANT2 connectors. Route the TMP end of the cable over near the KIO3 board. It
will be connected to the K144XV module later.
Installing the K144XV Module in the K3
Locate the two 6” (15.2 cm) TMP cables. One is marked near the connector at each end. Typically the
mark will be a colored band. White is used in this manual so it will show up clearly in the photographs.
Plug the cables into the two TMP connectors on the KXV3A board (see Figure 6). Note the connectors on
the KXV3A are marked IN and OUT. Be sure the marked TMP cable is in the OUT connector on the KXV3A.
The purpose of the marked cable is to positively identify the cable after the K3 side is replaced and you can no
longer see the KXV3A board. Be sure the connectors are fully seated.
Figure 6. Attaching TMP cables to the KXV3A Interface Board.
Skip this step if you are not installing the K144XV Reference Oscillator Phase Lock option at this time.
Disconnect the TMP cable from J83 on the Main KSYN3 board (mounted on the front panel shield closest to
the side panel you have removed; see Figure 4, TMP Cable Connections, in the K144XV Reference
Oscillator Phase Lock Option Installation manual). Leave the other end of the cable connected to J2 on the
KREF3 board. Take the TMP cable from your K144XV Ref Lock kit and plug it into J83 on the KSYN3
board. You will plug both of these cables into K144XV after the module has been installed. Be sure to
position the cables so you can reach them after installing the K144XV module in the following steps.
Mount the left side panel on the K3. Be sure you use the side panel equipped with the holes for mounting
the K144XV module (see Figure 2). Route the two TMP cables from the KXV3 through the slot in the KIO3
board (see Figure 6) so they are not pinched between the side panel and the KIO3 circuit board.

14
Mount the K144XV module on the side panel using three 6-32 1/4” (6.4 mm) black flat head screws as
shown in Figure 7. Be sure you don’t trap any of the TMP cables underneath the module.
Lift the top cover off of the K144XV module and connect the cables as follows (See Figure 7). The top
cover is supplied fitted but not screwed onto the module.
CAUTION
DO NOT touch the small red coils on the K144XV pc board. Doing so will disturb the
alignment and compromise the performance of your K144XV.
Connect the cable from the rear panel ANT3 connector.
Connect the marked cable from the KXV3A module to the IF IN connector on the K144XV board.
Connect the remaining cable from the KXV3A to the IF OUT connector on the K144XV board.
NOTE: The other connections indicated on the label have no pc board connectors at this
time. They are provided for future use.
Figure 7. Mounting the K144XV Module in the K3.
Skip this step if you are not installing the K144XV Reference Oscillator Phase Lock option at this time.
Refer to the K144XV Reference Oscillator Phase Lock Option Installation manual and install the Phase
Lock board as shown in Figure 3, Installing the Phase Lock Board, on page 7, and then connect the TMP
cables as described on page 8 and in Figure 4, TMP Cable Connections.

15
Install the top cover on the K144XV module. Ensure the lip fits outside the bottom cover on all three sides,
then secure the cover with five 4-40 1/4” (6.4mm) zinc pan head screws as shown in Figure 8.
Figure 8. Installing the K144XV Module Top Cover.
If you are installing the K144XV in a K3, connect the 14" (36 cm) power cable between the 3-pin
connector on the K144XV module and the 1-pin connector as shown in Figure 9. If you are installing the
K144XV in a K3S, use the 5" (13 cm) power cable instead and connect it to P95 near the main synthesizer as
shown in Figure 10.
Figure 9. Installing K144XV Power Cable in K3 Transceiver.

16
Figure 10. Attaching the Power Cable in a K3S Transceiver.
Replace the chassis stiffener using the screws you removed earlier. If your original stiffener lacks the
cutout required for the K144XV as shown in Figure 11, use the stiffener supplied with your K144XV kit.
Figure 11. Chassis Stiffener for K144XV.

17
Enabling the K144XV Module
The following steps configure your K3 for use with the K144XV option.
Reconnect power to your K3 and turn it on.
Hold CONFIG and note the K3 firmware revision displayed. It must read 4.12 or later. If necessary,
download and install the latest firmware from www.elecraft.com before proceeding.
In the CONFIG menu, set the parameters shown below. Note: This table assumes you’re using transverter
band 1 for the K144XV. (XV1). If you already have one or more external transverters connected to the K3, you
can select a different band for the K144XV. For example, if you wish to use band XV2, tap ‘2’ on the numeric
keypad before setting up parameters. When you are finished, tap CONFIG to leave the menu.
Menu Entry (VFO B)
Parameter (VFO A)
XV1 ON
YES
XV1 RF
144
XV1 IF
28
XV1 PWR
L 1.50 (see note 1)
XV1 OFS
0.00
XV1 ADR
Int. Trn0 (see note 2)
NOTES:
1) 1.0 mW is the normal drive level for full output. See Output Power Adjustment on page19 for more
information about properly adjusting the drive and output power levels.
2) Setting ADR to Int Trn0 tells the K3 than the internal 2 meter module is being used rather than an
external transverter. This sets up the KXV3A correctly and enables automatic K144XV crystal
switching at the 146-MHz boundary. Int Trn1 through Int Trn9 are provided for using the K144XV to
drive higher-frequency transverters (see Using External Transverters with the K144XV on page 21.)
Turn the K3 off, then on again while watching the status LED on the K144XV module. It should flash once
or twice when power is applied. That indicates normal operation. If it does anything else, refer to Status Light on
page 21.
Turn to Frequency Calibration on page 20 and follow those instructions enter the calibration data written
on the K144XV module top cover label into the K3 configuration menu.
After confirming your K144XV is operating normally, we strongly recommend you
check the Elecraft web site (www.elecraft.com), download and install newer K144XV
firmware if available. You can check the version of your K144XV firmware and install
updates as described in Firmware Updates on page 21.

18
Replacing the Top Cover
Hold the top cover above the K3, route the speaker wire under the stiffener bar. Route it under the stiffener
bar at the depression in the top of the K144XV module as shown in Figure 12 and plug it into P25 on the KIO3
board at the left rear of the K3.
Figure 12. Connecting the Speaker Cable.
Position the top cover on the K3. Note that the tab on the back center goes under the rear lip of the K3 rear
panel. Secure the top cover with the nine 4-40 3/16” (4.8 mm) black flat head screws you removed earlier (see
Figure 1 on page 9 for the screw locations).
REPLACE ALL THE SCREWS!
The K3 chassis has excellent rigidity despite its light weight. The screws that hold the top
cover in place are an important part of the structural design. Please be sure to replace all the
screws and verify they are tight whenever you replace the cover or other panels

19
Using the K144XV
The K144XV 2-meter option adds full coverage of the 2-meter band (144-148 MHz) to the K3. The K144XV is
a transverter, taking RF in the 28-30 MHz range from the K3, converting and amplifying it to provide up to 10
watts RF output in the two meter band. Two meter signals received by the K144XV are down-converted to the
28-30 MHz range and passed on to the K3 receiver. (The 28-30 MHz range is referred to as the I.F., or
intermediate frequency.)
To provide full 144-148 MHz coverage, the K144XV has two tuning ranges: 144-146 MHz and 146-148 MHz.
Both ranges use the same 28-30 MHz I.F., thanks to the use of two different conversion oscillator crystals (116
and 118 MHz). As you tune across the 146-MHz boundary, the K144XV automatically switches between the
two crystals.
The K144XV is fully-integrated into the K3, so most of the K3s controls behave exactly the same as they do on
the other bands. Differences specific to two meter operation are described below.
VFO Tuning
Tapping BAND selects the 2-meter band in normal rotation after the 6 meter band and before returning to the
160 meter band. Optionally, you can use direct frequency entry to select any frequency in the 144 – 148 MHz
range. You can store 2-meter frequencies in any of the K3 100 general-purpose memories as well as the per-
band quick memories as described in the manual.
If you use a number of different repeaters on 2 meters, you may wish to store information for each one in a K3
memory. You can assign up to 5-letter labels to each memory, such as an abbreviation of the repeater’s location
or call sign. If you want to designate a sequential group of memories for “channel hopping,” use ‘*’ as the first
letter of each label in that memory range. See Channel Hopping in the K3 manual.
When tuning across the 146 MHz boundary, you may hear a “click” from a relay in the K144XV module as it
switches tuning ranges. That is normal. You should not set up continuous scanning across this boundary, as it
would switch crystals rapidly, reducing the life of the relay.
The accuracy of the K3 frequency display on 2 meters depends upon entering the correct offset values into the
K3 configuration menu (see Frequency Calibration on page 20). A small amount of frequency drift is normal
during warm-up, or when switching from one range to the other.
Output Power Adjustment
PWR controls the K144XV output power. The 144- MHz output power is not measured directly. Rather the
28-MHz drive power is measured and displayed in mW and dBm, just as when using an external transverter.
The K3 bar graph shows the drive power in tenths of a mW, so 1 on the bar graph indicates 0.1 mW drive and
10 on the bar graph indicates 1.0 mW drive.
The drive power has a range of 1.5 mW down to 0.1 mW. The K144XV has a gain of about 40 dB, which means
that typically 1.0 mW of drive will produce the maximum 9 to 11 W output. If 1.0 mW drive does not produce
at least 9W output as measured by a known, calibrated 144MHz wattmeter, first calibrate the K3 1.0 mW output
using the K3 Utility program and a 50-ohm dummy load on the K3 rear-panel XVTR OUT jack. Consider using
more than 1.0 mW of drive only if the output is still below 9 W after completing the 1.0 mW calibration. Many
wattmeters have no more than 10-20% accuracy at 10W, so a reading of 7 to 10 watts is not unusual.
NOTE: The left side panel of the K3 may become very warm to the touch during continuous key-down
operation at full power. This is normal.

20
Frequency Calibration
There are two local oscillators in the K144XV that control the receive and transmit frequencies. One is active
from 144 to 146 MHz and the other is active from 146 to 148 MHz. Both oscillators must be calibrated to
provide an accurate frequency display across the band. The calibration is done by entering a frequency offset in
the K3 configuration menu (this was done at the factory if you purchased your K3 with the K144XV already
installed).
K144XV Reference Oscillator Phase Lock Option Installed
With the K144 XV Reference Oscillator Phase Lock option installed, calibration of both oscillators occurs
automatically as both oscillators are phase locked to the master K3REF oscillator in the K3. Enable the
calibration as follows:
Be sure you have K3 Firmware ver. 4.42 or later installed.
Tune the K3 to any frequency in the 2-meter band.
Hold CONFIG to access the CONFIG menu and select XVn OFS, where n is the transverter number
you assigned to the K144XV (see Enabling the K144XV Module on pg. 16).
Tap the 0 switch until you see REFLOCK on the K3 LCD. The automatically calculated offset will
appear in upper half of the K3 LCD. This enables reflock for both the 144 and 146 MHz band
segments. You don’t have to repeat the procedure for each segment.
If the K3 EXREF option is also installed, the K3 reference oscillator itself will be
automatically calibrated by the external 10 MHz reference. In this case, enabling REFLOCK
for the K144XV module will allow the K144XV frequency to track the external reference. The
accuracy of the 2-meter frequency will be less than that on HF by a factor of about two, due to
the higher frequency of the K144XV local oscillators.
Without the K144XV Reference Oscillator Phase Lock Option
Each K144XV is tested at the factory and offset data is printed on the K144XV module top cover label in the
following format: OFFSETS 144 MHZ ± X.XX 146 MHZ ± X.XX. The 144 and 146 indicate the tuning range
being calibrated followed by either a plus or minus sign and the offset in KHz.
Enter the offset data as follows:
1. Tune the K3 to any frequency within the two meter band segment to be calibrated (144-145.999 or 146-
148 MHz).
2. Hold CONFIG (hold function of the MENU switch) to access the CONFIG menu. Select XV1 ADR
and ensure Int Trn0 is selected.
3. With the VFO B knob, select XV1 OFS. The display will show either 144 x.xx or 146 x.xx, indicating
the range being calibrated. Use the VFO A knob to enter the frequency correction in KHz. Be sure the
minus sign is visible for a negative value. No sign before the offset number indicates a positive value.
If you have a signal generator or frequency counter that you feel has the accuracy required, you can use it to
refine the calibration. Be sure you allow at least a 10 minute warm-up period and then note the difference
between the generator or counter frequency display and the K3 frequency display. Enter the difference as the
offset value. The menu allows setting the desired offset within 10 Hz.
/